-

Qualtrics Platform -

Customer Journey Optimizer -

XM Discover -

Qualtrics Social Connect
Load Data to Discover Task
Attention: To use this task you must have an XM Discover account linked to your Qualtrics account. For more information, see Linking XM User Accounts.
About the Load Data to Discover Task
The Load Data to Discover task is used to send data from Qualtrics to Discover. To use this task, you must first load data into Qualtrics using a data extractor task.
Qtip: For information on general limits that apply to ETL workflows, see Workflow Limits. For any task-specific limits, refer to the information on this page.
Setting up a Load Data to Discover Task
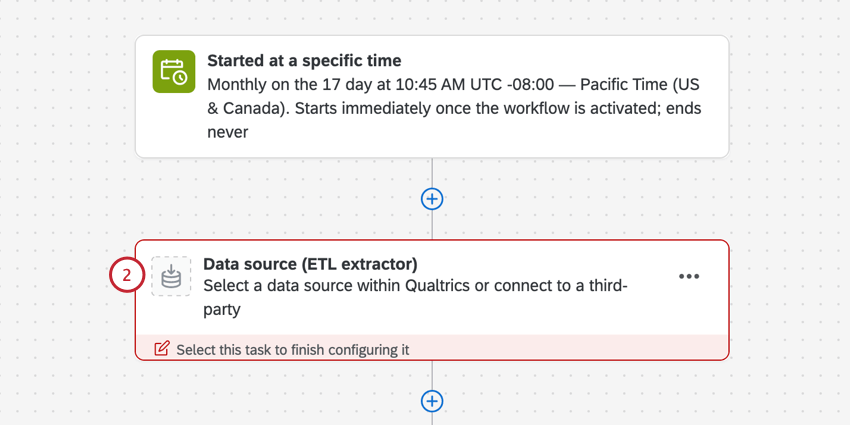
- Create an ETL workflow.
- Select Data source (ETL extractor). In this step, you’ll extract data that you can load to another destination. See using Building ETL Workflows for more information.
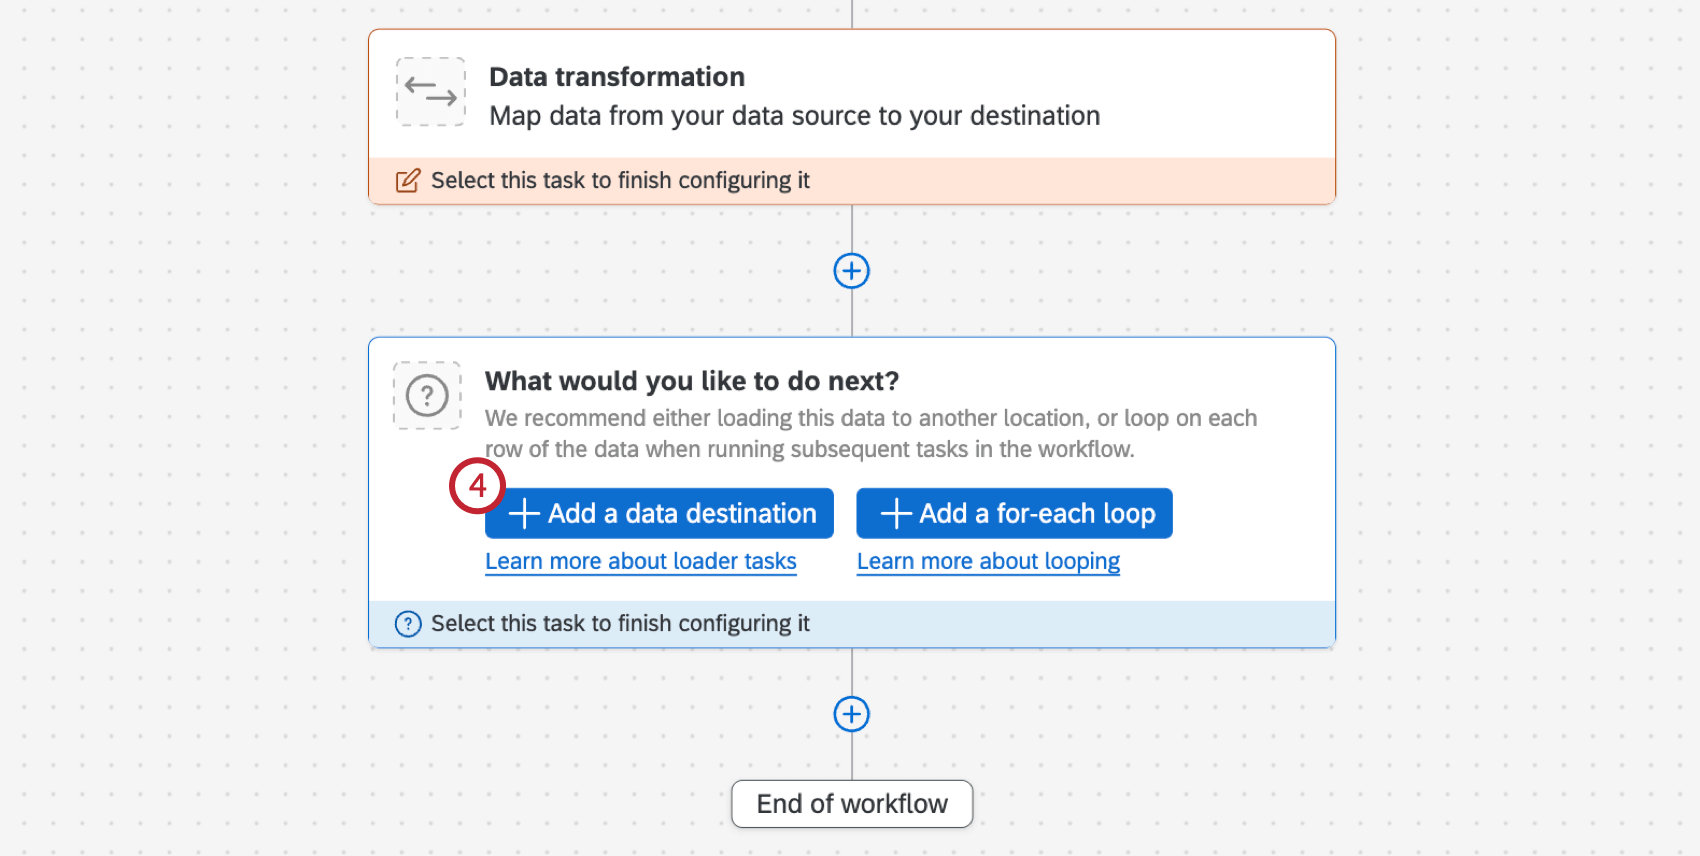
- If desired, set up a data transformation task.
- Click Add a data destination.
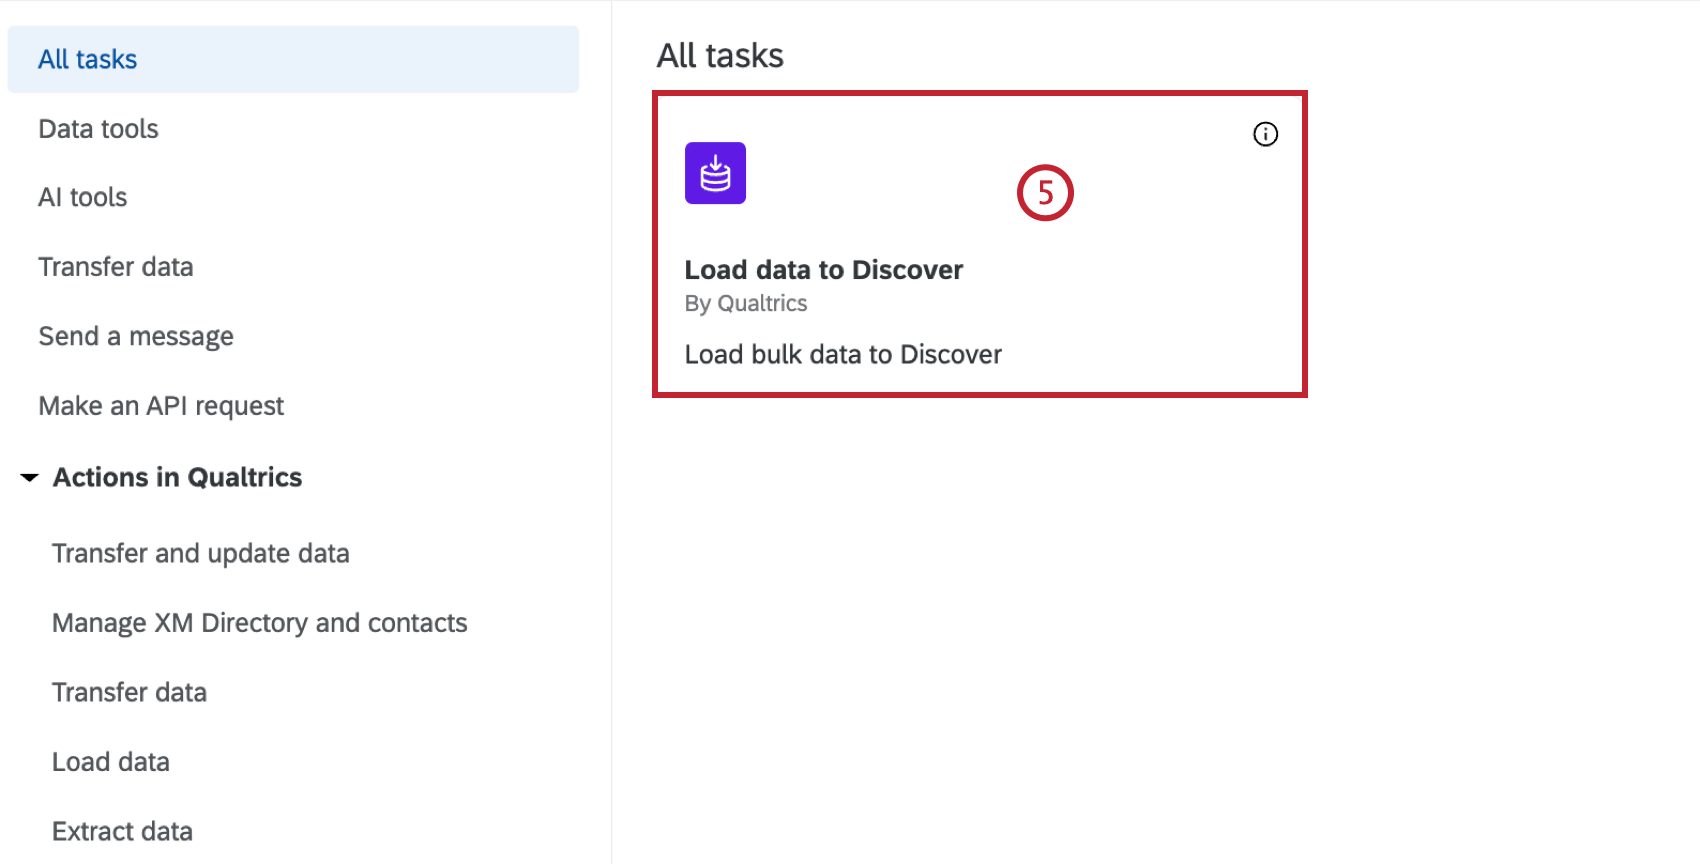
- Choose the Load data to Discover task.
- Select a Discover Content Provider. If you only have access to 1 content provider, it will be automatically selected.
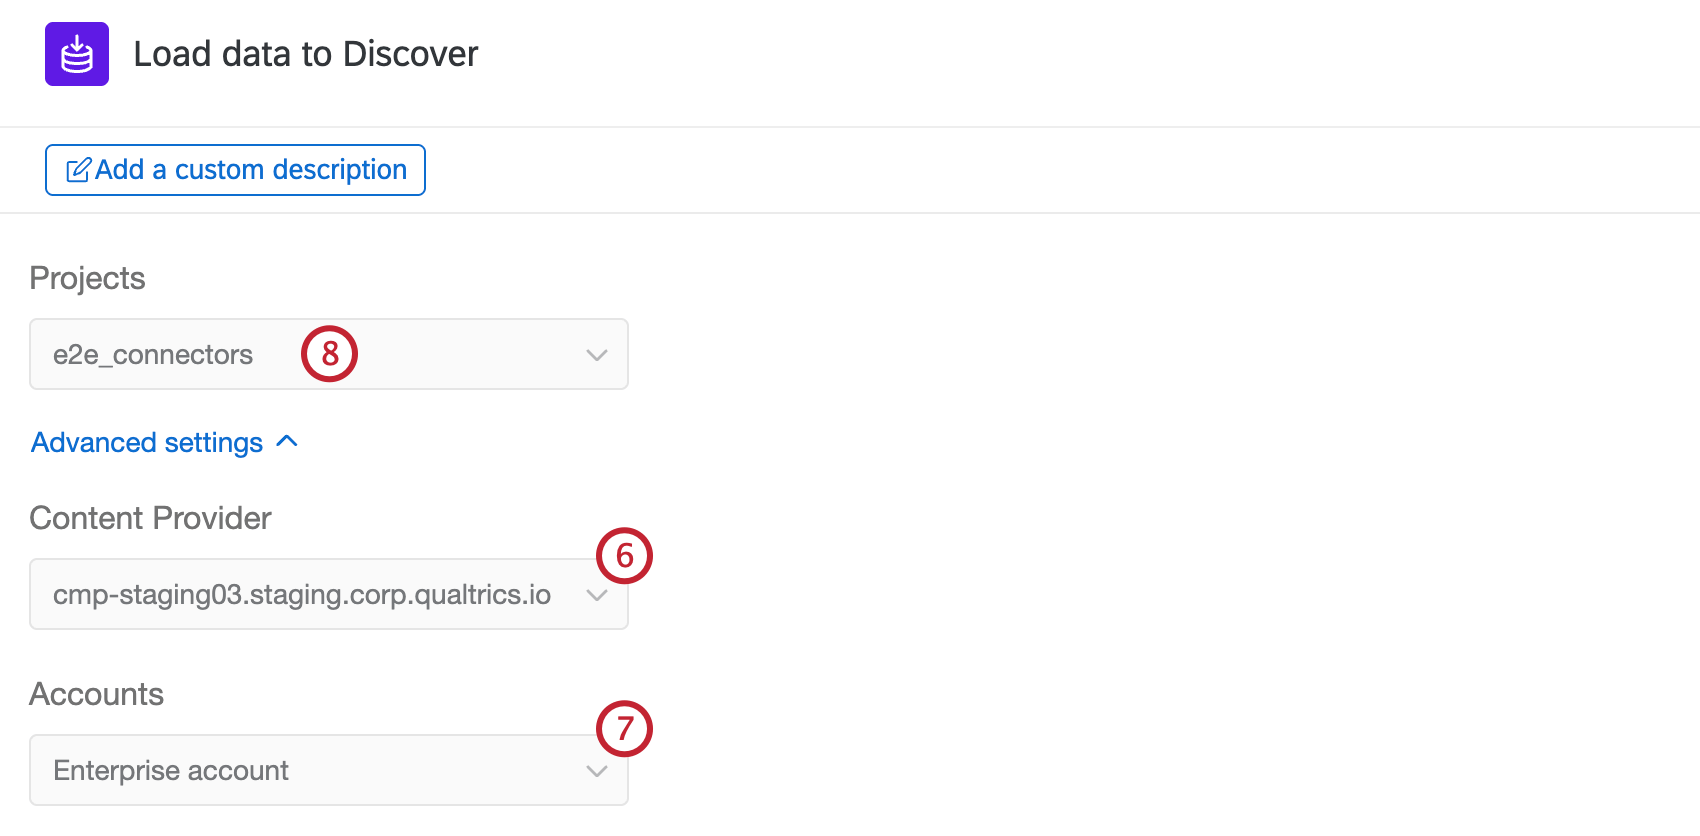
- Select an account within the content provider. If you only have access to 1 account, it will be automatically selected.
- Select a Discover project to load data into. If you only have access to 1 project, it will be automatically selected.
Attention: You must have “Read Only” or “Administrator” project permissions to be able to select a project in this task.
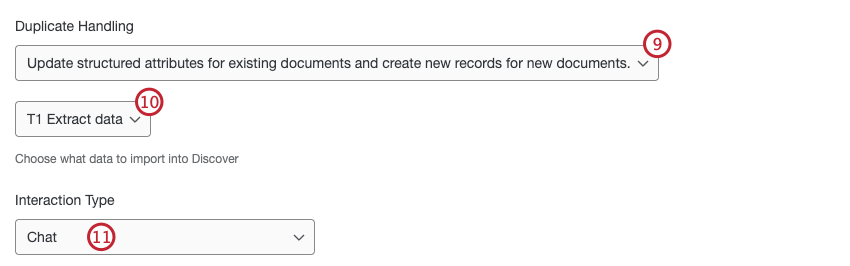
- Use the dropdown to select how duplicates are handled:
- If you have multiple extractor tasks in your workflow, select the task with the data you want to import to Discover.
- Depending on the extractor task you configured in the workflow, you may need to select an Interaction Type. Use the dropdown to select the data type that you’ll be loading to Discover with your extractor task:
- Chat: Web chat, in-app chats, instant messages, SMS text conversations, and direct message chats between an individual and a customer support team. This does not include community chats between a customer and a group of individuals like Discord or Slack channels.
- Call: A customer-provided transcript of a telephone call or voicemail, or an audio file or a call recording.
- Review: A single public review thread left by an individual on an online review site.
- Social: A post, including any replies, in a single thread on a social media platform that mentions the business or location being researched.
- Select if the data is conversational or not.
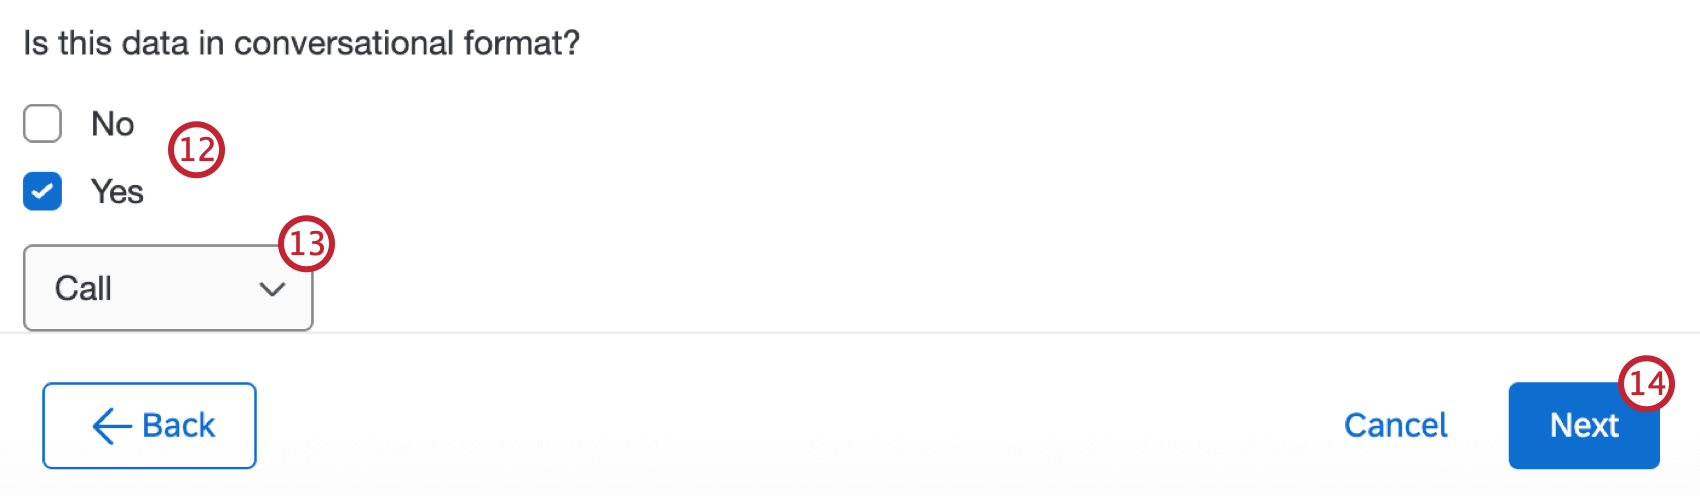
- If you selected “Yes”, use the dropdown to select the conversational format.
- Select Next.
- If the data is conversational, map your conversational fields. See Mapping Data Fields for step-by-step instructions.
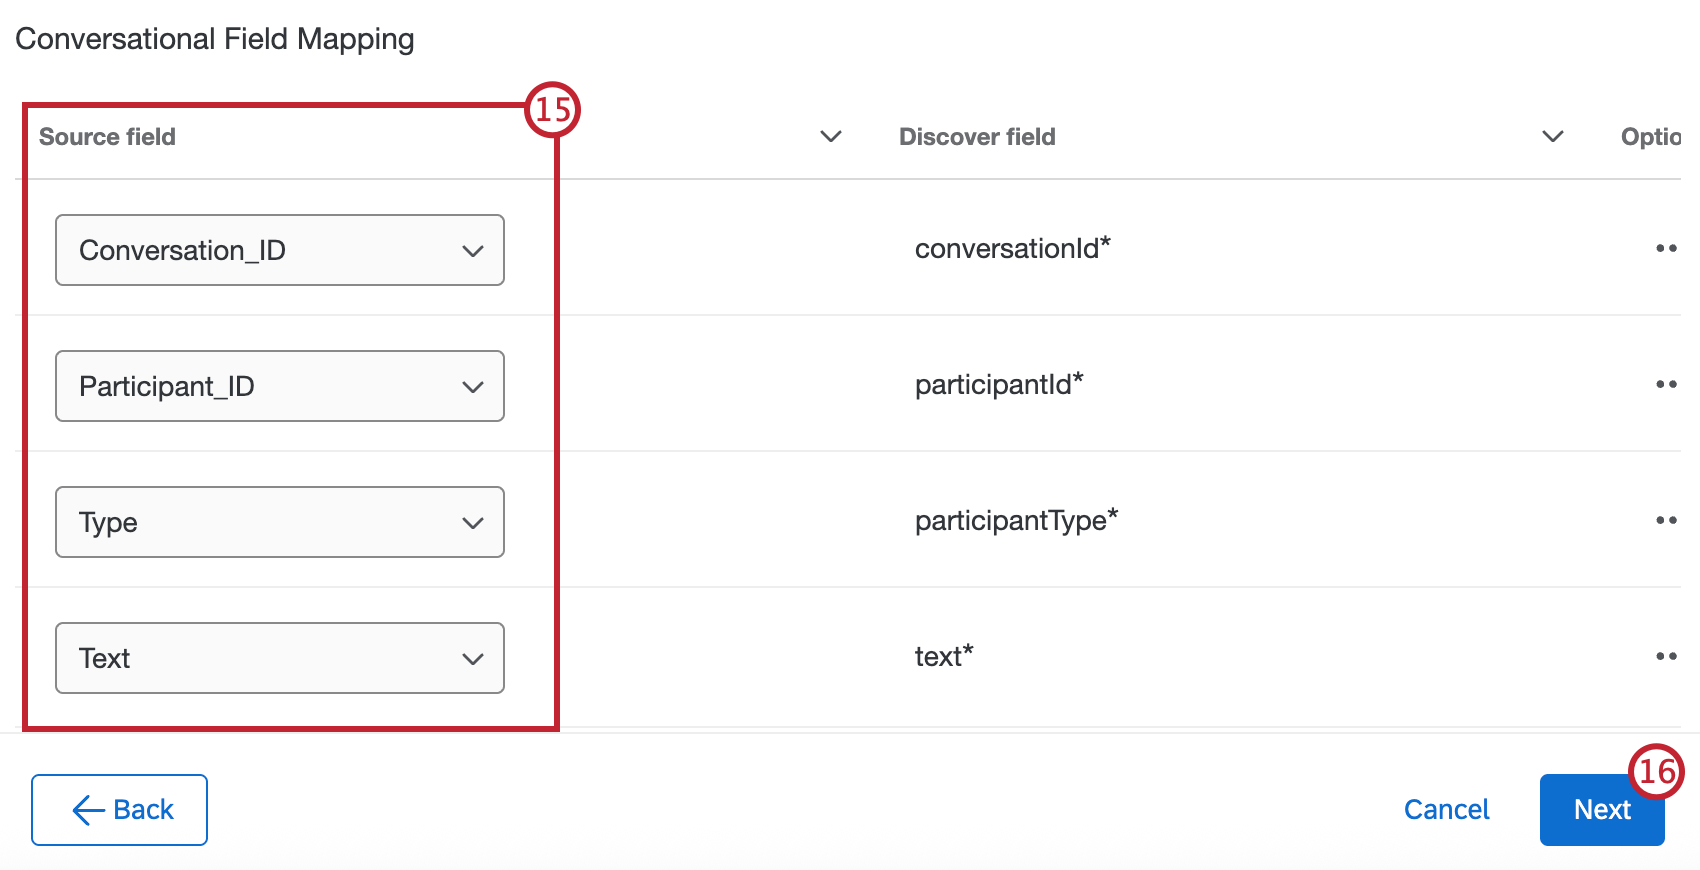
- Select Next.
- Enter a Source attribute value. This value will be used to populate the source attribute of documents uploaded by the task, so you have a record of where your documents came from when they are loaded into Discover. If you don’t enter a value, this will default to “Load to Discover”.
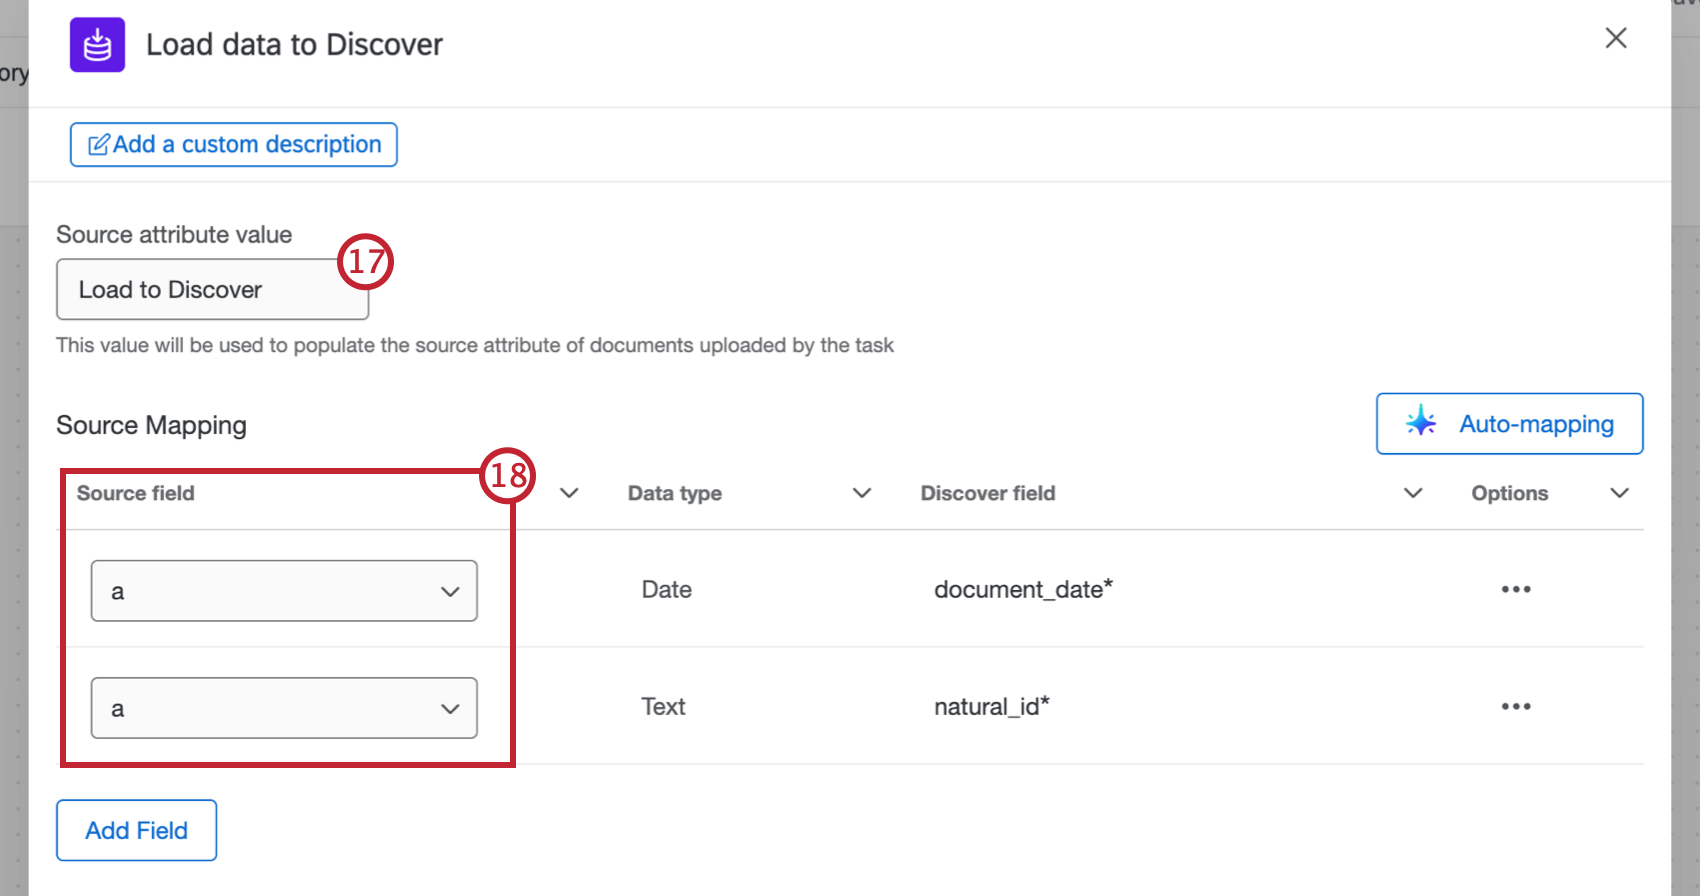
- Map your data fields, either manually or automatically. See Mapping Data Fields for step-by-step instructions.
- After mapping your fields, select Save.
Mapping Data Fields
Attention: When mapping fields, Document Date must be in ISO-8601 or YYYY-MM-DD HH:mm:ss format. If you are using data from an imported data project, the recorded date must be reformatted with the Basic Transform Task before it is loaded to Discover.
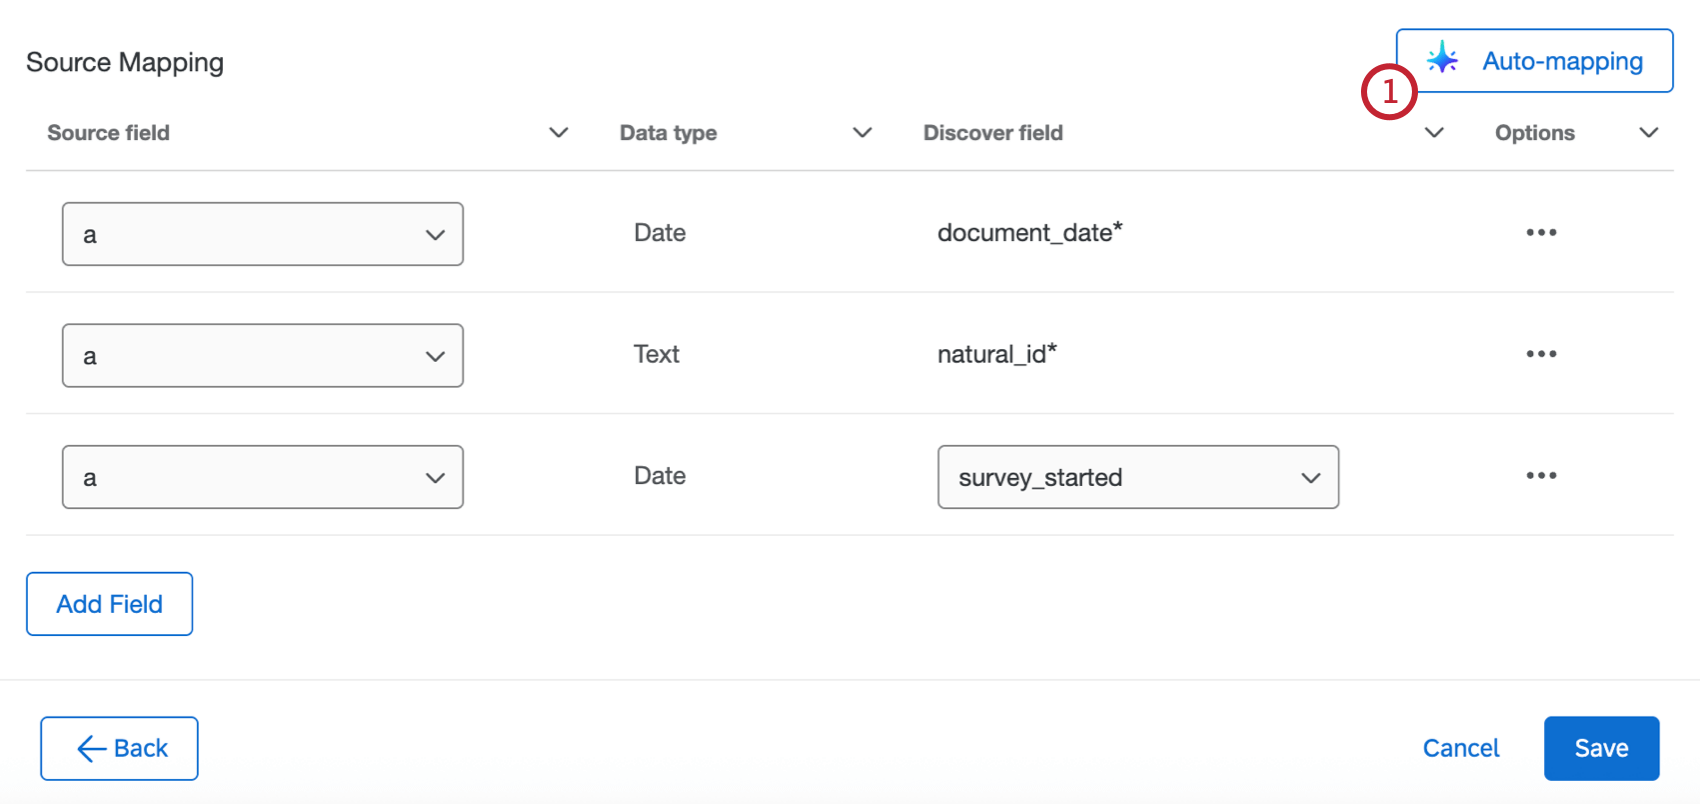
Mapping Fields Manually
- After configuring the initial parts of your task, use the dropdowns in the Source field column to map your source fields in Qualtrics to your destination fields in Discover. document_date and natural_id are required.
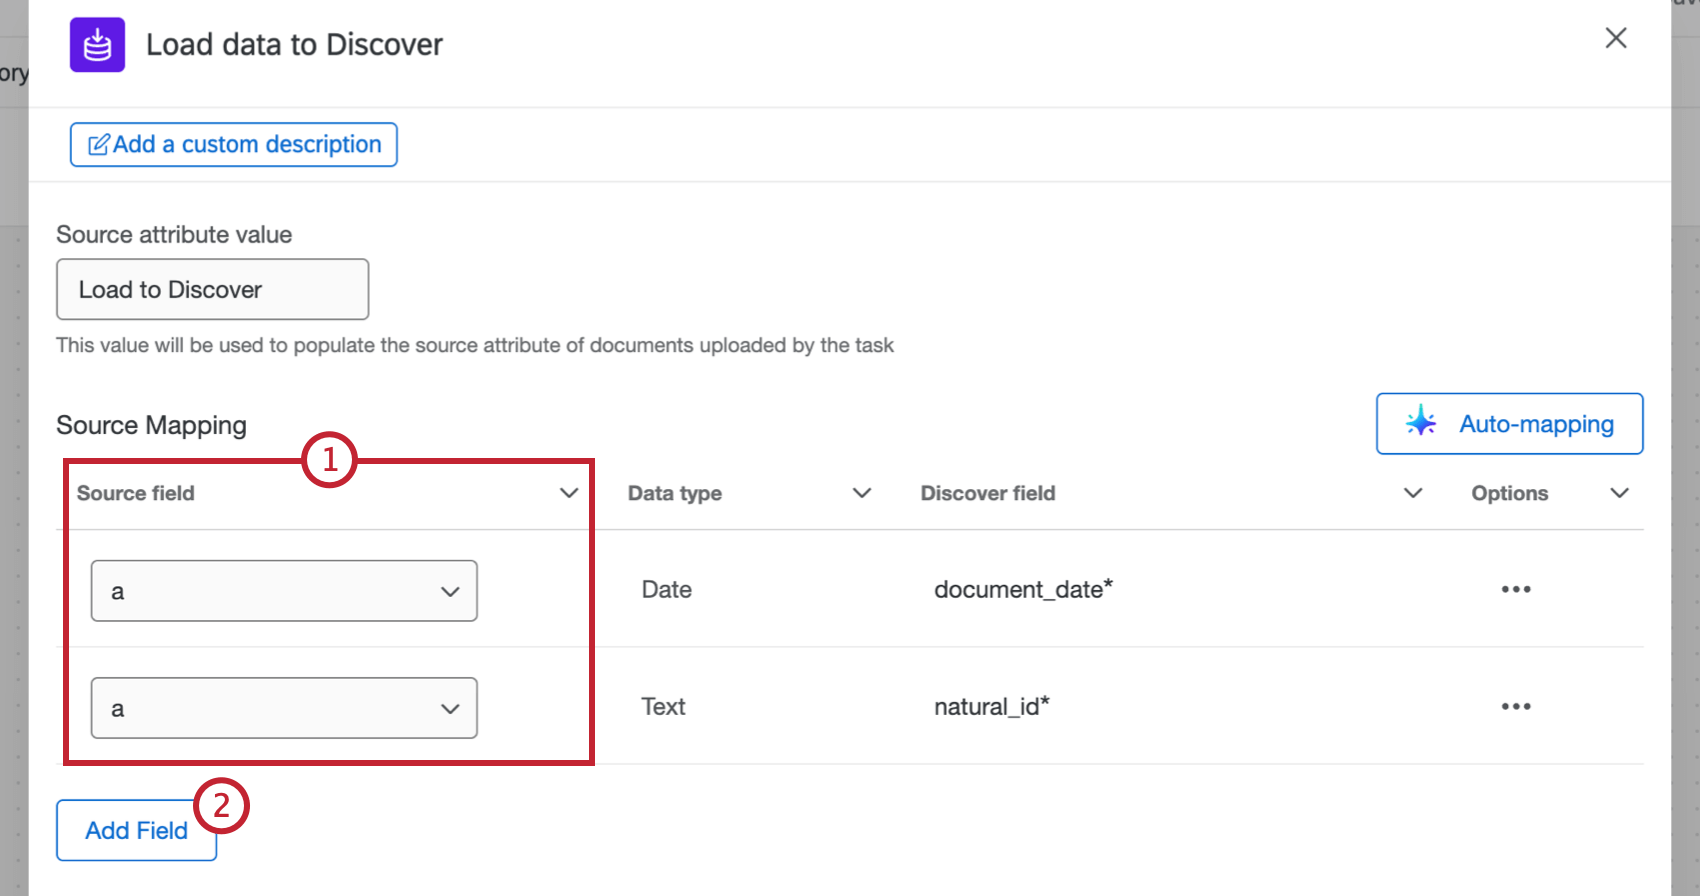
- Required fields will show up automatically. To import additional fields, select Add Field.
- For your additional field, select the source field from Qualtrics.
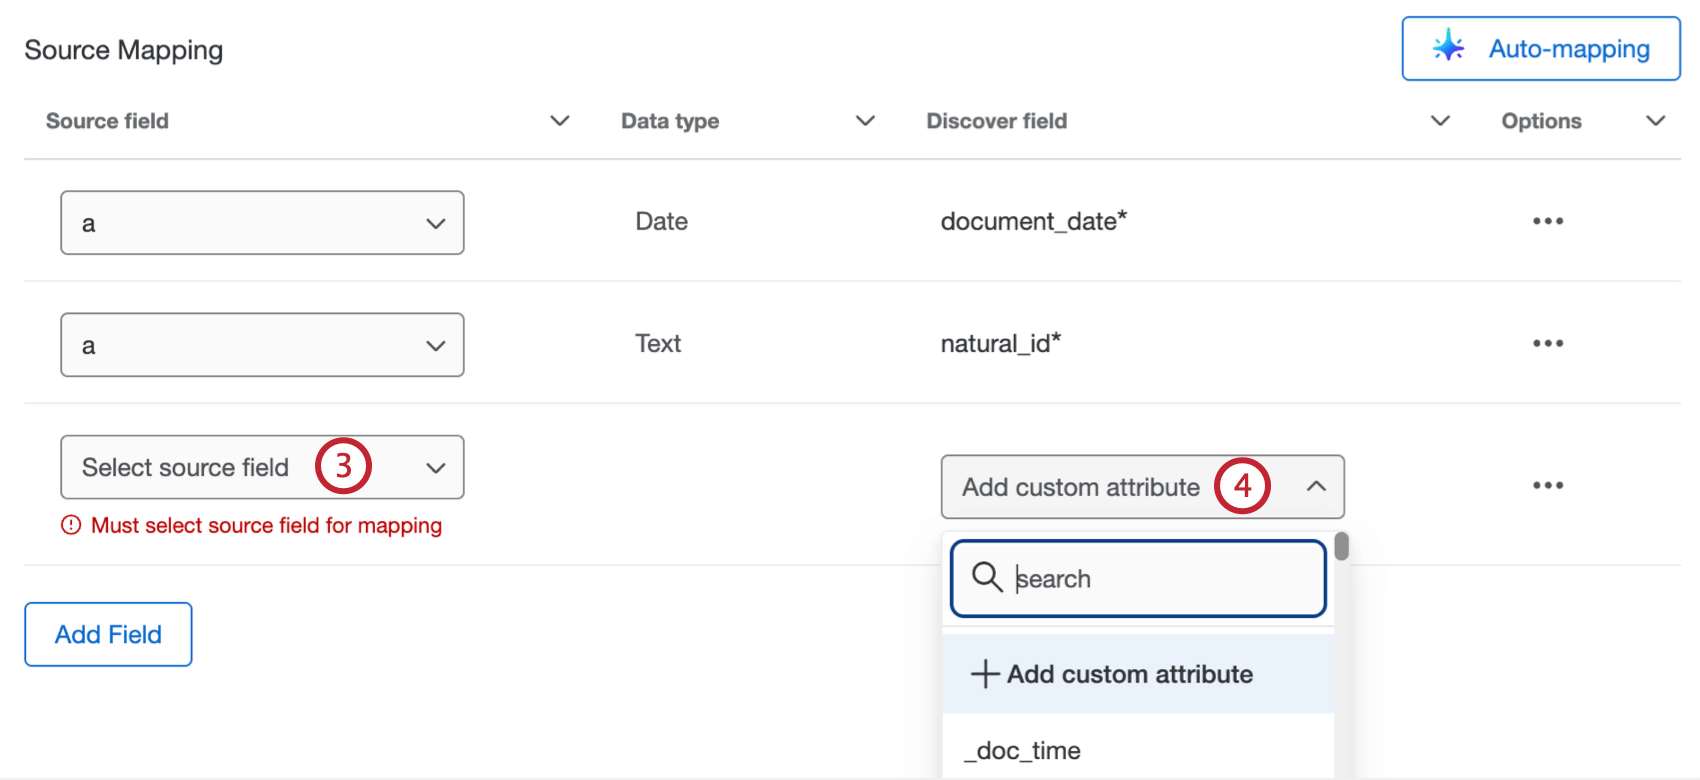
- Use the dropdown in the Discover field column to select a field from your Discover project to load the data to. You can also select Add custom attribute to create a new Discover field instead.
- If you are creating a new field, enter the Attribute Name, Data Type, and Attribute Display Name.
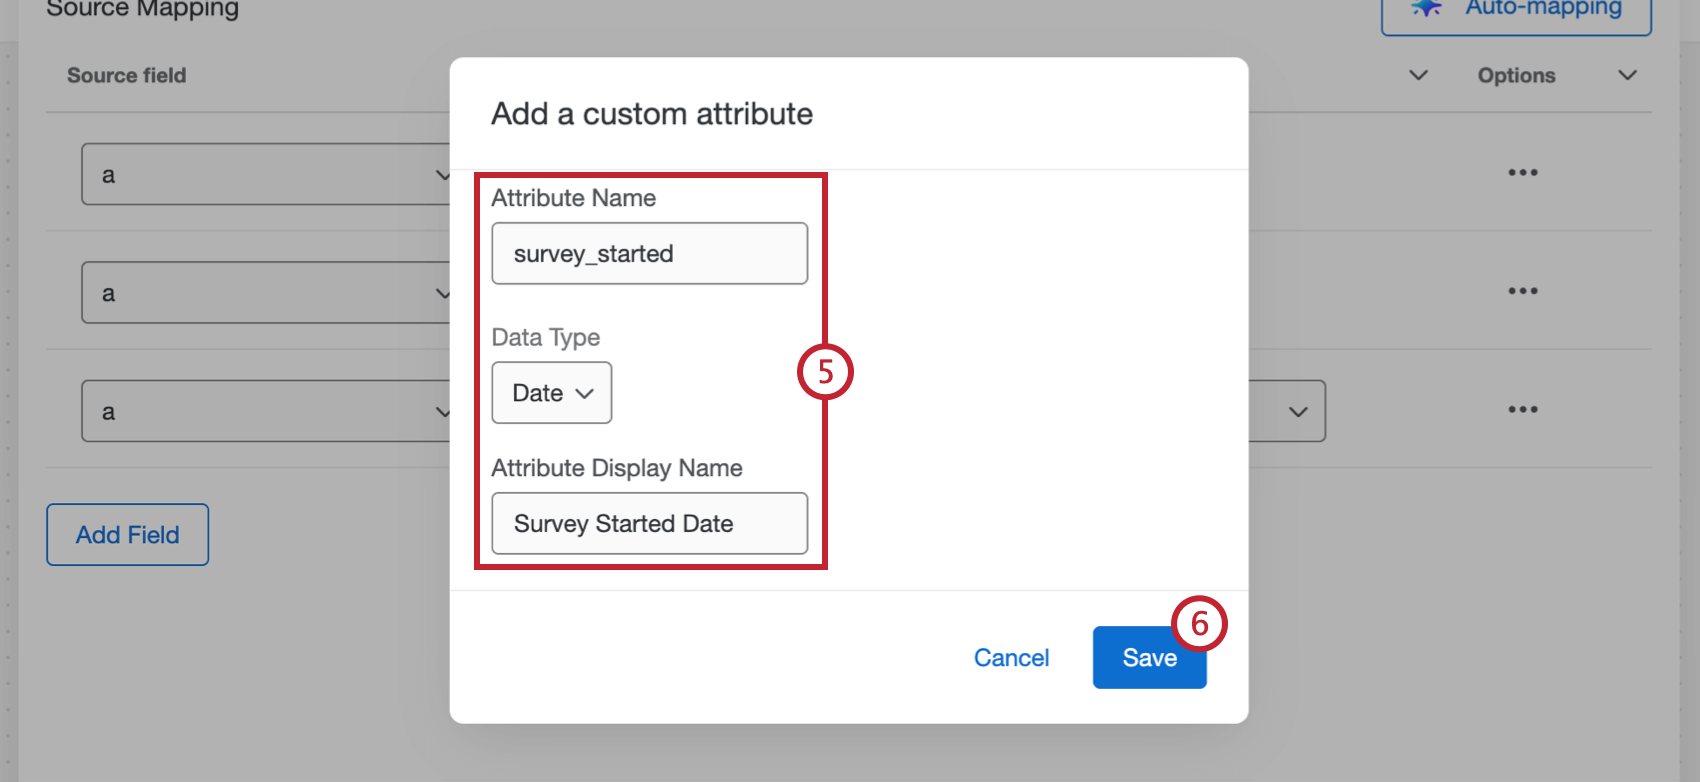
- Click Save.
- To delete an additional field, click the 3 dots menu and select Delete.
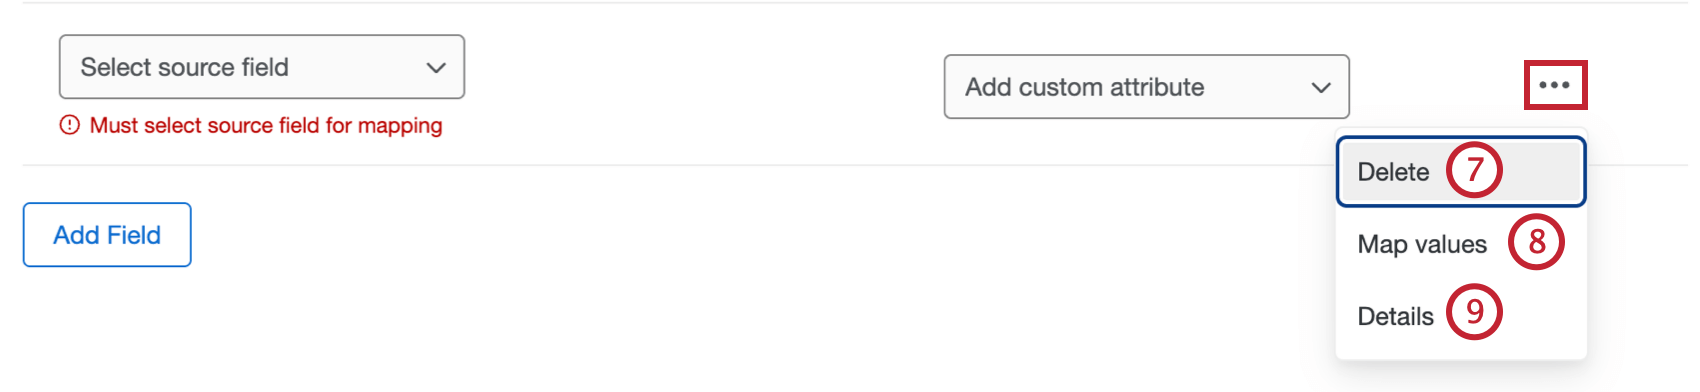
- If needed, you can map specific values for your field by clicking the 3 dots menu and selecting Map values. You can use this feature if you want to save your data with different values than they have in Qualtrics.
Qtip: After selecting Map values, you can assign a static text value to a field. To do this, select a source field for the row, then specify a default value that will always be assigned if no other mapped values are provided.
- For more information about a field, select the 3 horizontal dots and select Details to see details about the field.
- Click Save.
Mapping Fields Automatically
Attention: You can only use auto-mapping if a Brand Administrator has enabled the Enable AI Assistance in Configuring Workflows permission for your organization in the Admin tab.
Attention: Auto-mapping is not currently available for customers in the FedRAMP environment.
To map your task fields automatically using AI, follow these steps:
- After configuring the initial parts of your task, select Auto-mapping.
- Select one of the following:
- Map to existing fields only: Only automatically map fields that already exist in Discover.
- Create new fields if no match is found: Automatically map fields that already exist in Discover, and create new fields if a matching one doesn’t exist.
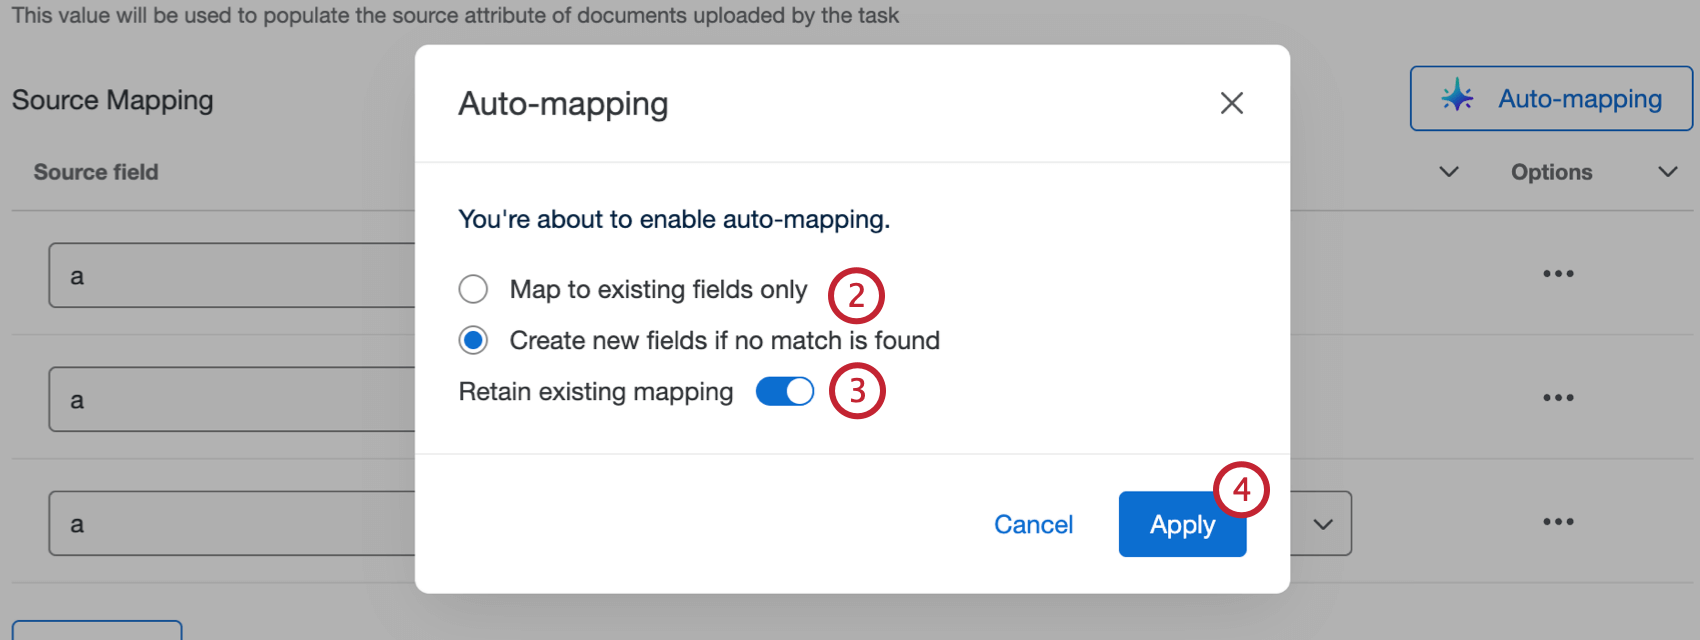
- Click the toggle if you want to retain existing mapping. When this is enabled, auto-mapping won’t overwrite any fields that have already been mapped.
- Select Apply.
- When mapping is finished, a preview of the fields will appear. Review the mapping and make edits as needed.
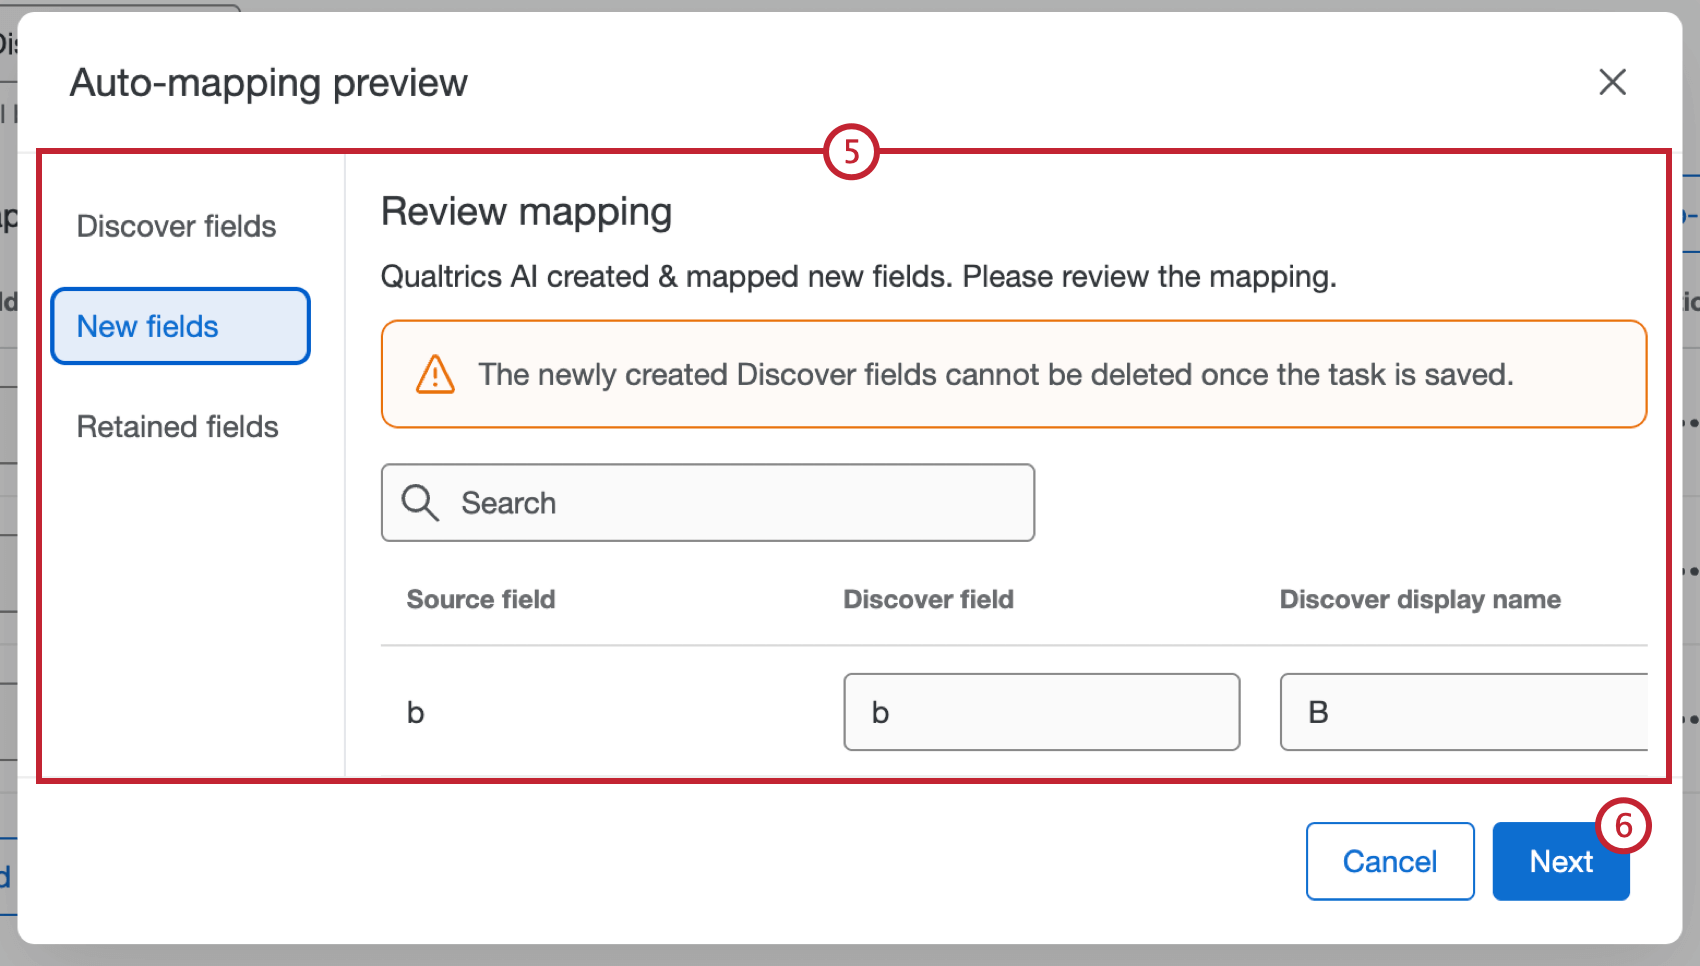 Attention: Any newly created Discover fields cannot be deleted once the task is saved.
 - If everything looks correct, click Next.
Viewing the Run History
After you’ve run the task, you can view the status and more information in the Run History.
The task will have a status of Succeeded even if some or all of the documents failed to be loaded to Discover. You can download the task data file to see the upload status of individual documents. For more information, see Downloading Data Files.