-

Qualtrics Platform -

Customer Journey Optimizer -

XM Discover -

Qualtrics Social Connect
Survey Response Task
About Survey Response Task
The Survey response task allows you to use and update survey response data in a Qualtrics workflow. You can use this task to automate survey response data management without needing to use the Qualtrics API.
There are 2 different actions available in this task:
- Get survey response: Retrieve data from a single survey response.
- Update survey response: Add or update data in a single survey response.
Setting Up a Get Survey Response Task
The get survey response task retrieves an individual response from a survey as a single JSON export. This makes the full response available for use in other tasks in the workflow, which can be useful for importing data into systems like Salesforce. You can also use responses in the AI response task, which allows you to analyze text, generate replies to customers, and more.
- Navigate to the Workflows tab in your project or the stand-alone Workflows page.
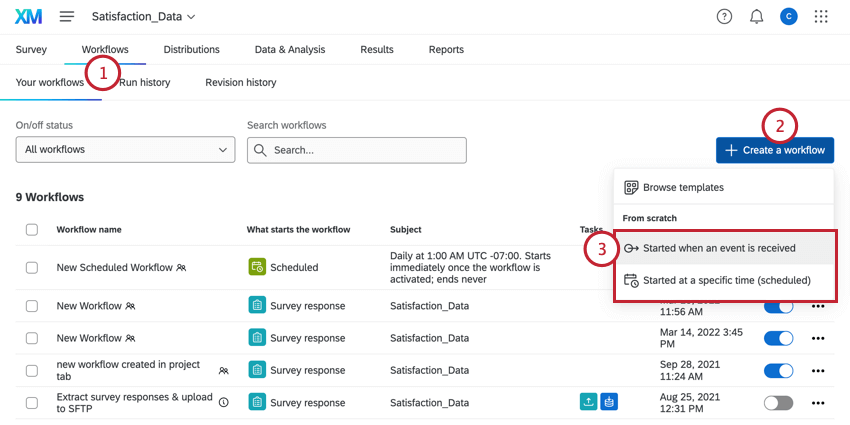
- Click Create a workflow.
- Choose if you want the workflow to be triggered by an event or run on a schedule. (See a comparison).
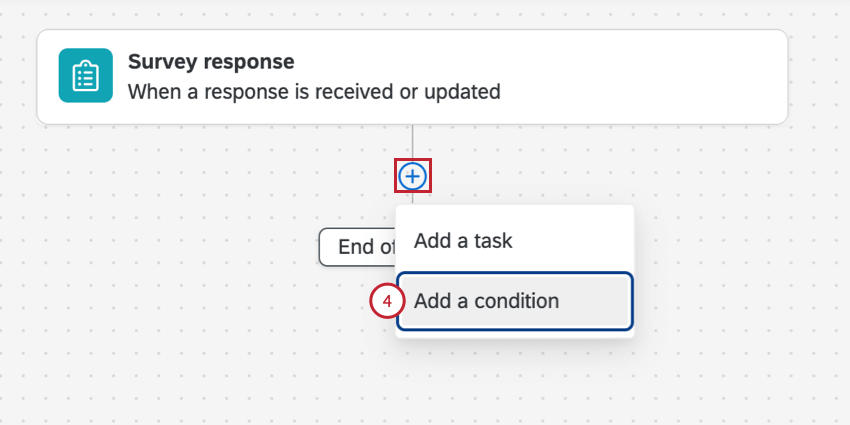
- Click the plus sign ( + ) and then Add a condition to set up conditions for your workflow.
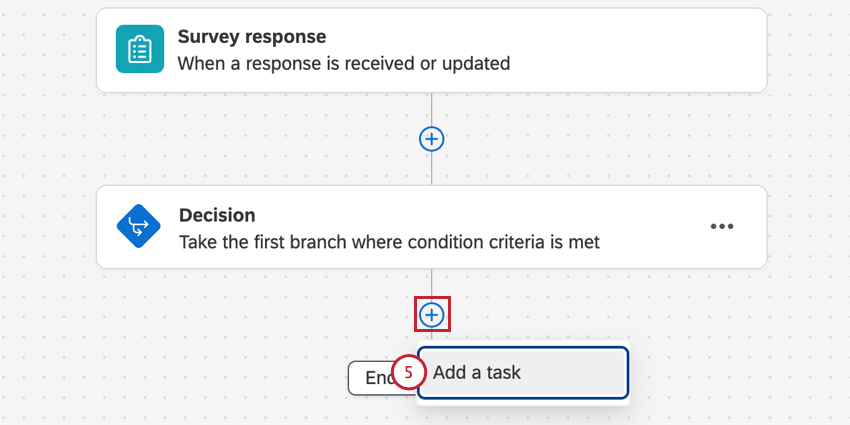
- Click the plus sign ( + ) and then Add a task.
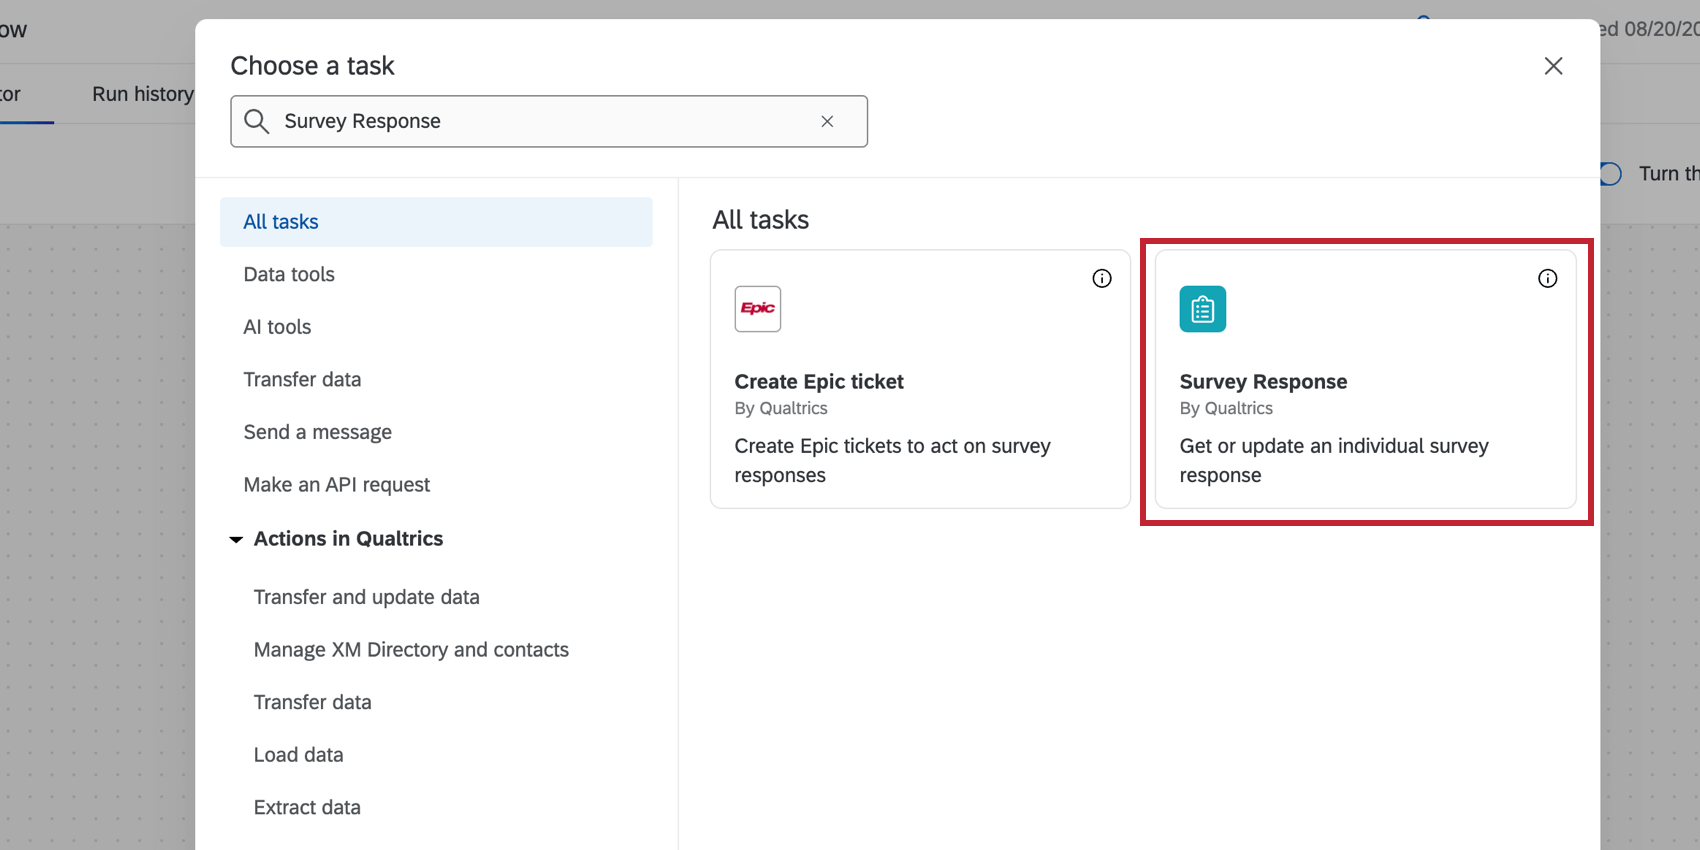
- Choose the Survey Response task.
- Select Get survey response.
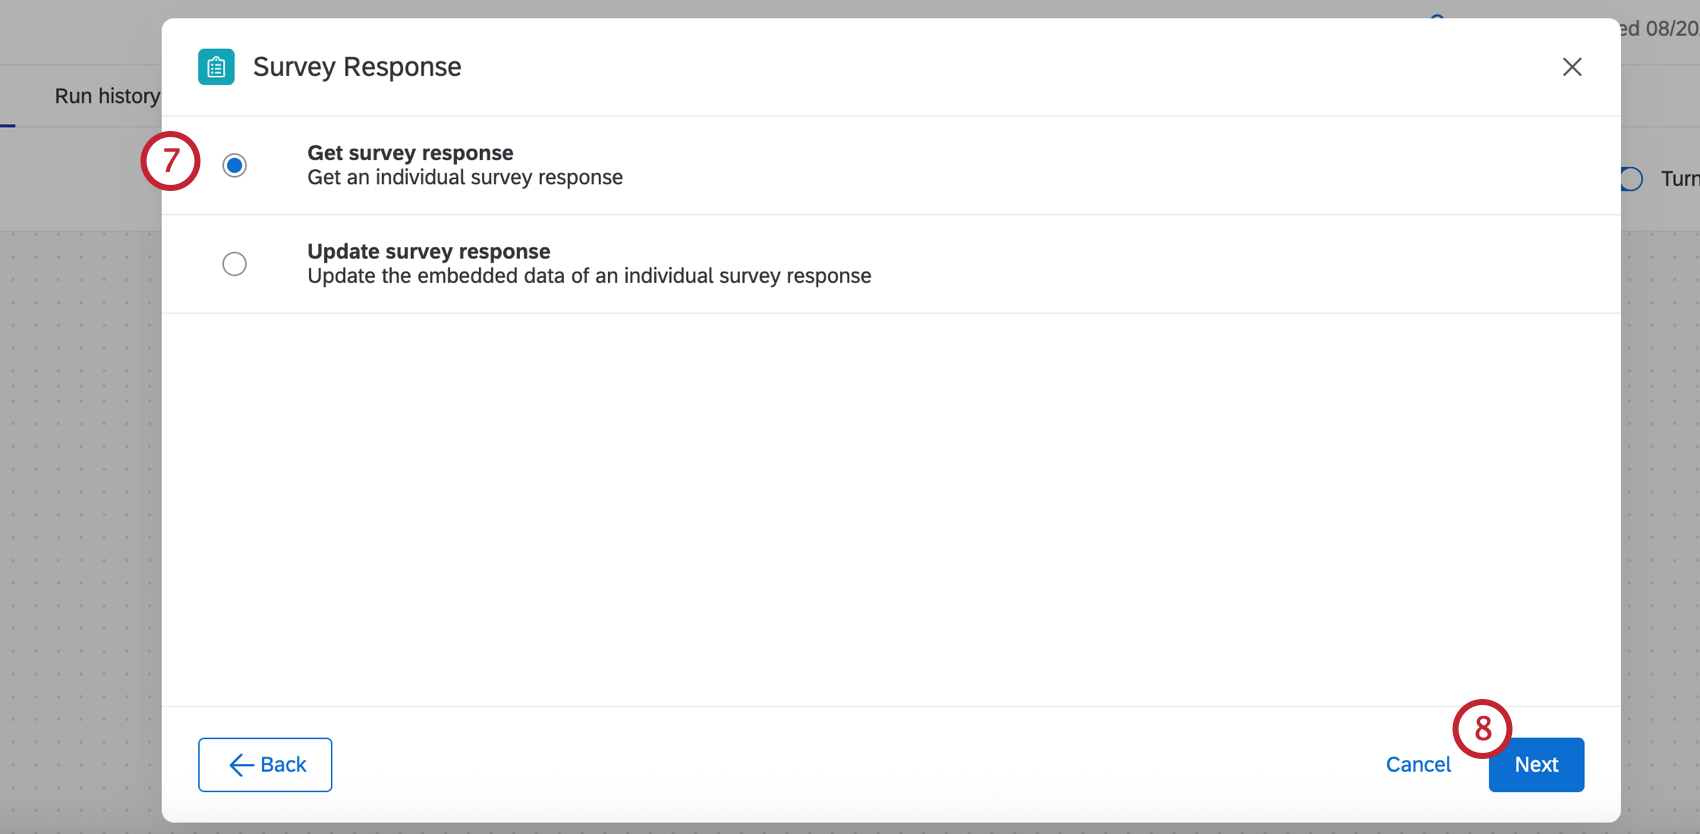
- Click Next.
- Click Add a custom description to add a description to the task.
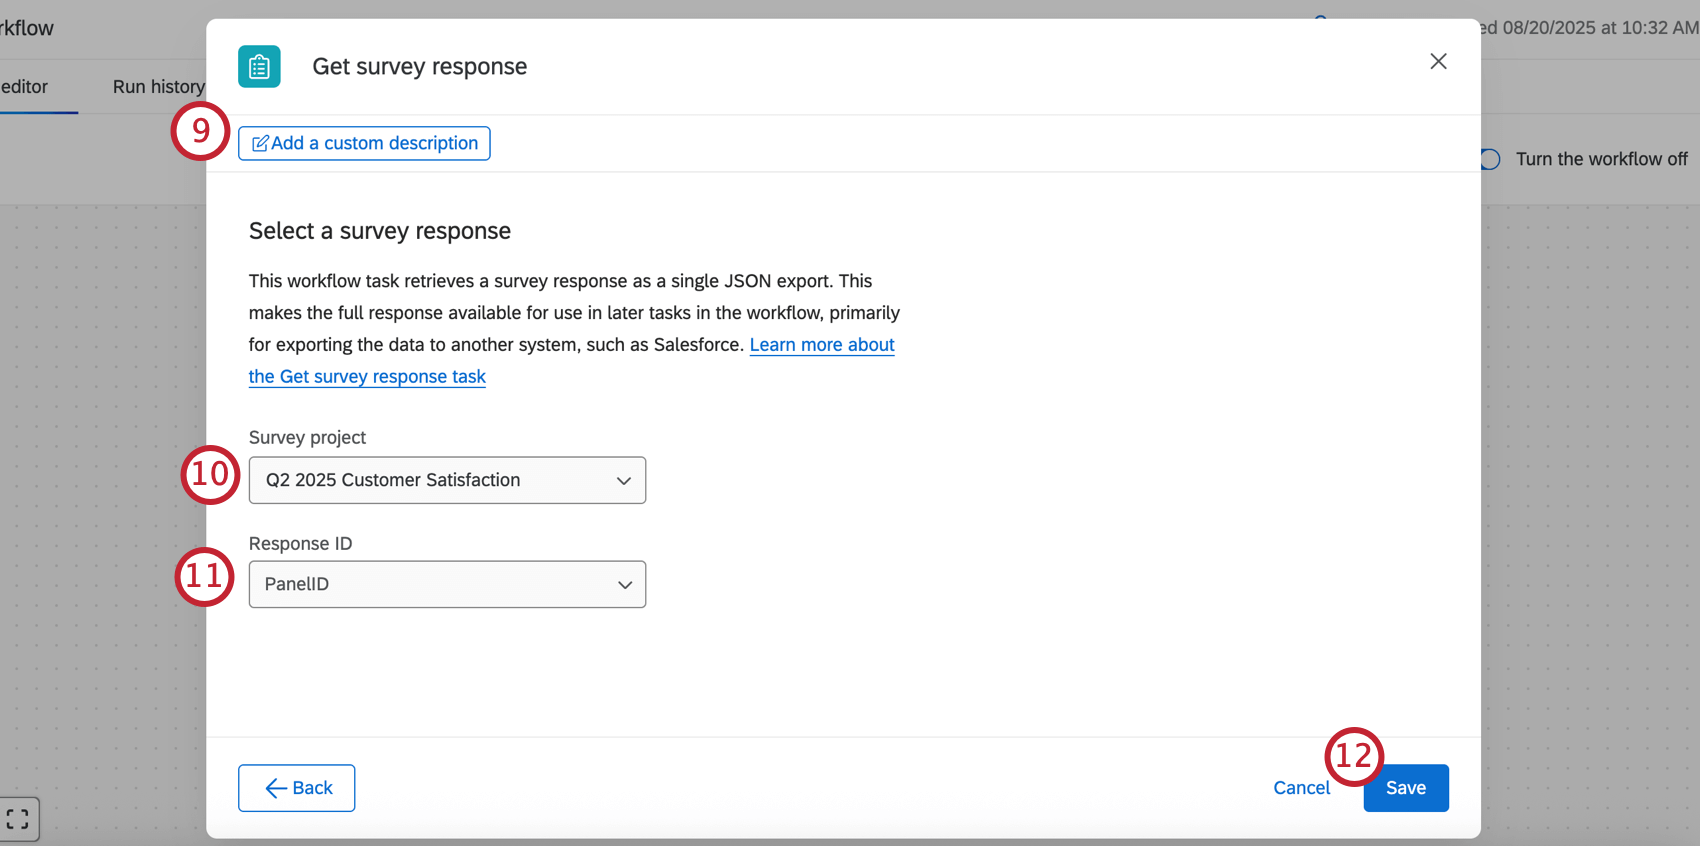
- Using the dropdown menu, select the survey project containing the response you would like to retrieve.
- Using the dropdown menu, select the field in your survey project that contains the Response ID that you would like to retrieve.
- Click Save.
Setting Up an Update Survey Response Task
Have you ever wanted to add or update data in a survey response after it’s been submitted? For example, you may have extra demographic information about the respondent or campaign data related to the survey that could add context to the response. The Update survey response task enables you to update existing embedded data fields from a survey response using a Qualtrics workflow.
- Follow the linked instructions to create a new event-based workflow.
- Configure the event that triggers your workflow. Common events to pair with this task include:
- Survey response event: Start the workflow when a survey response is recorded or updated.
- If desired, you can add other tasks to your workflow to add their output to the desired survey response. Some examples include:
- OpenAI task: Use third-party AI to gather insights from your response data.
- Code task: Use JavaScript to analyze and manipulate response data.
- AI Response task: Use Qualtrics AI to gather insights from your response data.
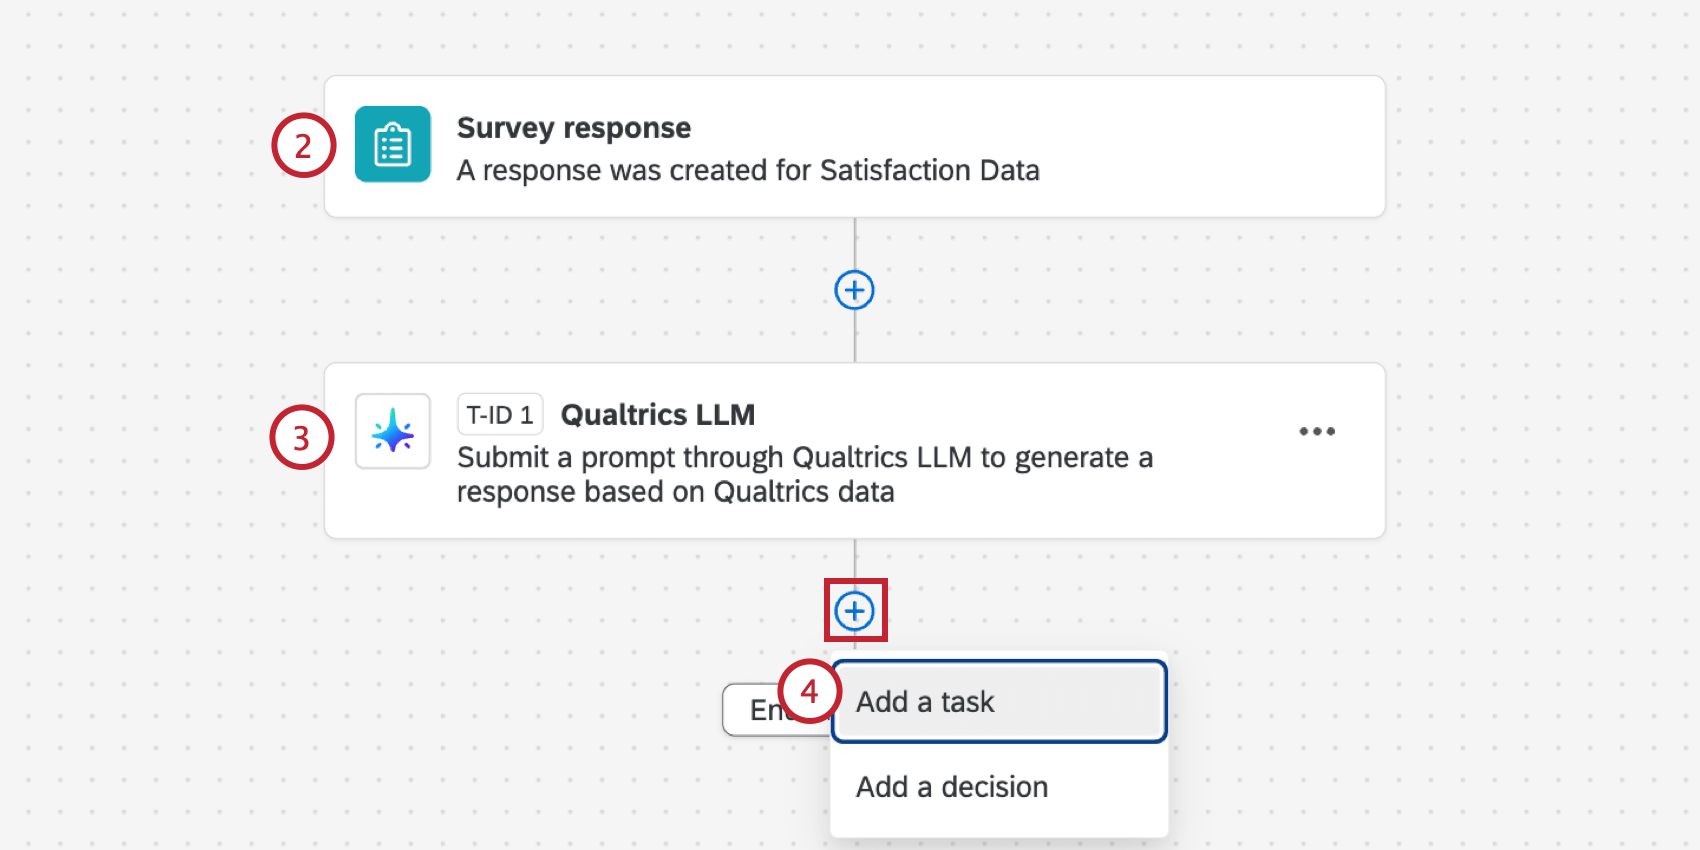
- Click the plus sign ( + ) and select Add a task.
- Choose the Survey Response task.
- Select Update survey response.
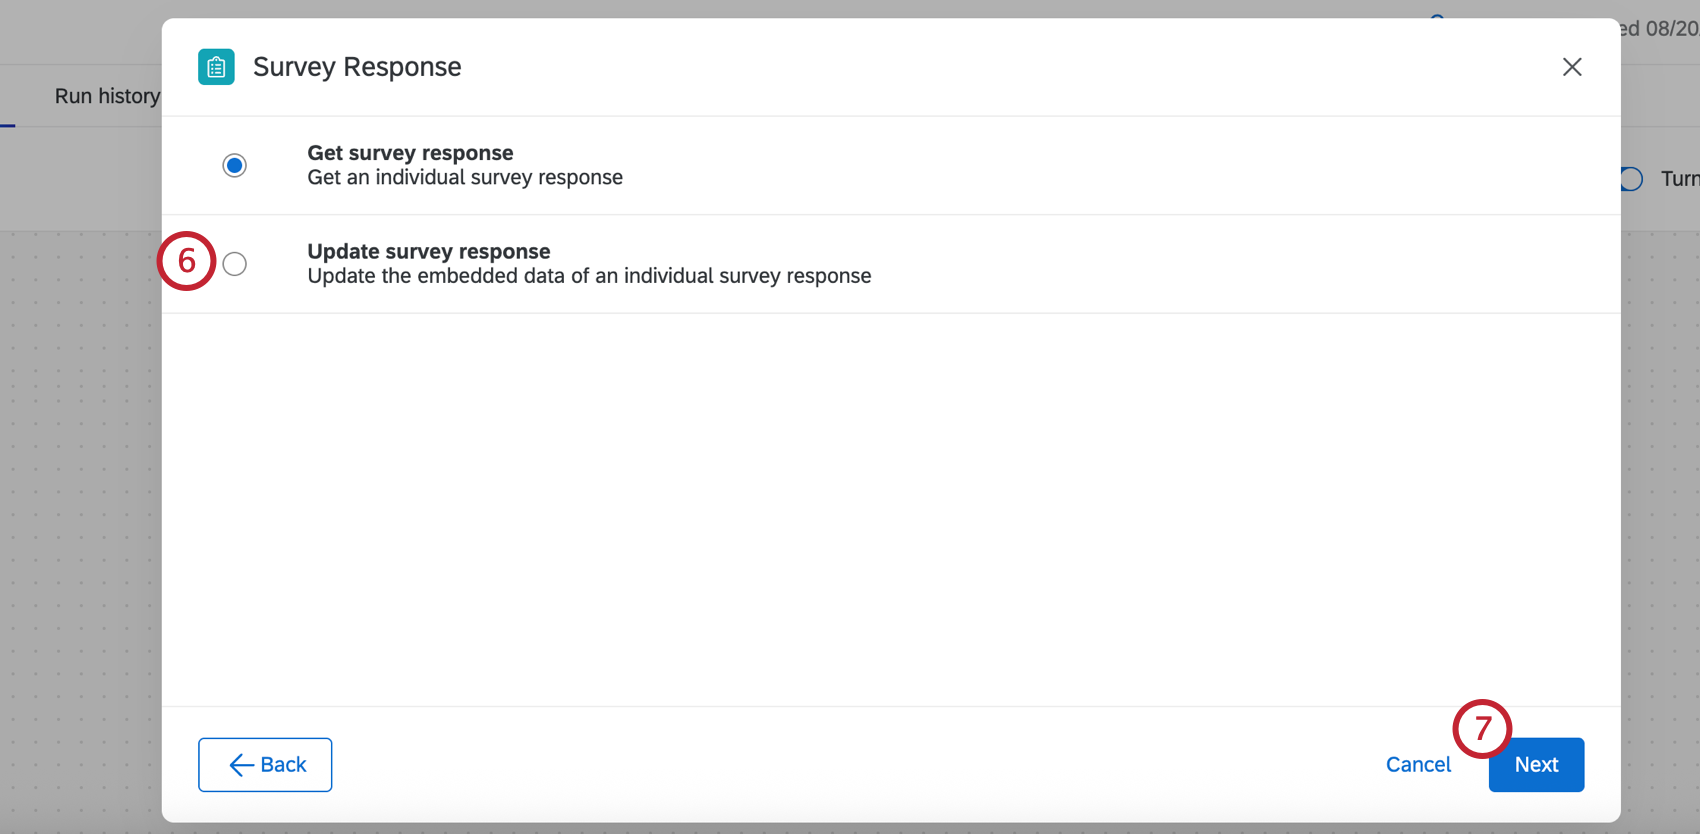
- Click Next.
- Choose the Survey project that contains the response you’d like to update.
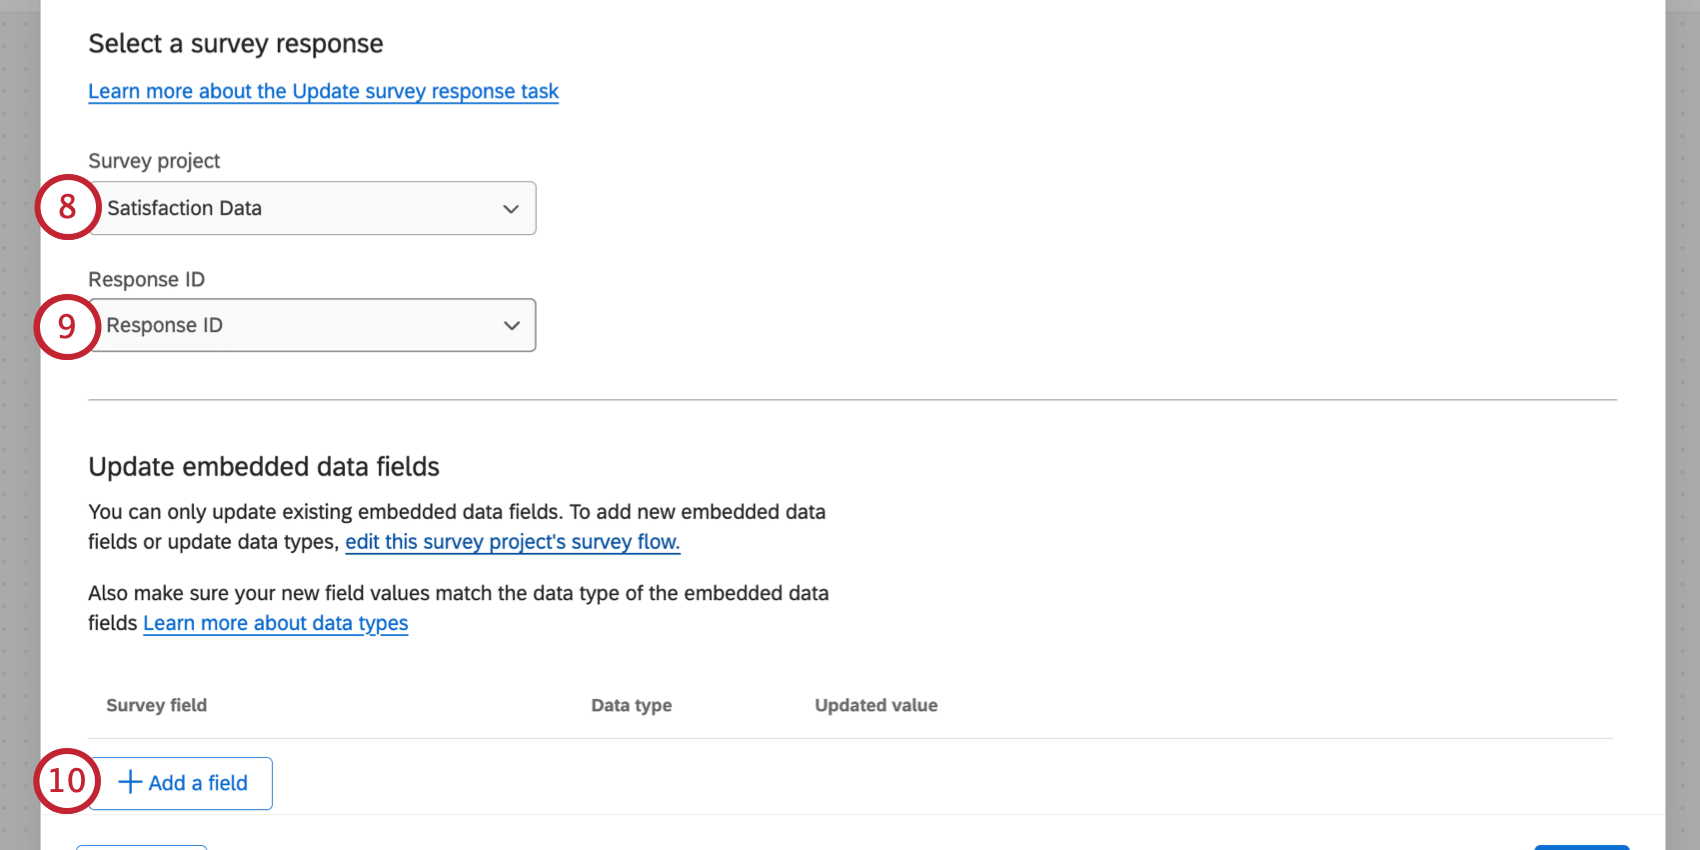 Qtip: Depending on your selected event, the survey project and response ID may already be prefilled for you.
 - Choose the Response ID field used to identify the response.
- Click Add a field.
- Select the survey embedded data field you’d like to update.
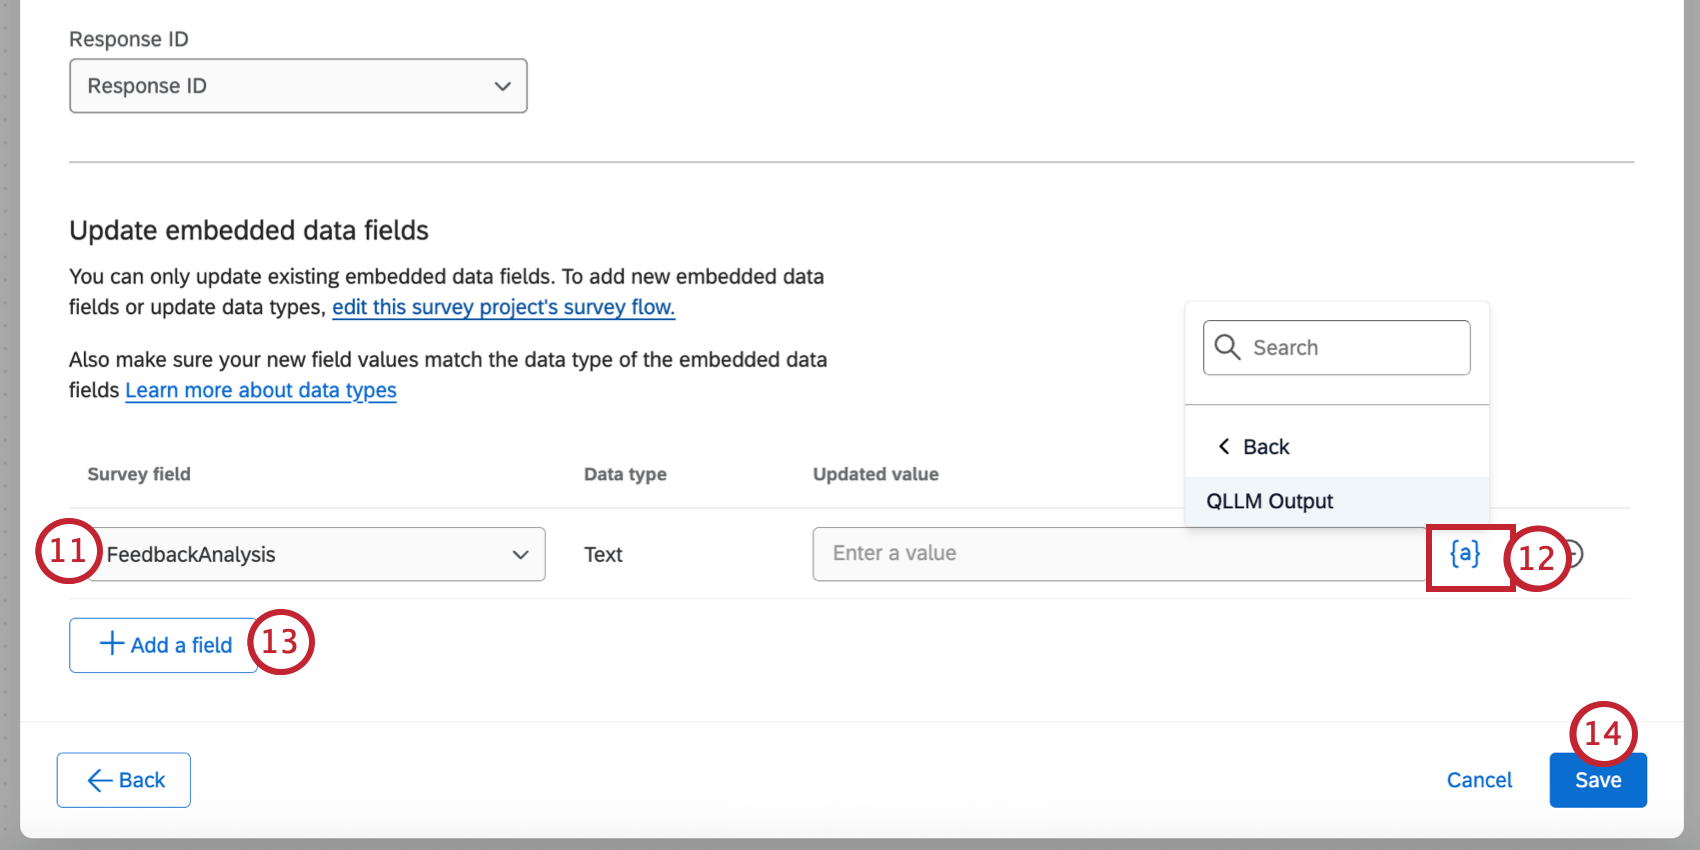
- Use the piped text menu, {a}, to select the dynamic value you’d like to save for the embedded data field (usually the output from the intermediate task defined in step 3). Alternatively, you can hard code a value by typing it directly in the box.
- Add additional fields by clicking Add a field. You can remove a field by clicking the minus sign ( – ) to the right of it.
- When finished, click Save.