-

Qualtrics Platform -

Customer Journey Optimizer -

XM Discover -

Qualtrics Social Connect
Customizing the Product Test App
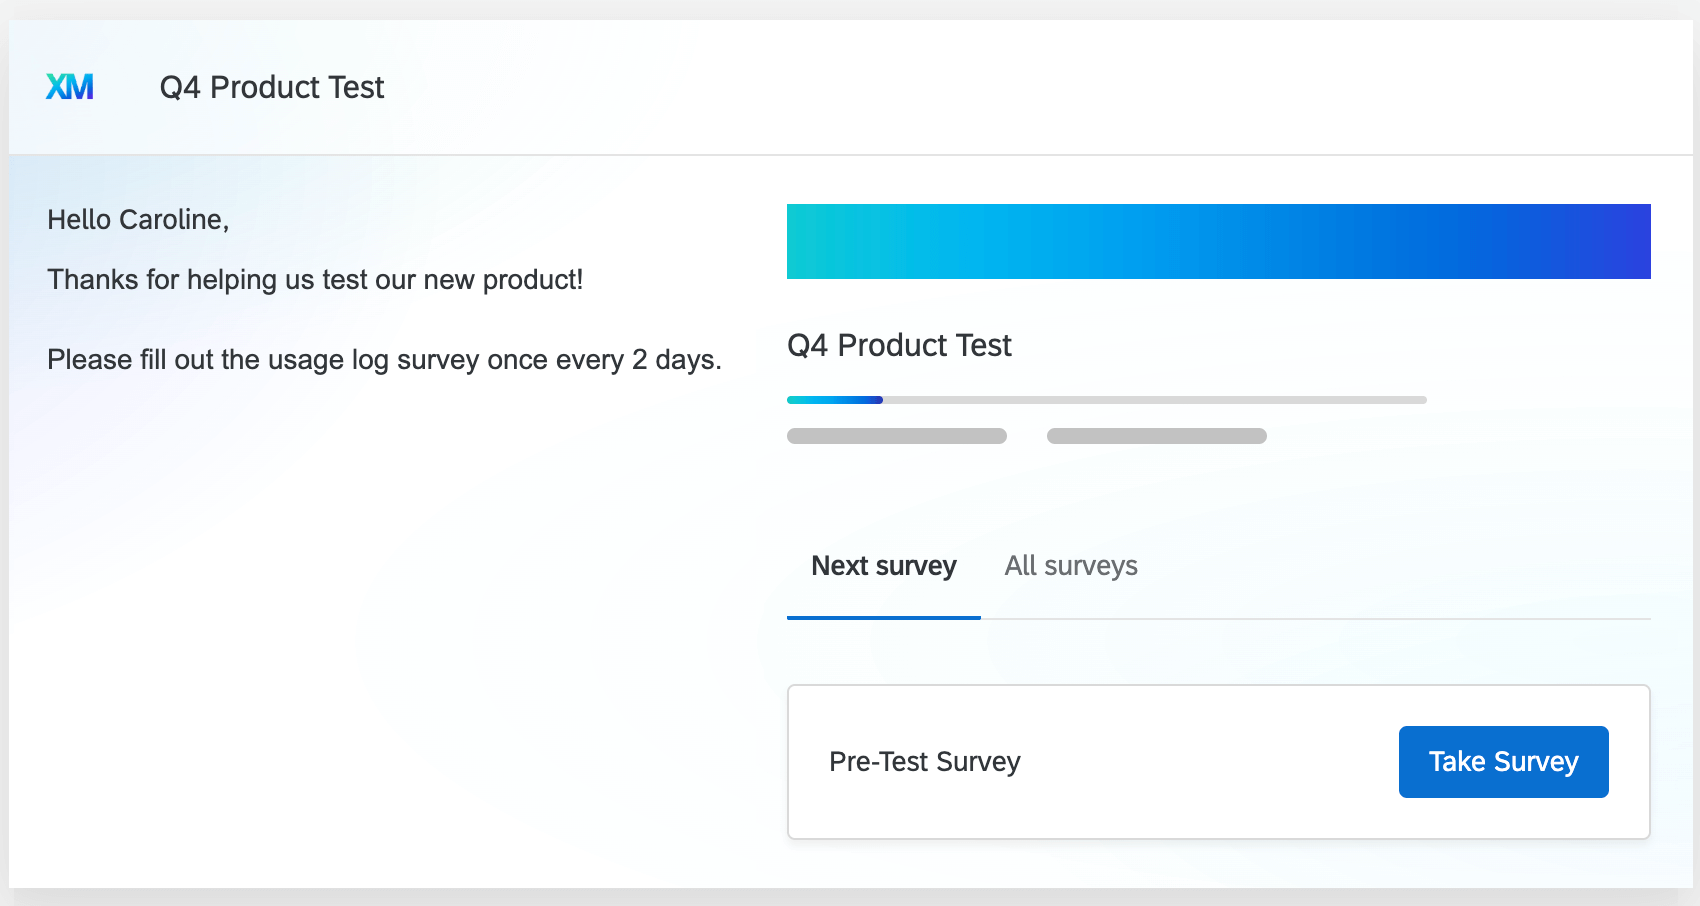
About the Tester App
The tester app is a centralized place where participants in your product test can view all surveys available to them. Here they can view information about your product test, including instructions, and access your surveys.
For information on viewing the tester app as a participant, see Accessing the Tester App as a Participant.
For more information on Product Testing projects, see Product Testing Overview.
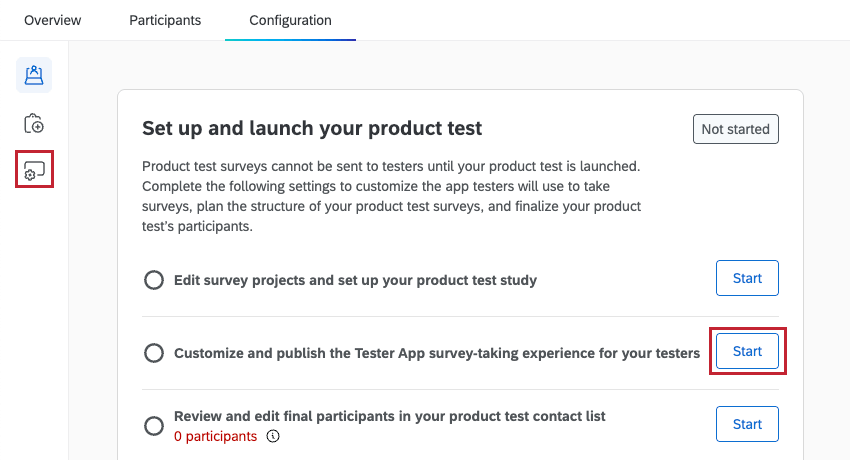
Accessing the App Settings
To start editing the tester app, select the Tester app setup section within the Configuration tab, or click Start next to “Customize and publish the Tester App survey-taking experience for your testers” within the Product test overview section.
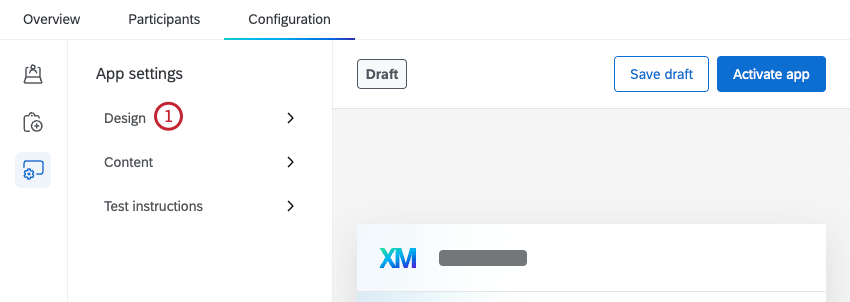
Design Section
In this section you can add a logo or banner graphic to your tester app.
- Select Design within the App Settings section.
- To add a logo, click Upload graphic within the Add logo section.
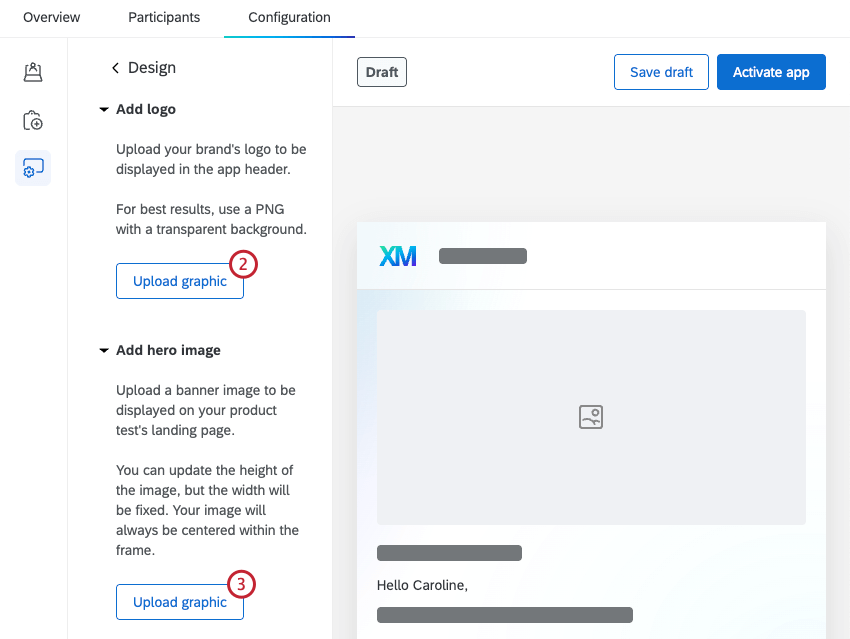
- To add a banner to the top of the product test landing page, click Upload graphic within the Add hero image section.
Attention: A hero image is required when setting up your tester app.
- Select an existing logo image from a library, or click Choose file to upload a new image. See Library Graphics for more information on uploading images to your library.
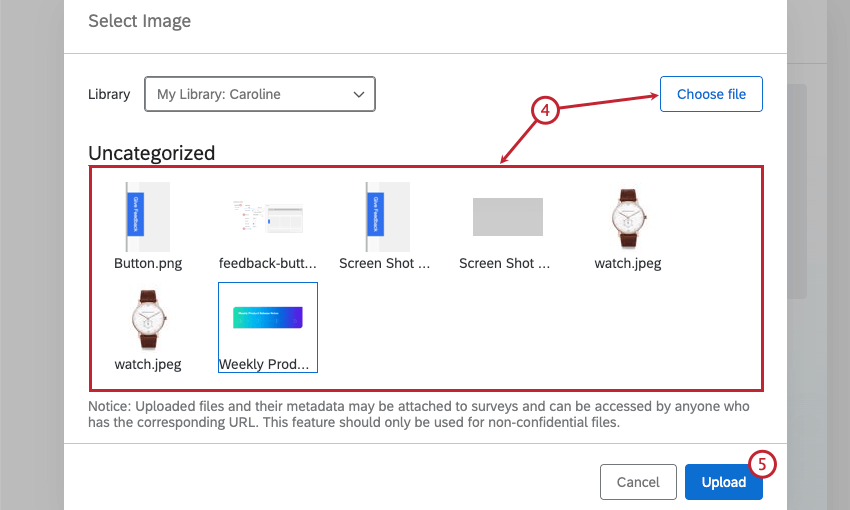
- Click Upload.
Content Section
In this section you can edit details about your product test, like the test name and introduction, add a legal notice, or add support information.
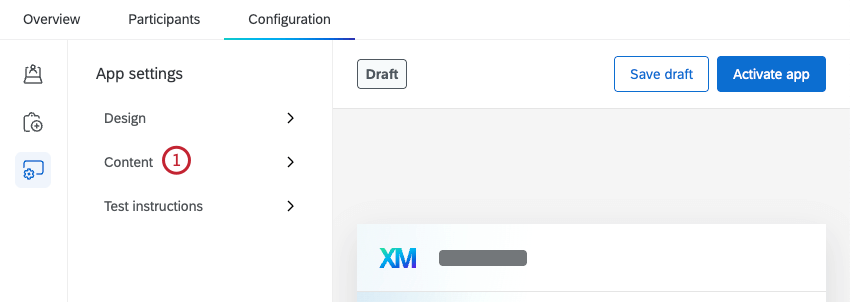
- Select Content within the App Settings section.
- Enter a Product test name to be displayed at the top of the tester app and within email messages.
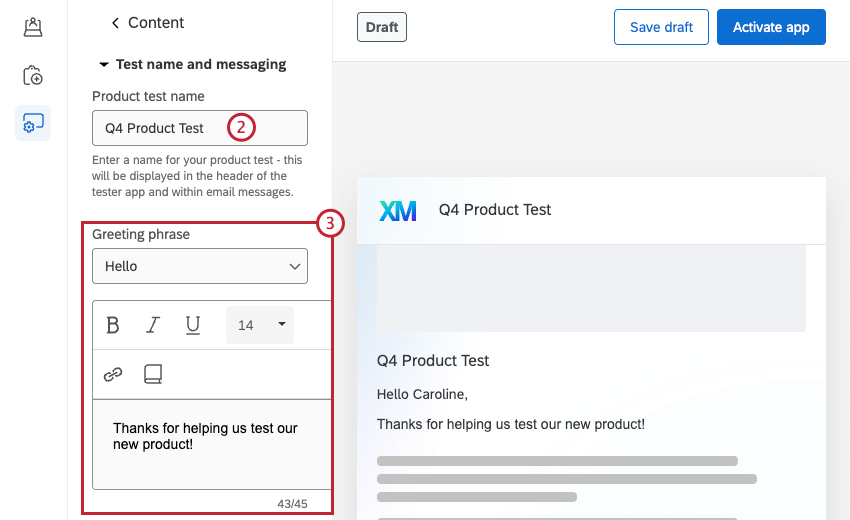
- Choose a Greeting phrase, which determines how testers are addressed in the app. You can also set an additional welcome message by typing in the text box below.
Qtip: Click the book icon to load a message from your library. See Library Messages for more information on adding messages to your library.
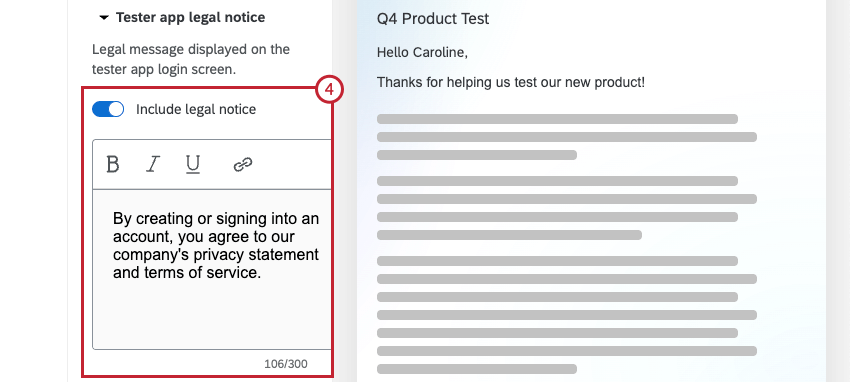
- If you’d like to include a legal notice for testers, enable the Include legal notice option. You can then customize the message in the text box.
- In the Contact email section, you can add an email address where testers can reach out if they need help.
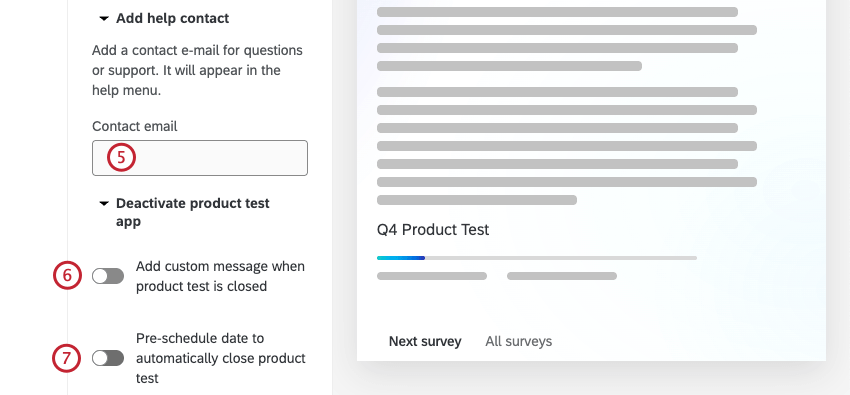
- To show testers a custom message when the product test is closed, enable Add custom message when product test is closed and enter a custom message.
- To schedule a date for your product test to automatically close, enable Pre-schedule date to automatically close product test and select a date and time for the product test to close.
Attention: Once you select an end date and time for your product test, you cannot change it.
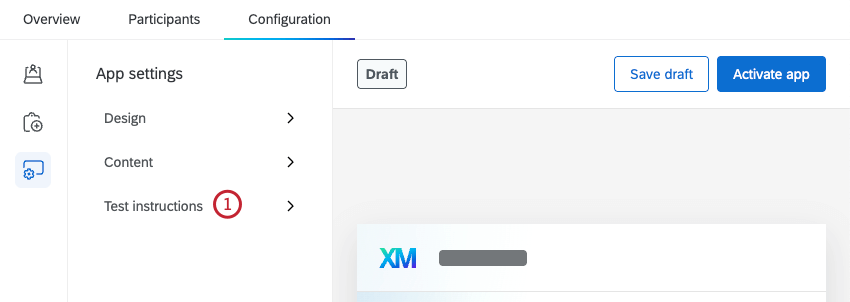
Test Instructions Section
In this section you can edit the instructions that are displayed to testers.
- Select Test instructions within the App Settings section.
- Click Add instructions.
- Enter your instructions in the text editor. These will be displayed to testers on the tester app landing screen. For more information on editing text in Qualtrics, see the Rich Content Editor support page.
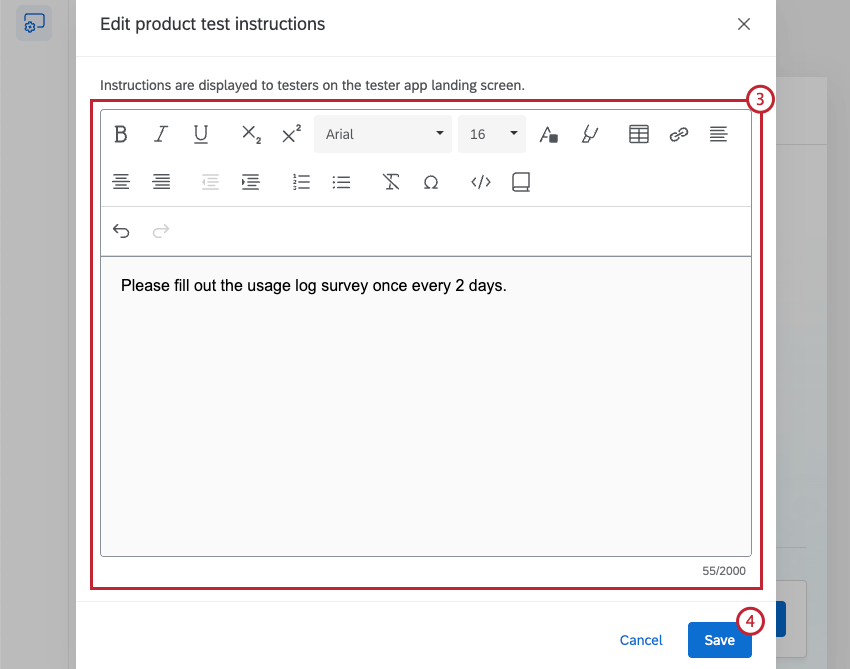 Qtip: Click the book icon to load a message from your library. See Library Messages for more information on adding messages to your library.
 - Click Save.
Saving & Activating the Tester App
To save any changes you make as a draft, click Save draft. To activate the app for testers, select Activate app. Once your app is active, this button will say “Publish changes,” which you can press to save any additional changes you make.

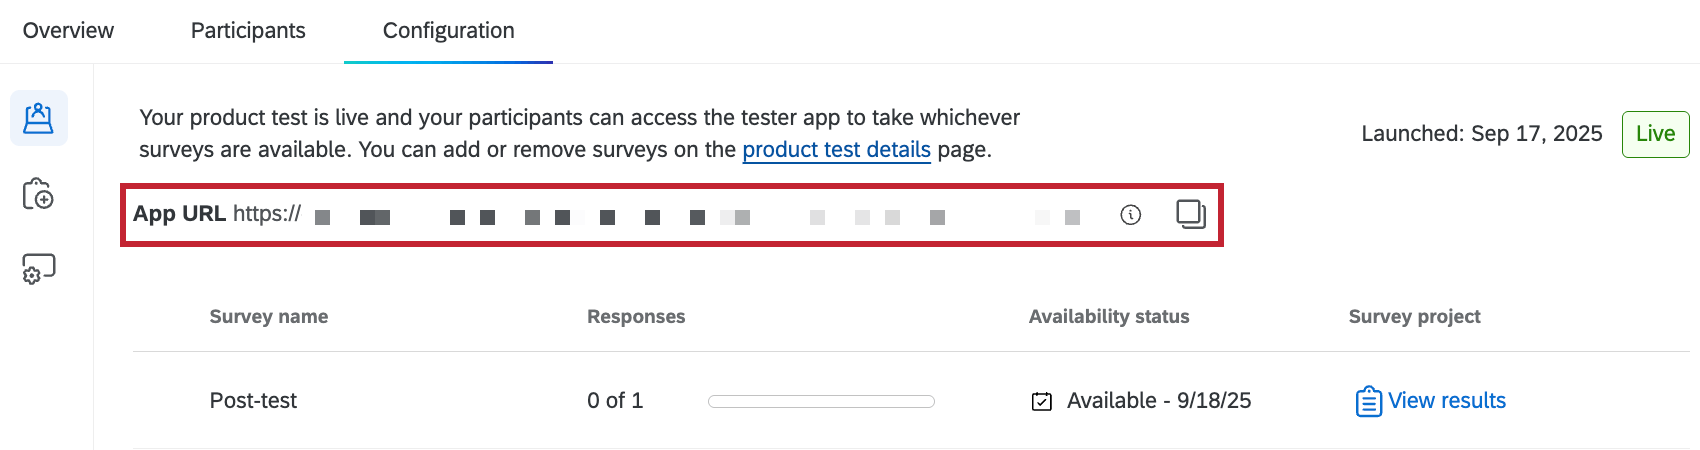
Sharing the Tester App
Once your product test has been launched, you can share a link to the app with your testers. Navigate to the Configuration tab of your project to copy the link.
When the product test launches, testers will also receive an email invite with a link to the panelist app. You can also choose to notify them when new surveys are added to the app, and they will receive additional emails.
Accessing the Tester App as a Participant
To access the app, testers can click the link they receive in their invitation email. From there testers can create a participant account, which they can log into in the future to access product test surveys.