-

Qualtrics Platform -

Customer Journey Optimizer -

XM Discover -

Qualtrics Social Connect
Configuring a Customer Care App
About Configuring a Customer Care App
Brand Administrators and other users with the relevant permission can manage how the Customer Care app appears to users. This includes choosing which tabs are displayed, and which content is displayed within those tabs.
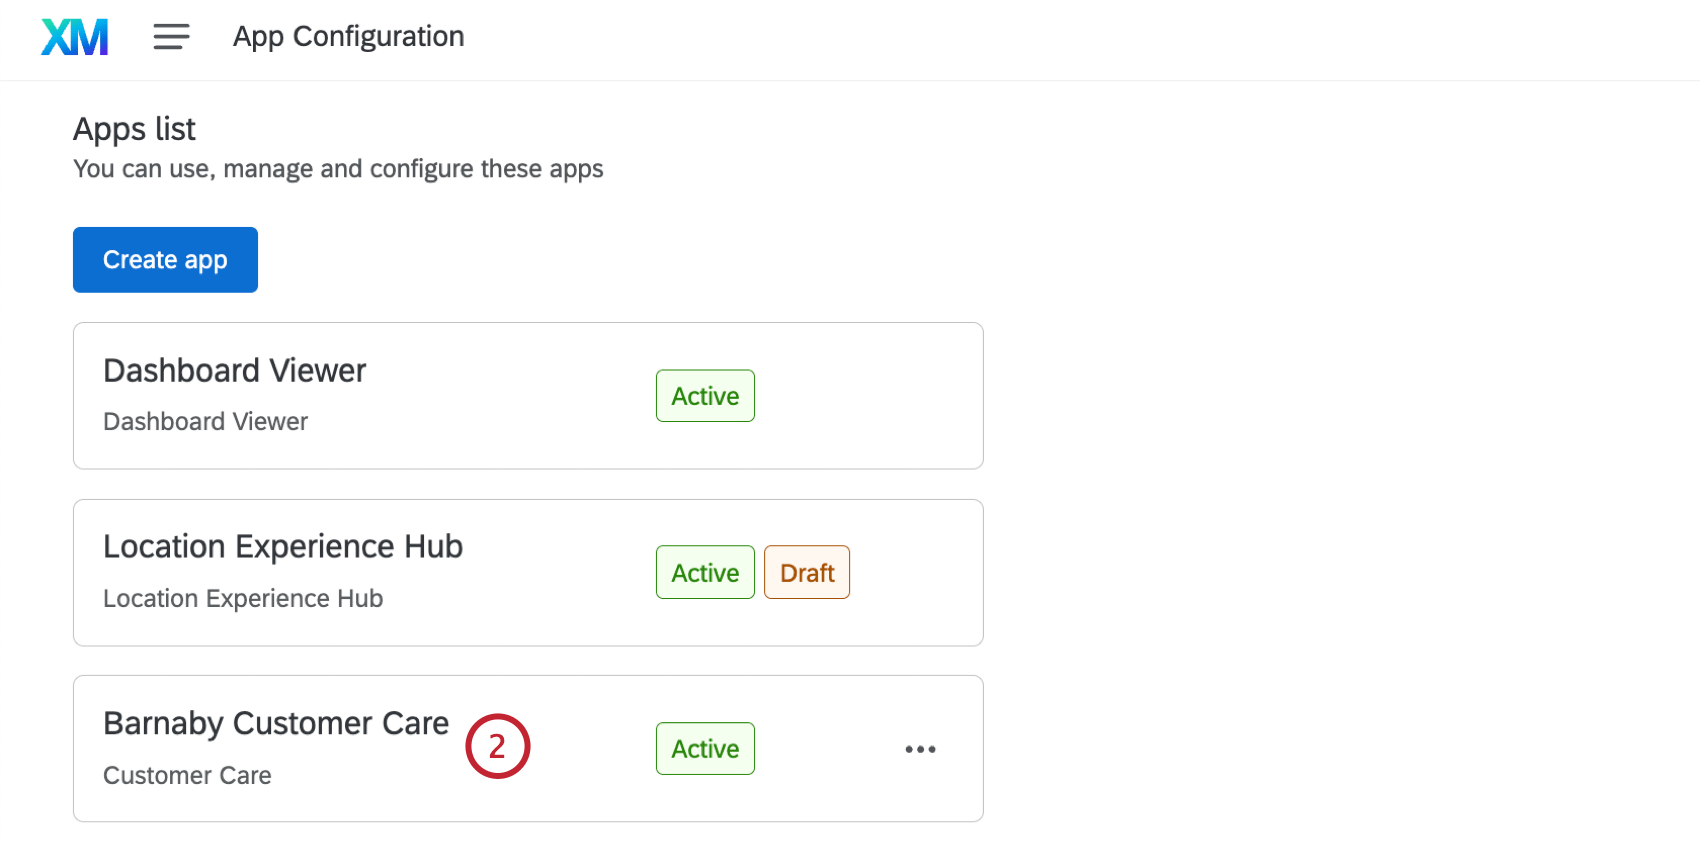
Users with the permission to manage the Customer Care app can also activate and deactivate it for their organization. Once a Customer Care app is activated, any changes will impact all users in the organization.
For more information on configuring apps, see App Configuration Overview. For an overview of the Customer Care app, see Customer Care App Overview.
Accessing App Configuration
Once you have the necessary permission to configure a Customer Care app for your organization, you can access it from the App Configuration menu.
- Using the global navigation menu in the top left, go to App Configuration.
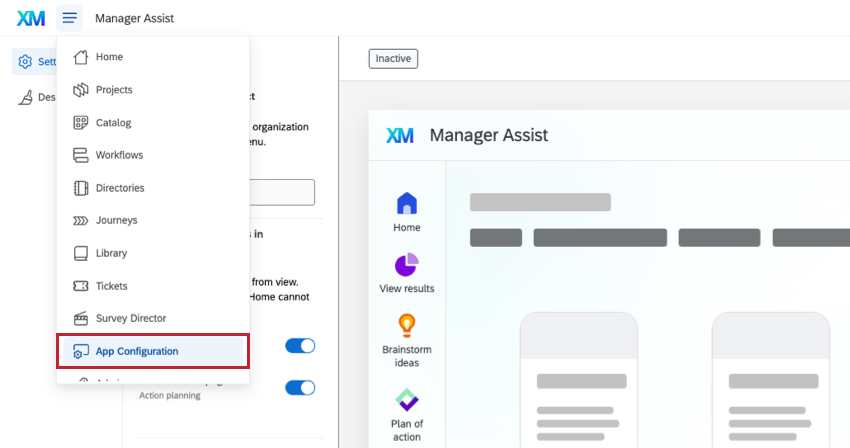
- Select Customer Care from the Apps list.
Settings Tab
In the Settings tab you can customize which tabs appear in your Customer Care app, as well as the content of those tabs.
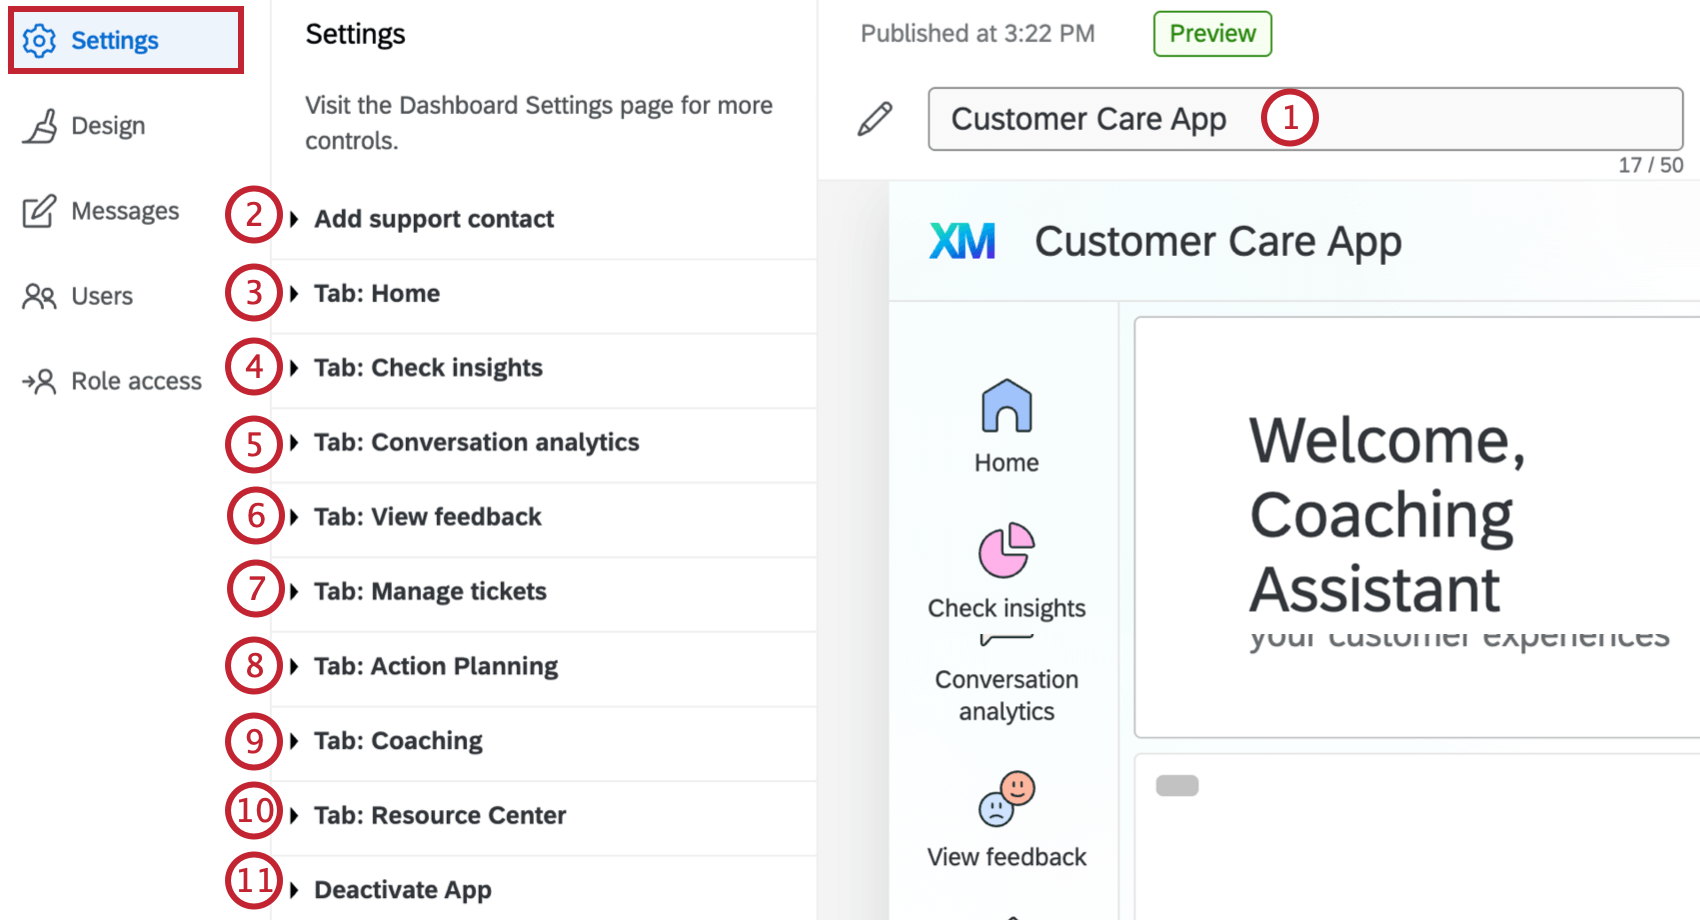
- Rename: Change the Customer Care app’s display name.
- Add support contact: Enter a contact email from your organization to appear in the help menu.
- Tab: Home: Customize the appearance of the Home tab, including adding actions and key metrics.
- Tab: Check insights: Select a CX dashboard to use within the Check insights tab.
- Tab: Conversation analytics: Select a CX dashboard to use within the Conversation analytics tab.
- Tab: View feedback: Select a CX dashboard to use within the View feedback tab.
- Tab: Manage tickets: Enable the Manage tickets tab or hide it from view.
- Tab: Action Planning: Select a CX dashboard with action planning set up to use within the Action Planning tab.
- Tab: Coaching: Select a coaching project and configure the appearance of the Coaching tab.
- Tab: Resource Center: Select a CX dashboard to display that contains help resources or answer to questions.
- Deactivate App: Deactivate this Customer Care app for your organization.
Qtip: You can use existing dashboards for these tabs. If you would like to simplify or make changes to the dashboard for displaying in a Customer Care app, we recommend creating a copy dashboard for use in the app. Making the following changes to your dashboards can help Customer Care app users get the most out of the displayed dashboards:
- Use section headers, images, widget titles, and dividers to create sections of your dashboard for easy data digestion.
- Use a white dashboard background.
- Remove widget borders.
Design Tab
In the Design tab, you can customize the appearance of your Customer Care app to match your organization’s branding. See Design Tab for more information about the options available here.
Messages Tab
In the Messages tab, you can select a message to appear to all users as a banner on the Home tab. You can choose the default message, create a custom one, or select no message. See Messages Tab for more information.
Users and Role Access
The Users tab shows all CX Dashboard Users within your brand. This tab functions the same as the User Admin tab in CX Dashboards. See Managing CX Dashboard Users for more information on creating and managing users.
The Role access tab is used to give access to the Customer Care app via CX dashboard user roles. See Role-Based App Access for step-by-step instructions.