
Formatting Embedded Targets
What's on this page
About Formatting Embedded Targets
The target of a creative is where you want your link to appear. An embedded target isn’t just a link, but an embedded window where, instead of simply linking out, you show the target site or survey.
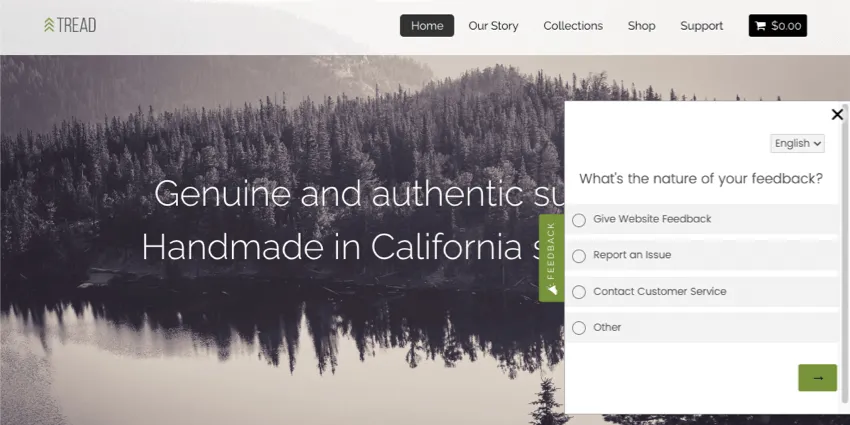
Example: You don’t want your feedback button to link out to a survey; you want the survey to appear from the side of the screen, as seen below. This means the visitor doesn’t navigate away from your webpage.
How you add an embedded target depends on the creative you select. With guided setups like responsive dialogs and feedback buttons, it’s extremely easy to embed a survey. With older, standalone creatives, there are a few extra steps.
Adding an Embedded Target to a Feedback Button
The feedback button appears on the side of a webpage. When someone clicks it, it can expand to show an embedded survey, or open a new overlay on the page where the survey is embedded.
Qtip: If you look to the left on this support article, you should see a feedback button that slides out to show an embedded survey.
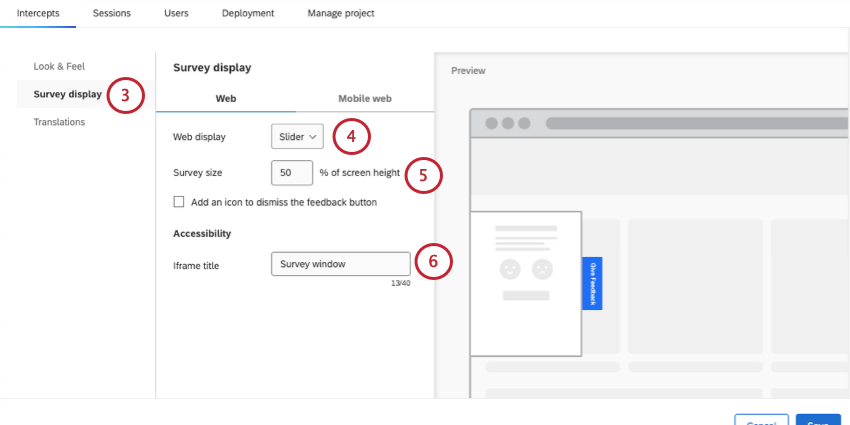
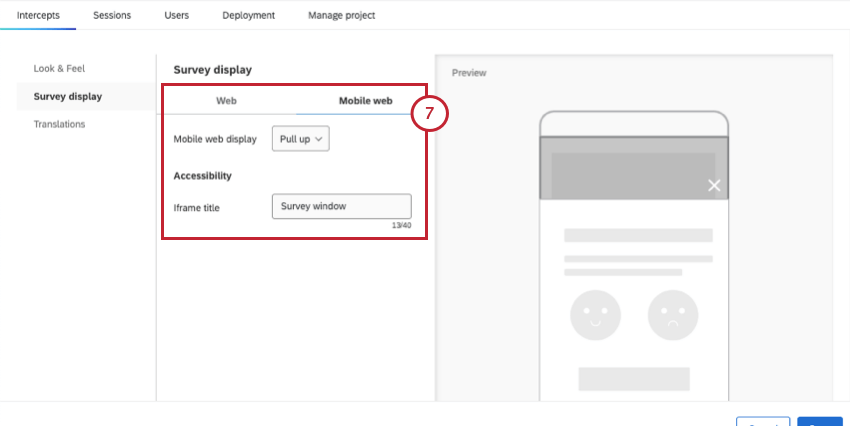
- Slider: The survey will show up in a dialog that slides in and out from the side of the webpage. (Like on the support pages.)
- Overlay: The survey will open up in a window that covers the screen.
Qtip: Adding an iframe title is important for ensuring your embedded survey is accessible, giving context to visitors who use screen readers.
Adding an Embedded Target to a Responsive Dialog
The responsive dialog is an overlay where you can add a message or embed a survey.
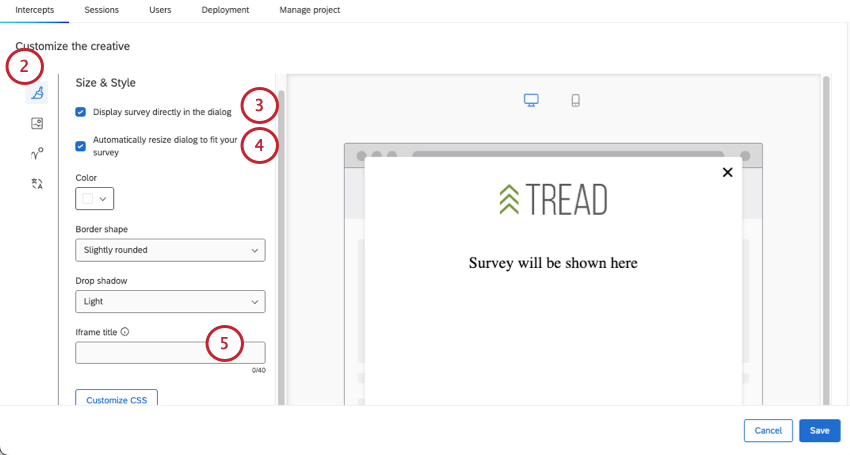
Qtip: Adding an iframe title is important for ensuring your embedded survey is accessible, giving context to visitors who use screen readers.
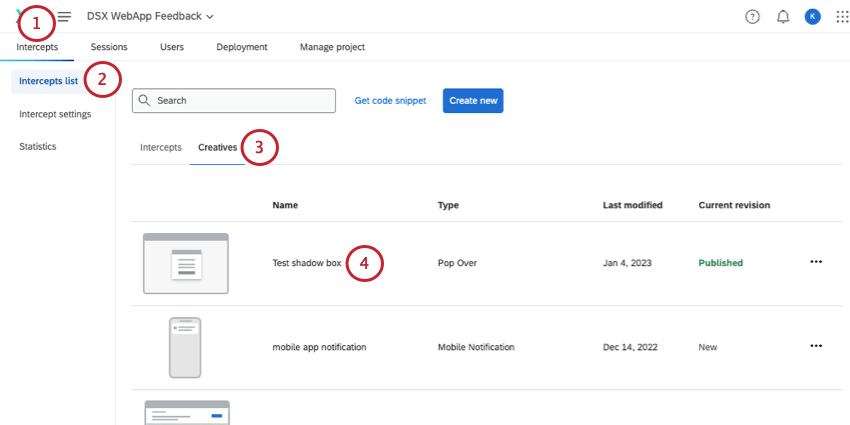
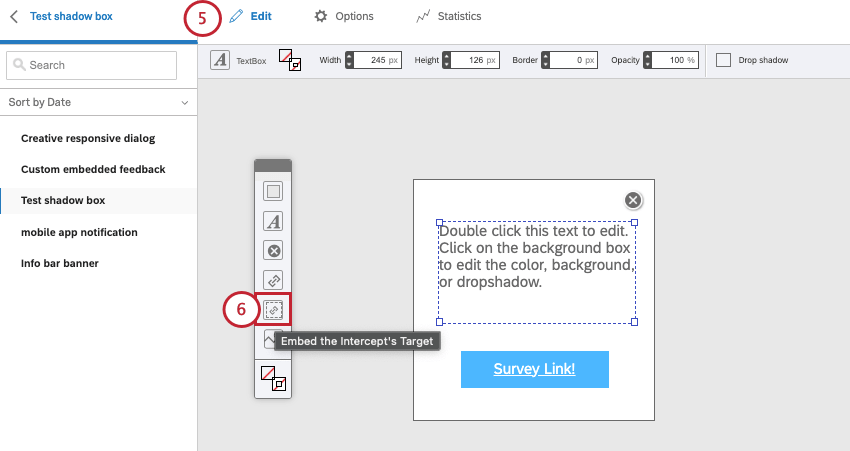
Adding an Embedded Target to a Standalone Creative
These steps are for older, standalone creatives, like pop overs.
Qtip: For more on customizing creatives, see the Edit Creative Section support page.
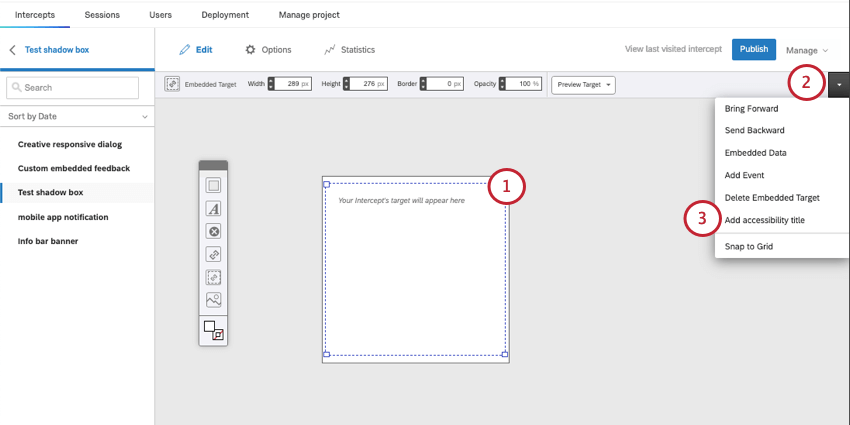
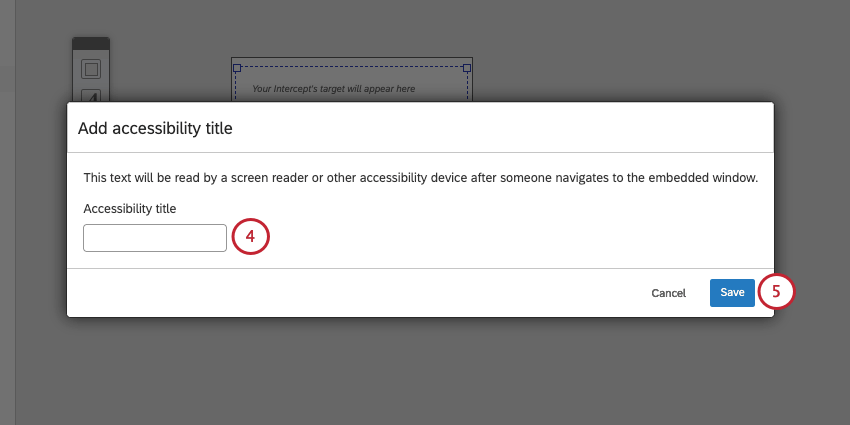
Adding an accessibility title
Adding an accessibility title is important for ensuring your embedded survey comes with context for visitors using a screenreader.
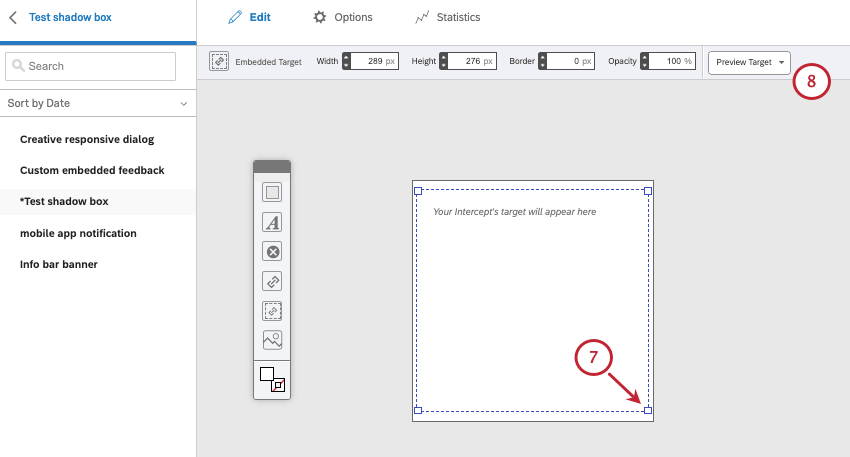
Qtip: If you don’t see this arrow, try adjusting your browser size, or scroll to the right.
Eliminating Scrollbars
One of the primary concerns most users have when creating an embedded target is fitting it inside the creative so it doesn’t scroll. Especially if your survey is a single question, it doesn’t hurt the visitor’s experience to make sure the survey fits on the creative without the visitor having to scroll.
To format the embedded target, you will not work in the Website Feedback platform, but primarily in the survey itself.
Question Length
In general, to get a survey to fit onto the creative, you want to make sure your questions are short and succinct. You shouldn’t sacrifice crucial information, but try not to write overly complicated sentences where a simpler one will do.
Complicated: Consider your experience navigating our website today. From the following options, how would you rate our website?
Simple: How would you rate our website?
In general, keeping questions short and sweet also enhances your visitor’s overall experience, keeping your survey easy to understand and quick to complete.
Survey Taking Experience
When designing your survey, we recommend using the New Survey Taking Experience. The experience is designed to make your survey more mobile-friendly, easy to use, and accessible for your respondents. For example, matrix tables are always in a mobile-friendly accordion format in the New Survey Taking Experience, even if the mobile-friendly option hasn’t been enabled in the question itself. The New Survey Taking Experience is now the default layout for surveys, but older surveys or surveys made from a copy may not have this layout applied yet.
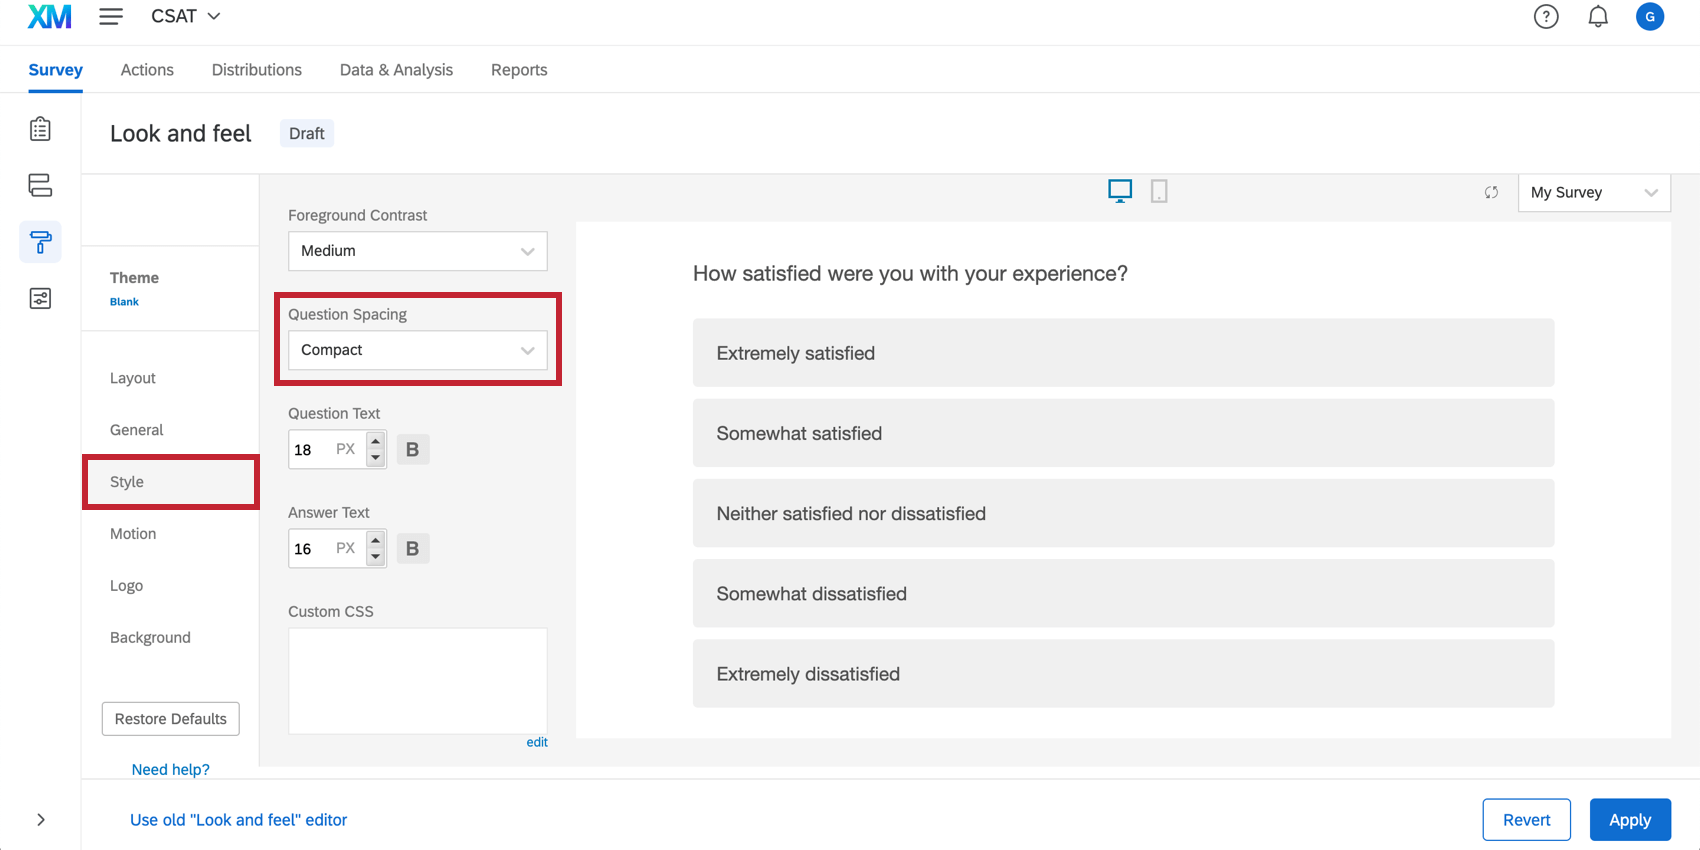
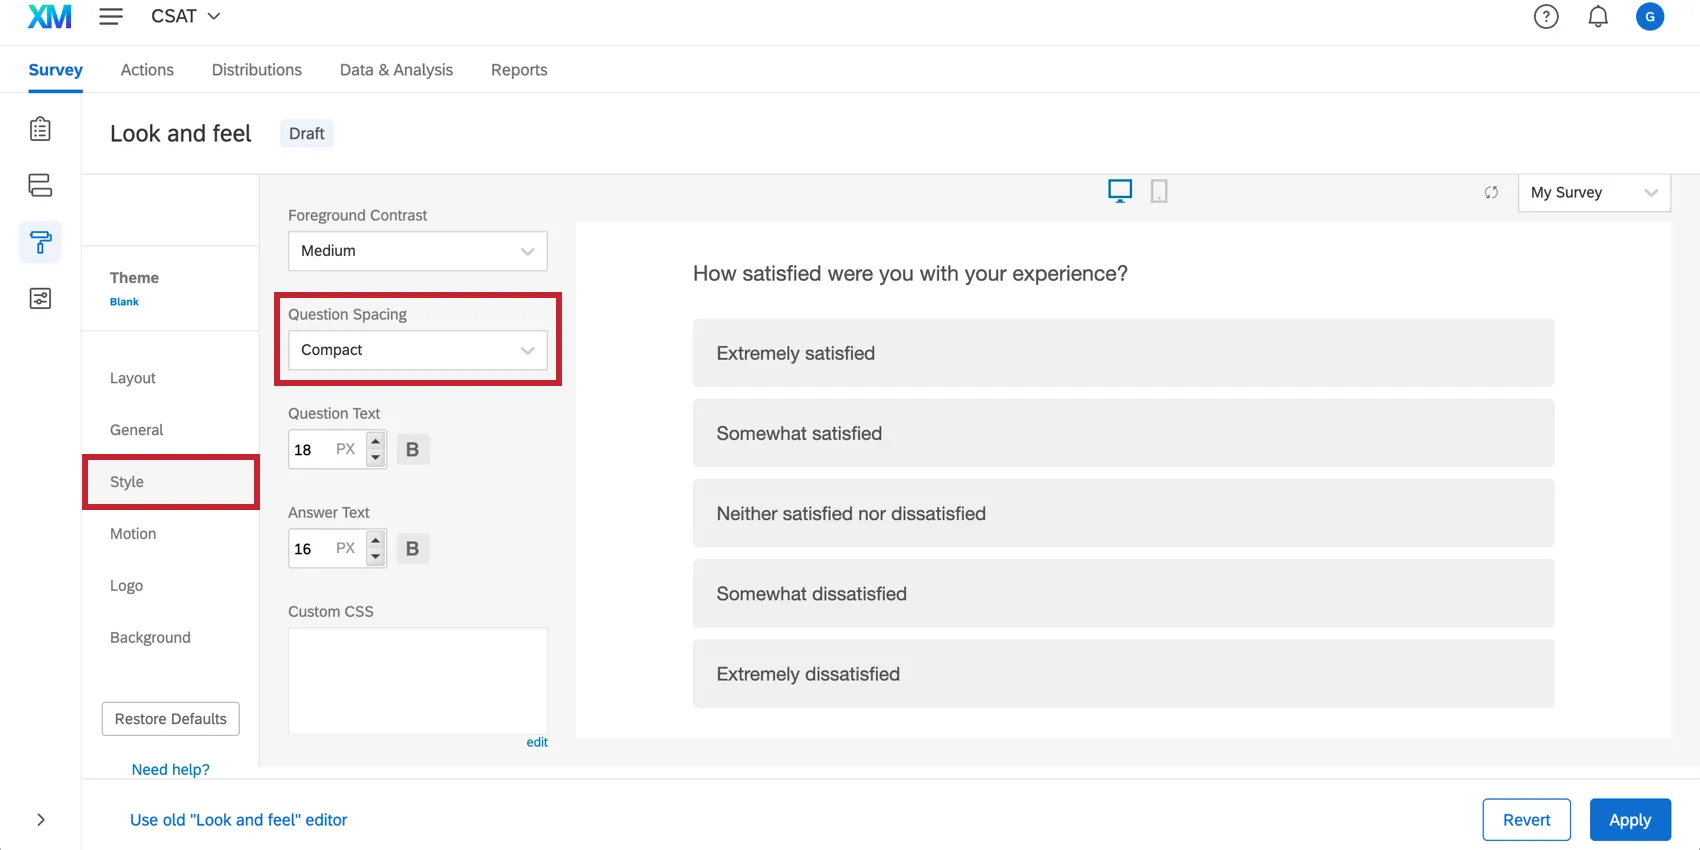
Space Between Questions
If you want to keep a multi-question survey from scrolling, it’s important to minimize spacing between questions. You can do this with the Look and feel menu. Make sure the Question Spacing in the Style section is set to Compact.
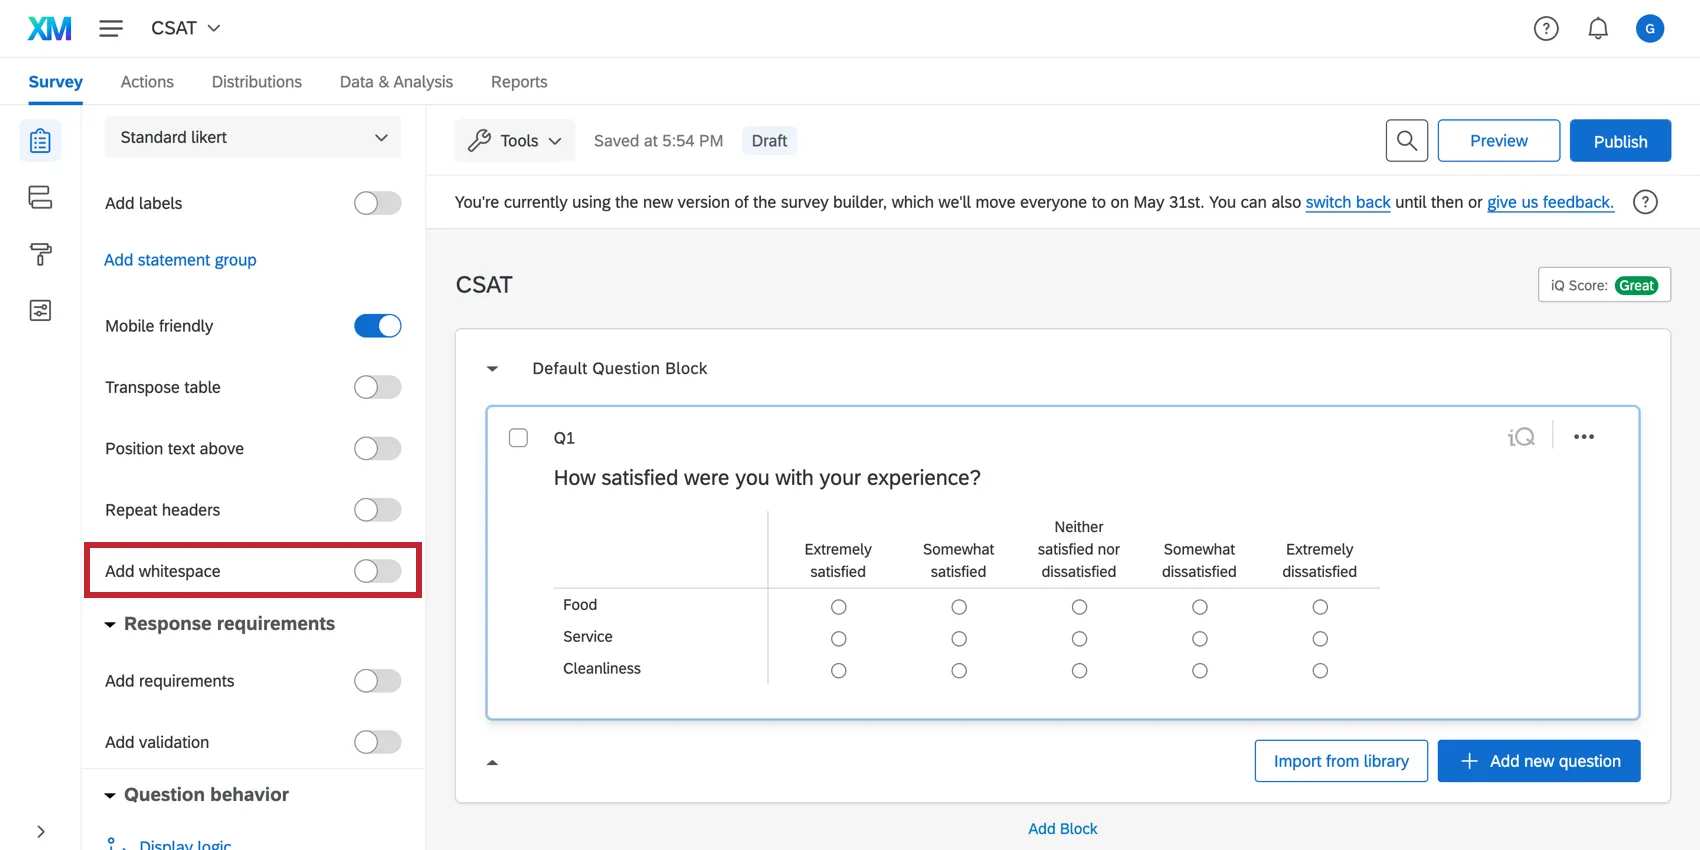
Qtip: Matrix table questions can take up a lot of space by necessity of their format. But if you must use one, make sure Add whitespace is deselected. Whether you select Mobile friendly or not may depend on the content of your question. For more on what the “Mobile friendly” setting does, see Mobile Survey Optimization.
Page Breaks
If your survey absolutely needs multiple questions, you can add page breaks between the questions to eliminate scrolling. Instead, the visitor will click a Next button to see additional options.
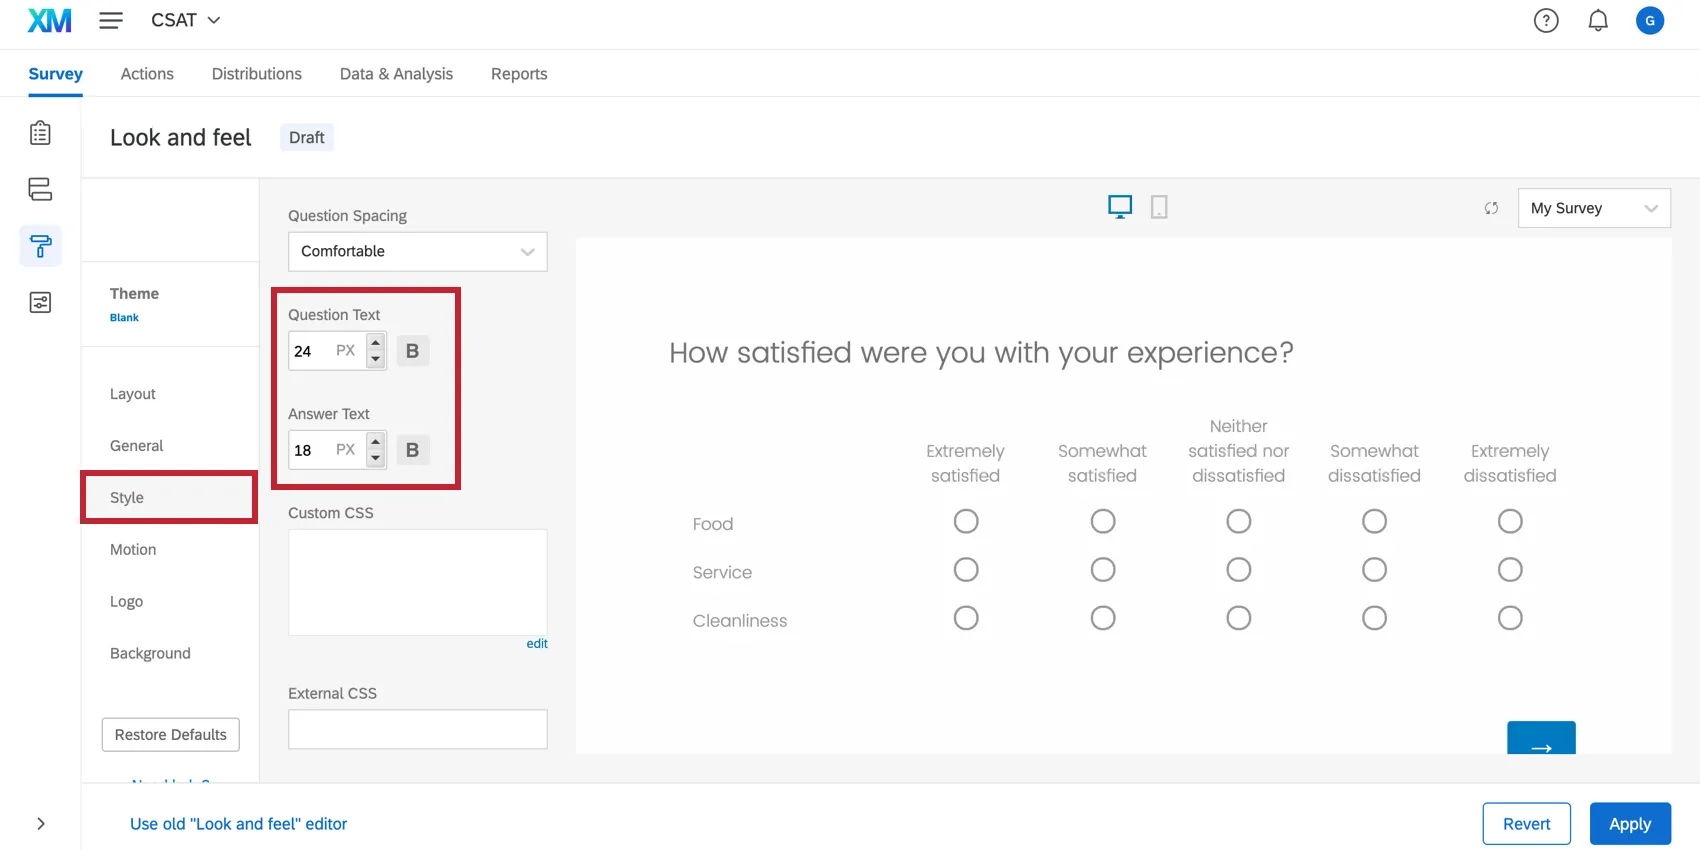
Font Sizes
To make a survey fit on a creative, you’ll want to adjust the font type and size. Navigate to the Style section of the Look and feel menu to change the survey fonts. You can globally edit question or answer text independently of each other.
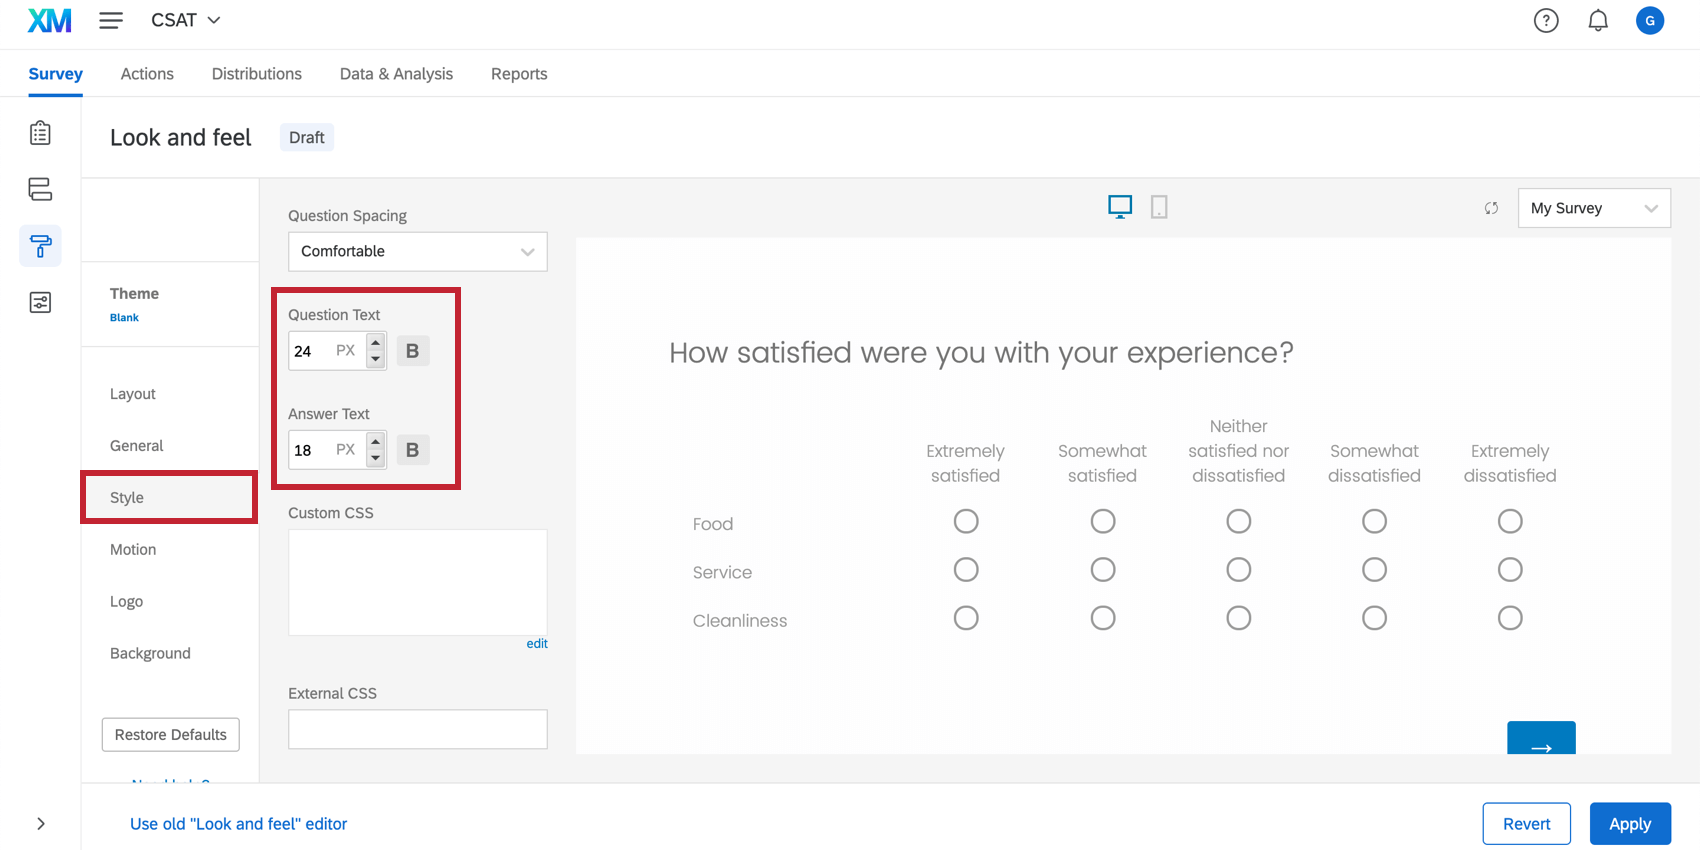
Headers and Footers
Headers and footers can add extra unnecessary space on your survey. Consider adding logos and such to the creative instead, and making sure the survey is free of headers or footers.
To do this, go to the General tab of the Look and feel menu and select Edit on the Header or Footer settings.
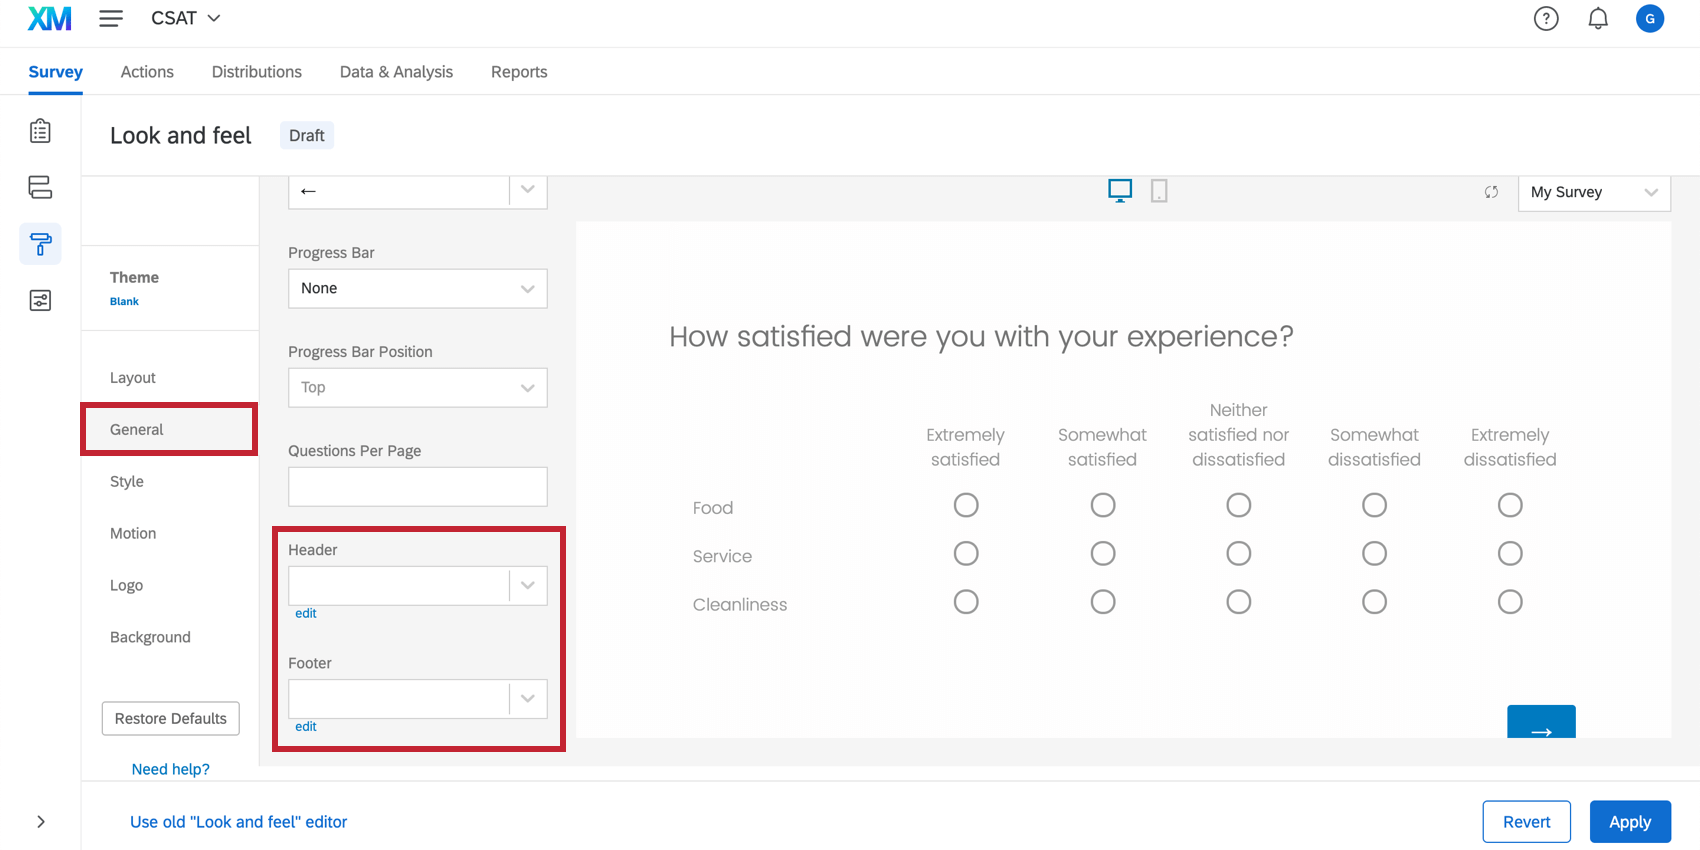

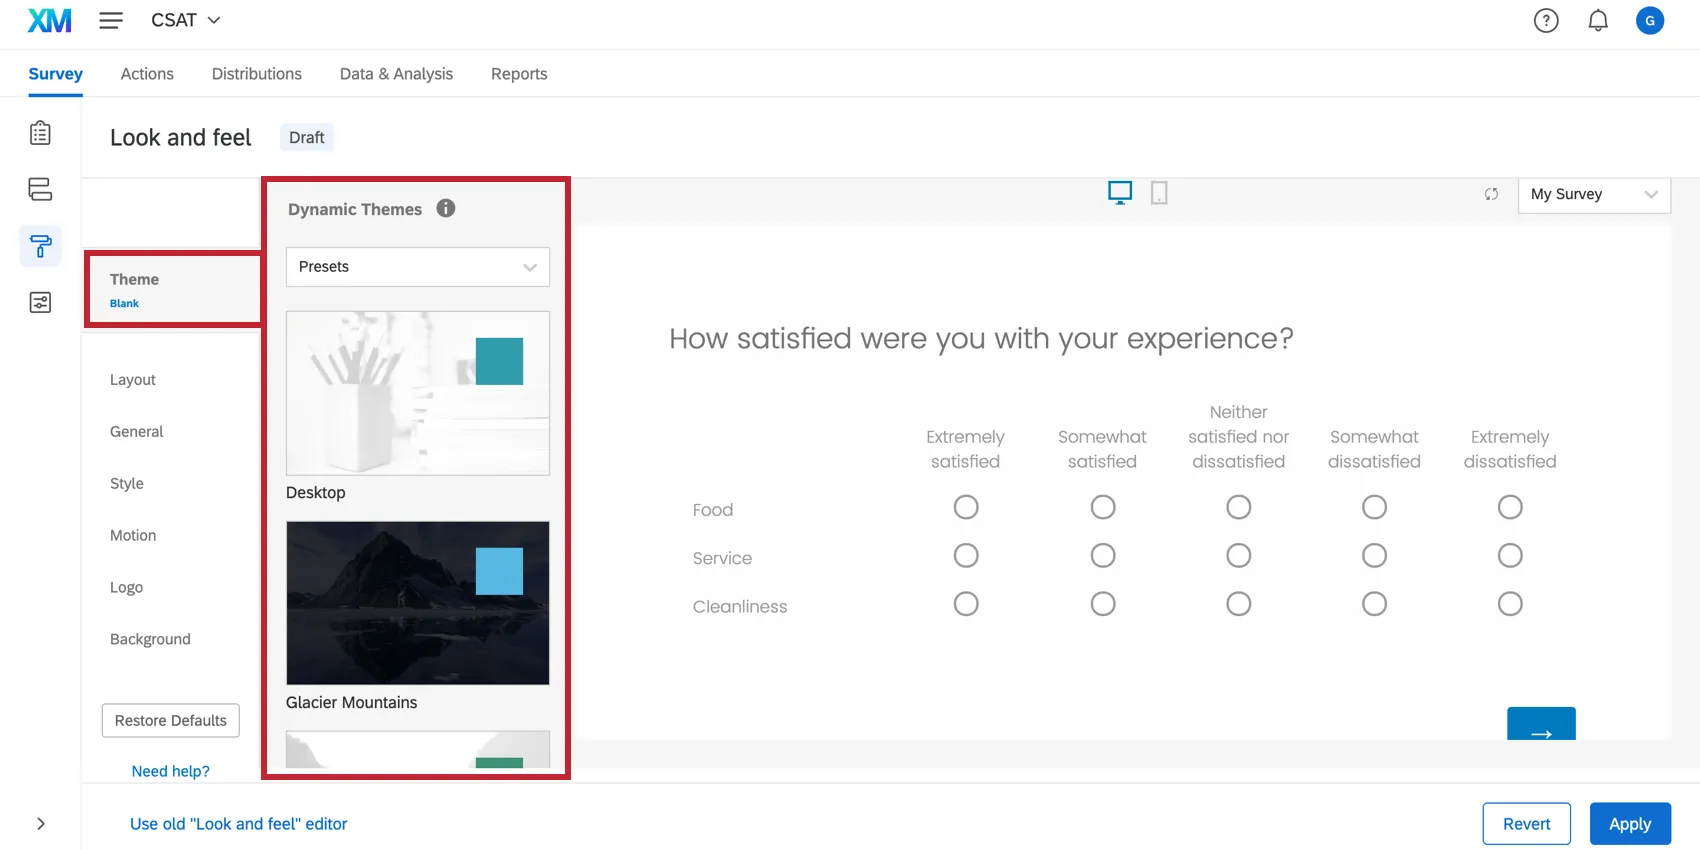
Theming
Every theme has its own default settings and formatting built into it. Therefore, the theme you pick may affect how much editing you do to make the survey fit in the embedded target. Generally, minimalist themes without logos and excess features will take up less room.
To select a theme, go to the Theme tab of the Look and feel menu and choose an available theme.
Custom CSS
You can also add custom CSS in the Style tab of the Look and feel menu to adjust any theme’s settings, including the spacing between questions.

Qtip: Qualtrics Support does not support custom coding. You can always try asking our community of dedicated users instead.
Creative Dimensions
There is one change within the Website & App Insights platform itself that may help eliminate the scrollbar. Since your survey will be responsive within the creative, adjusting the height or width of your embedded target may impact how your survey will appear. To make this change, you will go to the Edit tab of creative and adjust the embedded target within your creative.
Testing
The most important tool when editing your embedded target is the Test Intercept section. Once you make the desired changes to your survey, return to the Test Intercept section and use the bookmarklet to see how your edits will look on the intercept when it’s live.
FAQs
I have built my intercept but would like to test it before activation. How can I do that?
I have built my intercept but would like to test it before activation. How can I do that?
That's great! Thank you for your feedback!
Thank you for your feedback!