
XM Discover Social Listening
What's on this page
Attention: This feature is only available to users on the new simplified pricing and packaging plans or customers who actively participated in the Preview Program for this feature. For more information, see Qualtrics Public Preview. If you have questions about your Qualtrics pricing and packaging plan, reach out to Account Services.
About Social Listening for Discover
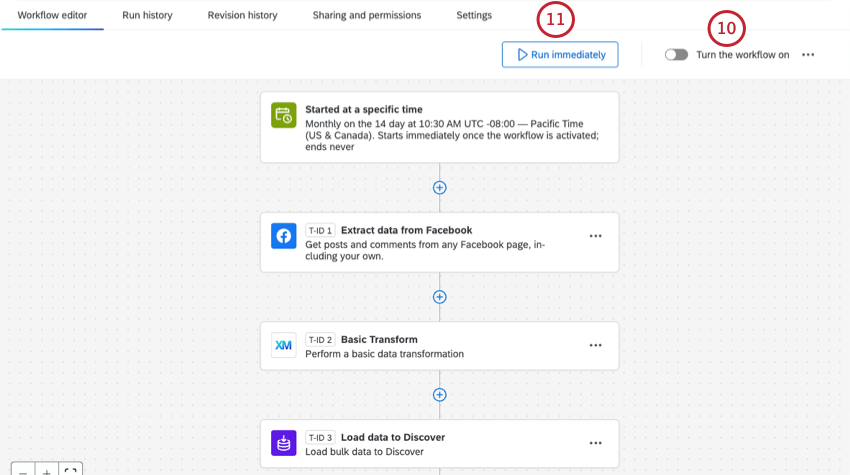
Social listening is the practice of tracking and analyzing what people are saying online about your organization. Engage workflows can pull data from social media like Facebook or Instagram, then load them into XM Discover for analysis and Studio dashboard creation.
Setting up social listening requires both Engage and XM Discover access. When combined, these powerful platforms can enable access to a wider array of social media than just Connectors can offer, such as Instagram and Facebook.
Permissions
Attention: To use this integration, you must have an XM Discover account linked to your Qualtrics account. For more information, see Linking XM User Accounts.
Discover Requirements
Your Discover account should be a configuration analyst. Otherwise, there are no unique permissions needed for the social listening solution.
Engage Requirements
To use this integration, you need to have an Engage user account you can log into.
For the permissions this account needs, see Permissions on the Engage Social Listening page.
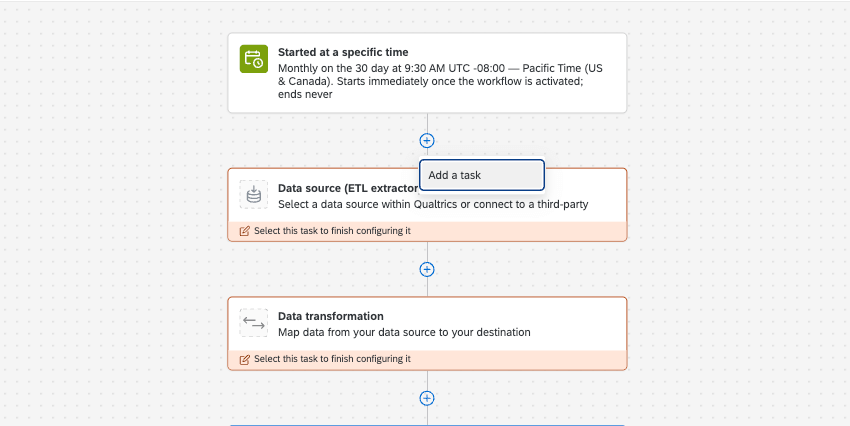
Step 1: Create a Project and Add Workflows
In this section, we’ll start by linking out to steps on the Engage Social Listening page, because the steps are the same, even if your ultimate goal is to get the data in Discover. From there, we’ll go into the steps unique for XM Discover use cases.

Qtip: This first step is required even if you plan to instead load data into XM Discover.

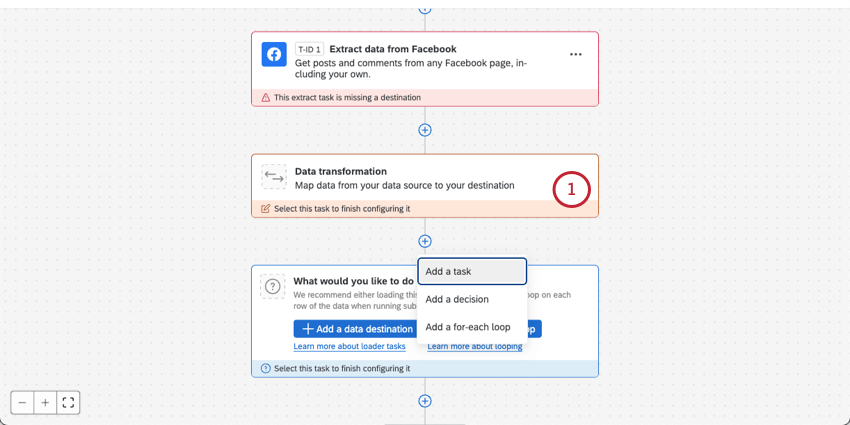
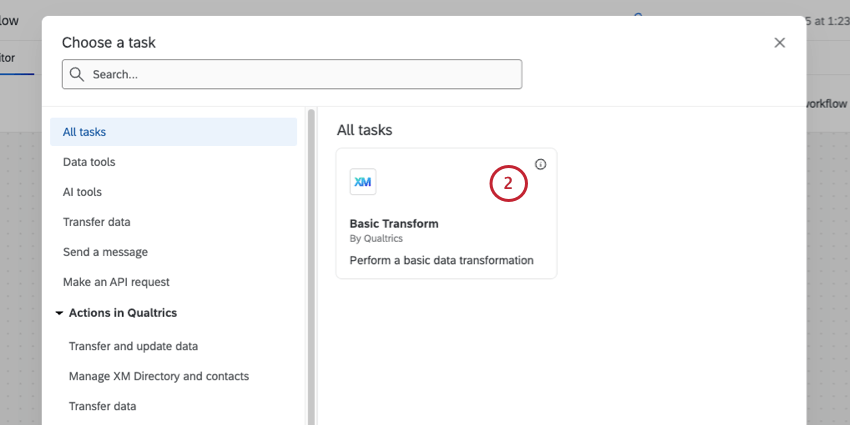
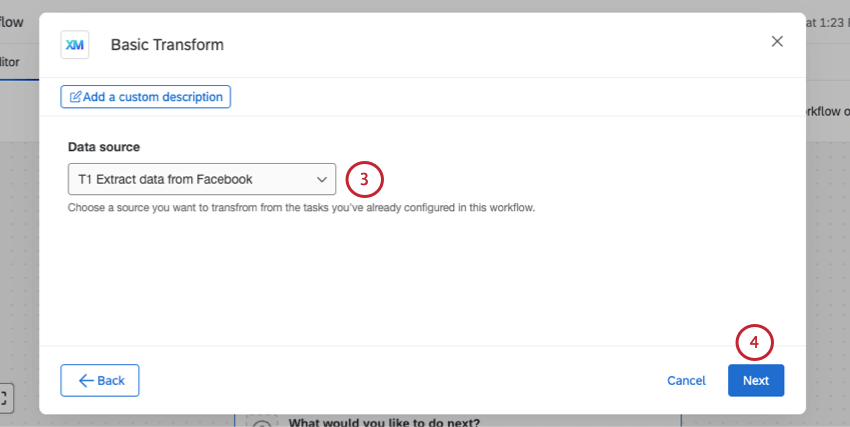
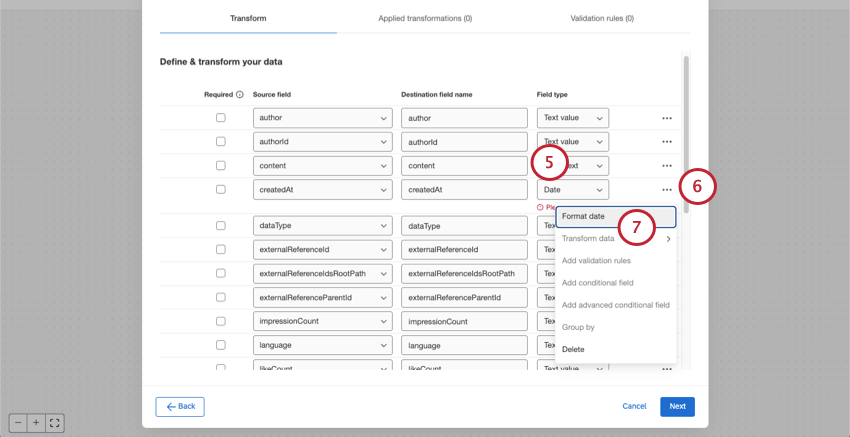
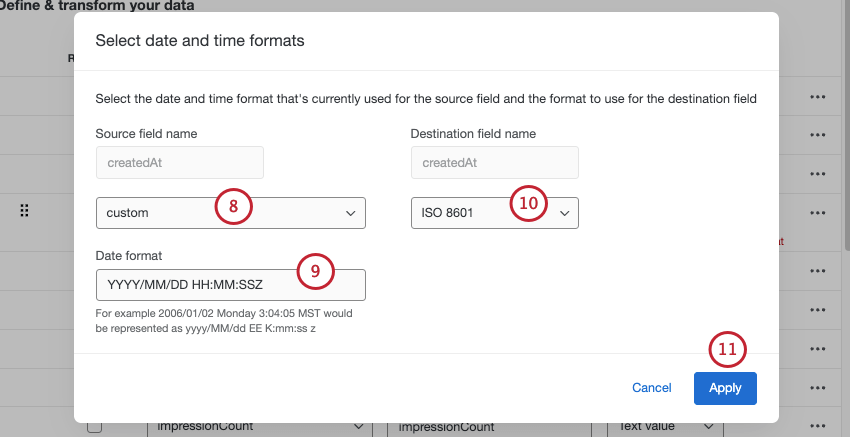
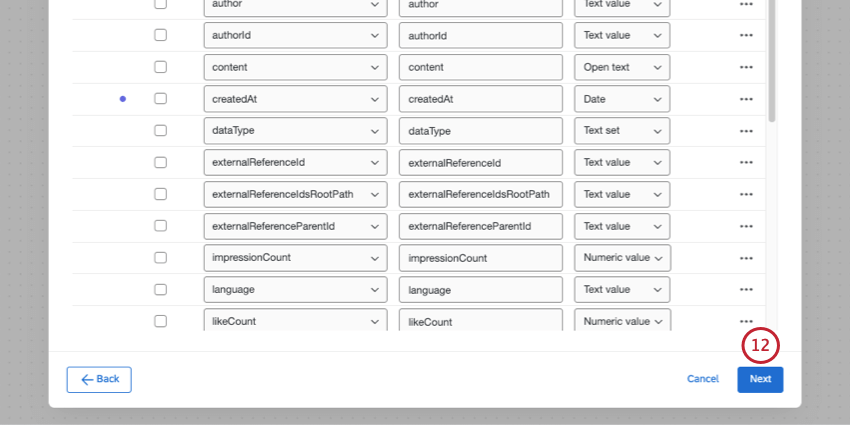
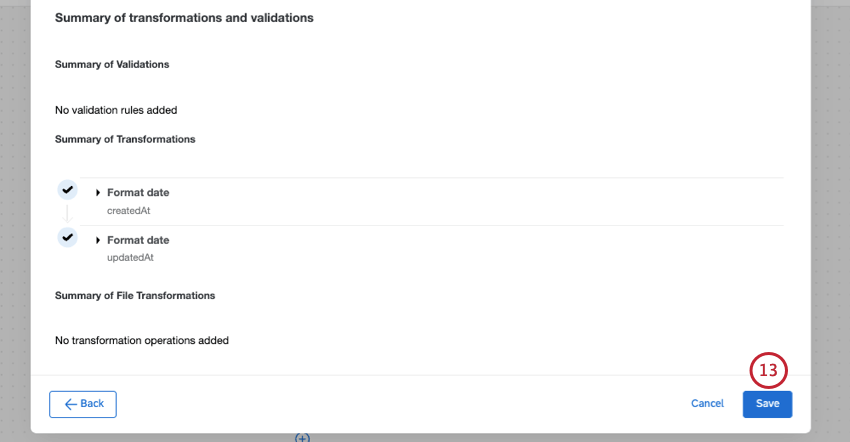
Step 2: Transform the Data
Discover formats the document date in ISO 8601 format. To ensure data is passed correctly to Discover, we need to transform the “createdAt” field formatting.
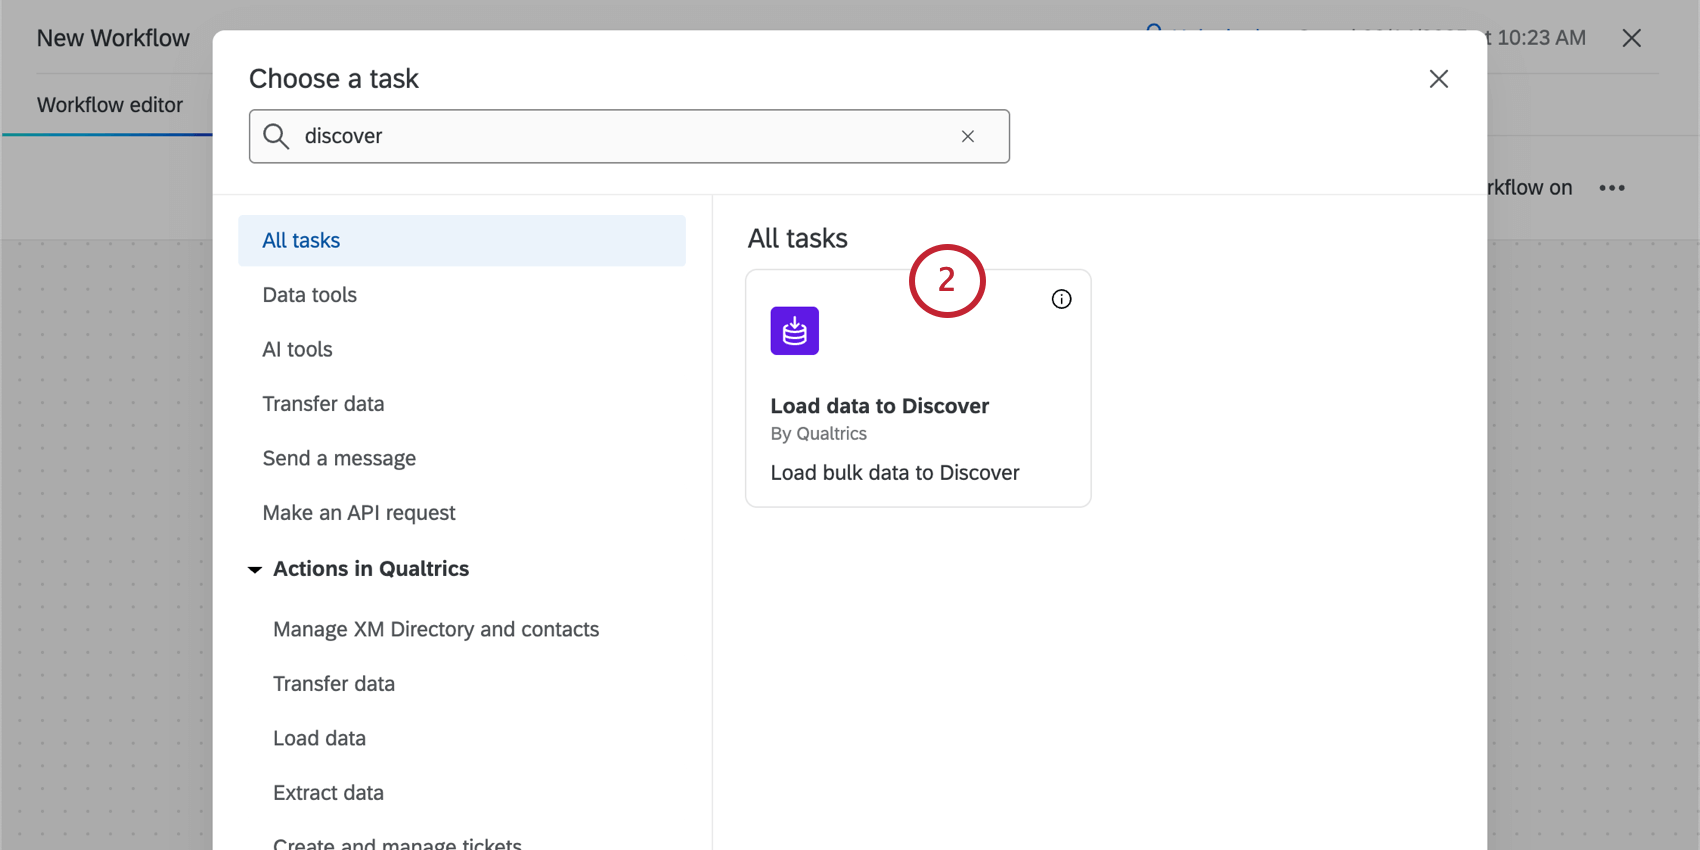
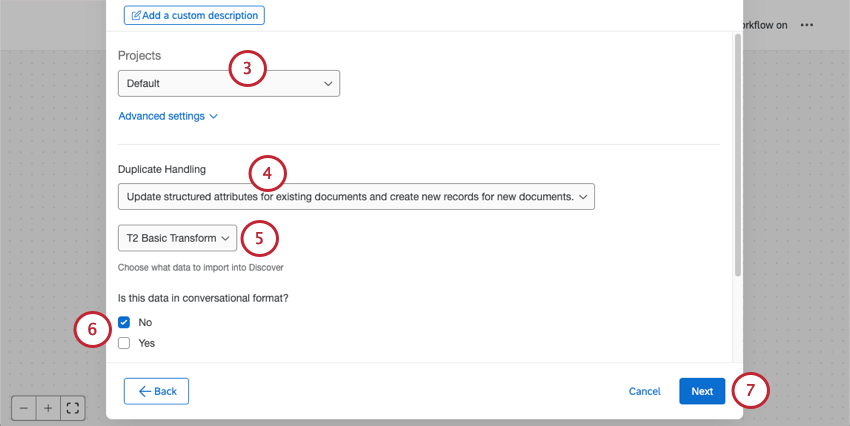
Step 3: Load the Data to Discover
Qtip: In this step, you’ll select an existing Discover project to add social data to. If you don’t have an existing project yet, make sure you create one in Designer.

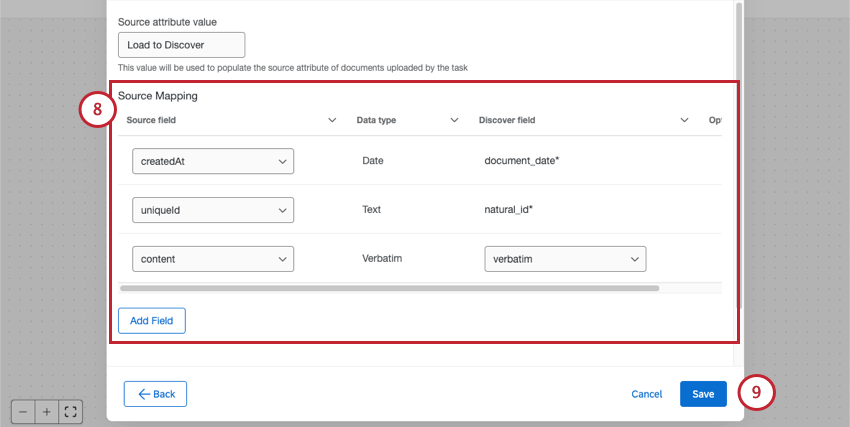
- document_date: This is the date that Discover uses to understand when the document was created (for example, when a tweet was posted). Select createdAt for this field mapping.
- natural_id: This is the unique ID Discover uses to identify individual documents. Select uniqueID for this field mapping. Qtip: The content field should be mapped as verbatim.
 Qtip: Discover fields can be formatted as text, number, and date data types.
Qtip: Learn more about Engage workflow run histories and general workflow troubleshooting.
Step 4: Connecting Social Data to a Studio Dashboard
Since you mapped the data types in the previous steps, your Designer project is ready to be added to Studio dashboards. See how to add a project to a Studio dashboard when you first create a dashboard. This can also be adjusted in dashboard properties and individual widget properties.
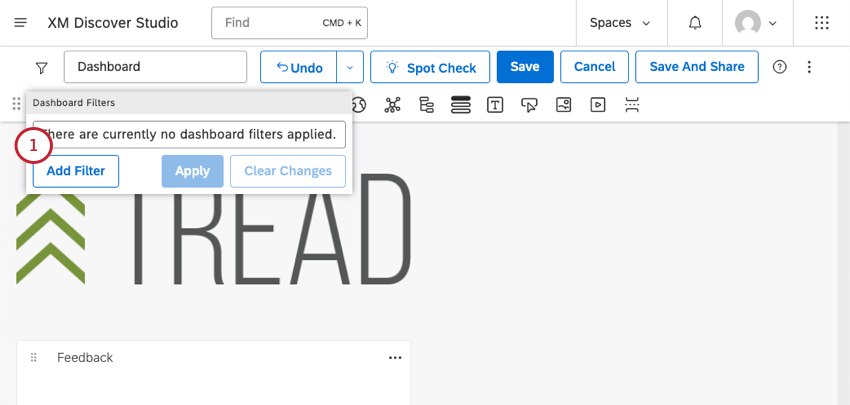
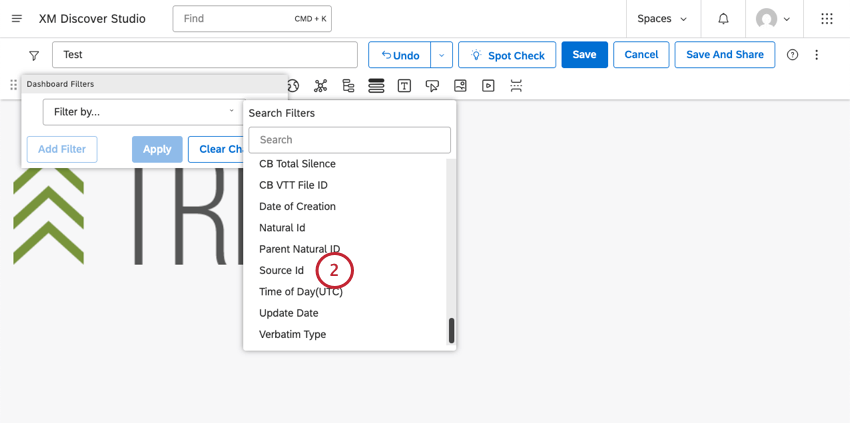
If you added this social data to an existing project with many different sources, you can create filters that isolate this social data, regardless of whether you chose to carry over more attributes. To filter for this social data:

FAQs
What is XM Engage?
What is XM Engage?
Why are some of the comments/replies missing from my dashboard?
Why are some of the comments/replies missing from my dashboard?
- Qualtrics pulls posts and comments from the last 14 days for Instagram. If the comments are older, they may have been excluded.
- The workflow prioritizes the most recent data. Depending on the amount of traffic on targeted pages and profiles, this means older comments may not be pulled at first, and it may take a few workflow runs before they are available within Qualtrics for analysis.
- Due to volume and API limits, only a certain amount of data can be pulled into Qualtrics at a given time. Some of these are Qualtrics-imposed limits, while others are due to Facebook or Instagram’s API token rate limits. Unfortunately, while we can help with Qualtrics-related limits, we are not able to retrieve your Meta accounts’ limits.
That's great! Thank you for your feedback!
Thank you for your feedback!