
Experience ID Change Event
What's on this page
About Experience ID Change Events
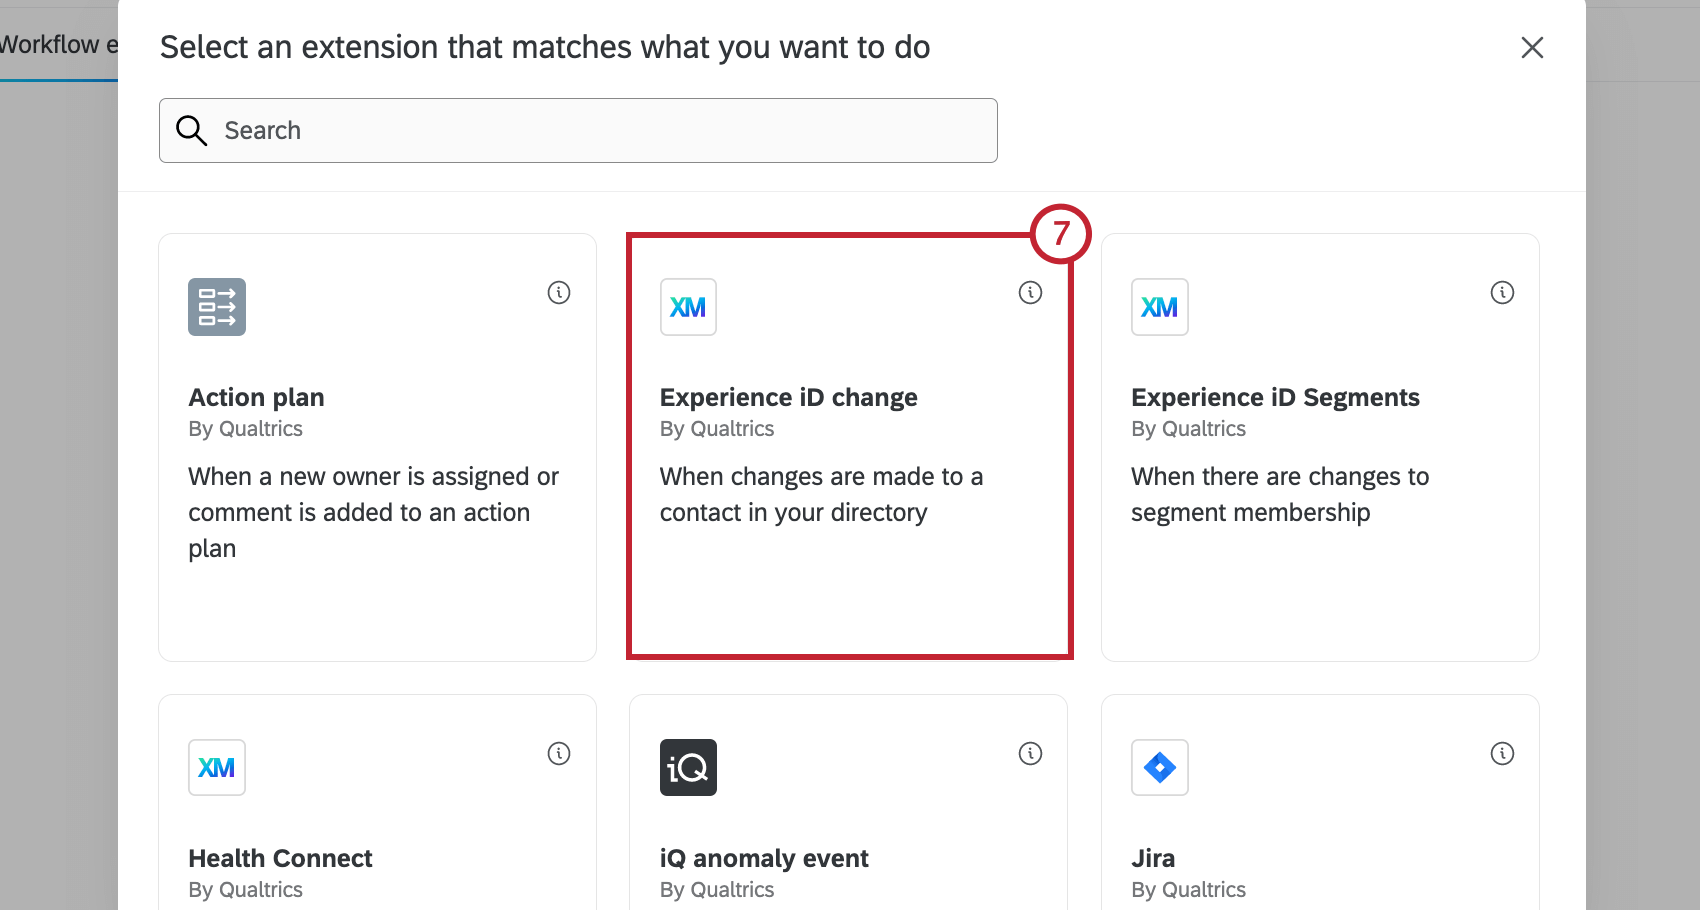
When contacts undergo changes in your directory, you can automatically set off different tasks, such as sending notifications (such as emails or Slack messages), creating tickets (in Qualtrics, Freshdesk, or elsewhere), and much, much more. These tasks can be triggered by contact data changes, subscription changes, or interaction (transaction) changes.
Example: Send a confirmation email to a contact when their contact email is updated to confirm the email change is accurate.
Example: Create a ticket for your customer success team whenever a contact’s member status is upgraded from a free to premium account.
Qtip: You can use the Experience ID Change event to create a message trigger! Message triggers alert specific people when contacts have been added to a specific mailing list. For steps, see XM Directory Triggers in Workflows.
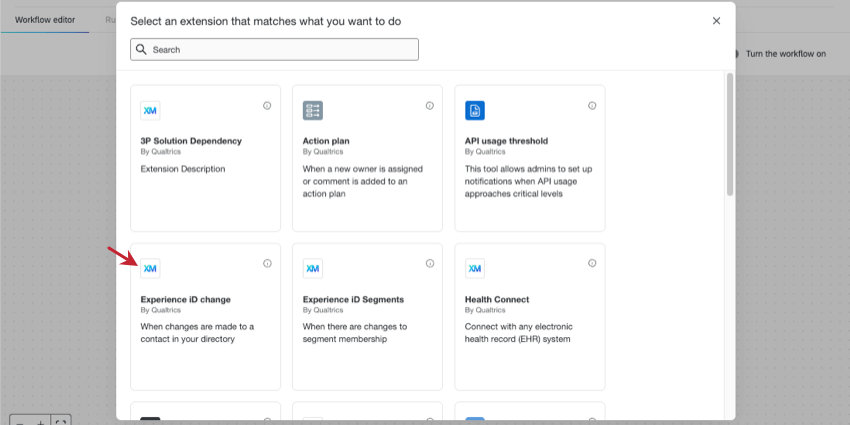
Setting up an Experience ID Change Event

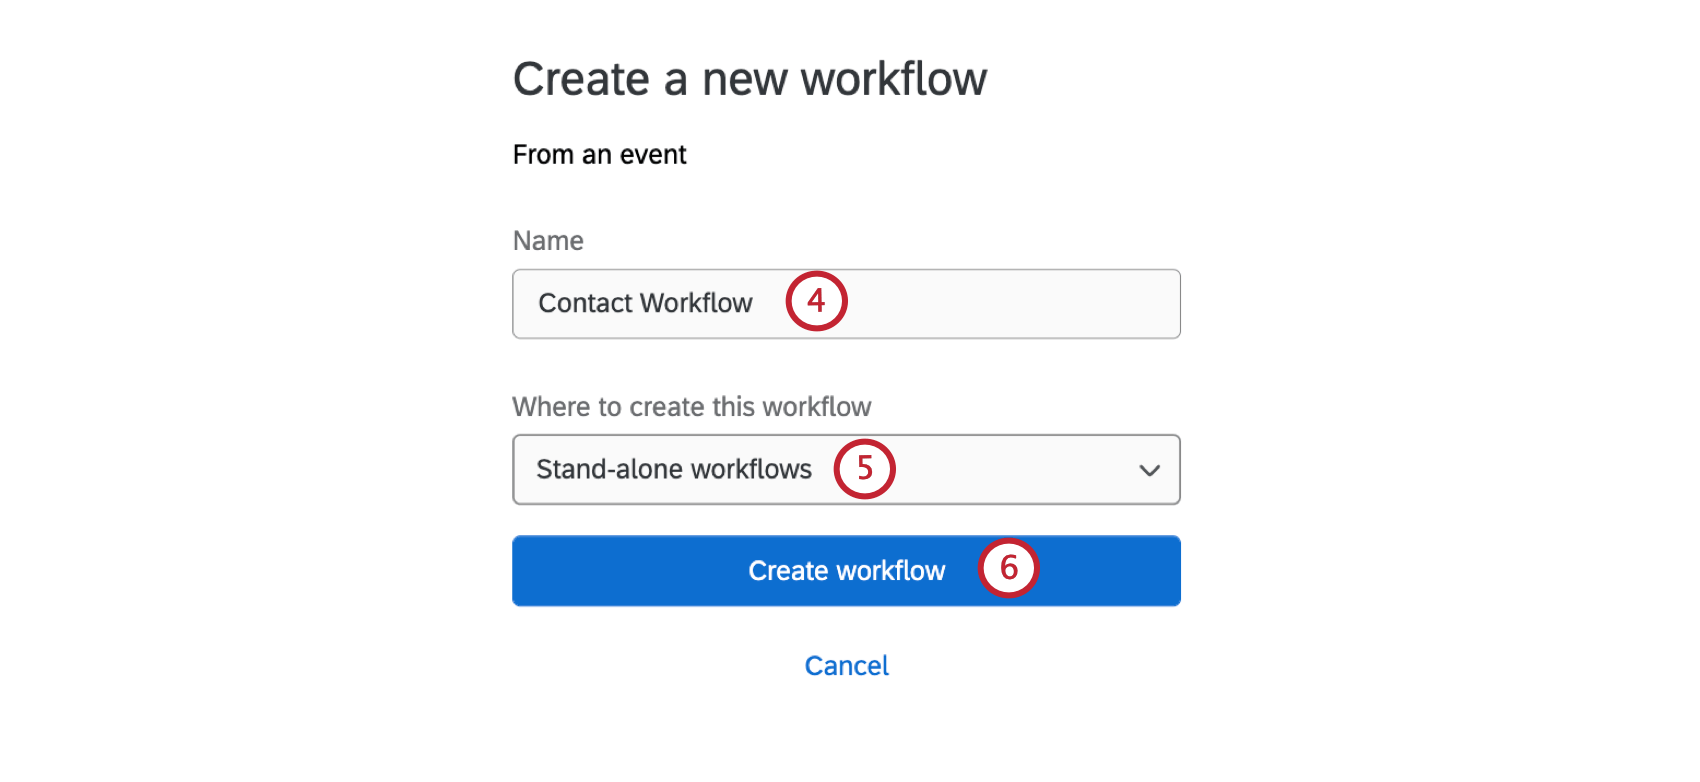
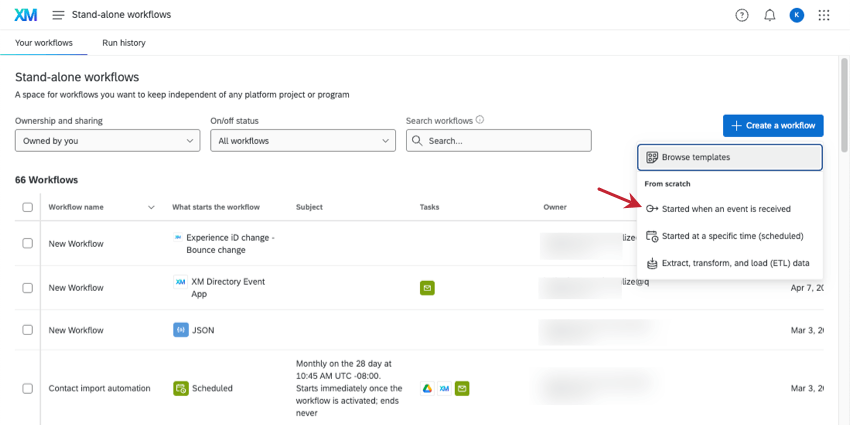
Attention: Experience ID change events can only be created as stand-alone workflows.
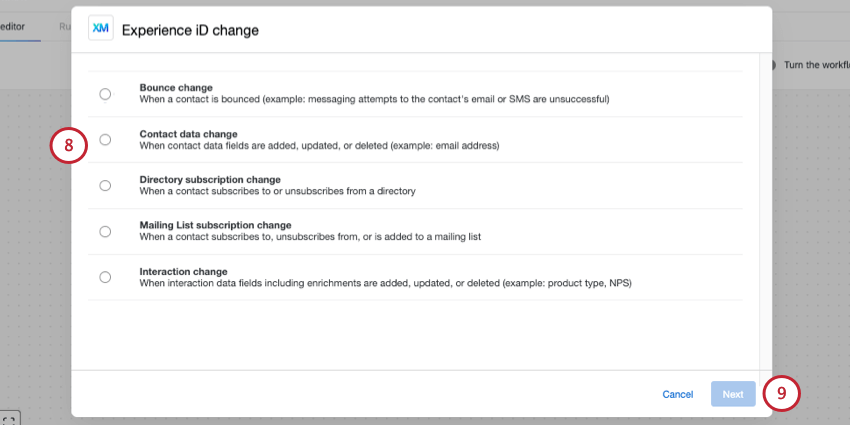
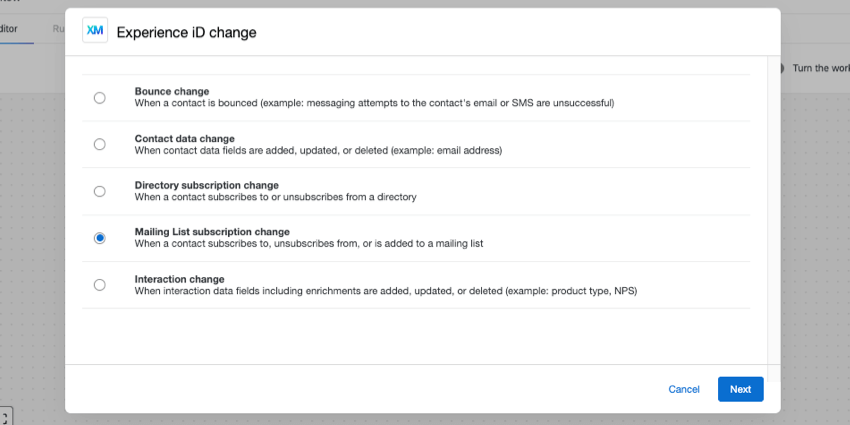
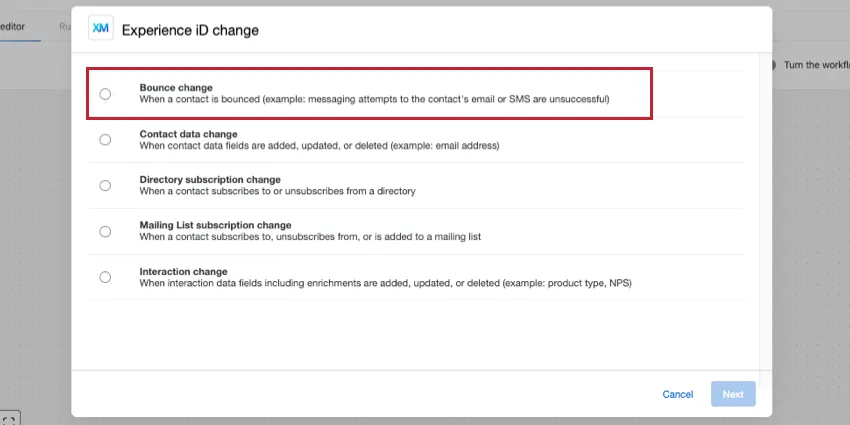
- Bounce change: When a contact is bounced, meaning the email or SMS message was unsuccessful.
- Contact data change: When contact data is added, updated, or deleted.
- Directory subscription change: When a contact subscribes to or unsubscribes from a directory.
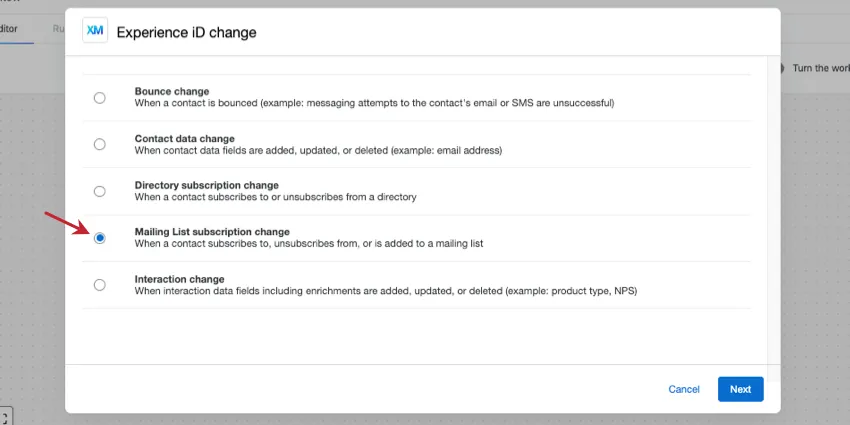
- Mailing List subscription change: When a contact subscribes to or unsubscribes from a mailing list.
- Interaction change: When interaction data fields, including transactional and enrichment data, are added, updated, or deleted.
Bounce Changes
After setting up your Experience ID Change Event, follow these steps to configure the event for bounce changes. This event is set off by emails or SMS messages sent to contacts bouncing instead.
Qtip: Some information is carried over by default when you use the bounce change event, such as bounce type (hard or soft), bounce category (whether the recipient, message, sender, or other was rejected), and bounce reason, which is a detailed, specific explanation. You can use piped text in your ensuing tasks to include information from these fields.
Contact Data Changes
After setting up your Experience ID Change Event, follow these steps to configure the event for contact data changes. The event can be set off by contact data being added, updated, or deleted.
Qtip: For instructions on distributing surveys to single contacts based on contact data changes, see Distributing to a Single Contact.
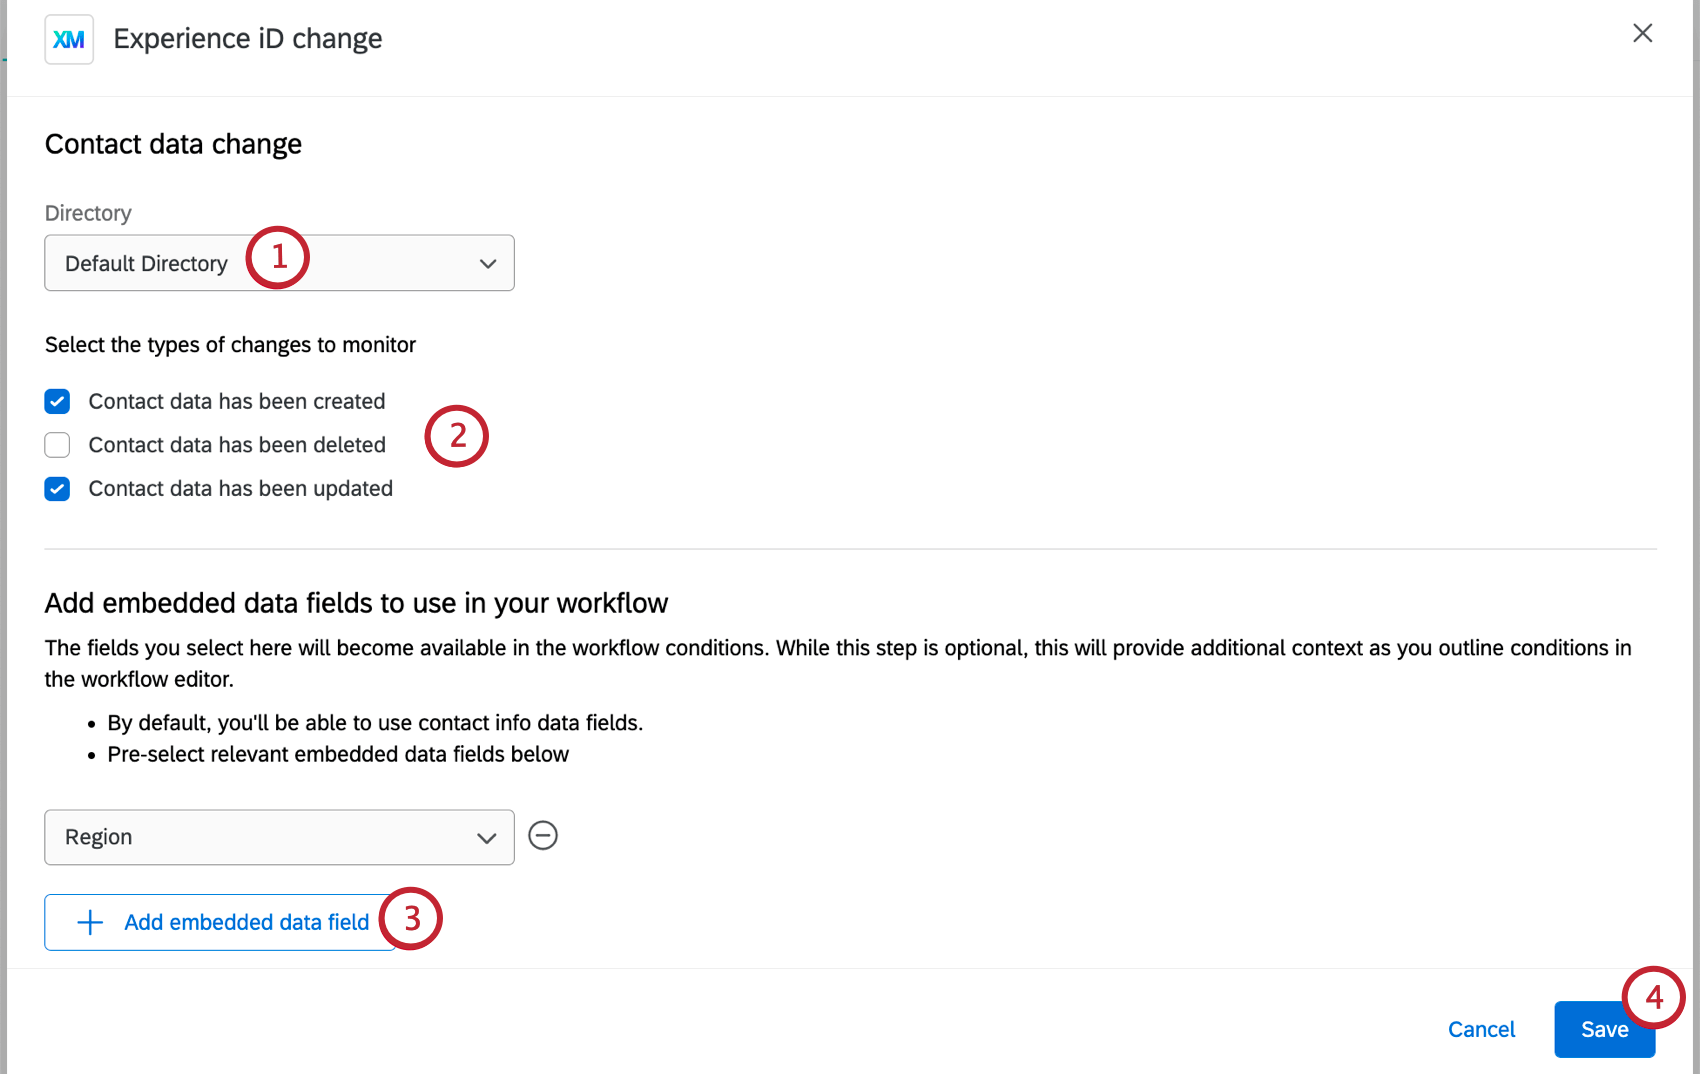
- Contact data has been created
- Contact data has been deleted
- Contact data has been updated
Attention: Contacts opting in or opting out will not trigger this event.
Subscription Changes
After setting up your Experience ID Change Event, follow these steps to configure the event for contact subscription changes. The event can be set off by contacts subscribing or unsubscribing from a mailing list or directory.
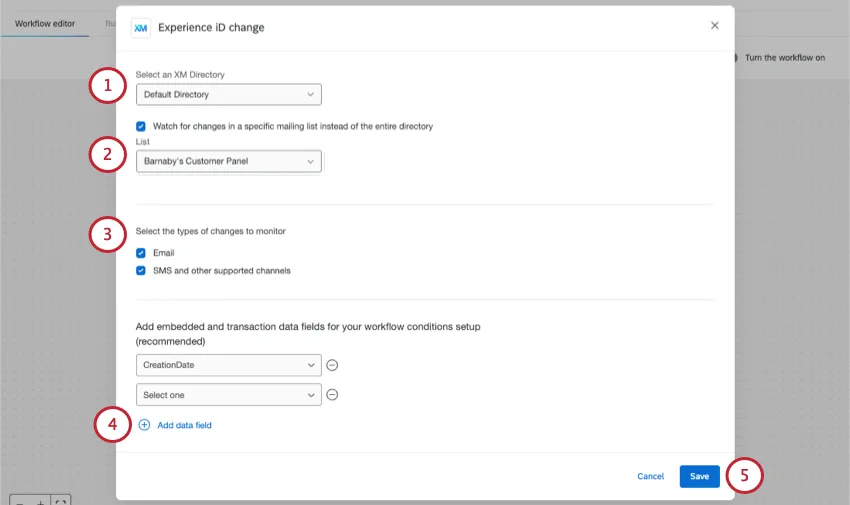
Select which directory to monitor for contact subscription changes.
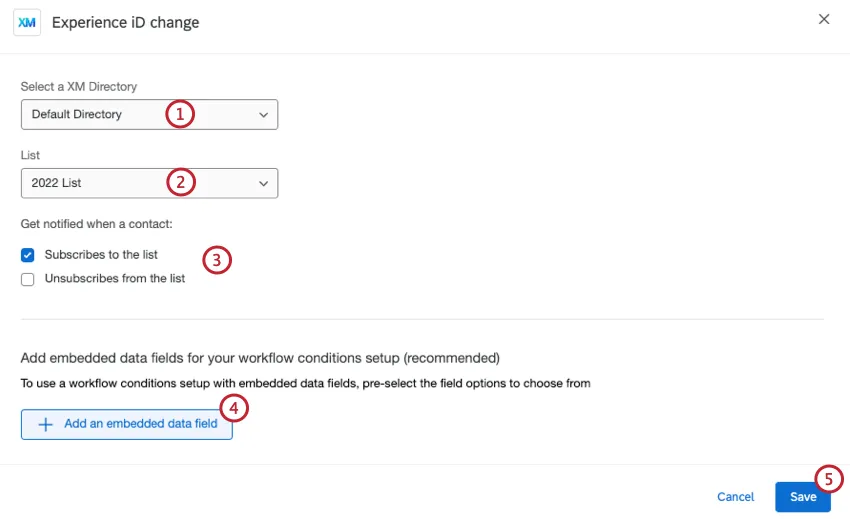
If you selected Mailing List subscription change while setting up your event, select a specific list from the directory to monitor.
Select what subscription behaviors you want to be notified about. You can choose from the following:
- Subscribes to the list/directory
- Unsubscribes from the list/directory
Qtip: Creating or moving a contact into a mailing list or directory does not count as a subscription change event. A contact must explicitly opt in or opt out of a mailing list or directory in order to trigger this event.
If desired, select Add an embedded data field and choose a field from your directory if you want to add embedded data fields for use in your workflow. The fields you add can be used in the tasks and conditions within your workflow.
Click Save.
Attention: Mailing list change subscription change events won’t work if the contact is opted out of the entire directory.
Interaction Changes
An “interaction” can refer to a transaction, with or without an enrichment attached. Enrichment fields are analytics generated by Qualtrics; for example, there are text analysis enrichments like sentiment and actionability, and there are digital enrichments like rage clicks and mouse thrashes. Enrichments can be added to transactions to give more context to your data, thus “enriching” it.
Example: As the same customer submits NPS feedback over time, you have a transaction field that changes to show their current (and historical) NPS. To give their feedback more context, you bring over sentiment data. One day, you see your customer’s NPS rating dropped from an 8 to a 4; thanks to the enrichment, you see that the customer wrote a review with a highly negative sentiment, which can give this NPS drop more context.
Thus, interaction change events can start your workflow when a transaction (or enriched transaction) is created, deleted, or updated. Updated interactions include scenarios where an existing interaction gains new fields.
After setting up your Experience ID Change Event, follow these steps to configure the event for interaction data changes.

- Interactions have been created
- Interactions have been deleted
- Interactions have been updated (including when new fields are added to an existing interaction)
Qtip: We recommend adding data if you think it will be used later in the workflow, such as being piped into a task, or if you want to set conditions for the workflow based on that data.
Qtip: You can select specific embedded data, transaction, and enrichment fields in your directory. Enrichment fields are specific embedded data generated by analysis in Qualtrics; for example, there are text analysis enrichments like sentiment and actionability, and there are digital analyses like rage clicks and mouse thrashes. Enrichments can come from all over the platform, so to learn more about a specific field, we’d recommend searching its name here on the support site.
Setting Conditions for an Experience ID Change Event
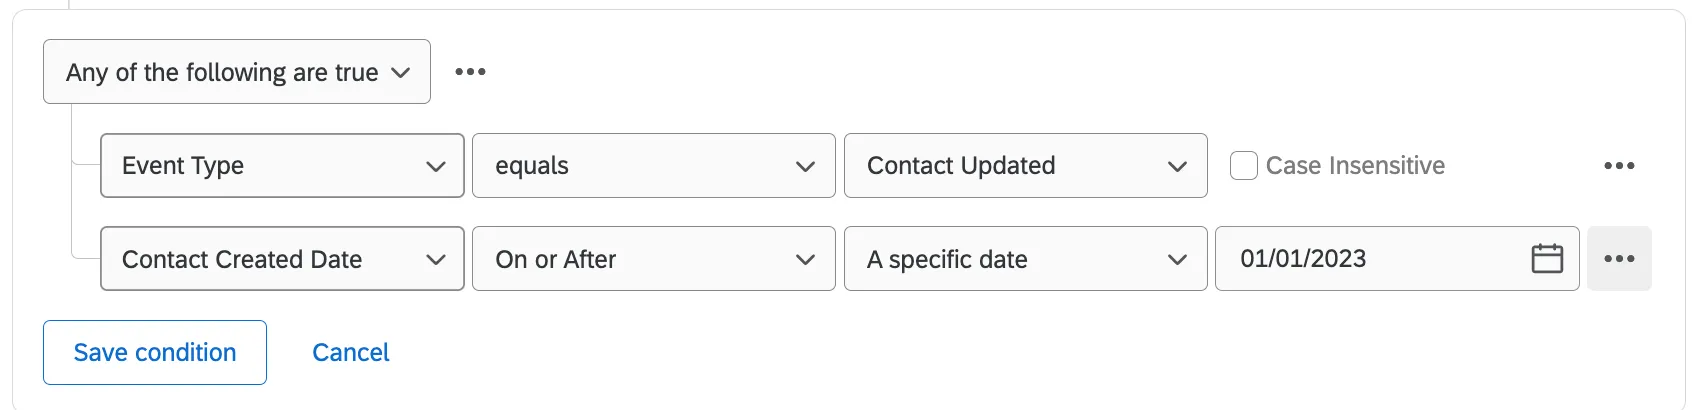
Conditional statements apply All or Any to define when a task should be triggered. In “all” conditions, every condition listed below must be met. It is similar to joining statements by “and.” In “any” conditions, any of the conditions can be met, but not all have to be. It is similar to joining statements by “or.”
Example: In this example, only 1 of the 2 conditions must be met for the task to be triggered.
The conditions you set for an experience id change event can be based off of various pieces of information about the contact.
Conditions for Contact Data Changes
- Contact: Contact information like first name, last name, email address, and more.
- Contact ID: The Qualtrics ID associated with each contact.
- Embedded Data: Embedded data stored for the contact.
- Event Type: The specific event the contact triggered; either Contact Created, Contact Deleted, or Contact Updated.
Conditions for Interaction Data Changes
- Event Type: The specific event the contact triggered; either Interaction Created, Interaction Updated, or Interaction Deleted.
- Main Contact Data: Data saved within the contact, like contact created data, email, first name, and more.
- Other Contact Data: Interaction data and embedded data stored for the contact. This is selected in the event set-up.
- Transaction ID: The ID of an individual transaction.
Conditions for bounce changes
These can be found under Main Contact Data.
- Bounce Type: Whether the bounce was hard or soft. The exact values for this field are:
- Hard
Soft

Qtip: Hard bounces are messages that can’t be delivered due to a permanent reason. This could include the email address not existing, the recipient server not accepting emails, or the domain not being a real email domain. Soft bounces are messages that can’t be delivered due to temporary reasons. The recipient inbox could be full, the message could be too large, or the recipient server could be temporarily down.
- Bounce Category: How the message was bounced. The exact values for this field are:
- RECIPIENT_REJECTED
- MESSAGE_REJECTED
- SENDER_REJECTED
- OTHER
- Bounce Reason: A detailed explanation as to why the message was bounced. We do not recommend using this field for workflow conditions. However, this information can be valuable if you want to pull it into your task as piped text.
Migrating a Workflow from the Legacy XM Directory Event App
The XM Directory Event App (formerly known as the XM Directory Funnel Event) is fully deprecated as of October 22, 2025.
Attention: Workflows with the XM Directory Event App are permanently disabled. These workflows cannot be enabled or copied.
In order to make sure your workflows continue to fully function, you need to adopt the Experience ID Change Event instead. The Experience ID Change Event has all of the same functionality plus useful upgrades, such as the ability to select directories other than the default, and additional triggers, like contact data and interaction changes.
Creating a new workflow
You cannot replace an event once a workflow is created, so you will need to recreate workflows from scratch.
Qtip: Try opening the old version of your workflow in another window so you can quickly copy its settings as you rebuild a new version.
Bounces
If you used “Bounce from Email” or “Bounce from SMS and other supported channels” in your XM Directory Event, you’ll use the Bounce change option in the Experience ID Event.
Here’s the old XM Directory Event App setting:
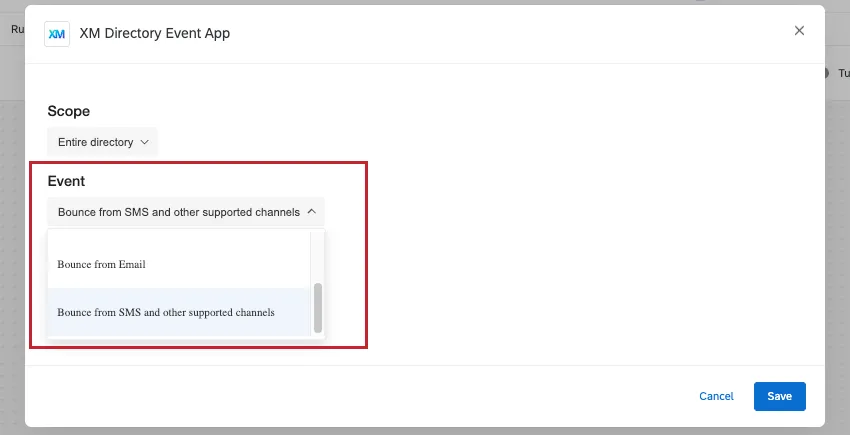
Here’s what the new version looks like in the Experience ID Event. As you can see on this support page, you can monitor bounces for a specific list or entire directory, and you can choose to monitor both SMS and email at once.
Subscriptions
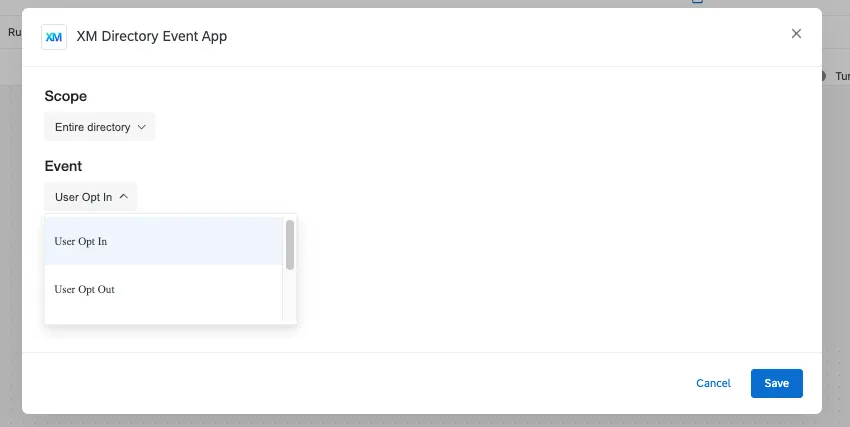
If you used “User Opt In” or “User Opt Out” in your XM Directory Event, you’ll choose one of the following based on your previous scope:
If you previously chose “Entire directory,” select Directory subscription change in your Experience ID Event. Read additional setup you can add here.

If you previously chose a specific mailing list, select Mailing List subscription change in your Experience ID Event. Read additional setup you can add here.
FAQs
Do I have access to all extensions available through the Workflows templates?
Do I have access to all extensions available through the Workflows templates?
Is there a link to all Workflows events and tasks?
Is there a link to all Workflows events and tasks?
What are Workflows templates?
What are Workflows templates?
What are workflows? / Where are actions?
What are workflows? / Where are actions?
There are no changes to workflow functionality as part of this update.
That's great! Thank you for your feedback!
Thank you for your feedback!