
A/B Testing in Surveys
What's on this page
About A/B Testing in Surveys
A/B Testing is a classic research format used across disciplines. In it, you compare a control condition to one where a treatment is applied, so you can then analyze if there is a significant difference between the respondents’ behavior in the treatment vs. the control baseline. A/B Testing can also be useful in web development and marketing because it allows you to compare two versions of a product or design in order to determine which performs better, or is preferred by your customers.
A/B Testing can be performed in Qualtrics by randomly assigning respondents to one of the two (or more) conditions, without letting the respondents know what the other condition looks like. This allows respondents to provide opinions unbiased by the desire to compare and contrast options.
Basic Setup
This section goes over the easiest way to set up A/B Testing in Qualtrics. This setup is for basic studies that don’t require multiple blocks or other elements within each condition.
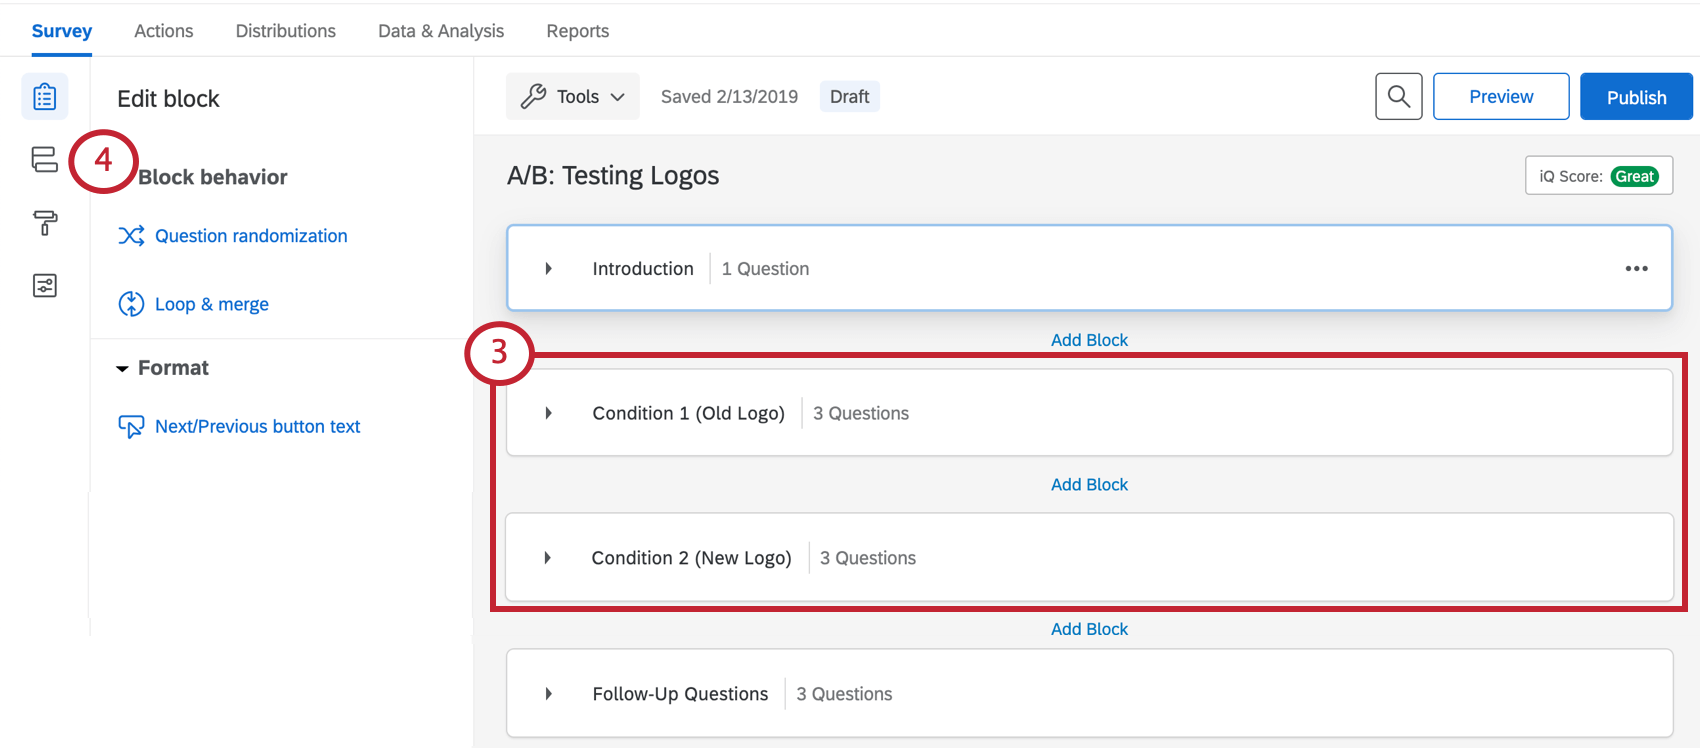
Qtip: This example has just two conditions, but this format can be used to build as many conditions as you want.
Qtip: See Randomization Data for how to export and interpret the results. By default, randomization data will not export the name of a block, but the Flow ID. If you’d like your condition data to have clearer labelling, see the next section.
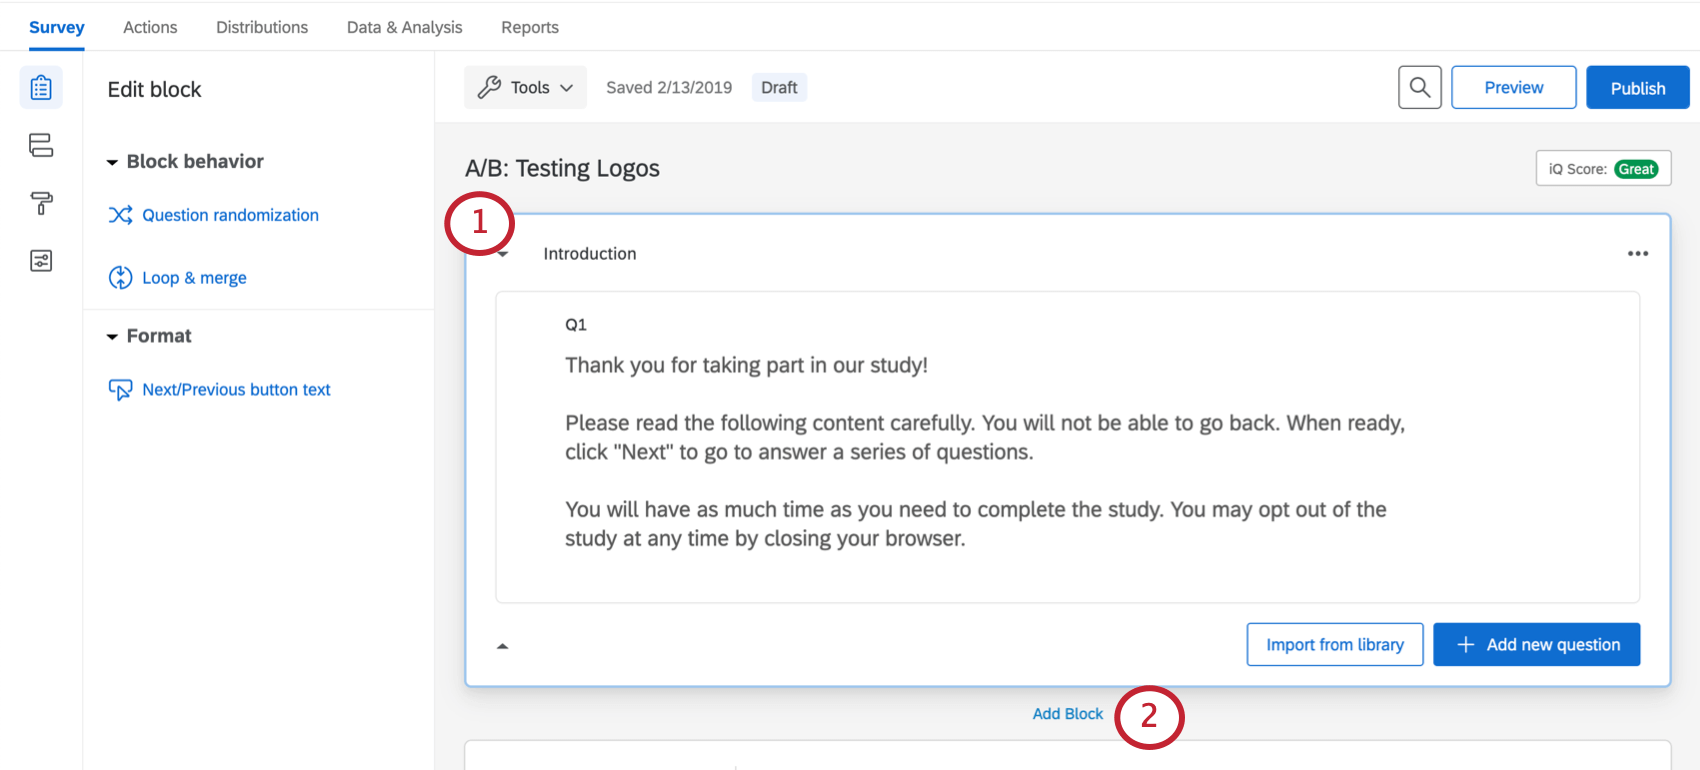
Qtip: This first block often serves as a consent form, demographic questions, or other general content that every respondent should see, regardless of condition.
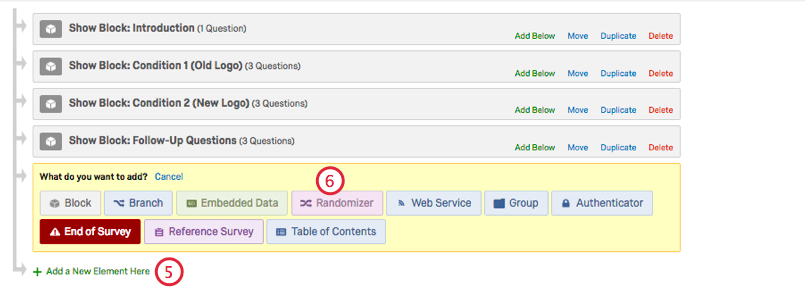
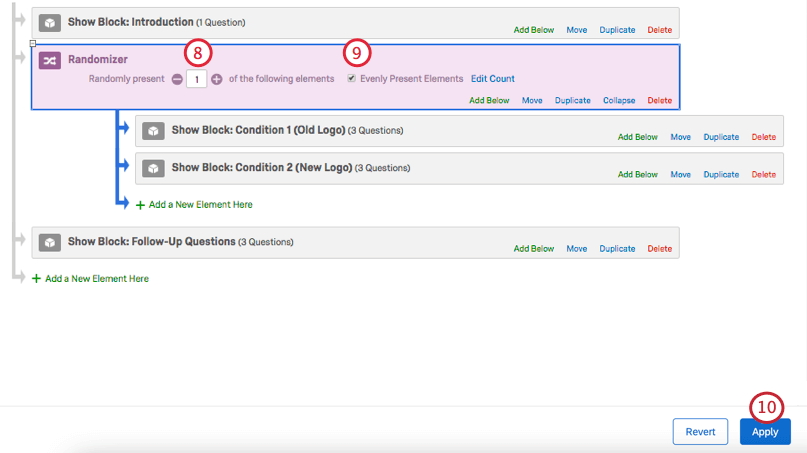
Qtip: You can add additional blocks to your survey that are shared by all respondents, regardless of condition. Just make sure that in the survey flow, blocks you don’t want randomly presented are not indented beneath the Randomizer. (See the Follow-Up Questions block in the above example.)
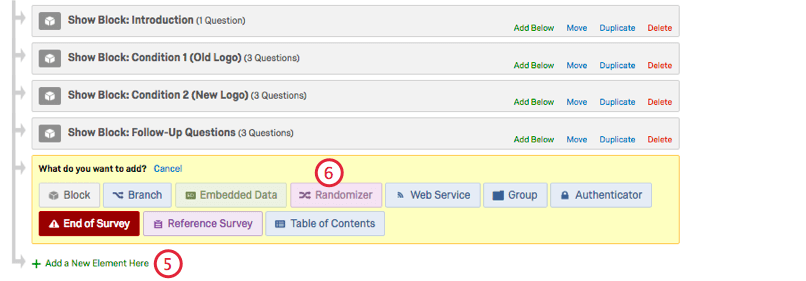
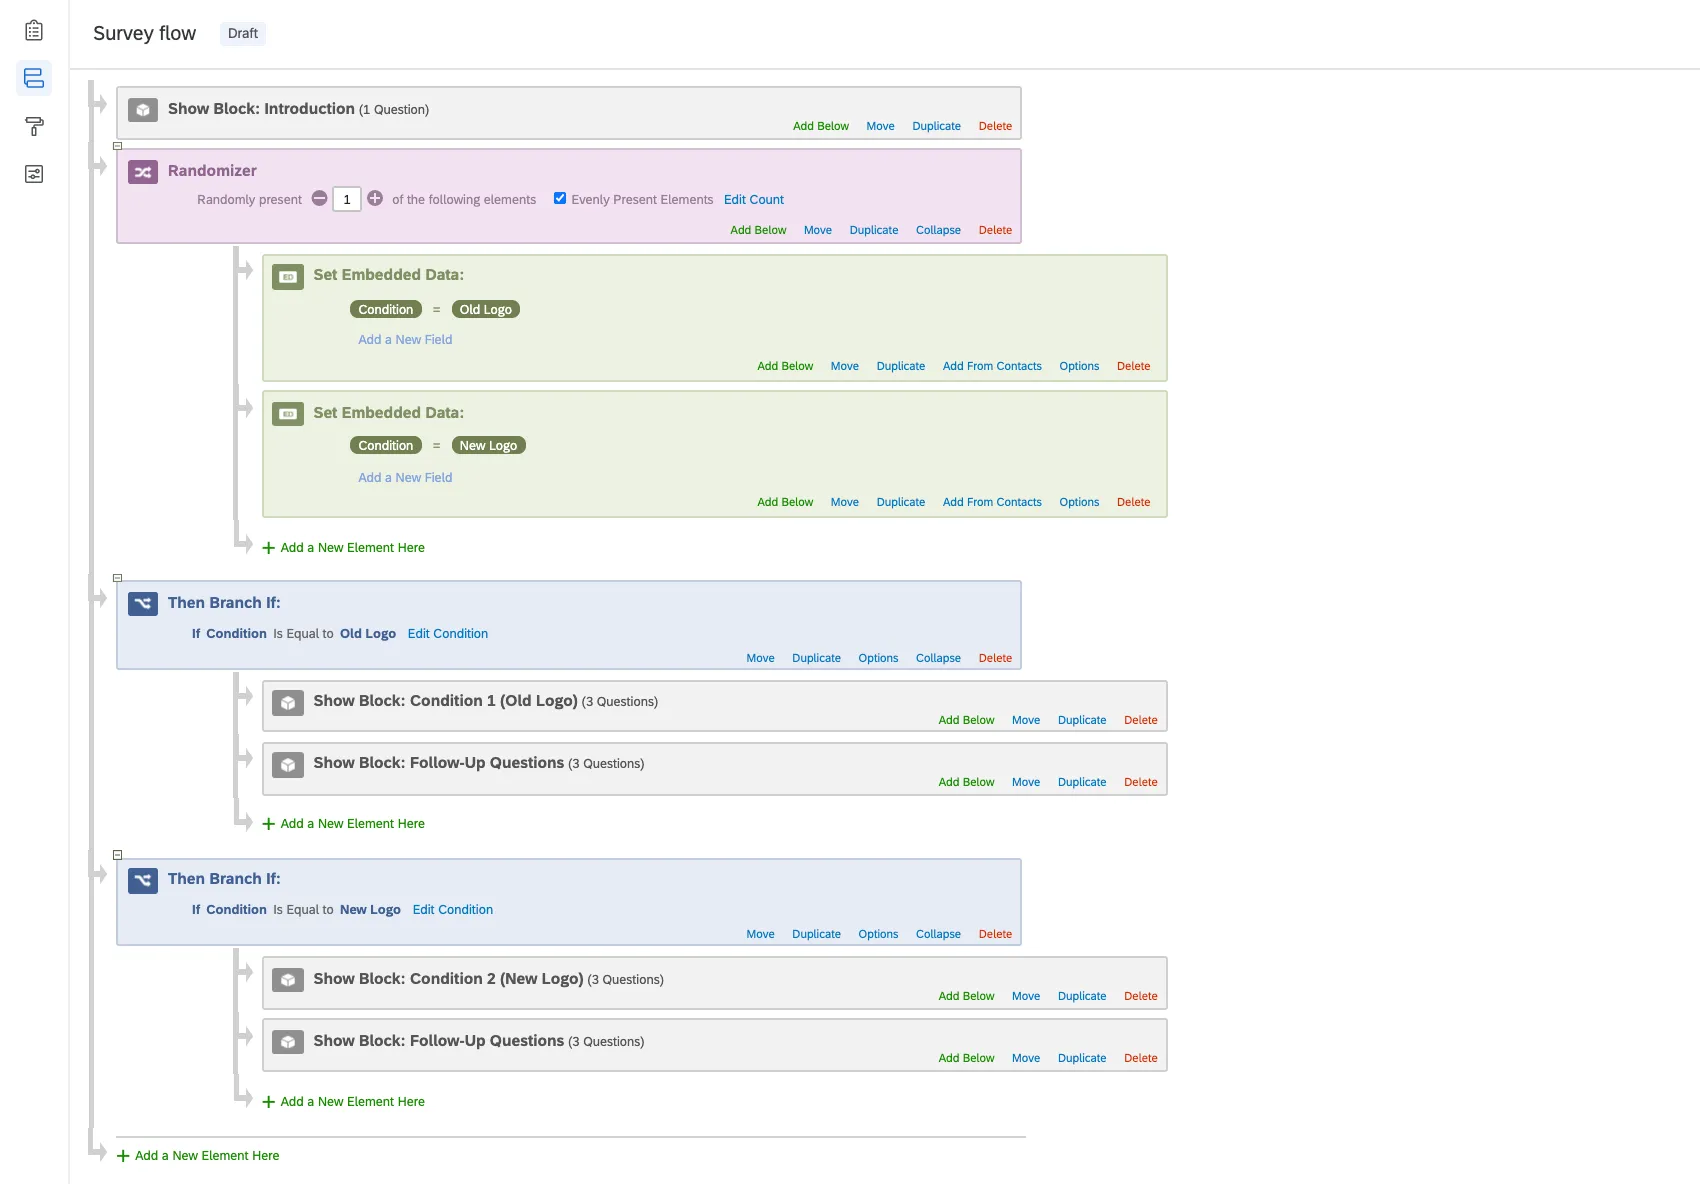
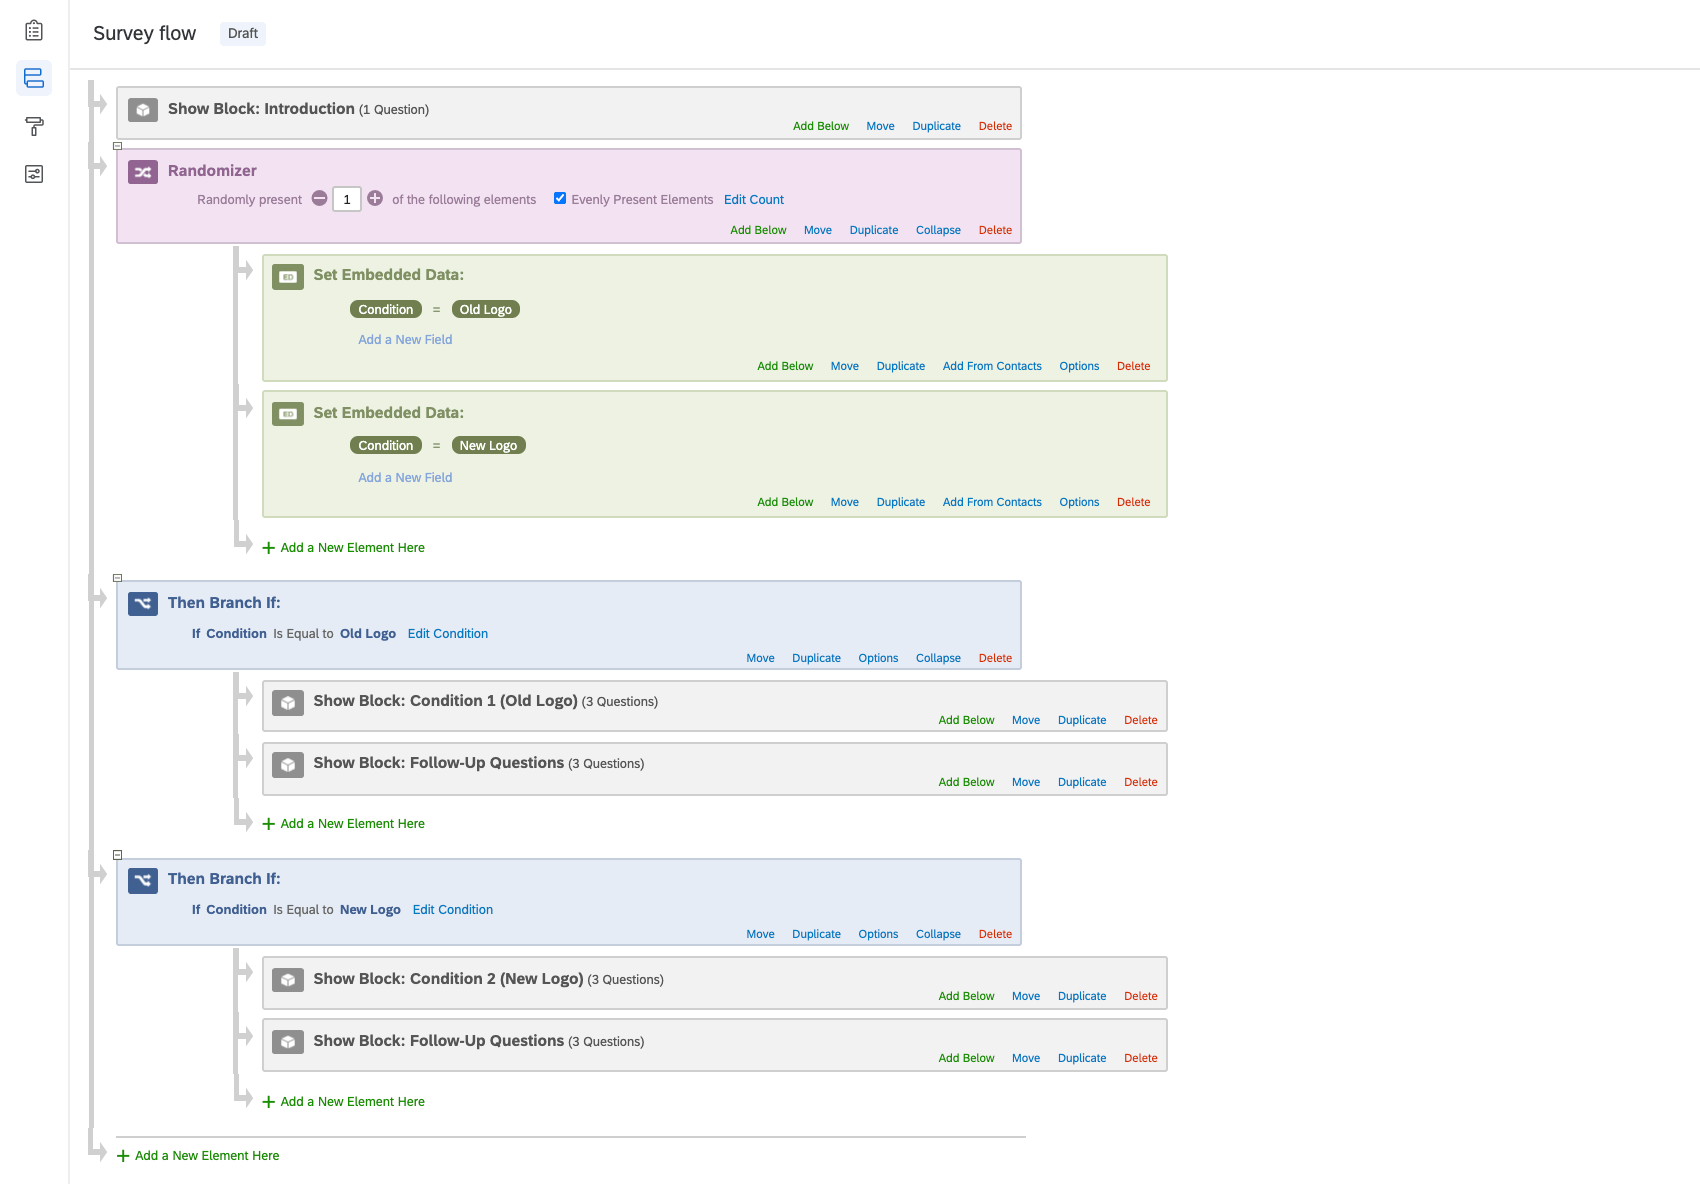
Setup for Complex Conditions
The steps discussed in this section allow you to add multiple blocks or elements into each condition. The branches themselves will be randomized, but once a branch is assigned, the condition will proceed through all the contents of the branch in order.
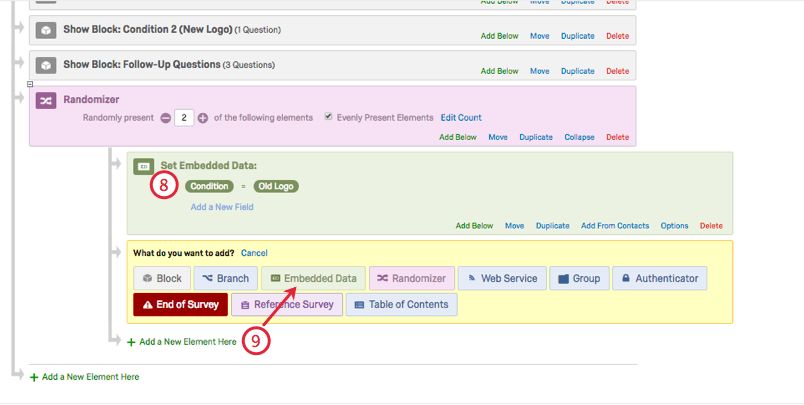
In addition, randomization data will not export the name of a block by default, instead returning a flow ID. In order to get more clearly labelled randomization data, we will set up certain parts of the Survey Flow differently than in the basic A/B setup. Following the example taught in the steps below, all randomized block data will be under the Condition column of your data.
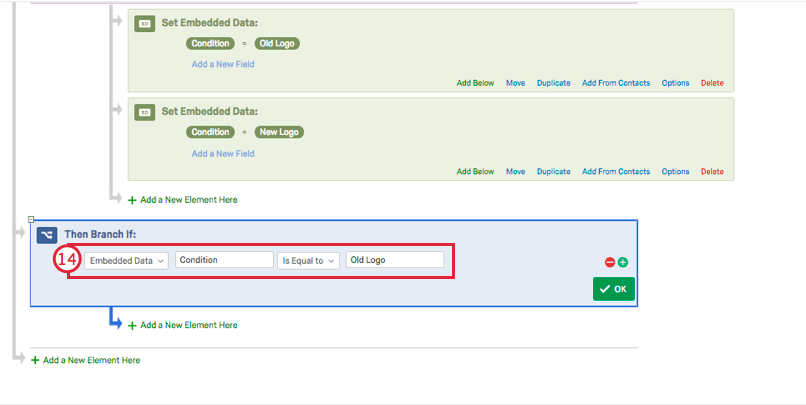
Qtip: This example has just two conditions, but this format can be used to build as many conditions as you want.
Qtip: This first block often serves as a consent form, demographic questions, or other general content that every respondent should see, regardless of condition.
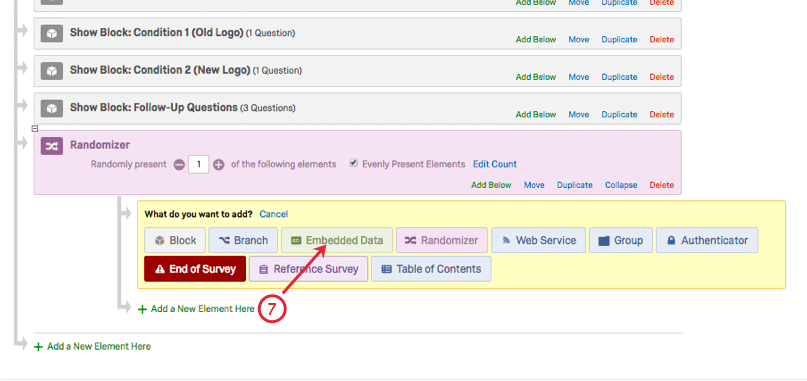

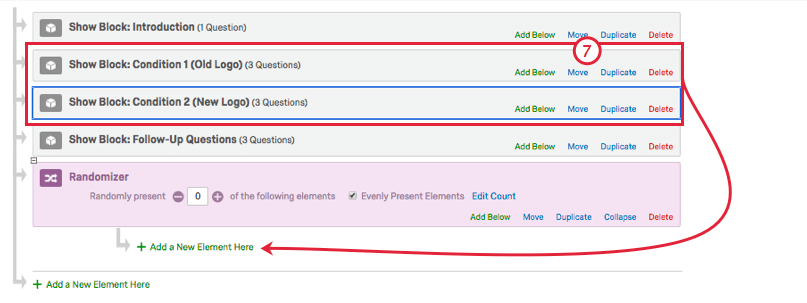
Qtip: This branch must be under the randomizer, but it must not be indented under the Randomizer! Use the images in these Steps as reference.
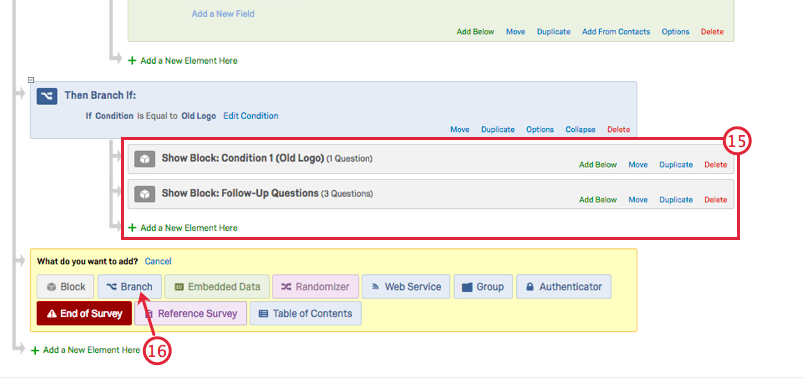
Qtip: This branch must be under the randomizer, but it must not be indented under the Randomizer or the other Branch! Use the images in these Steps as reference.
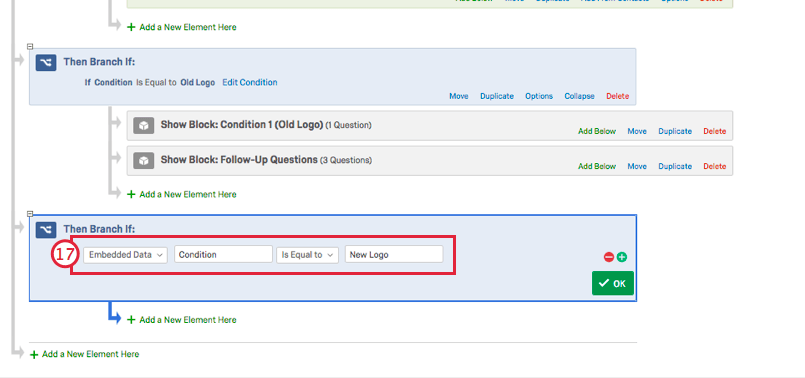
Qtip: You can add additional blocks to your survey that are shared by all respondents, regardless of condition. Just make sure that in the survey flow, blocks you don’t want randomly presented are not indented beneath the randomizer or the branches you’ve created.
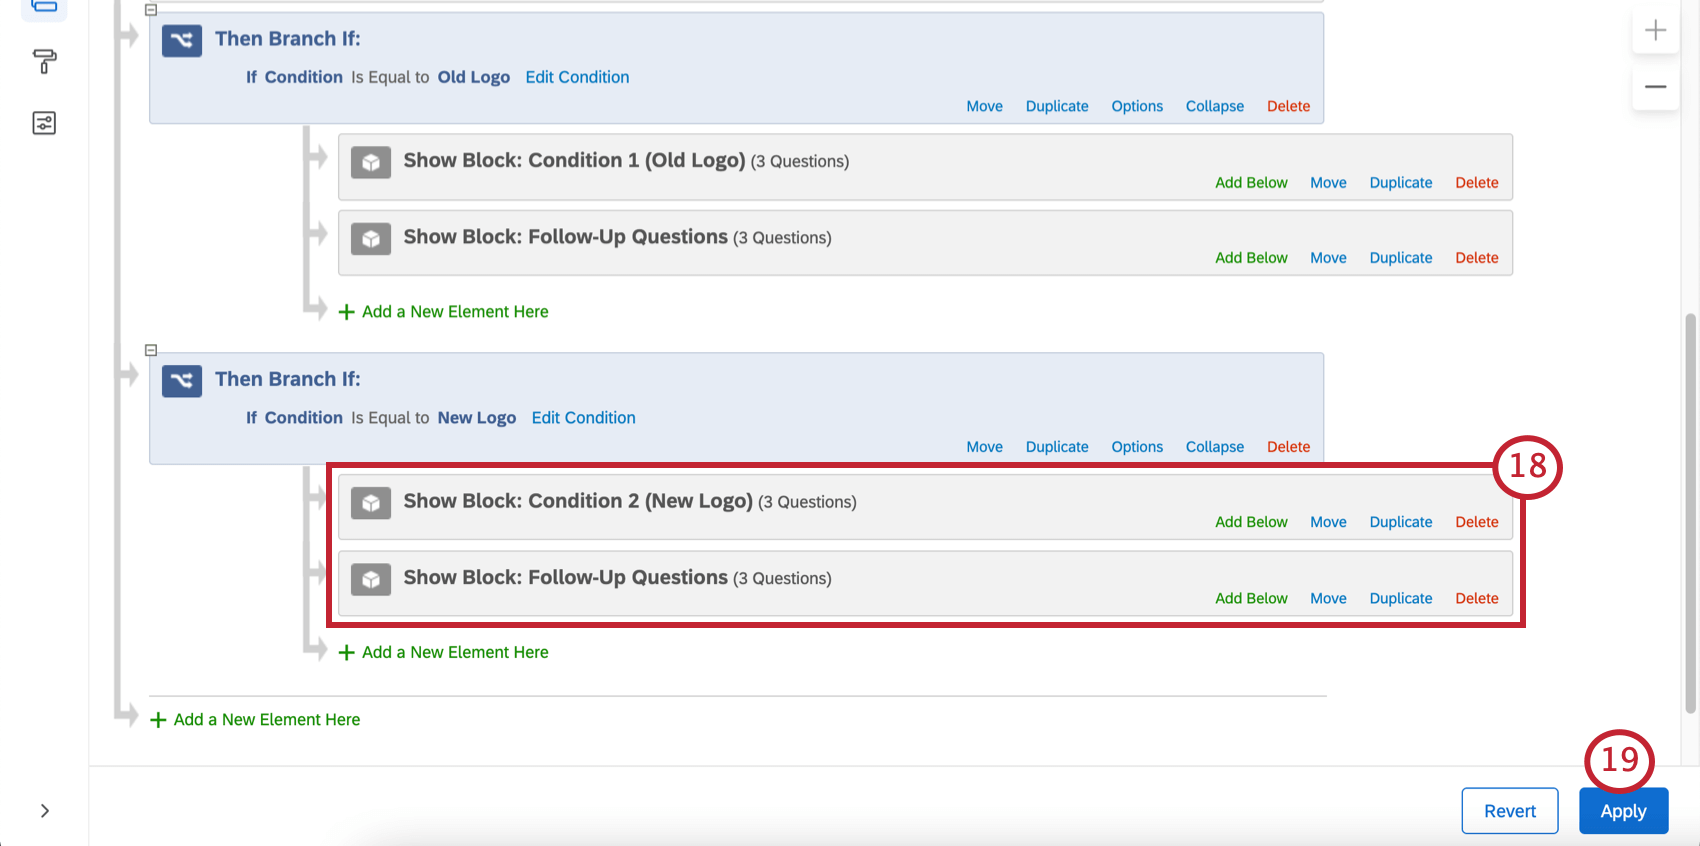
Example: This is what the survey flow we used in this example looks like when it’s finished being built.
Special thanks to Mary Curry, winner of the Community Competition for “Best Common Use Case Page.”
That's great! Thank you for your feedback!
Thank you for your feedback!