-

Qualtrics Platform -

Customer Journey Optimizer -

XM Discover -

Qualtrics Social Connect
Sharing Your Advanced-Reports
About Sharing Your Advanced-Reports
When your report is finished, you’ll want to share it with your colleagues, classmates, and maybe even a few friends. You are able to save your report as a PDF, create a link to a public webpage containing your report, or save individual visualizations for external use.
Exporting Reports to PDF
You can save your entire report as a PDF file. Once your report is saved this way, you are free to send it to colleagues or print it from your computer.
There are two ways you can save your report as a PDF:
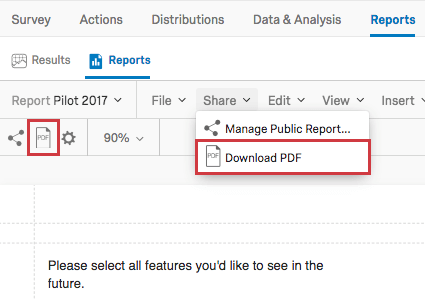
- Navigate to the menu bar, click Share, and select Download PDF.
- Navigate to the toolbar and select the PDF icon.
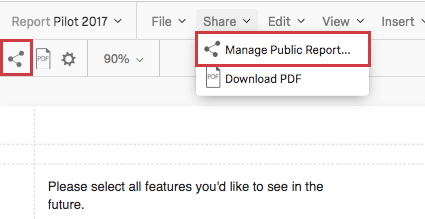
Managing a Public Report
A public report allows you to share your report through a link. This link is live, so that every time it’s refreshed, it displays the most recent data. This allows you to share a link to your report once without have to regenerate new PDFs over and over again.
Enabling a Public Report
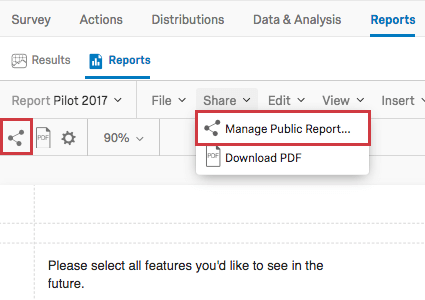
- Click Share > Manage Public Report, OR the sharing icon.
- Select Public Report Available.
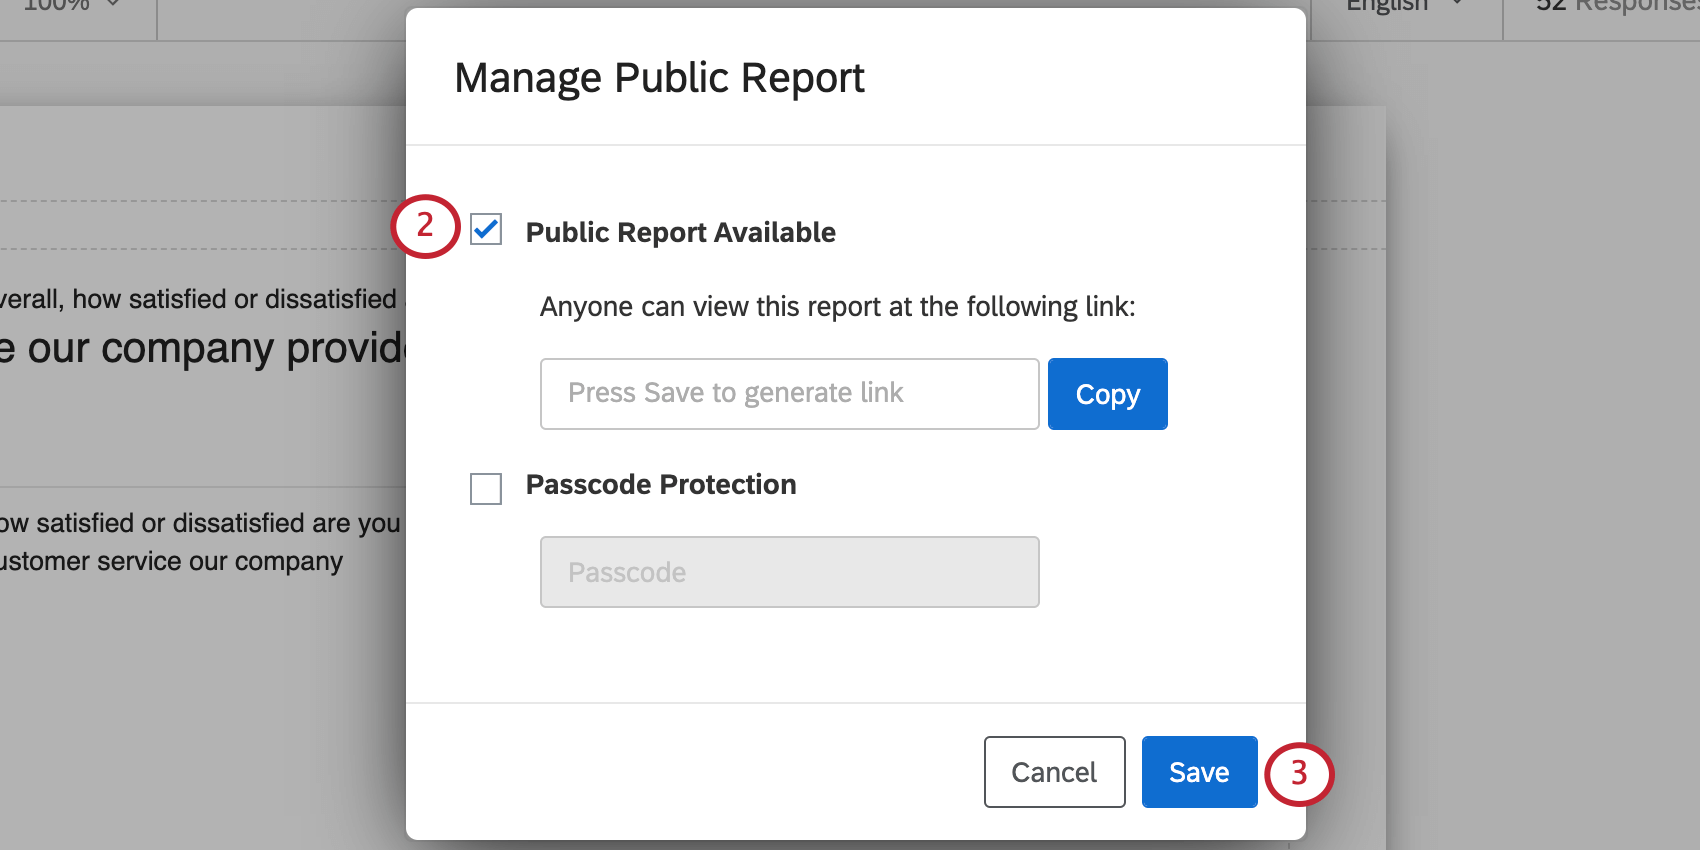
- Press Save to generate a link.
- Copy the link to share it with your friends and colleagues.
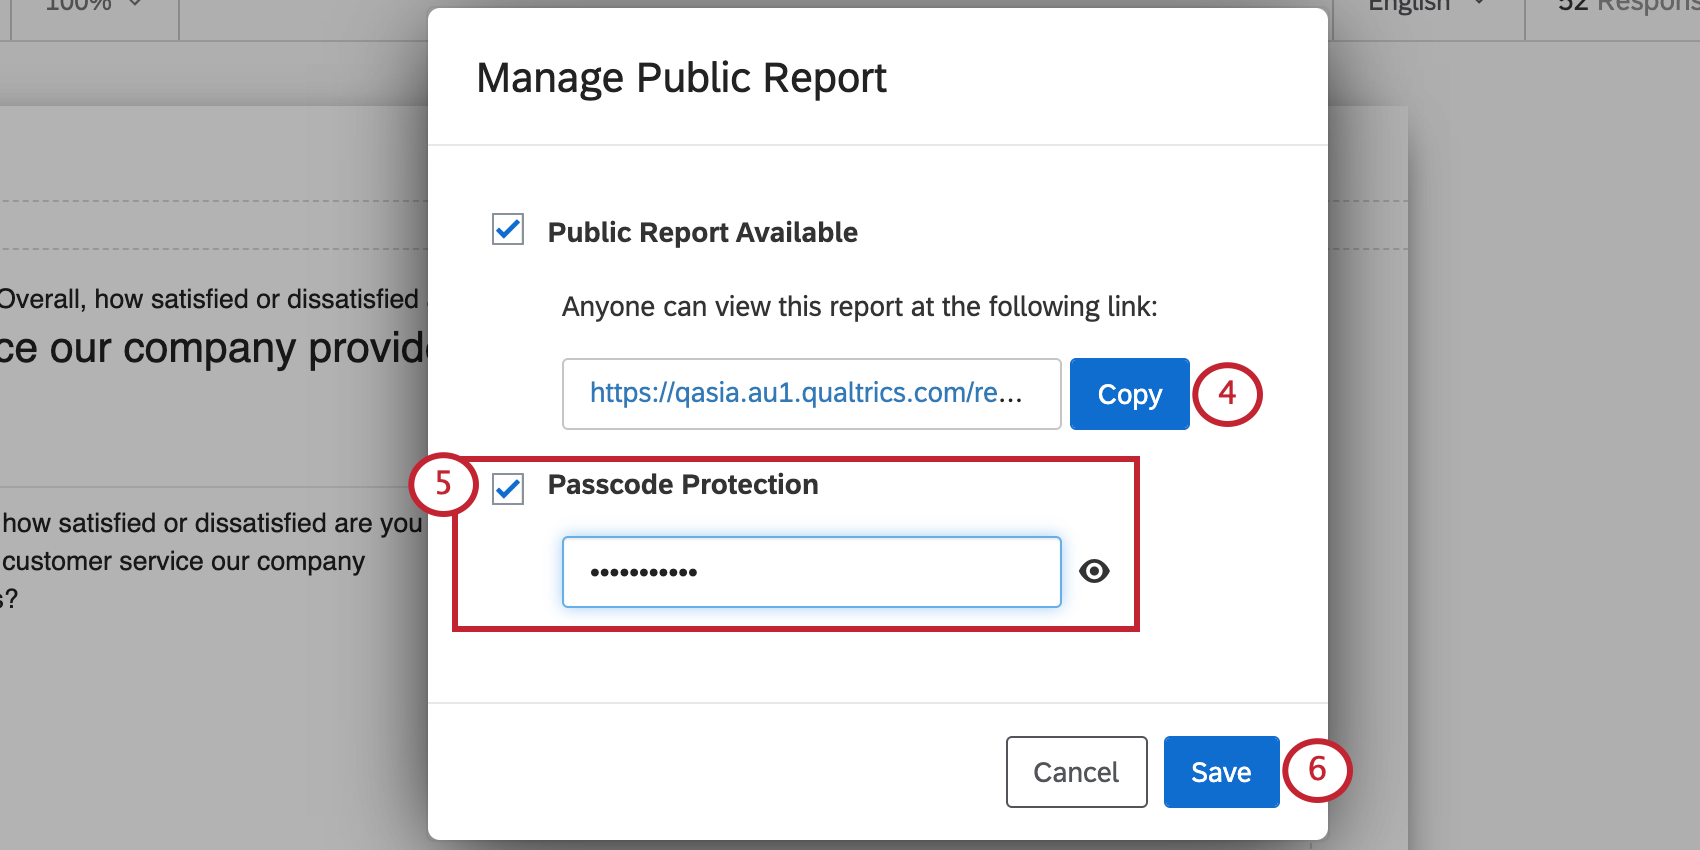
- If you’d like this report to be restricted to people with a password, select Passcode Protection and enter the desired password into the field.
- Click Save to close the window.
You can turn this option off at any time, disabling the link. If you turn the option back on, the same link will become active again, so you don’t have to worry about re-sharing it.
Public Report Appearance
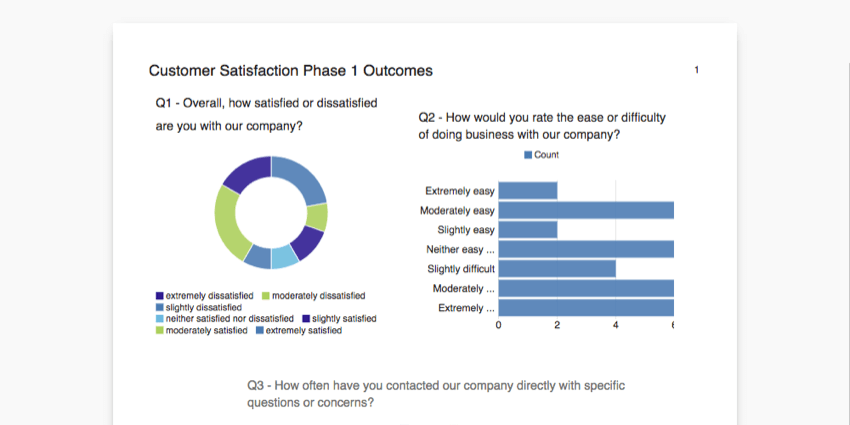
Your public report will look exactly like a PDF of your report. Every time you edit your report or get new data, this will be reflected on the public report.
Saving Visualizations
You can save an individual visualization as a JPEG image file, or you can save it as an image in a DOCX file. The ability to save visualizations is helpful if you have an external report or an essay you want to insert your Qualtrics findings into.
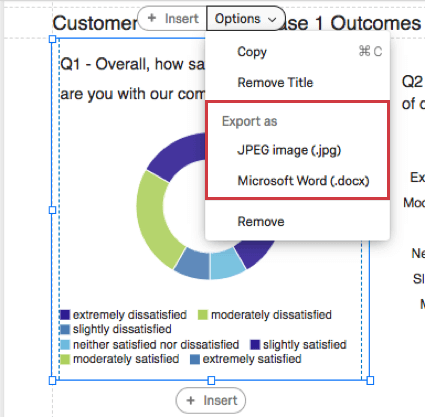
- Click the visualization you want to save.
- Click Options.
- Under Export as, choose your desired format.
Scheduling Report Emails
Scheduled Report Emails allow you to send a PDF copy of your advanced-report to a list of specified email addresses on a recurring basis. For example, you may need to send a PDF report with your customer satisfaction metrics to your manager every week. With Scheduled Report Emails, you can set up this email once, and it will continue to send automatically each week without any more work from you.
Scheduled Report Emails will send the most up-to-date data in each mailing. Your emailed PDF reports will dynamically include new response data and any update you’ve made to the report itself. With each mailing, you will send the most recent and relevant data to the desired individuals.
-
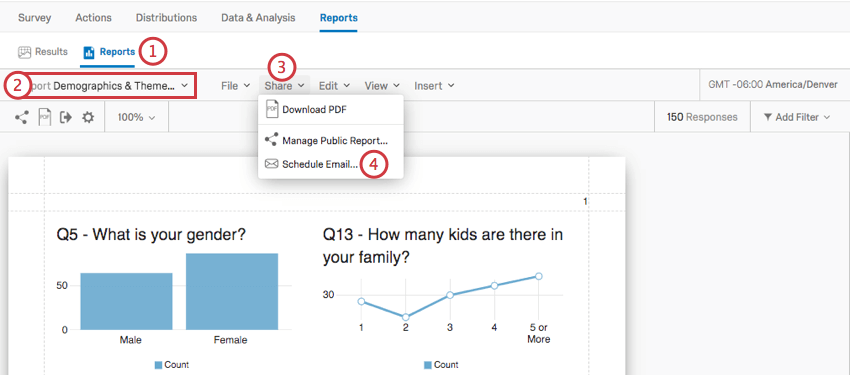
- Navigate to the Reports tab.
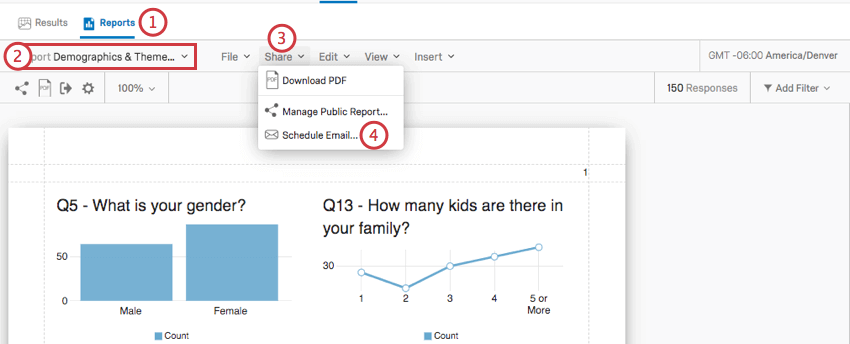
- Select the desired report from the report selection dropdown menu.
- Click Share.
- Select Schedule Email.
- Click New Email.
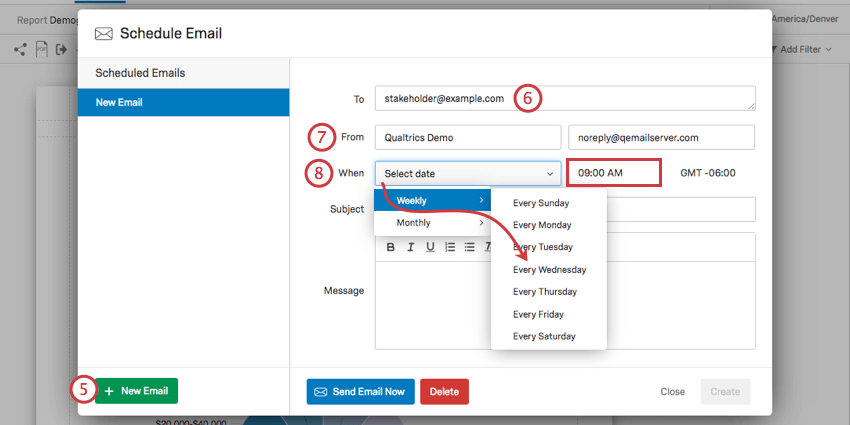
- Enter emails to send the report to. You may enter multiple, comma-separated.
- Fill out the “From” Address.
Qtip: The “From” Address address must be an approved address for your organization. If you attempt to use an unauthorized email, you will not be able to save your scheduled email, and it will not send. If you encounter any issues with your “From” Address, please reach out to your organization’s Brand Administrator.
- Select the frequency of the distribution, including whether it’s monthly or weekly, and then the specific day and time it should go out.
Qtip: This time zone is based on your account settings.
- Enter a Subject for your email.
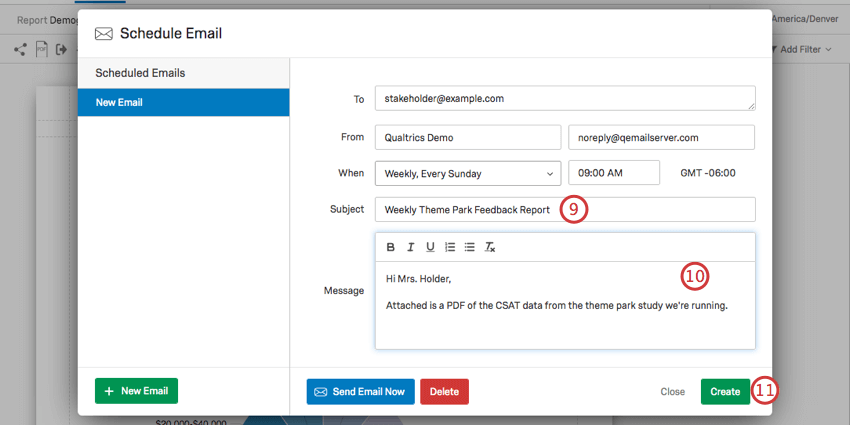
- Construct the email message that will accompany your attached report.
Qtip: In addition to the file of your report, you could also include the link to the online version. Just copy the link and the passcode from the Publish Report menu and paste them into the body of your email.
- Click Create when you are finished.
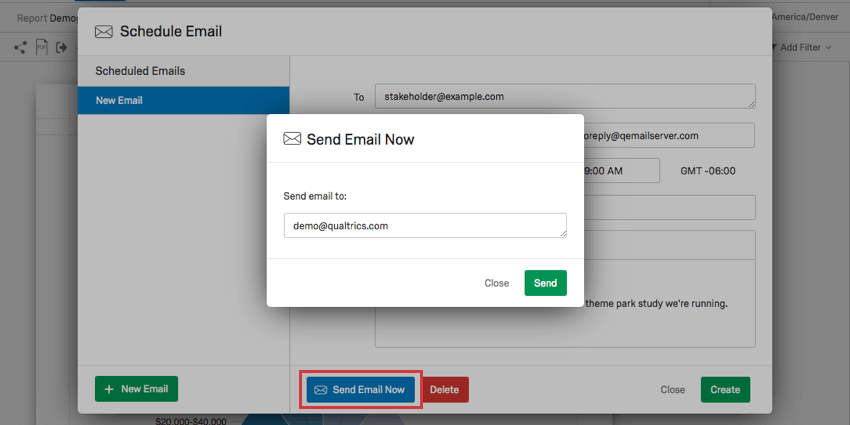
Qtip: If you would like to test your scheduled report before actually saving it, you can click the Send Email Now button, located in the lower-left corner. This allows you to send the report email to your own email address, where you can verify that it looks correct when viewed in an email inbox.
- Navigate to the Reports tab.
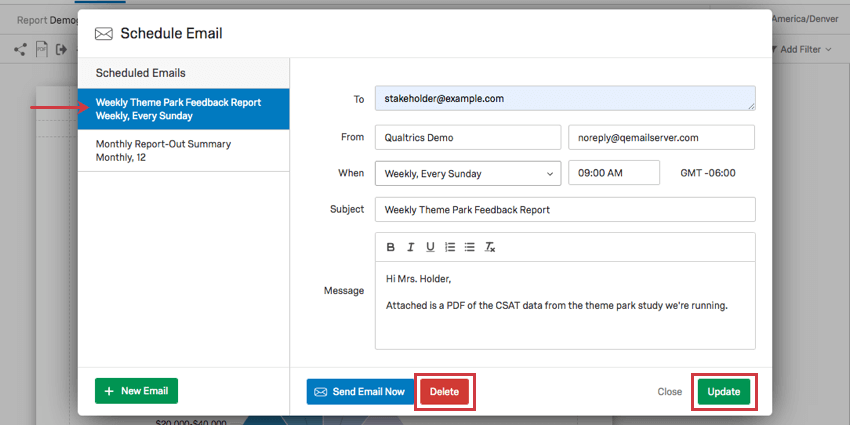
Editing and Cancelling Scheduled Reports
You can reopen the Schedule Email window at any time to delete or edit an existing scheduled report email. Just select an existing email from the left and either select Delete or Update.