
Opt-In Survey Upon Site Exit
What's on this page
Qtip: If you don’t have access to any of the features described on this page, reach out to your Account Executive. For more information about the differences between Digital Feedback and CustomerXM for Digital, see Digital Feedback vs. CustomerXM for Digital.
About Opt-in Surveys Upon Site Exit
Site exit surveys ask visitors to provide feedback after they leave a website.
Most site exit surveys pop under the webpage without asking the visitor to opt-in. For example, a standard Pop Under creates a window containing a survey invitation and hides behind the web page until the visitor ultimately exits the site. Once the visitor exits, the survey invitation window comes forward. However, in recent years, major browsers now prevent this behavior the same way they block Pop Ups.
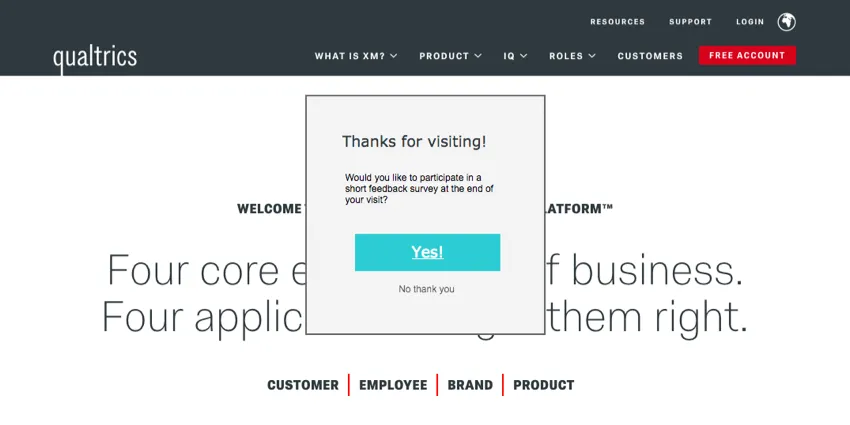
By asking the visitor’s consent (allowing them to “opt-in”) before giving them your site exit survey, you can circumvent ad blockers. In the initial Creative, the visitor is asked whether they’d be okay with the Pop Under window appearing, thus bypassing any blocking behavior from the browser. Using this opt-in method for site exit surveys is widely regarded as a best practice for collecting site satisfaction scores and other information from a representative audience.
Setting up an opt-in site exit survey involves three main steps:
Qtip: This outline assumes basic understanding of the following concepts: building Creatives, Responsive Dialogs, Pop Unders, and building Intercepts.
Attention: Pop Unders are not compatible with mobile browsers. Prevent these Intercepts from activating on mobile browsers by using Device Type logic.
Building Your Creatives
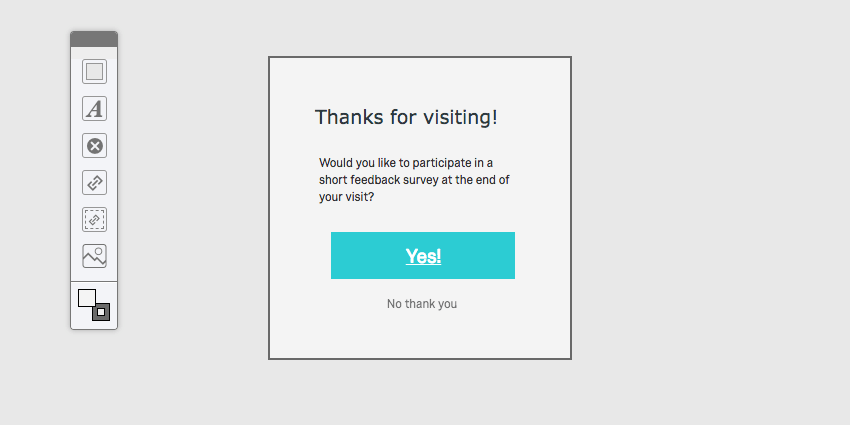
Qtip: Be sure to publish your Creative.
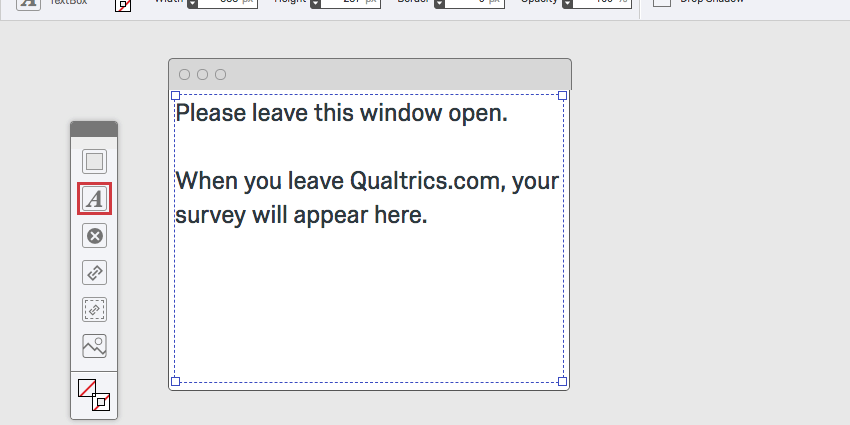
Attention: You may see a yellow warning message about Pop Unders and Chrome. This warning message refers to the use of Pop Under Creatives without the opt-in portion. When you add the opt-in portion, this ensures that the Pop Under appears after the visitor closes their page.
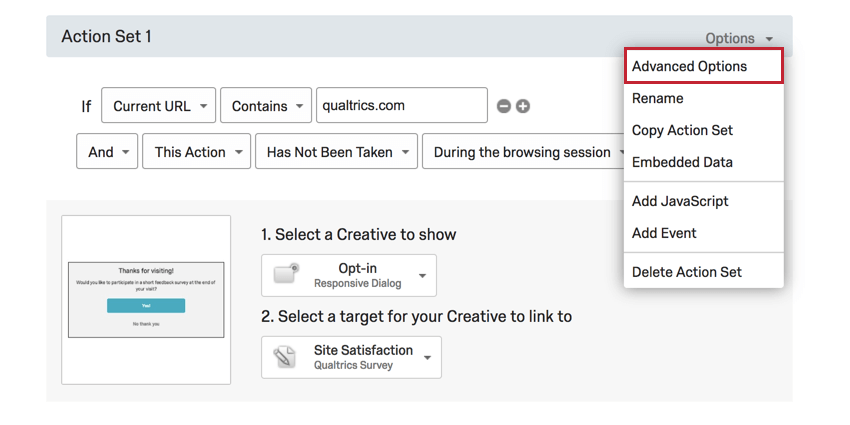
Setting Up Your Intercept
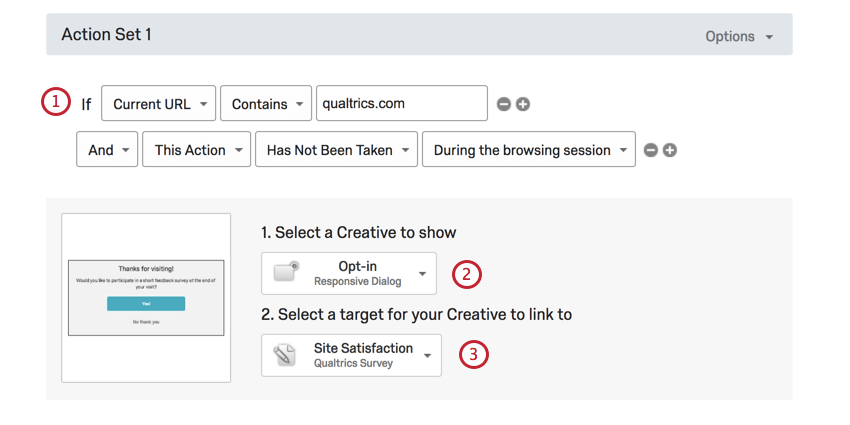

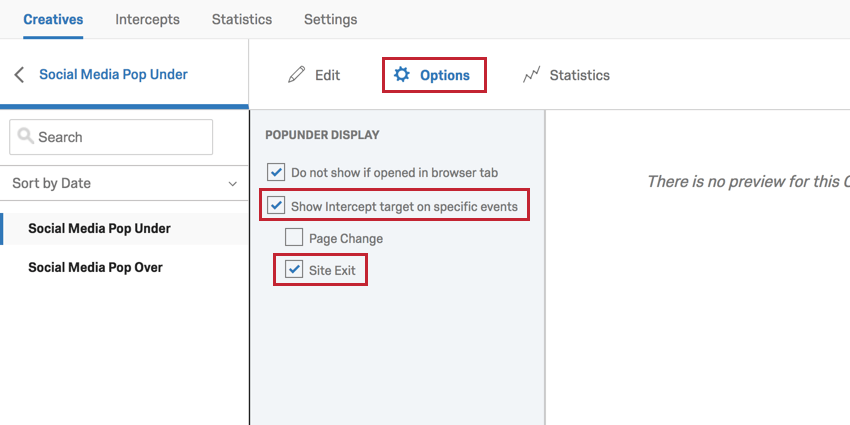
Connecting Your Pop Under

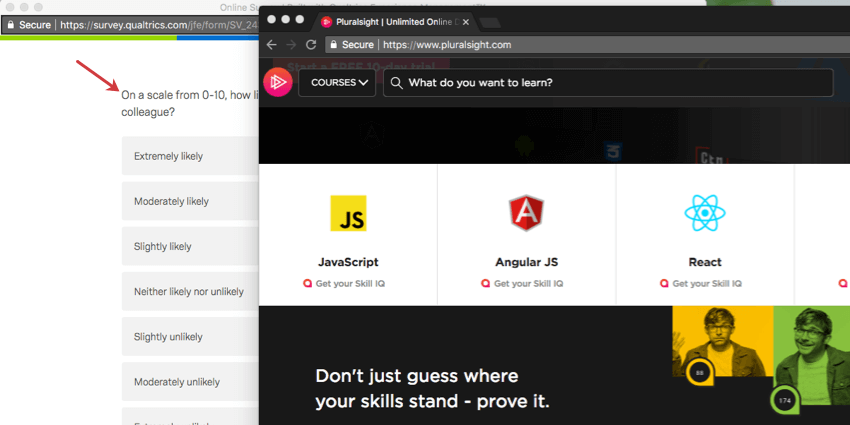
The Result

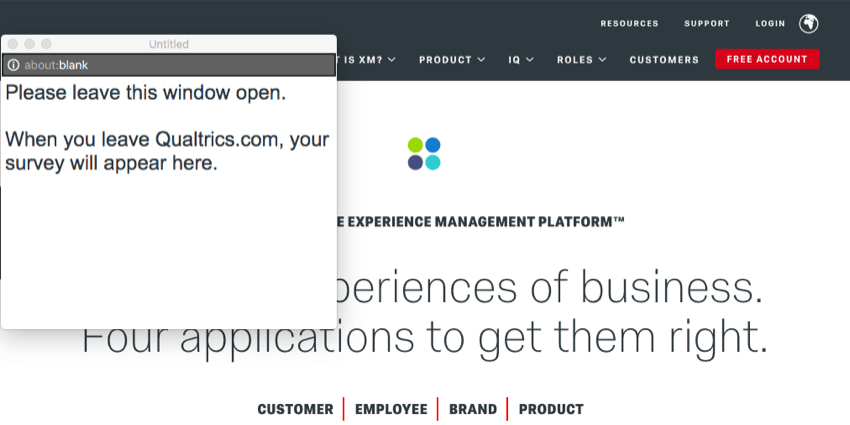
Qtip: Any Embedded Data being collected by your intercept is set the moment the Pop Under loads (i.e. when your visitor opts-in to the survey). For example, if you’re recording Site History, the Site History is not updated in the Pop Under if the visitor navigates to a new page after the Pop Under loads.
FAQs
I activated my intercept, but it‘s not showing up on my site. Why not?
I activated my intercept, but it‘s not showing up on my site. Why not?
- Logic: intercept targeting logic and action set logic are the conditions that must be met in order for an intercept to be displayed to a visitor. Checking this logic will be helpful in discovering why the Intercept is not displaying on a page.
- Logic sets that use “Contains”: A common cause of logic error is the use of the “Contains” vs. “Is.” To say a condition “Contains” means that the parameter you are basing the logic off (i.e., Current URL) will have the specified value present in addition to more information. For example, if I had logic that read as Current URL contains ‘qualtrics’, this would cause the intercept to display on any URL that has the word qualtrics present. The other option you have is using Current URL is [URL]. This condition depends on the visited URL being an exact match. Any differences or additional characters will prevent the intercept logic from passing.
- Intercept Revisions: When making edits to intercepts, changes are not made live until the intercept is published. When publishing an Intercept, a version of the intercept, or a “revision,” is saved. Reviewing the revisions that have been made is very useful for identifying any changes that may have suddenly prevented the intercept from appearing.
- Debug Window: The debug window is an invaluable tool for testing why an intercept is not displaying on a particular page.
For intercepts whose deployment code was implemented before March 2019, to enable the debug window, append a query string to any given URL called Q_DEBUG. This must be prefixed with a ? or a & like the following examples: https://www.qualtrics.com?Q_DEBUG, https://www.qualtrics.com/blog?item=value&Q_DEBUG.
For intercepts whose deployment code was implemented after March 2019, run the following JavaScript snippet in the Console of your web page:
 QSI.API.unload();
 QSI.isDebug = true;
 QSI.API.load();
QSI.API.run();Qtip: The Website Insights debugger does not function if the code has been implemented using a tag manager. Also, if the URL already has a query string with a ?, then the debugger will require a & instead.
- Network Request: Most browsers possess a developer tools menu that allows a user to see a site’s source code, resources, cookies, and network calls. Website Insights possesses a distinct presence in the Network section of these tools. To check for these scripts running, open the developer tools and navigate to the Network section. Once here, reload the webpage and the menu should begin to populate with all network requests being made by the website. To identify Website Insights code, look for calls that begin with ?Q_ZID or ?Q_SID. This is the code itself running checks on the display logic. If you cannot find anything matching this format, then there is an issue with the implementation of your project code. You can refer to our support page on implementation for advice on where is best to place the code.
- Content Security Policy Issues: If you receive a console log that violates a Content Security Policy, there is most likely a restriction on your website that is blocking our intercepts from deploying. We recommend reaching out to your web-development team to resolve. To ensure your intercepts work, we generally recommend allowlisting the following items in your Content Security Policy headers:
- connect-src https://*.qualtrics.com
- frame-src https://*.qualtrics.com
- img-src https://siteintercept.qualtrics.com
- script-src https://*.qualtrics.com
- SPA URL Handling: If your site uses a single-page application (SPA) framework, make sure your code triggers history.pushState() when navigating between views. Some frameworks may re-render or update the URL without pushing a new history entry, which can prevent intercepts from firing. If you're using useEffect or similar lifecycle hooks, make sure your intercept logic runs after navigation is complete.
I have built my intercept but would like to test it before activation. How can I do that?
I have built my intercept but would like to test it before activation. How can I do that?
What is the difference between displaying On Load, On Focus, On Exit Intent, and Manually?
What is the difference between displaying On Load, On Focus, On Exit Intent, and Manually?
- On Load: The On Load option is the most basic display option. With this option selected, an intercept fires on a valid page as soon as the page itself loads. This means that a website visitor could load a URL in a separate tab or browser instance and have a creative shown to them without seeing it themselves.
- On Focus: The On Focus option allows us to more reliably ensure that a website visitor is active on a page before encountering an intercept. When a page loads that would display an intercept, the On Focus setting prevents the script from running until the visitor is active on the page. This is determined by mouse movement and clicking. This means that if the URL loads in a new tab, for example, the user will need to navigate to that tab and interact with the page first before the script runs. This is useful if your creatives are set to display on a timer.
- On Exit Intent: This option aims to display a creative when the website visitor attempts to leave your site. When deployment code is present on a page, we can detect the movement of a user’s mouse within the bounds of the browser. The Exit Intent feature detects the moment a cursor moves to the upper regions of a browser and triggers the intercept at this moment. Thus, when someone attempts to close a tab, you can catch their attention.
- Manually: This option is primarily used in Single Page Application setups. Selecting this will prevent anything from being displayed automatically. Instead, the Website Insights API must be run by the site itself to make the script fire and a creative display. Commonly, this is used when you want an intercept to trigger when certain elements on a single page are changed, such as changing filter values or loading elements within the same URL.
That's great! Thank you for your feedback!
Thank you for your feedback!