
Building with Guided Intercepts
What's on this page
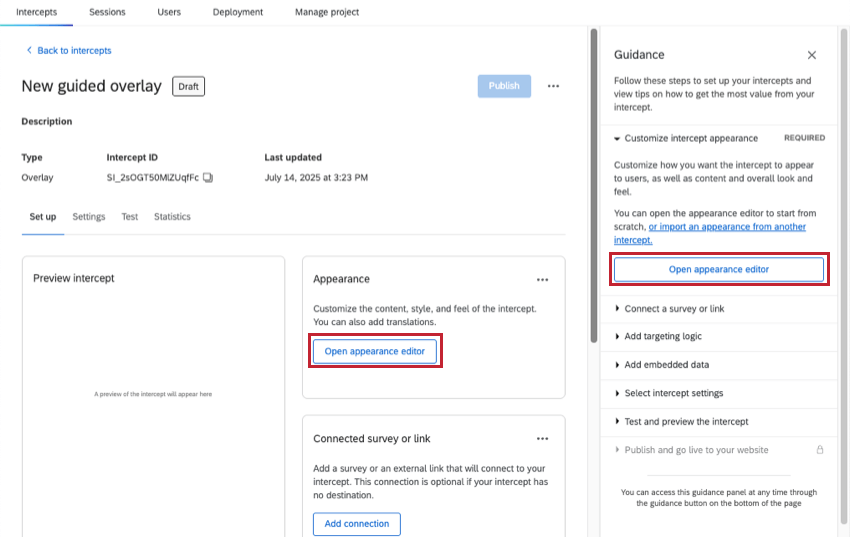
About Building With Guided Intercepts
Guided intercepts, also known as guided setups, are an excellent tool for collecting feedback on websites and apps, and are suitable for both new and experienced users. They streamline the setup process by combining the visual design, display settings, and deployment of a traditional Website Insights project into a single, user-friendly experience.
Guided intercepts offer visually appealing designs tailored to specific, common digital use cases, eliminating the need to start from a blank canvas. Unlike with standalone setups, it’s also faster to add translation, mobile, and accessibility settings, with certain features even built-in by default.
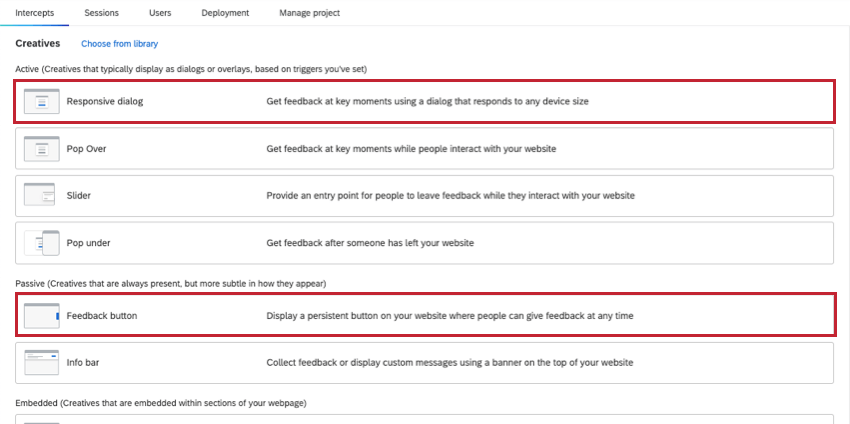
List of Guided Intercepts
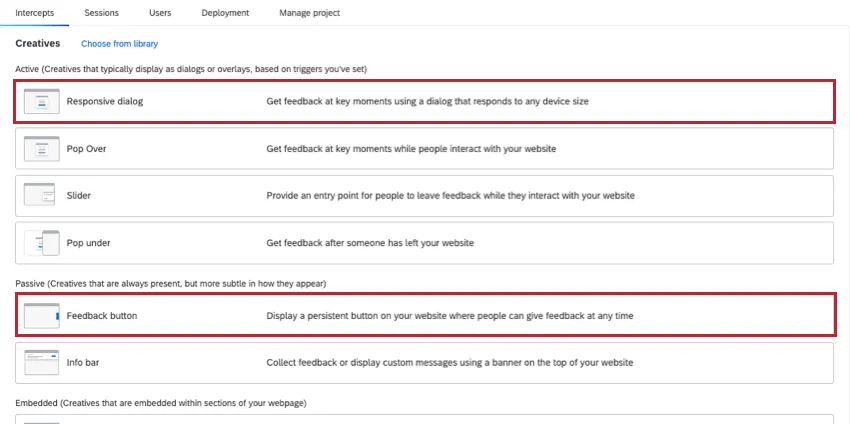
For Websites (desktop and mobile view)
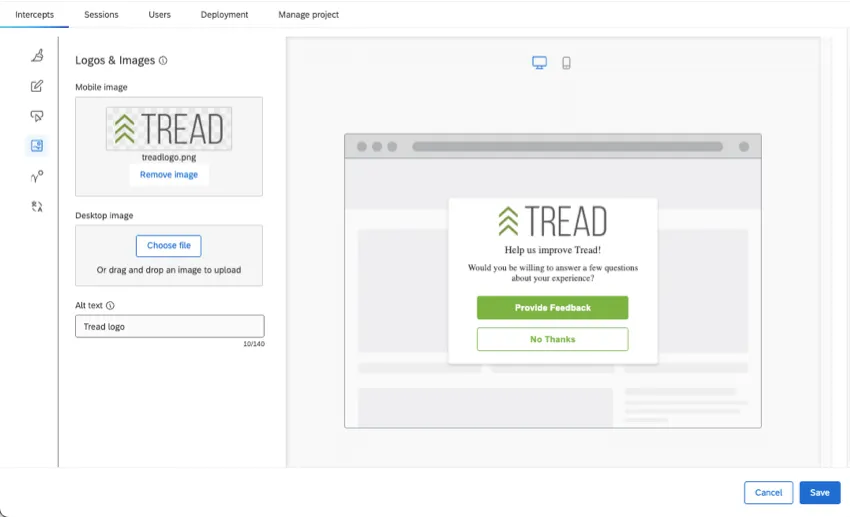
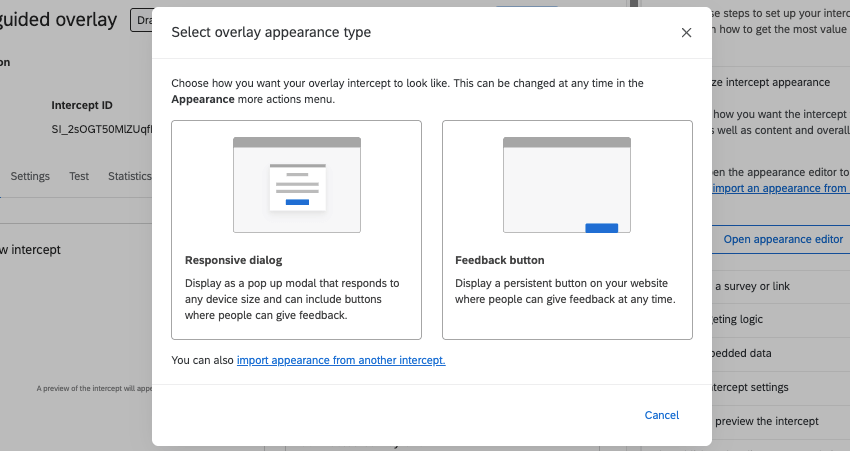
Responsive Dialog: Responsive dialogs open over a webpage, asking visitors to give feedback. Dialogs come ready with a header, question, and a place to put your logo, so you can hit the ground running with your customization.
Feedback Button: A button visitors can click that will expand to show a survey. See the left of this page for a real-time example.
Templated Embedded Feedback: Ask for feedback while embedding your survey directly into the body of the page. As the name suggests, templated embedded feedback includes several common options you can choose from.
For Mobile Apps
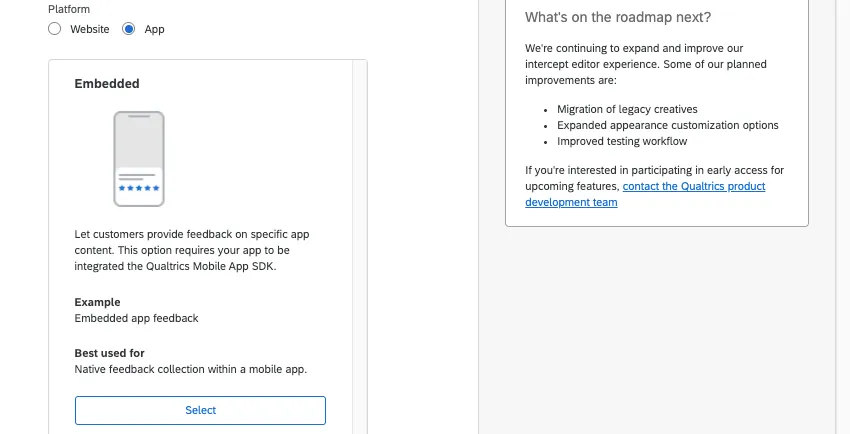
Embedded App Feedback: Ask for feedback while embedding your survey directly into the body of a mobile app. Much like with templated embedded feedback, embedded app feedback provides several common options you can choose from.
Benefits of Guided Intercepts
Qtip: If you’re new to Website & App Insights, we recommend starting with a guided intercept.
- Mobile-friendliness: By default, all guided intercepts are created to adjust to screen size changes, meaning they look great on desktop and mobile browsers. Intercepts also have additional mobile customization according to their use case, such as the ability to switch logos on responsive dialogs.
- Translation: While customizing your intercept, you can easily upload translations for all of your text strings. See Translating Guided Intercepts.
- Accessibility: Each guided setup has accessibility features unique to it. For example, feedback buttons make it easy to add alt text for the button itself, as well as add a title to your iframe, if you’re embedding your target survey.
- User friendly: Guided intercepts are designed with common use cases in mind, and offer base-level customization options that make it faster and easier to end up with a professional-looking result. Furthermore, by guiding you through each step, you don’t have to separately piece together the visual parts of your website project and the logic of how you want it to appear.
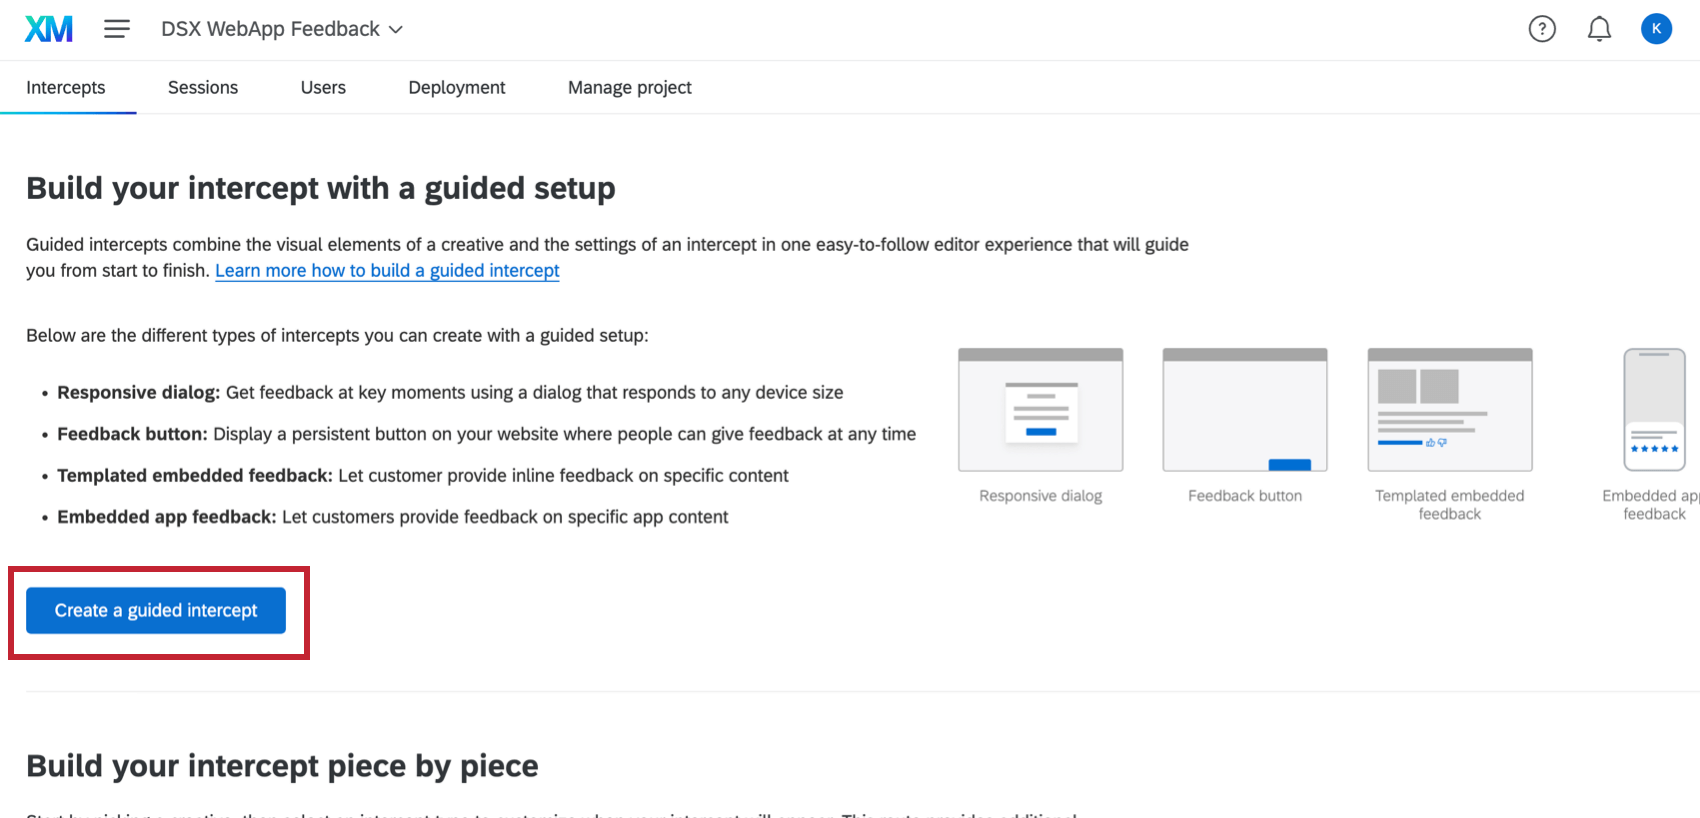
Creating Guided Intercepts
A guided setup walks you through every step of a Website and App Insights project. When created using the steps below, responsive dialogs, feedback buttons, templated embedded feedback, and embedded app feedback become guided intercepts.
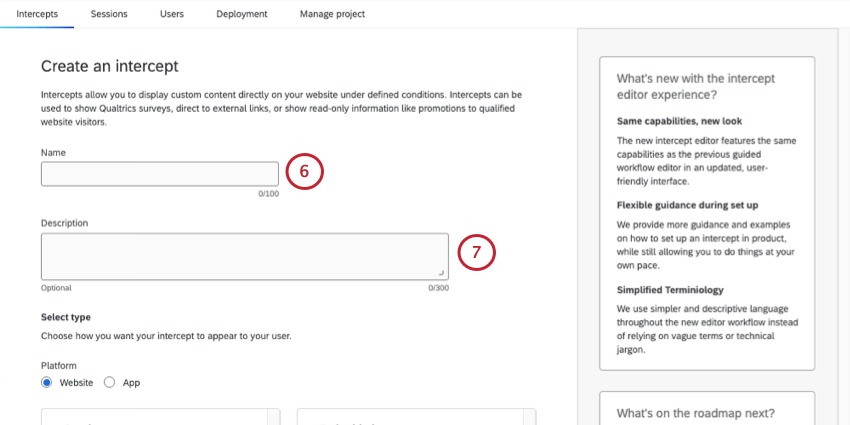
Qtip: It helps to choose something that explains when or how visitors will be prompted for feedback, e.g., “Feedback Tab,” “Weekday Feedback Request,” “Support Site Only,” and so on.
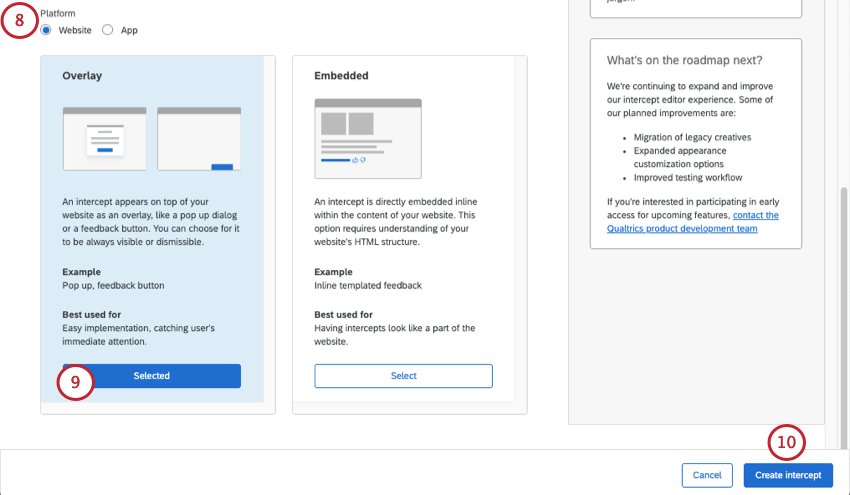
- Website will give you several options of intercepts that work well for websites, with each option supporting both desktop and mobile view.
- App will let you select Embedded App Feedback, which is compatible with the Mobile App SDK.
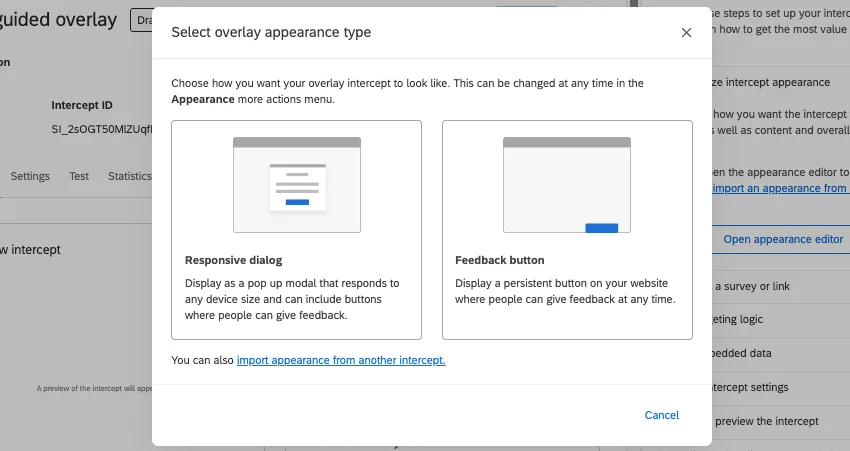
- Overlay: This option lets you choose between a Responsive Dialog and a Feedback Button. Qtip: You don’t select between the feedback button and responsive dialog until later, in step 11, when you edit the appearance.

- Embedded: This option gives you access to Templated Embedded Feedback.
Qtip: As you progress, the guidance sidebar will show you required steps, as well as steps you’ve already completed.
- Responsive Dialog
- Feedback Button
- Templated Embedded Feedback
- Embedded App Feedback Qtip: The steps “connect a survey or link” and “CSS selector” will also differ between intercept types. See linked pages for details on your chosen intercept.
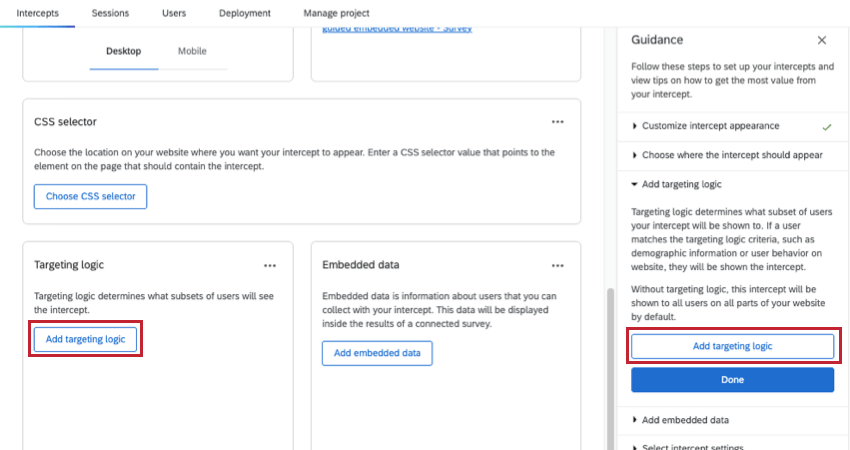
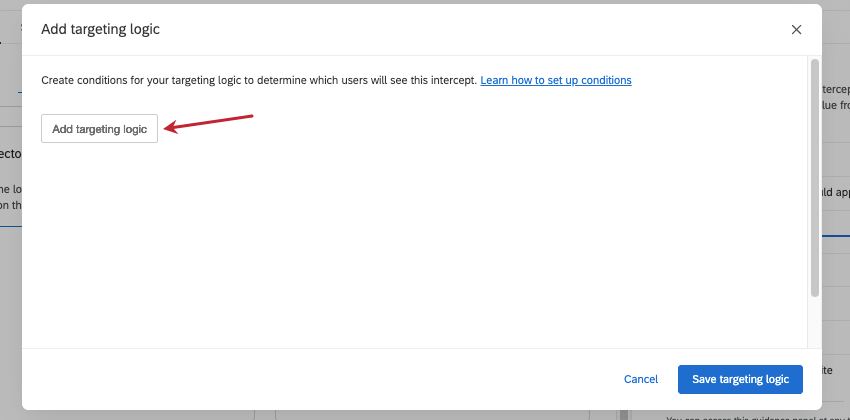
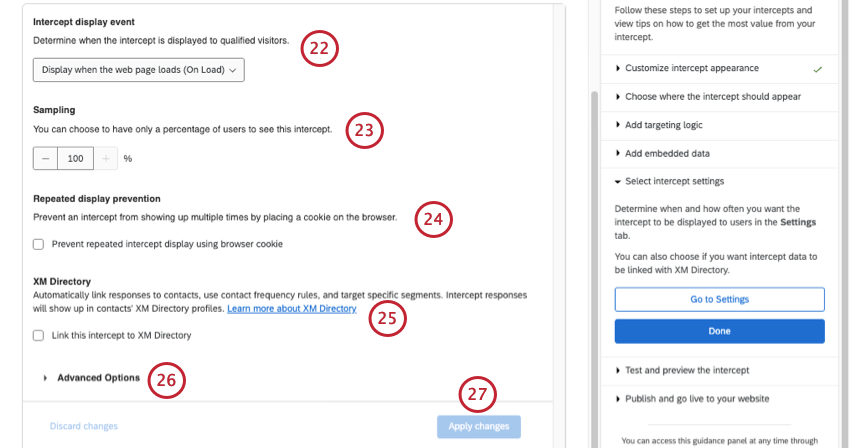
Qtip: You can limit the creative’s appearance based on a lot of different information, from cookies placed on the browser, to whether it has already been displayed to website visitors recently, to the URL of the page, and more.
Qtip: You can press Shift on your keyboard when clicking the plus sign ( + ) to create separate logic sets. For more details on building conditions, see Advanced Action Set Logic.
Qtip: Guided intercepts automatically include the embedded data Q_SR_ID and Q_SR_PlaybackUrl, which are for Digital Experience Analysis. These fields are included even if you don’t have Digital Experience Analysis on your license to ensure a smooth transition if you do decide to enable this feature. Read more about these fields.
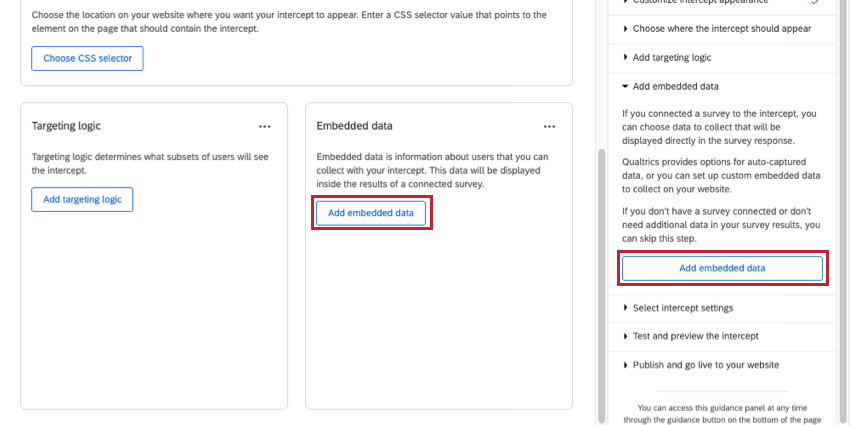
Qtip: Learn more about different types of embedded data in Website & App Insights.

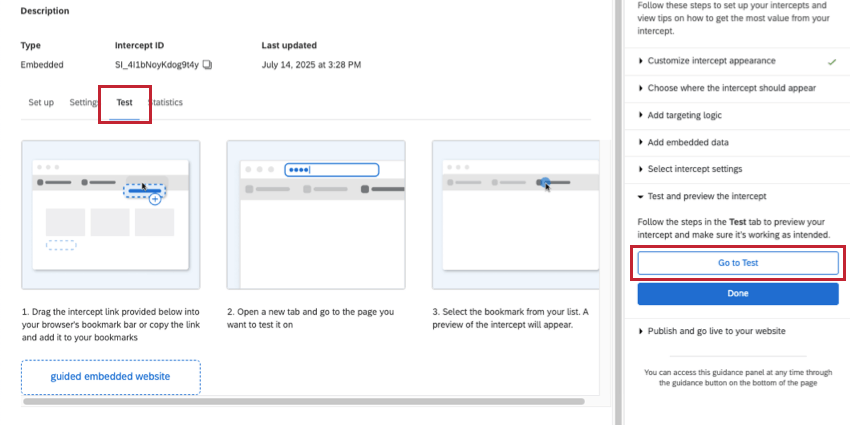
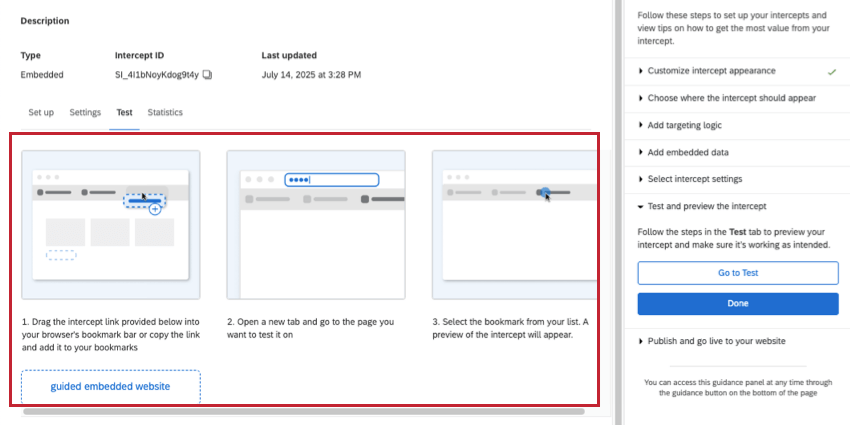
Qtip: Learn more about testing unpublished intercepts.
Locating Guided Intercepts in a Project
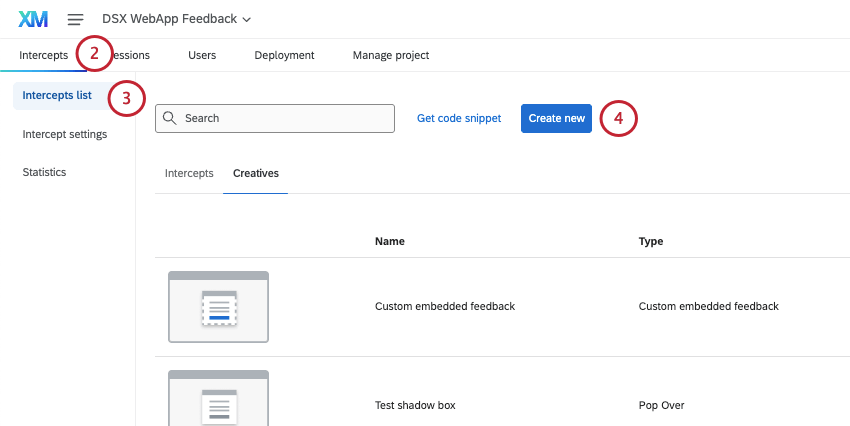
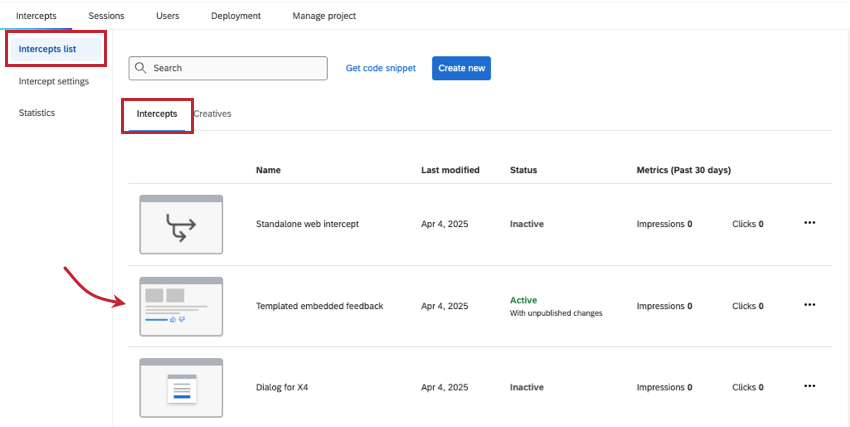
Once a guided intercept is created, it can always be found in the Intercepts section of the Intercepts list.

For more on managing intercepts (such as copying, deleting, and more), see Managing Intercepts in the List.
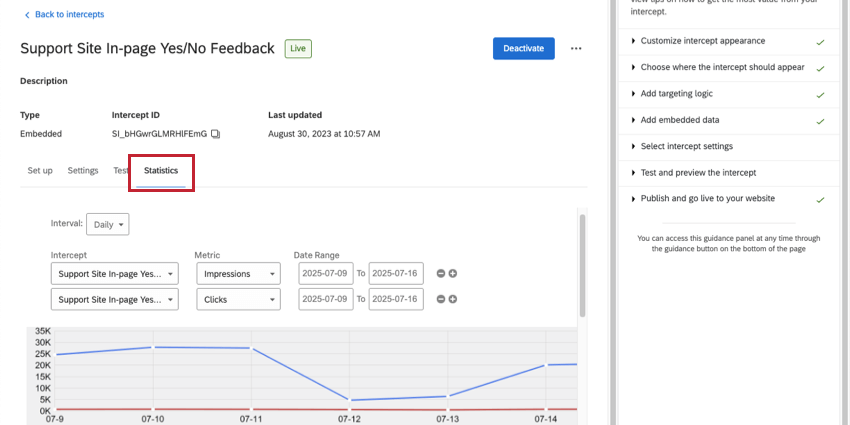
Viewing Statistics for Guided Intercepts
In the Statistics section, you’ll see the clicks and impressions on your guided intercept, and be able to filter different time periods you’re interested in.
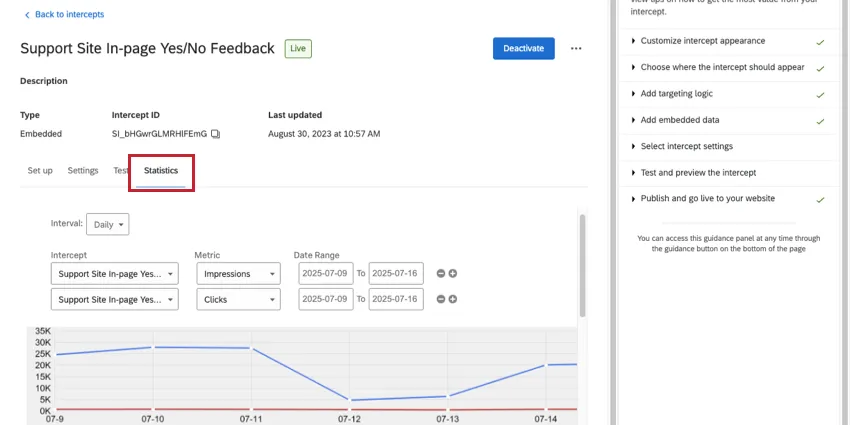
For more on what clicks and impressions mean, see Statistics in Website / App Insights Projects.
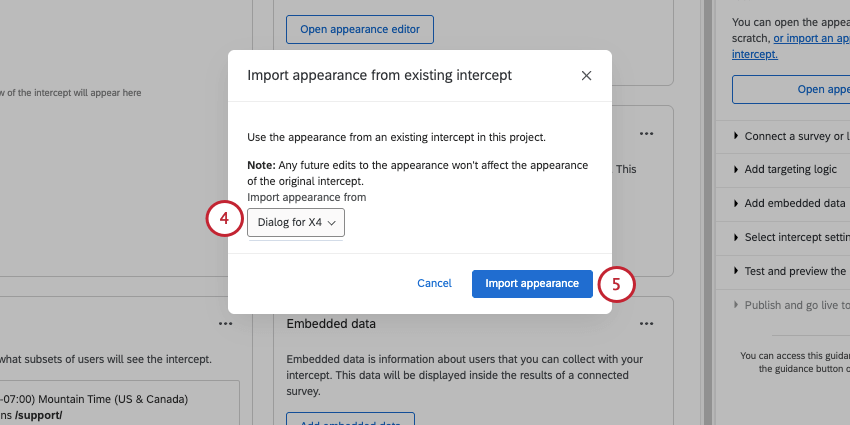
Importing Details from Another Guided Intercept
Rather than having to set up your guided intercept from scratch, you can copy details from another intercept. You can copy details from any other guided intercept in the same project.
You can import the following details from one intercept into another:
- Appearance (for feedback buttons and responsive dialogs only)
- Targeting logic
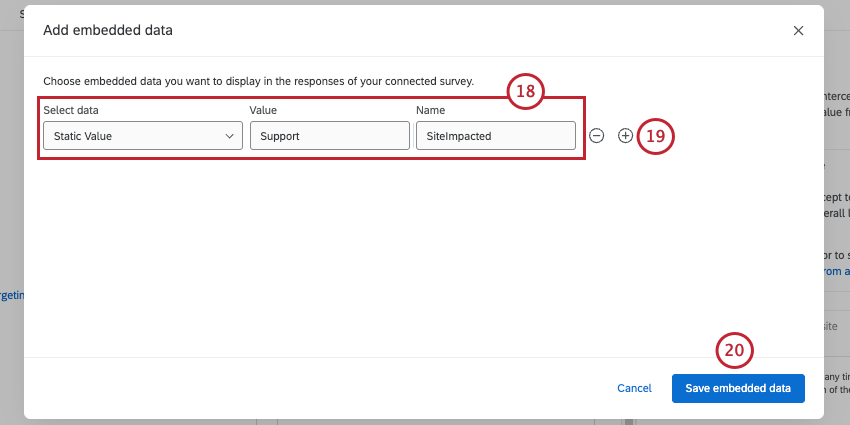
- Embedded data
Importing any of these details will not affect the original intercept you’re copying from. Edits made to each intercept will be separate.
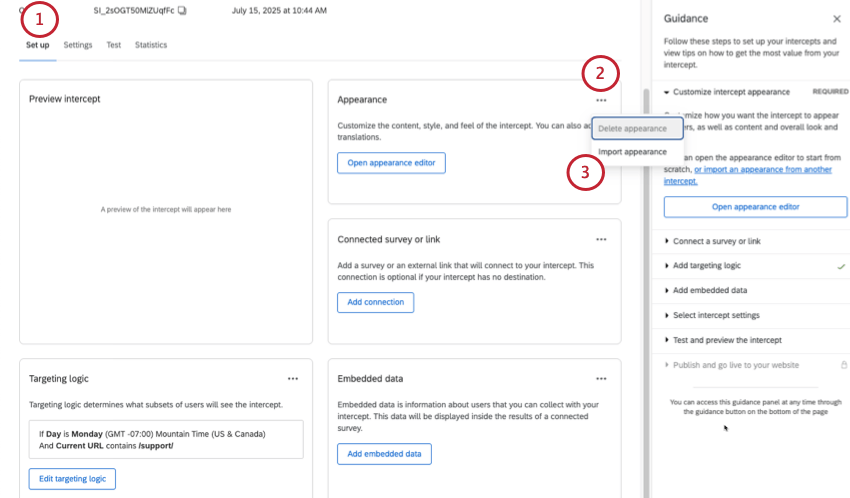
Qtip: You can also import details from the guidance sidebar and a few other places during intercept setup.
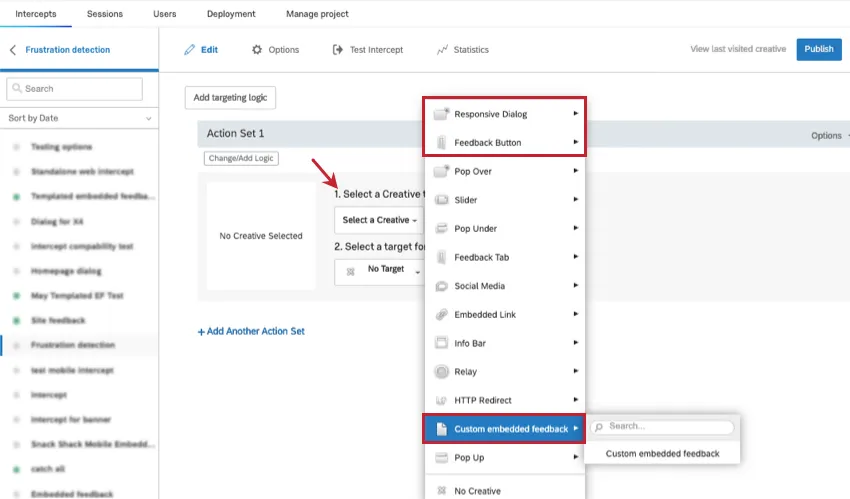
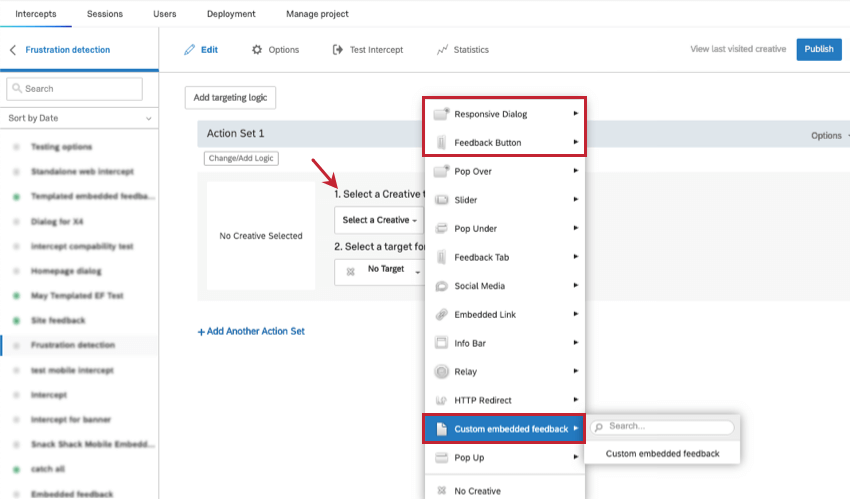
Action Sets
You cannot create multiple action sets with a guided intercept, but that’s because many of the features you’d use multiple action sets for are already built directly into the guided setup. For example, you don’t need to make separate creatives for each screen size or language on your website.
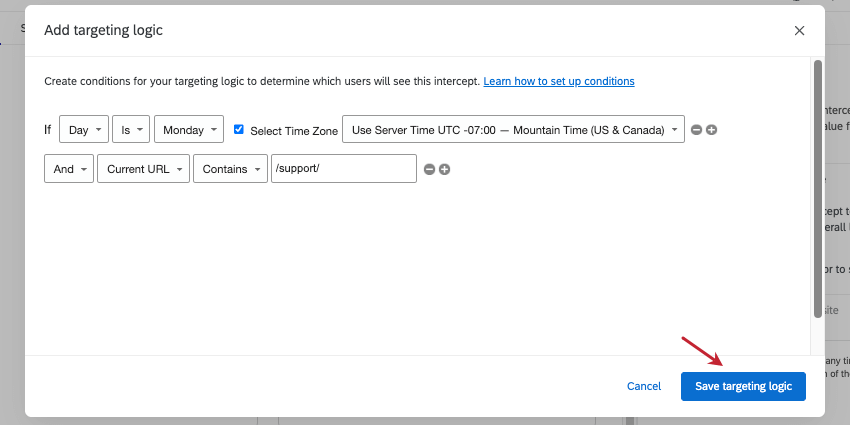
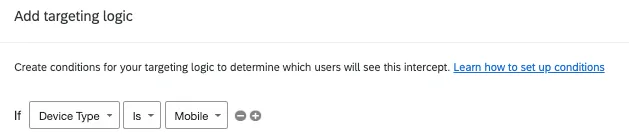
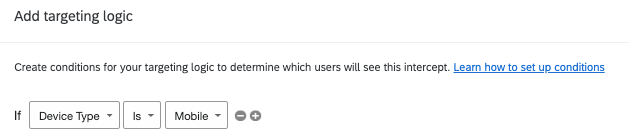
Example: You want mobile users to see a responsive dialog, but web users to see a feedback button. All you have to do is create one of each, then give each guided intercept unique targeting logic based on device type. Here is an example of the responsive dialog’s logic:
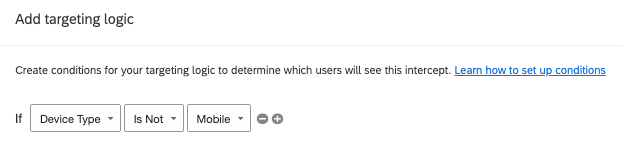
Here is an example of the feedback button’s logic:

In addition, while you can’t have multiple action sets with a guided intercept, you can add advanced targeting logic. That means guided intercepts can have multiple conditions in multiple logic sets, as shown below.

You can use any type of digital logic with a guided intercept, including user info conditions, browsing session, website, date time, Qualtrics survey, intercept, and frustration behaviors. The only exception is “this action,” which makes sense, because there aren’t multiple action sets to reference.
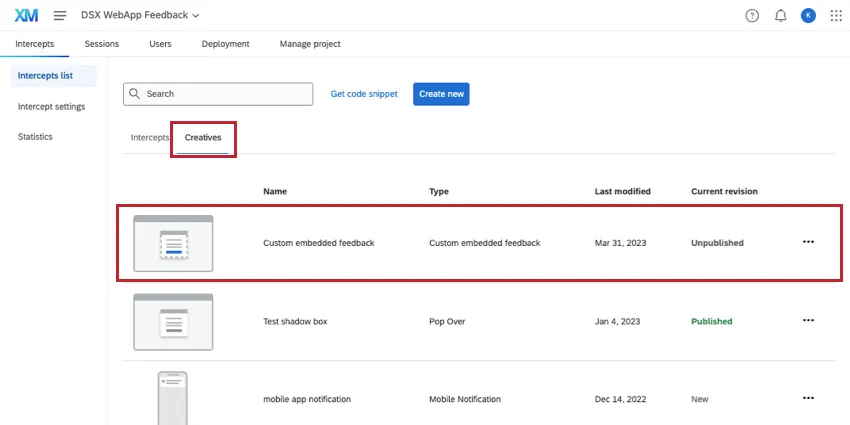
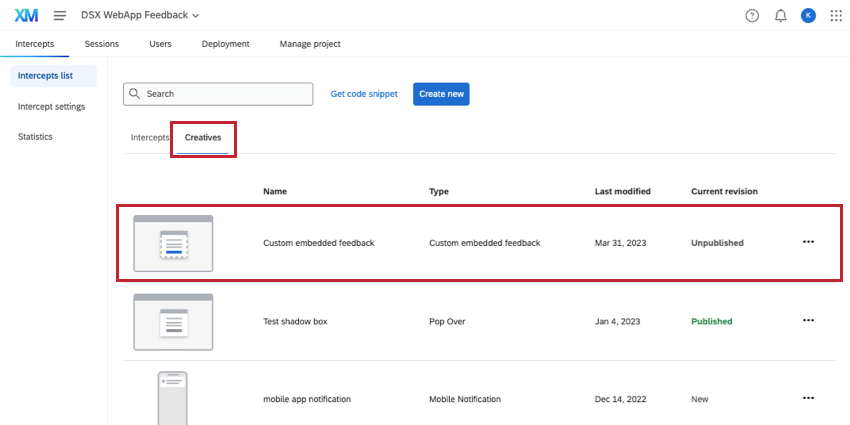
Guided Creatives vs. Guided Intercepts
If you selected the responsive dialog, feedback button, templated embedded feedback, or embedded app feedback in the Creatives section instead of the guided setup section, it will act differently from the guided intercept setup. In this case, we’ll call them guided creatives instead.
Guided creatives are different from guided intercepts in the following ways:
- They appear on the Creatives side of the Intercepts list, not the Intercepts section.
- They can be added to a standalone intercept as its Creative.
- Because of this, when you make a guided creative, you can’t immediately add targeting logic or embedded data. Instead, this happens after you add it to a standalone intercept.
Qtip: We do not recommend making a guided creative unless you want to use an existing intercept with a responsive dialog, feedback button, templated embedded feedback, or embedded app feedback. Instead, create a guided intercept.
Approvals
Responsive dialog, feedback button, templated embedded feedback, and embedded app feedback can be used with approval rules.
Guided intercepts only follow intercept approval requirements.
Guided creatives only follow intercept approval requirements.
FAQs
What’s the difference between standalone intercepts, guided intercepts, and guided creatives?
What’s the difference between standalone intercepts, guided intercepts, and guided creatives?
Guided intercepts are when you create features like responsive dialogs, templated embedded feedback, feedback buttons, and embedded app feedback using these steps. Also known as guided setups, guided intercepts combine the visual element of a creative and the settings of a creative into one easy-to-follow flow that will guide you from start to finish.
Guided creatives are when you create features like responsive dialogs, templated embedded feedback, feedback buttons, and embedded app feedback using these steps instead. With a guided creative, you need to create a separate intercept to pair it with. You still get the improved creative editor, but not the rest of the guided setup.
I created a responsive dialog as a creative, but I want to use it as a guided intercept instead. Can I switch it over?
I created a responsive dialog as a creative, but I want to use it as a guided intercept instead. Can I switch it over?
Can I save guided setups to the library?
Can I save guided setups to the library?
That's great! Thank you for your feedback!
Thank you for your feedback!