
Panelist App (Audience Management)
What's on this page
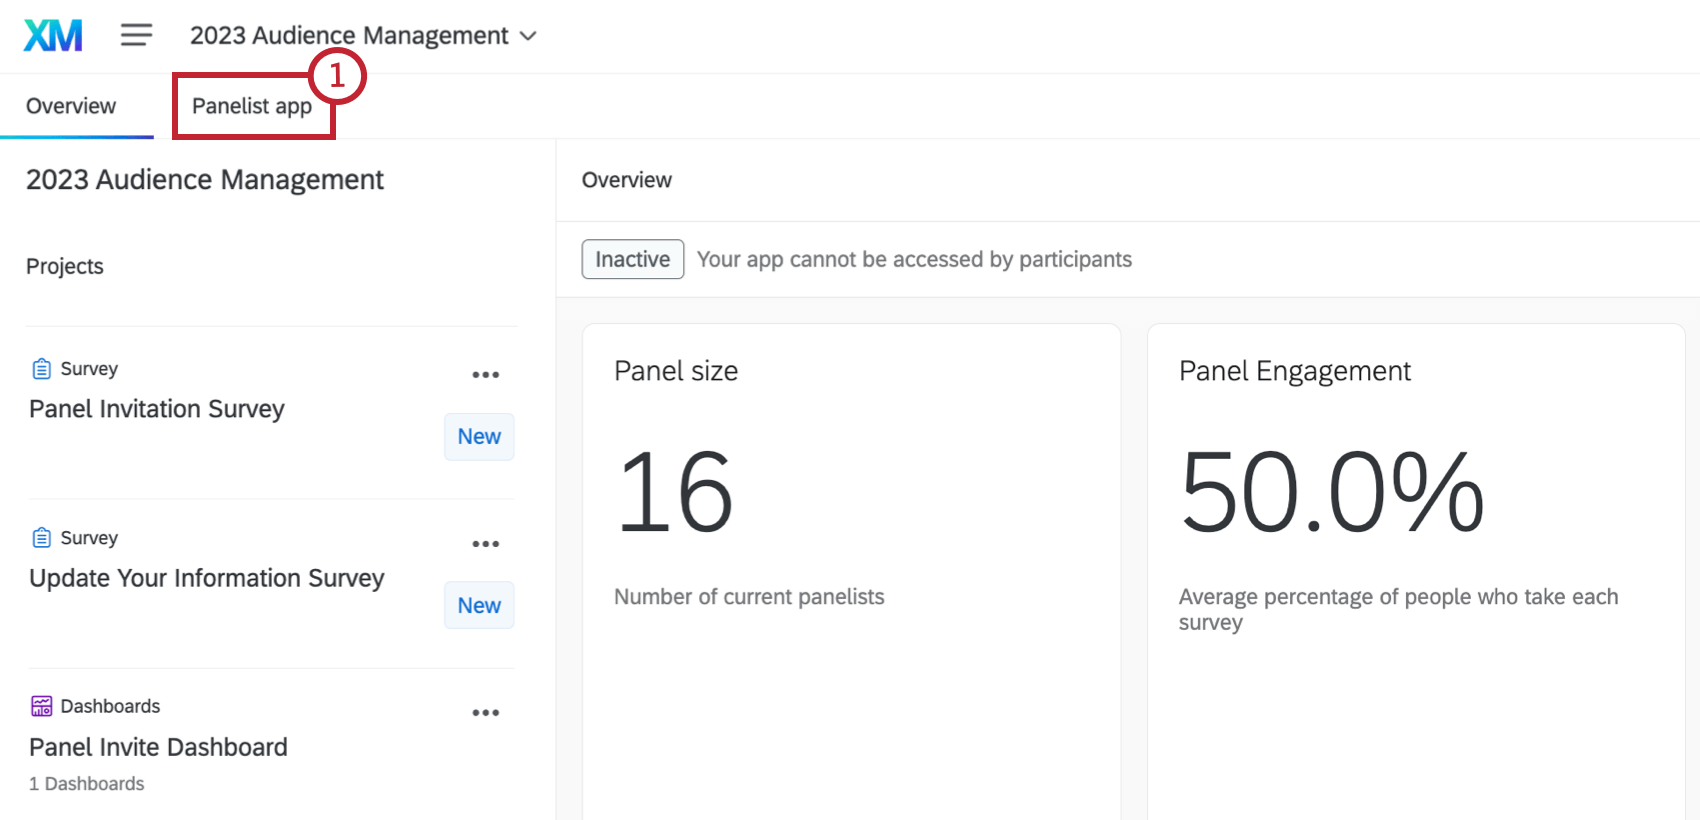
About the Panelist App
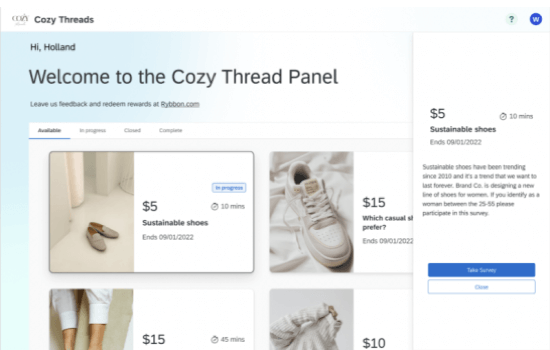
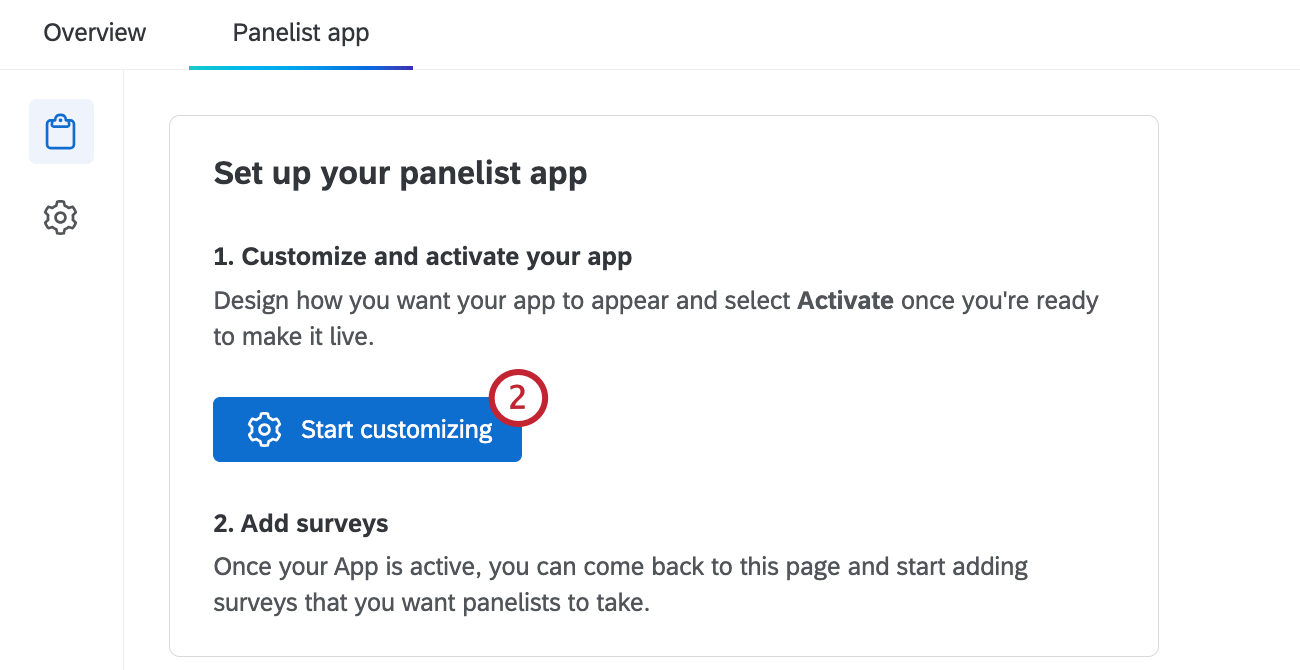
You can customize the app that panelists use to see available studies. This page covers how to set up the app and add survey projects. Once the app is set up, panelists can use it as a centralized place to view all surveys available to them.
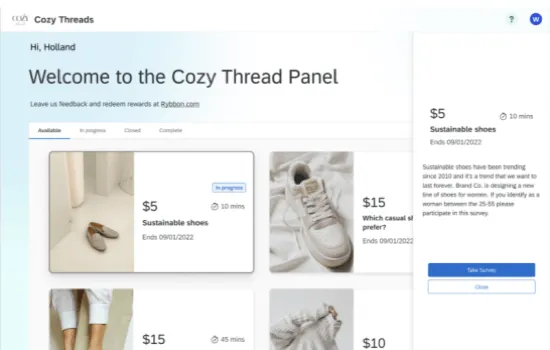
You can share a link to the app with panelists or choose to notify them when new surveys are added to the app. To access the app, panelists can sign in to their existing account or create a new one.
Qtip: If you have a vanity URL set up for your brand, your subdomain and brand will be used by default within the panelist app URL. If your brand doesn’t have a vanity URL, your panelist app will use a Qualtrics URL by default. If you are interested in setting up a vanity URL, contact your Brand Administrator.
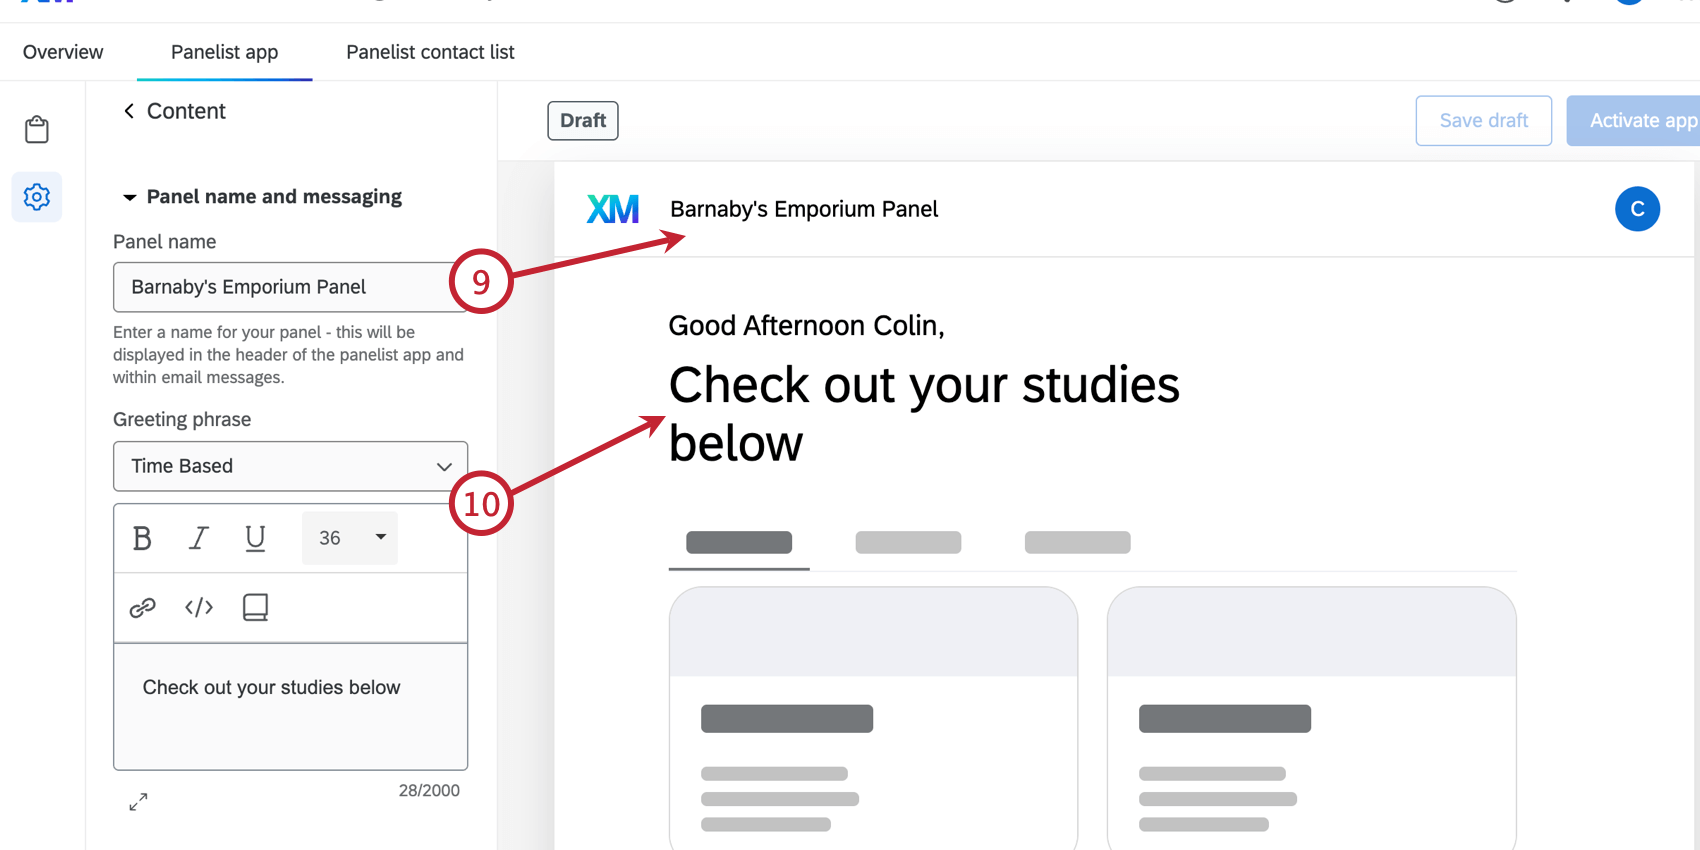
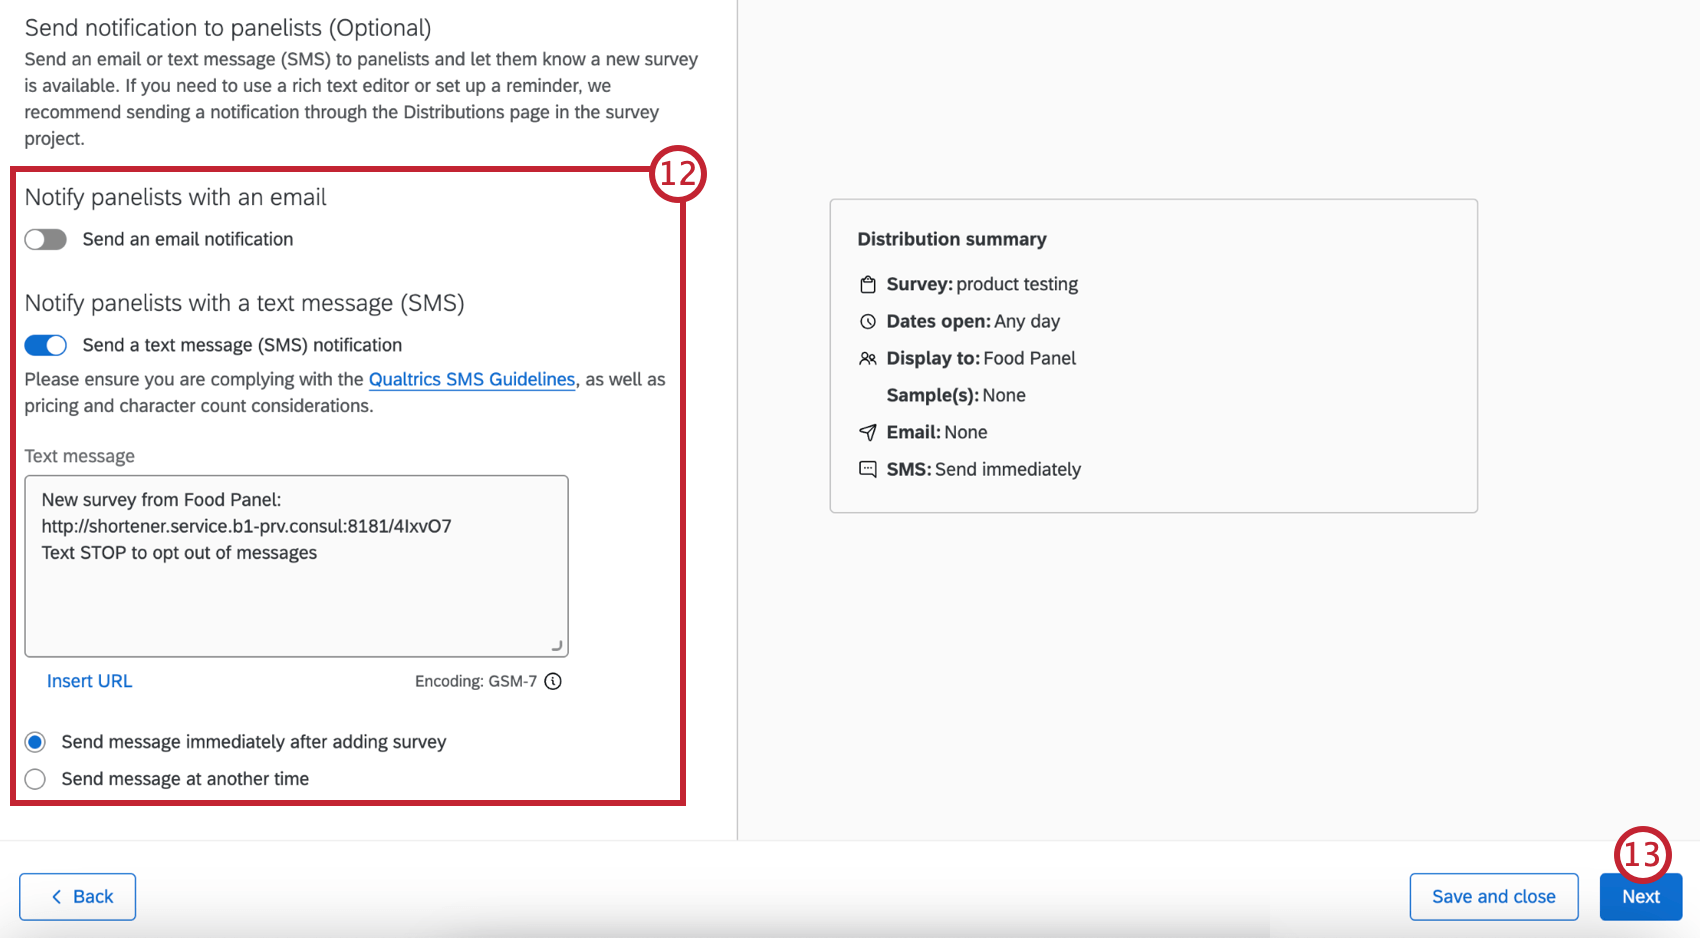
Qtip: Click the book icon to load a message from your library. See Library Messages for more information on adding messages to your library.
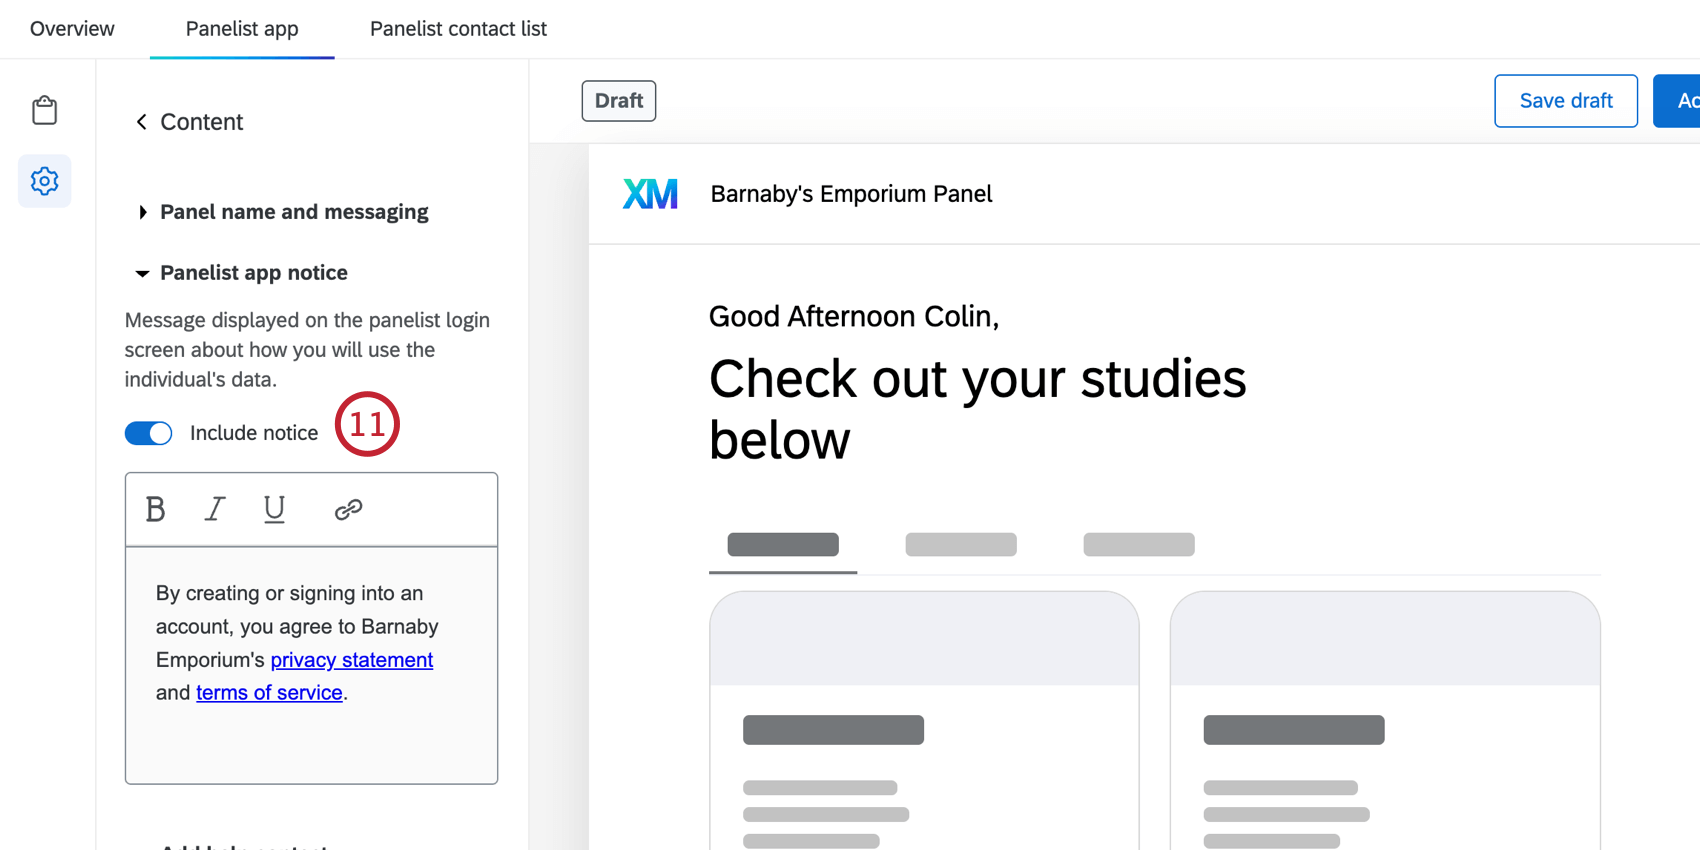
Qtip: You have to customize the default notice message. You won’t be able to activate the app until you do.
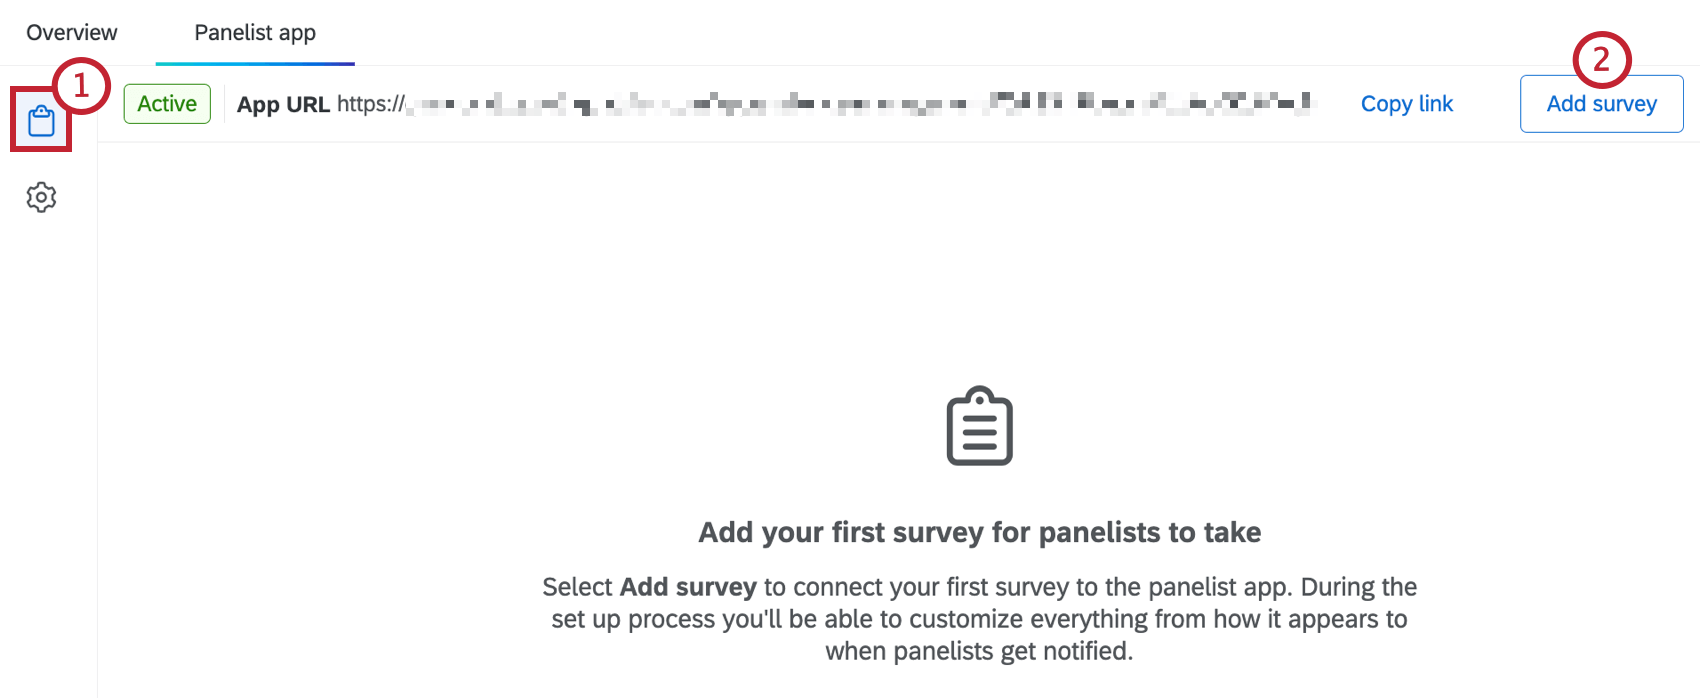
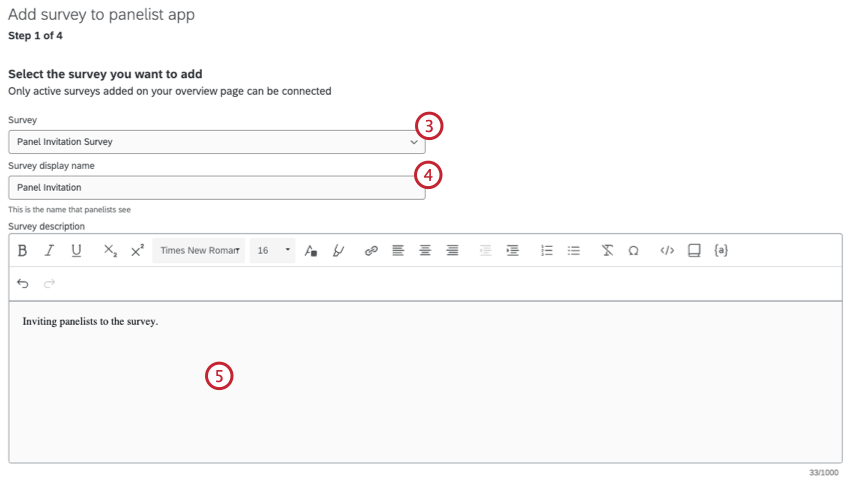
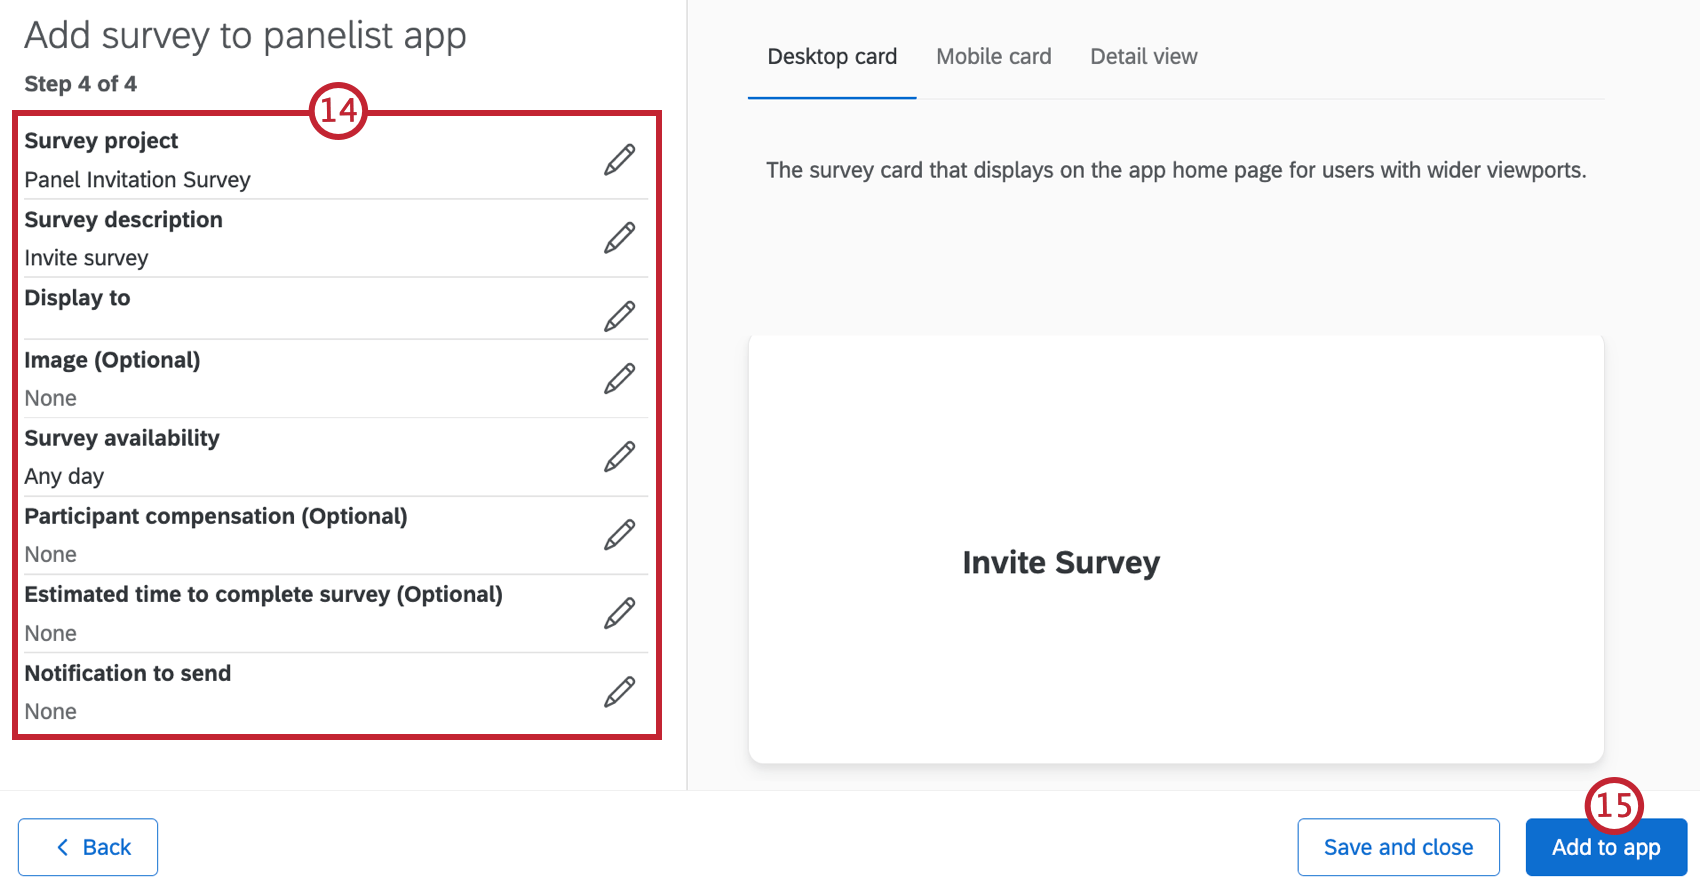
Adding Surveys to the App
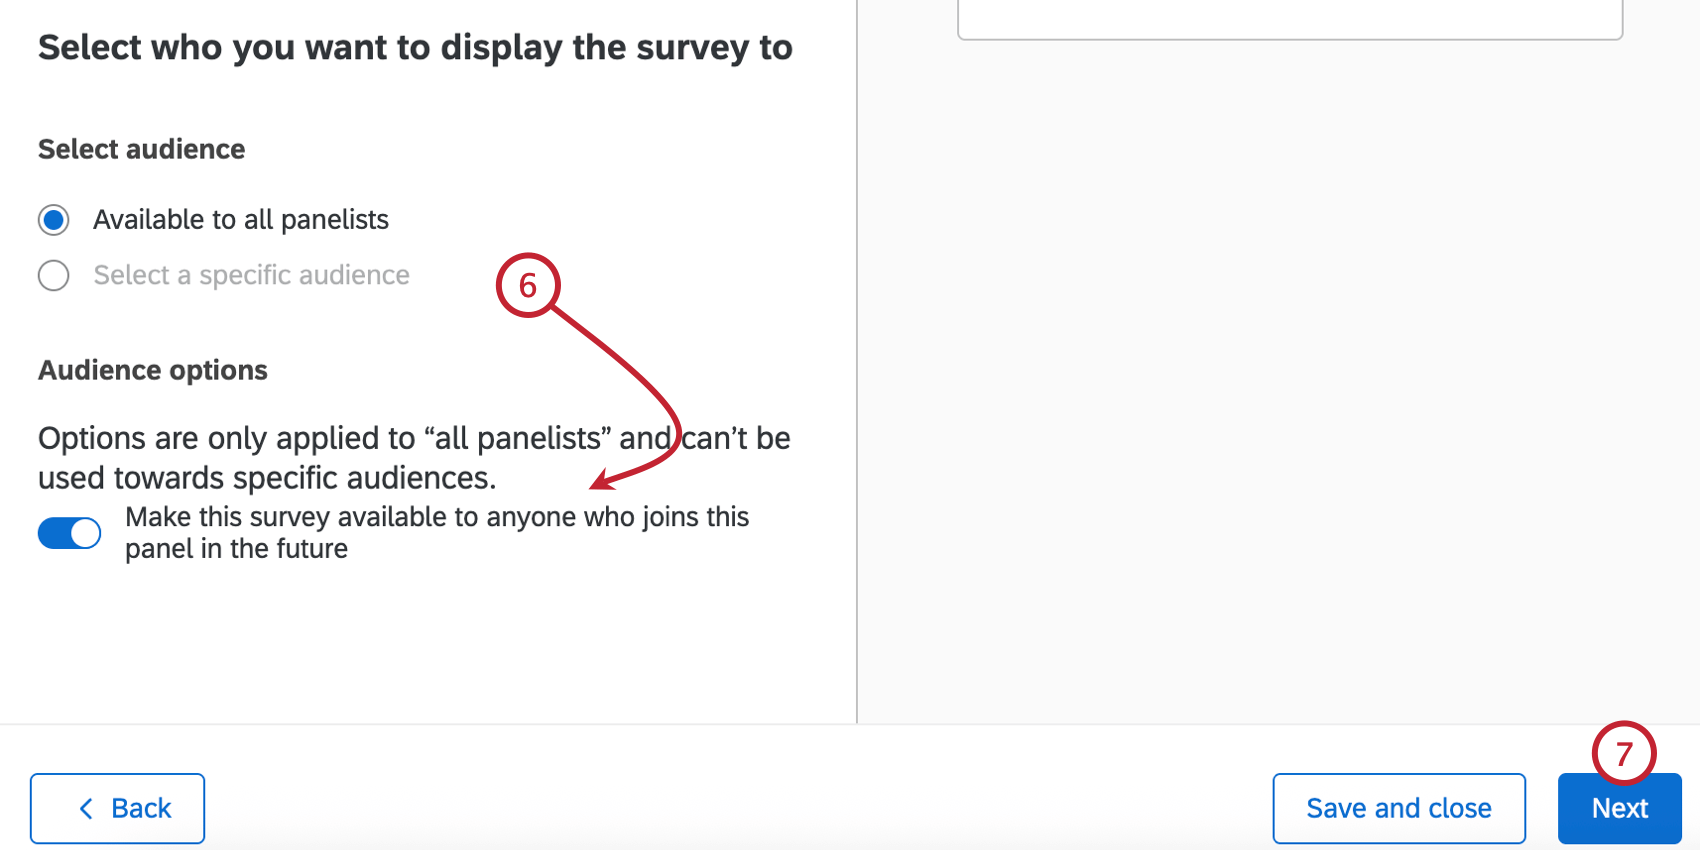
- Available to all panelists: Display the survey to all panelists. Qtip: By default, this option only displays the survey to current panelists. If you’d like this survey to be automatically displayed to new panelists, then enable Make this survey available to anyone who joins this panel in the future.

- Select a specific audience: Display the survey to only a specific sample.

- Edit survey: Edit the survey in the survey builder.
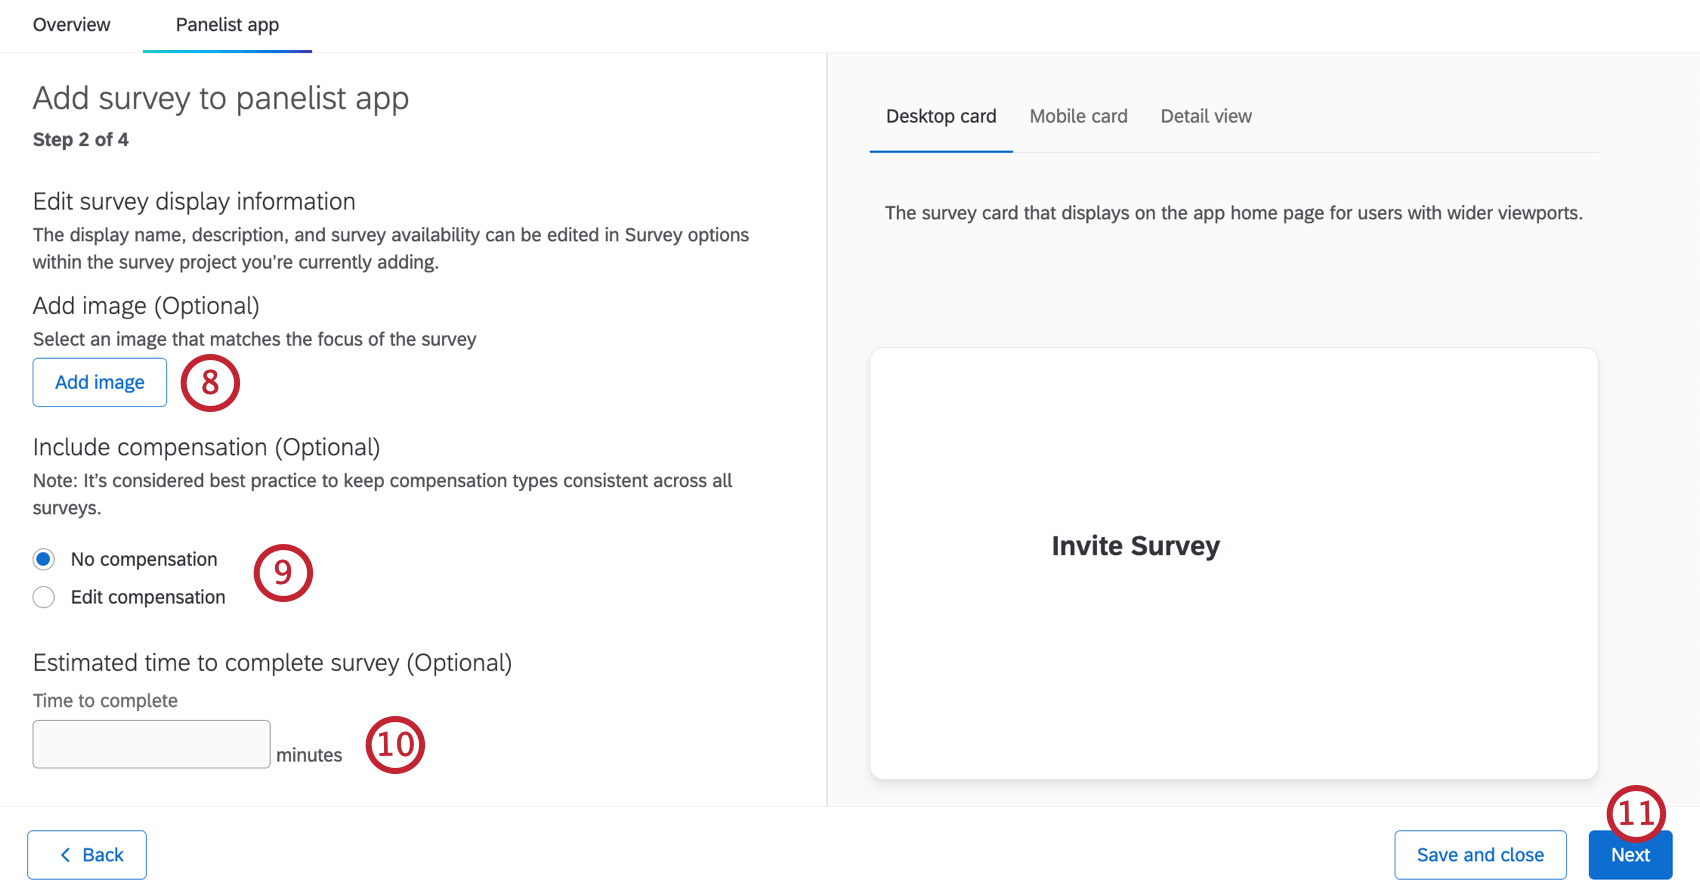
- Edit survey display: Change the display settings for the survey.
- Remove from panelist app: Remove the survey from the panelist app.
After the app is set up, panelists can use the link to access it. They can either log in with an existing panelist account if they’ve already created one, or create a new one. After logging in, they’ll be able to view and access the studies available to them.
Adding App Translations
You can add translations to make the panelist app available in additional languages. The language the app is displayed in is based on the language each panelist is assigned within the contact list.
Click the Translations tab to start adding translations.

Adding app translations uses the same process as adding survey translations. For instructions, see Manually Translating a Survey.
That's great! Thank you for your feedback!
Thank you for your feedback!