
Transactions
What's on this page
About Transactions
Transactions allow you to record interaction data about events associated with your contacts by representing a specific interaction at a specific moment in time. Transaction data serves as a rich data source to understand how customers interact with your brand and offers deep insights into past behaviors. Once you have transaction data in Qualtrics, you can distribute surveys that are customized based on this transaction data, create segments, and target workflows based on transaction data.
Transactional data is similar to embedded data, however, it allows you to record multiple values for the same field without overwriting historical values. You can manually upload transactional data, or save survey response data as a transaction for your contacts using workflows.
Example: The customer Barnaby Smith is a contact in your directory. He visits one of your stores in Provo, Utah and his purchase information is saved to your ERP, which is then imported into Qualtrics as a transaction. Later that week, Barnaby visits your store in Lehi, Utah and makes a different purchase, which is also imported into Qualtrics as a transaction. If this data was imported as standard embedded data, then we would not be able to send Barnaby two separate surveys based on his interactions since the embedded data fields would be updated to have the most recent values. However, since we used transactions, we can save information about both of these interactions without overwriting any data. Each interaction data value can be used in a survey when a distribution targeting a specific transaction is triggered from the Distributions tab or via API.
Attention: Transactional data must be uploaded within the Transactions tab, through an automation, or within a Workflows task. Manual edits to contacts within your directory will not be saved as transactions.
Transactions are a feature exclusive to XM Directory.
Preparing a Transaction File for Import
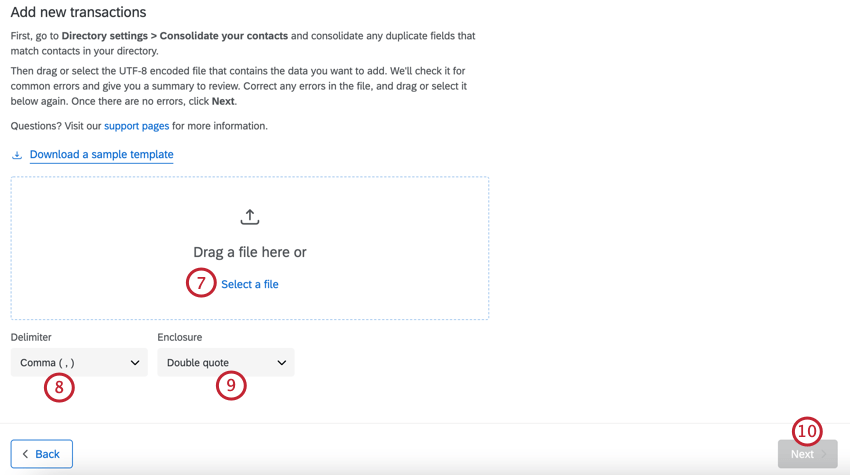
To save transaction data in Qualtrics, you can import a file containing your data. This section covers how to format your file so it imports correctly into Qualtrics. When saving your file, make sure you’ve saved it with UTF-8 encoding.
Qtip: If you experience issues with importing your file, see Troubleshooting File Imports for more information.
Template File
Qualtrics provides a template file with the correct formatting. We recommend you use this file to get started with importing transactions. To find the template file, click Download a sample template while creating your transactions.
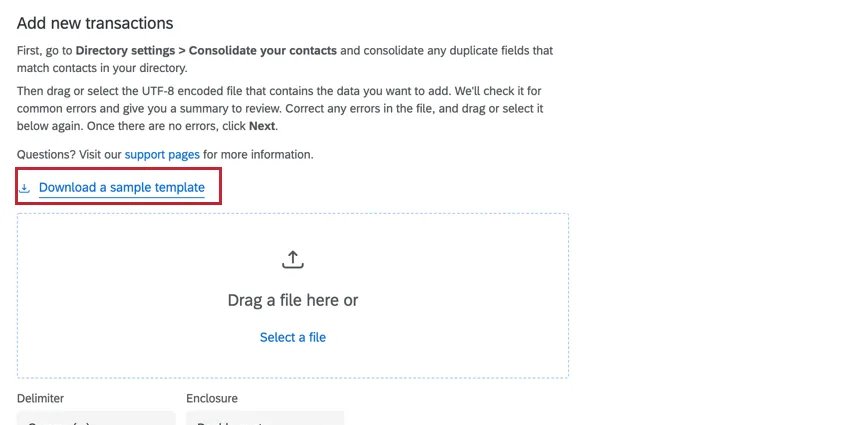
After downloading the file, open it in a spreadsheet editor such as Excel and make any necessary changes. The following sections cover required and recommended fields.
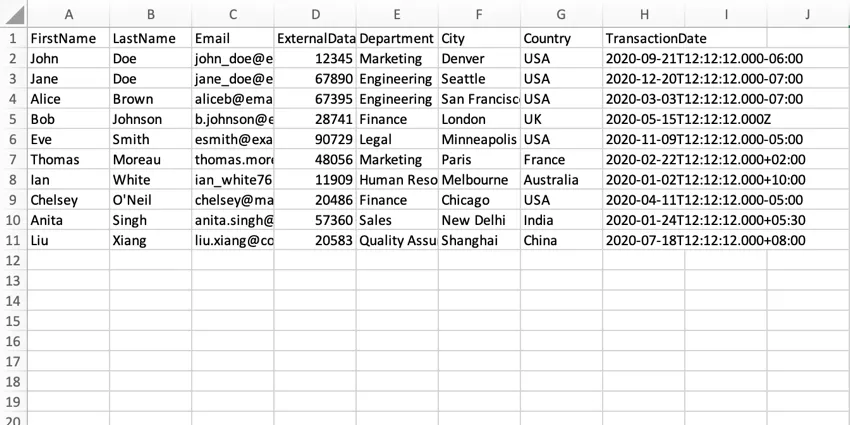
Required Fields
In your file, you must have the following fields:
Transaction Date: The datetime of the transaction. Transaction dates must be in ISO-8601 format (e.g. YYYY-MM-DDTHH:mm:ss+ZZZZ ; more information about these symbols can be found on the Date Format Syntax support page).

Example: Let’s say our transaction date is March 31, 2021 at 9:00:00AM EDT (UTC-4). This date in ISO-8601 format is 2021-03-21T13:00:00.000Z. Note how the time has been converted from EDT to UTC.
- At least 1 of the following contact fields. This could be:
- First name: The contact’s first name
- Last name: The contact’s last name
- Email: The contact’s email address.
- External data reference: A reference ID number for the contact.
You will not be able to import transactions if you are missing the above fields.
Attention: When filtering by transaction fields, only transactions with a Transaction Date from the past year will be returned. For example, if you created a transaction today, but gave it a Transaction Date set 2 years in the past, it will not be searchable in your account.
Recommended Fields
In addition to the above required fields, we recommend you include the following fields to ensure an organized and high-quality directory:
- First name: The contact’s first name.
- Last name: The contact’s last name.
- Email: The contact’s email address.
- Phone: The contact’s phone number.
- External data reference: A reference ID number for the contact.
- Embedded data: Useful embedded data fields, depending on your use case (for example, store location, customer spend, or customer address).
Qtip: We recommend you include any fields that are defined in your directory’s duplicate contact settings. If automatic deduplication fields are excluded, then a new contact will be created with the associated transaction data.
Qtip: The above fields are not case-sensitive; however, if you import a file that exactly matches the above field names, then your fields will be automatically mapped when importing your transaction.
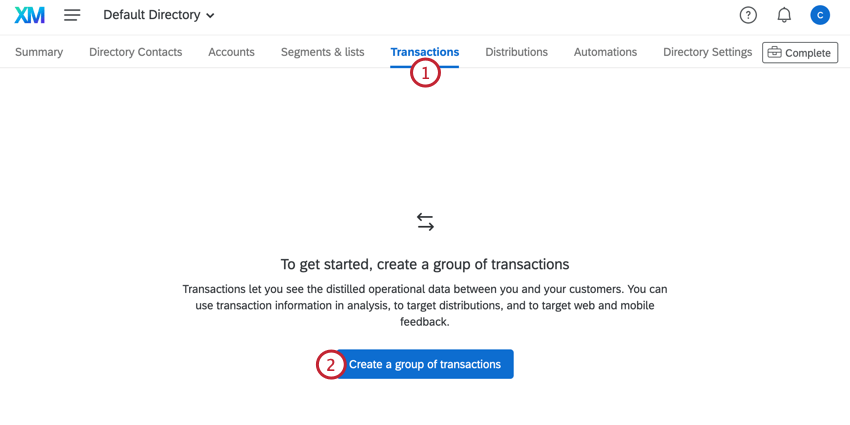
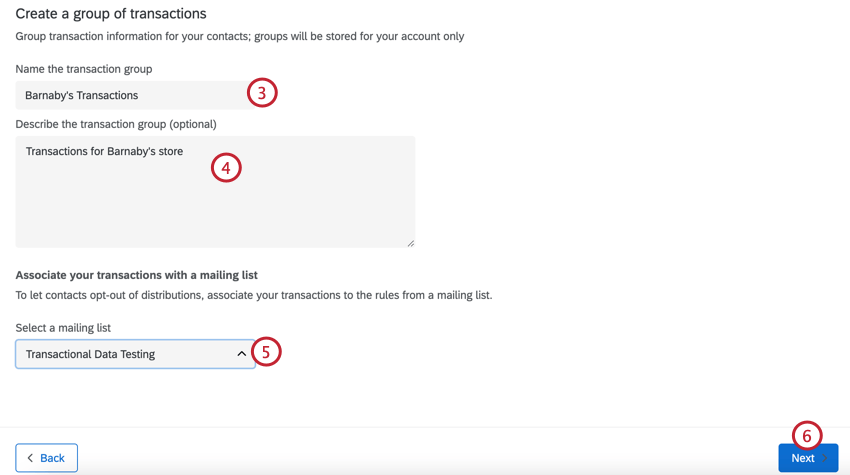
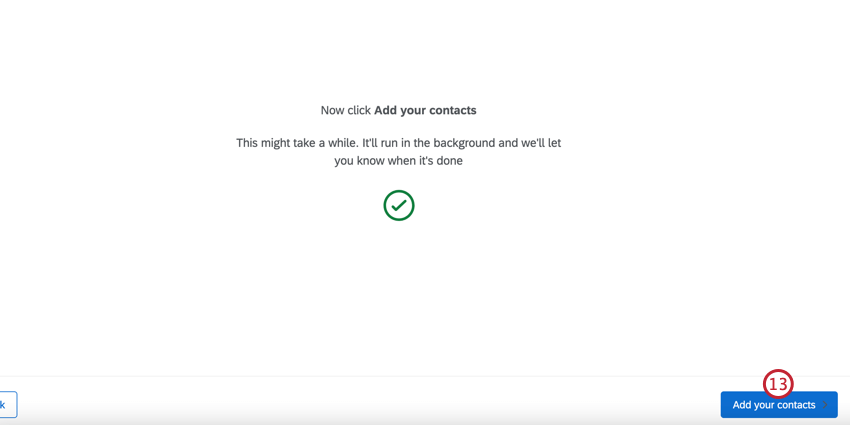
Creating a Transaction Group
A transaction group is simply a collection of transactions. You can import a file with your transaction data to save in Qualtrics.
Attention: Transaction groups are automatically deleted one year after they're created.
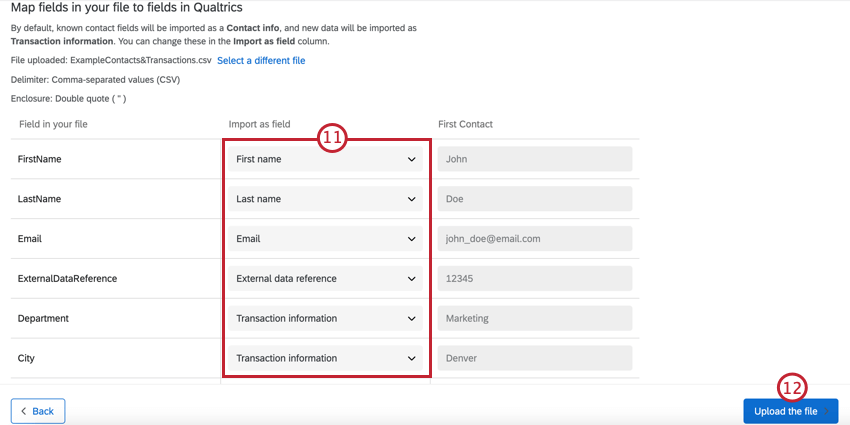
- Embedded data: Saves the field as an embedded data field with the contact. If the field does not exist, it will be created. If the field does exist, its value will be updated.
- Qtip: If your contact file has a field used as embedded data and transactional, one being upper case and one being lower case, both fields will pull into the survey data and display their respected values. If the transactional field has a value for the contact, and the embedded data field is missing a value, in the survey data, the embedded data field will display the value the contact has for transactional.

-
- Transaction information: Saves the field as transactional data with the contact. A new transaction record will be created for your contact with this transaction information and the associated transaction date.
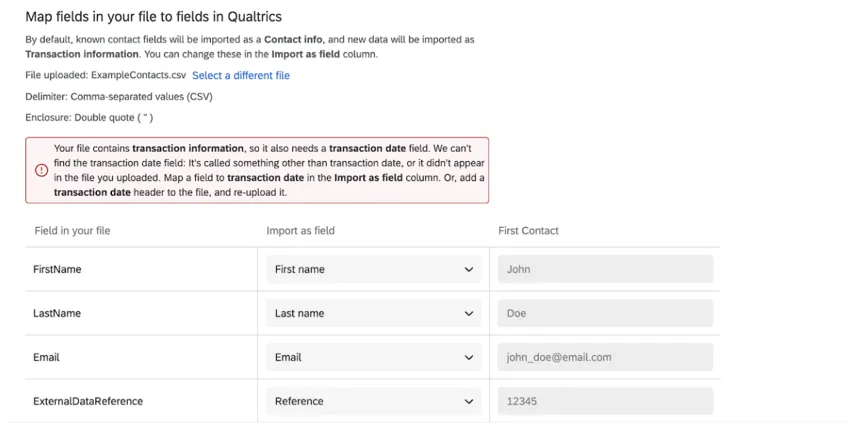
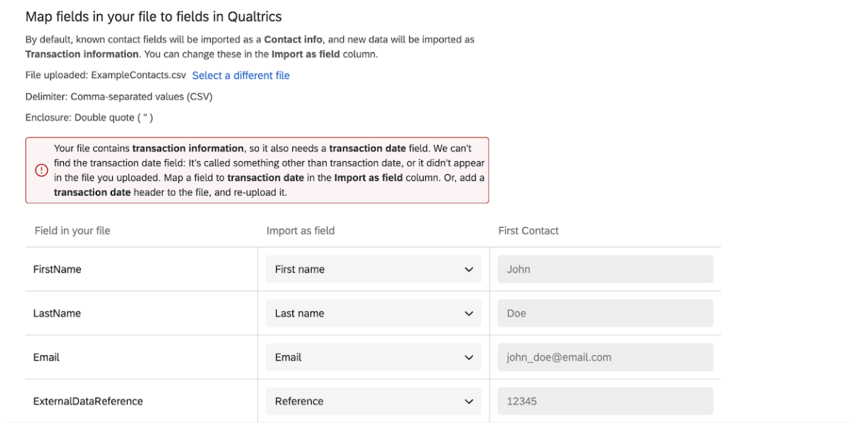
- Transaction date: The datetime of the transaction. Transaction dates must be in ISO-8601 format (e.g. YYYY-MM-DDTHH:mm:ss+ZZZZ ; more information about these symbols can be found on the Date Format Syntax support page). This field is required. Example: Let’s say our transaction date is March 31, 2021 at 9:00AM EDT (UTC-4). This date in ISO-8601 format is 2021-03-21T09:00:00-0400.Qtip: You will receive the below error if you are missing the transaction date field.
- Email: The email address associated with the contact
- First name: The contact’s first name.
- Last name: The contact’s last name.
- Phone: The contact’s phone number.
- Language: The contact’s preferred language.
- External data reference: A reference ID number.
- Unsubscribe: Used to update the contact’s opt-out status in the associated mailing list. A value of “Yes” will unsubscribe (i.e. opt-out) the contact, while a value of “No” will keep the contact subscribed to mailings (i.e. opted-in).
- Exclude from import: Excludes the field from being imported. Use this option for any unneeded fields in your file. Qtip: In addition to the required transaction date field, you must map at least one contact field. This includes first name, last name, email, and external data reference.
Qtip: If you’re running into issues uploading your file, check out the CSV/TSV upload issues page for troubleshooting tips.
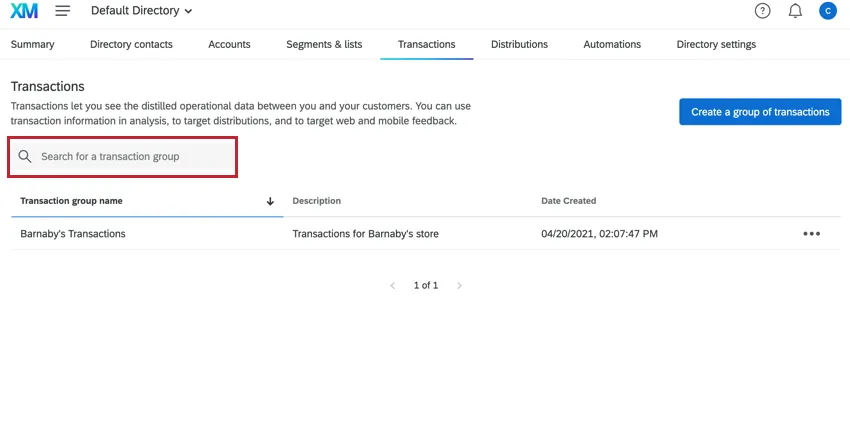
Managing Transaction Groups
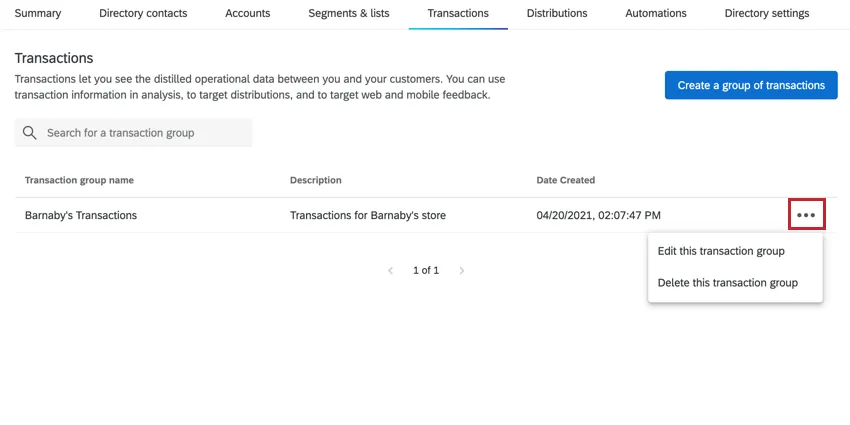
You can search your transaction groups by transaction group name at the top of the Transactions page. You can sort the table of transaction groups by name and creation date by clicking the field name in the transactions table.
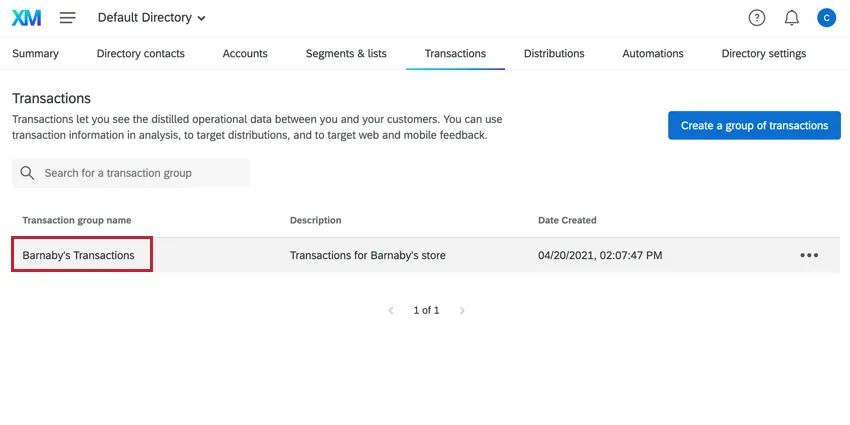
To view the transactions within a transaction group, click the group name.
You can then use the Transaction group options dropdown to perform the following actions:
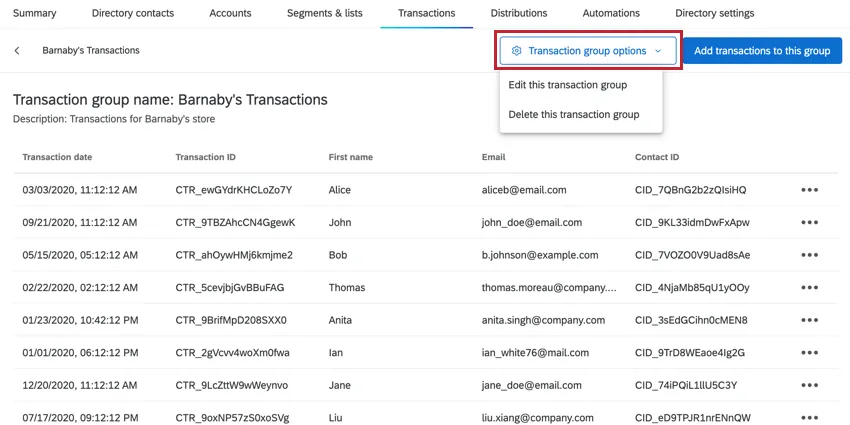
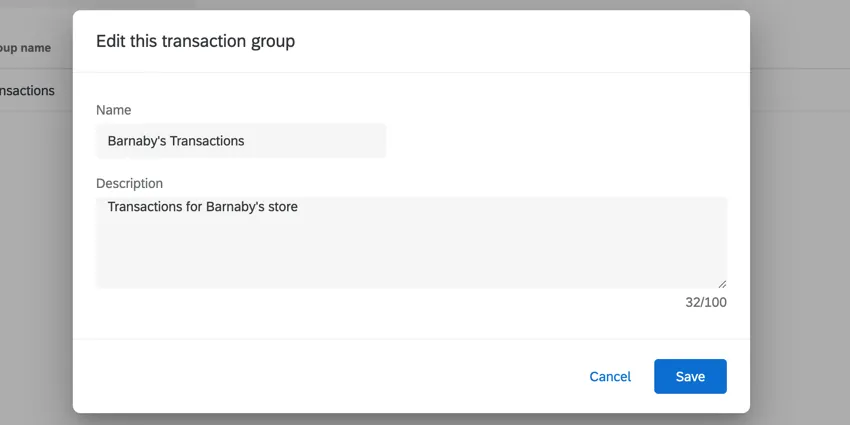
Edit this transaction group: Allows you to change the transaction group’s name and / or description.
- Delete this transaction group: Deletes the transaction group. Note that the transactions will still exist for each contact.
Qtip: These options are also available from the main transactions page.
Viewing a Single Transaction
After opening your transaction group, you can view more information about a single transaction by clicking the transaction. A window on the right hand side of the page will open with more information.
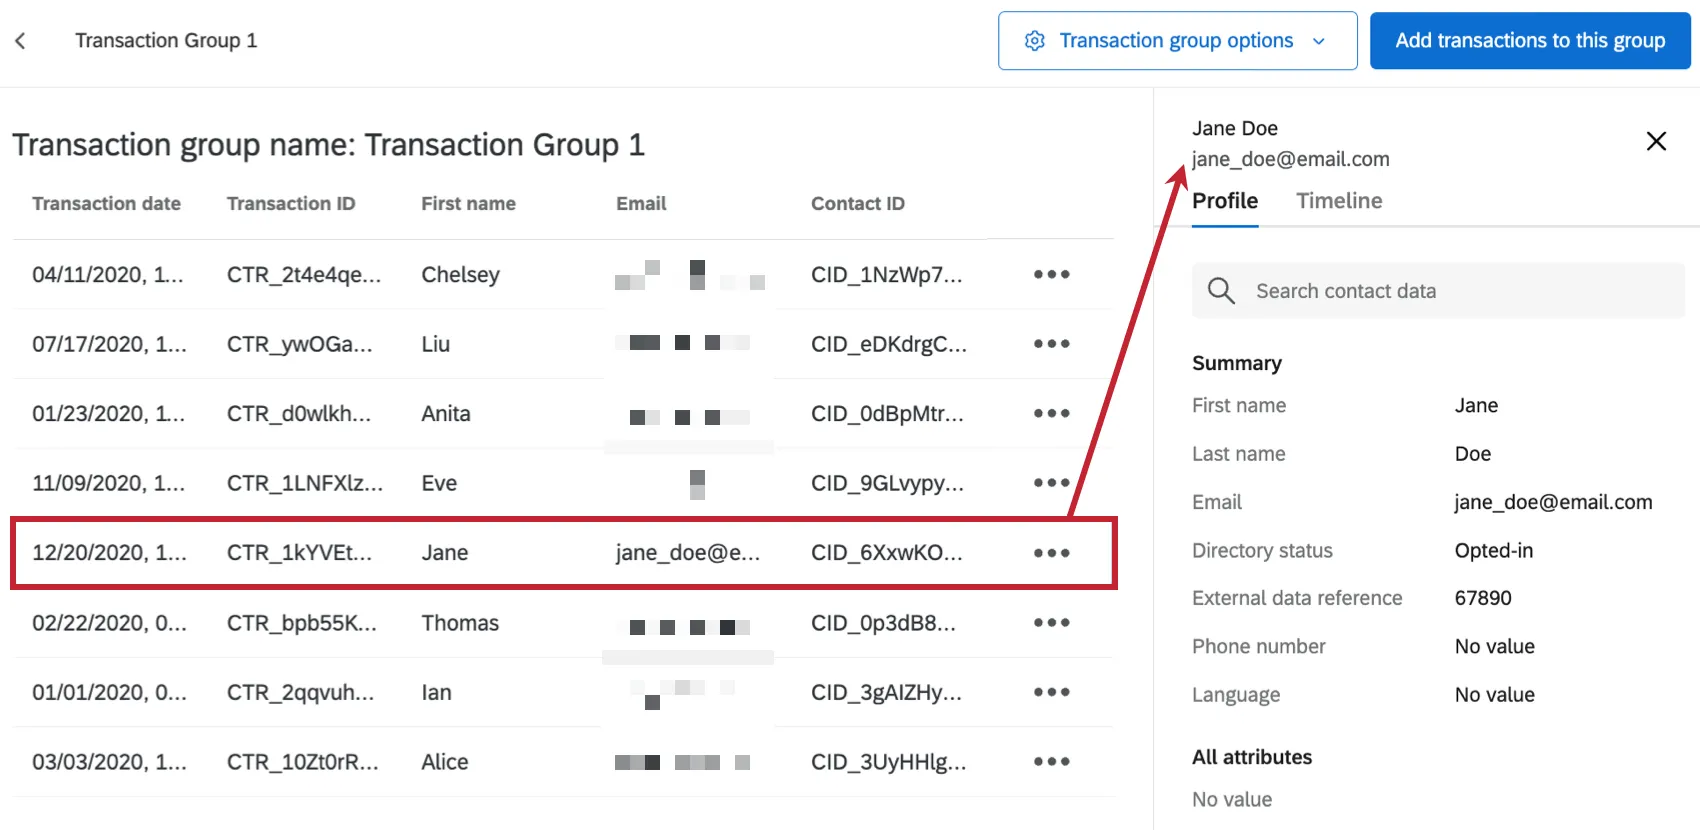
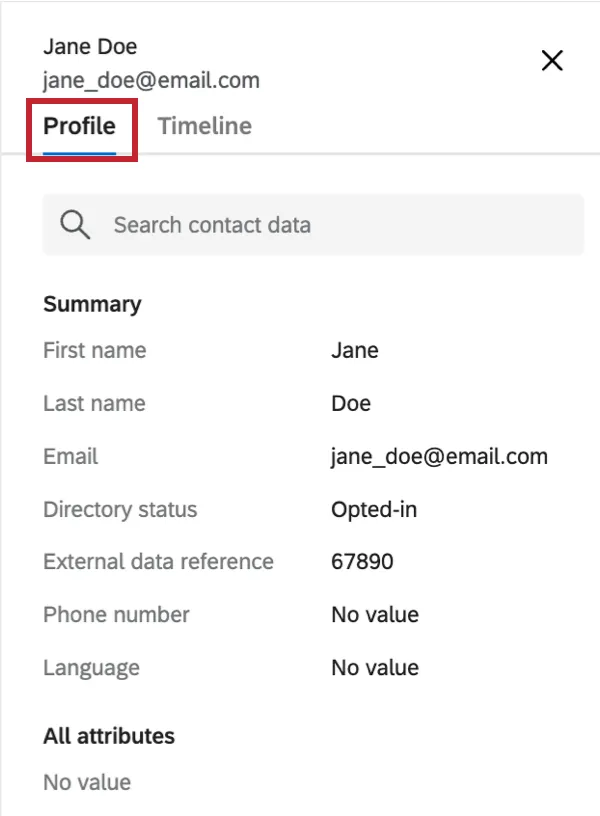
The Profile tab contains more information about the contact associated with the transaction. You can view all contact data and attributes in this window, and search for a specific field by using the search bar at the top of the window.
The Timeline tab contains a touchpoint timeline for the contact. Click on an interaction to expand it and see all associated transaction data. The transaction data associated with this specific transaction group will be listed under the “related” section, and any historical transactions for the contact will be listed below.
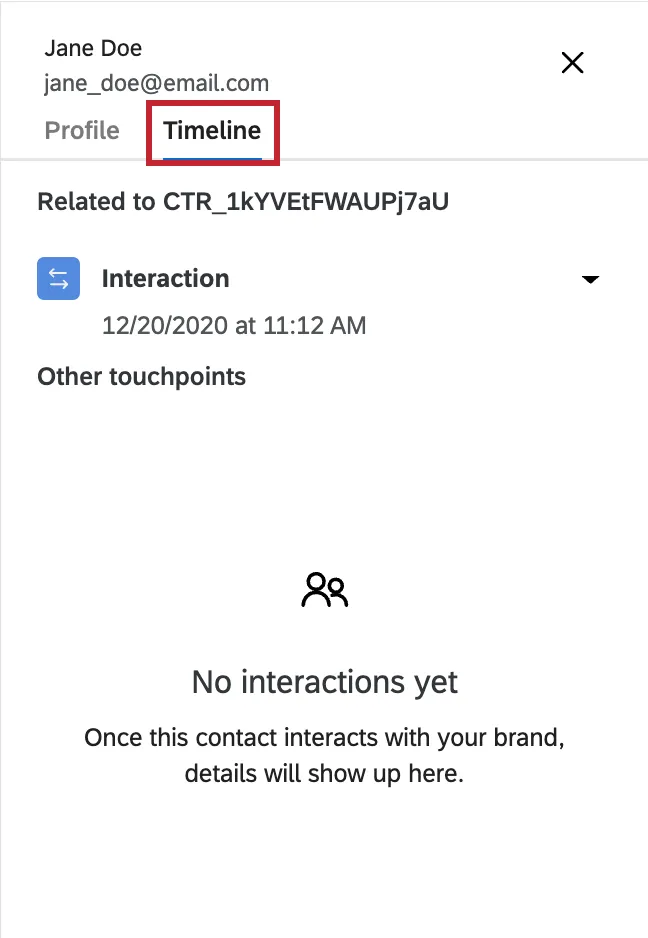
Qtip: Up to 100 transactions can be displayed on the timeline.
Qtip: Interaction times in the timeline are pulled from the browser’s timezone.
If needed, you can delete a single transaction from your transaction group. To delete a transaction, click the three dots next to the transaction and then Remove this transaction information.

Distributing to Transactions
You can send surveys and emails to your transactions from the Distributions section of XM Directory.
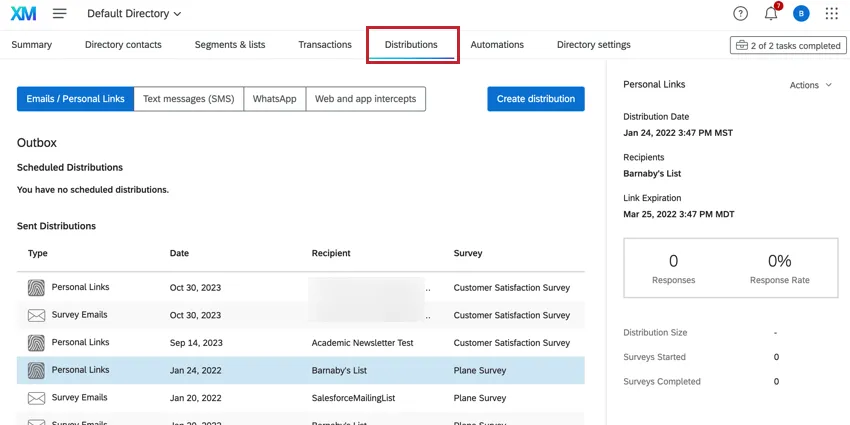
Qtip: You can only distribute to transactions from the Distributions section of XM Directory. You cannot email a transaction group from the Distributions section of a survey.
When creating your distribution, choose All Transaction Groups and then select the transaction group you want to distribute to.
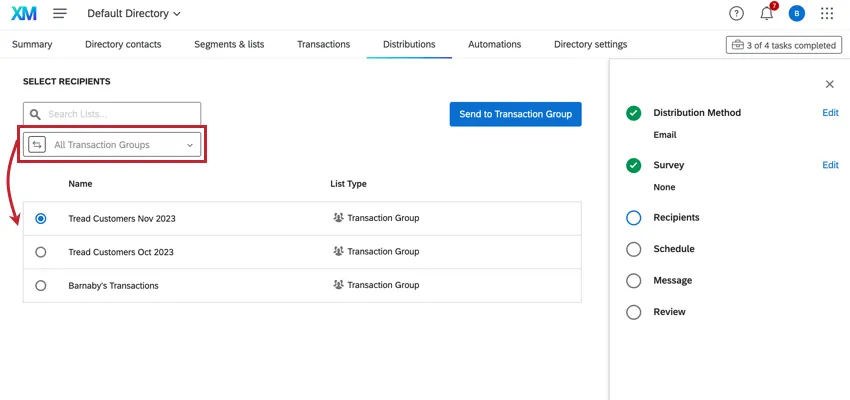
Please see the Send Emails in XM Directory support page for step-by-step instructions on creating distributions in XM Directory.
Workflows Based On Transactions
You can trigger workflows based on changes to transactions, including the addition of enrichments. You can do this using an Experience ID Change Event at the start of your workflow.
For more on transaction-based events, see Interaction Changes.
Using the Qualtrics Transactions API
Attention: The Qualtrics API is not included in all licenses. If you are an administrator, please contact your Qualtrics Account Executive if you’re interested in this feature.
In addition to importing transactions right inside Qualtrics, you can also create and manage transactions through the Qualtrics API. Check out the following API documents for more information:
- Using Transactions in XM Directory
- Create Contact Transactions
- Get Contact Transaction
- List Contact Transactions
- Append Contact Transaction
- Update Contact Transaction
- Delete Contract Transaction
Attention: Transactions created by the Qualtrics API are not visible in the Qualtrics platform. If you’d like to view your transactions within Qualtrics, use the above importing method.
That's great! Thank you for your feedback!
Thank you for your feedback!