-

Qualtrics Platform -

Customer Journey Optimizer -

XM Discover -

Qualtrics Social Connect
Ticket Event
About Ticket Events
Have you ever wished you could get an email when someone makes a sub-ticket on one of your tickets? Maybe you want your colleagues to receive an email if you change the priority of their ticket to high. Or maybe you want to know right away if a ticket’s been deleted.
Ticket events allow you to set different tasks into motion (such as emails, Salesforce triggers, or Slack messages) when something happens to a ticket in Qualtrics.
Types of Ticket Events
The following can be used to define a Ticket event:
- Comment added: Someone added a comment to a ticket.
- Status changed: Someone changed the status of a ticket.
- Priority changed: Someone changed the priority of the ticket.
- Ticket reassigned: The ticket owner was changed to someone else.
- Sub-ticket created: A sub-ticket was created for the ticket.
- Sub-ticket deleted: A sub-ticket was deleted.
- Ticket deleted: A ticket was deleted.
- Root cause changed: Someone changed the root cause they initially picked for the ticket.
- Email sent: An email was sent from the ticket using the Send Email button.
- Email received: There was a response to an email sent through the ticket.
- Follow-up details changed: Any information changed in a follow-up detail (additional questions on the ticket).
- Assigned from queue: Someone picked up a ticket from a tickets queue they belong to.
- Ticket name changed: The ticket’s name was edited.
- Ticket data changed: Ticket data was edited.
Setting Up a Ticket Event
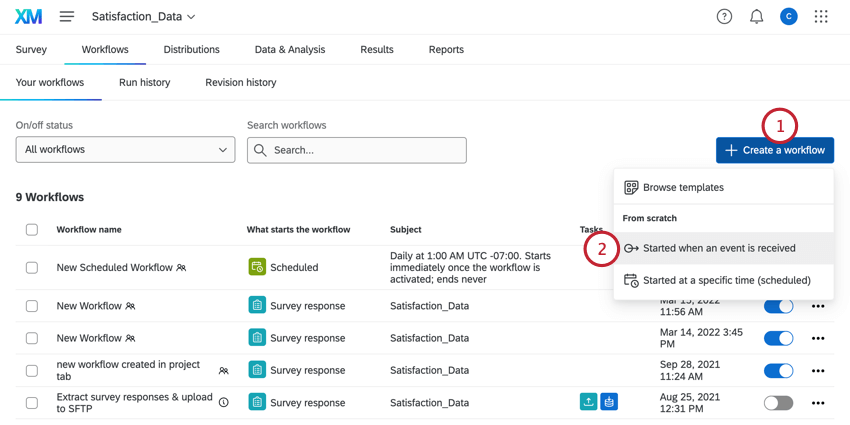
- In the stand-alone Workflows page, click Create a workflow.
 Qtip: You can also use ticket events in the Workflows tab in a project. We only recommend adding a workflow to a specific project if they’re explicitly related. (For example, you are distributing that project based on the ticket event.)
 - Select Started when an event is received.
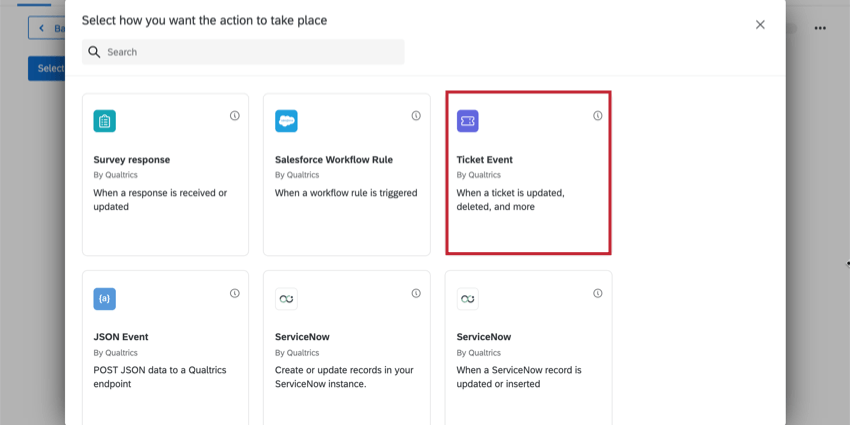
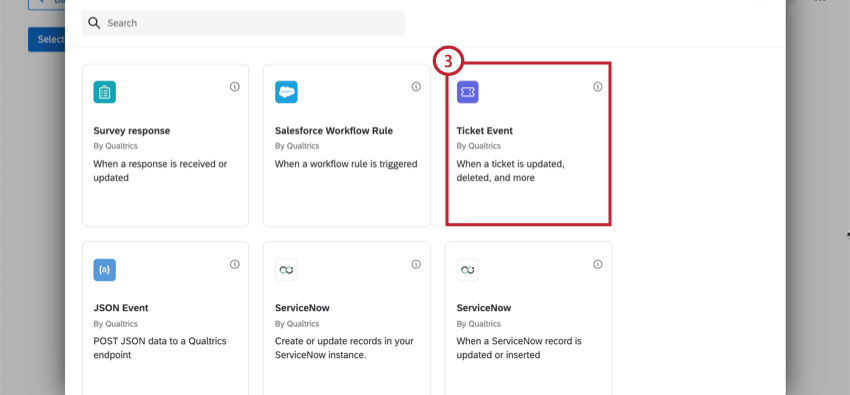
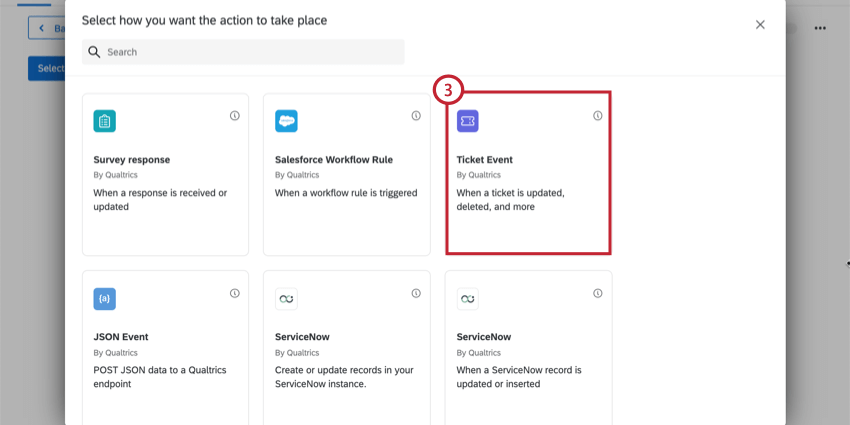
- Choose the Ticket Event.
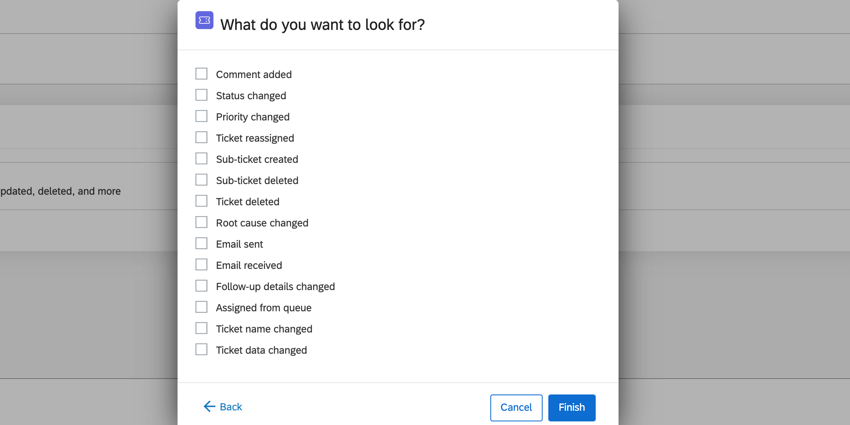
- Choose the types of ticket events that trigger the workflow. You may select multiple events.
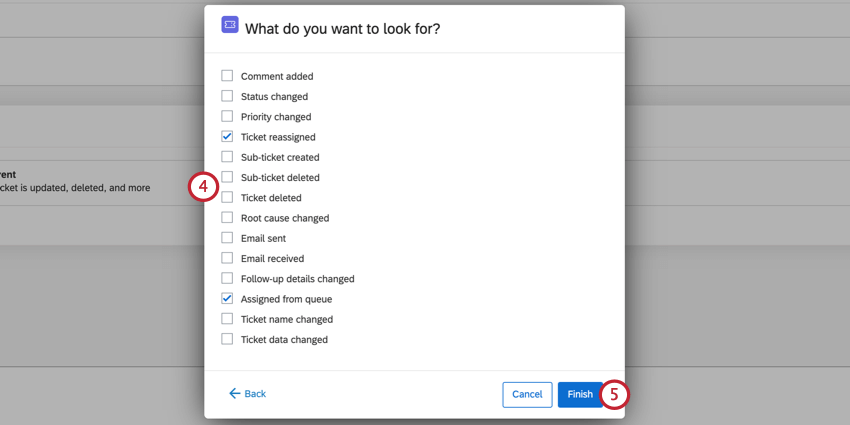
- Click Finish.
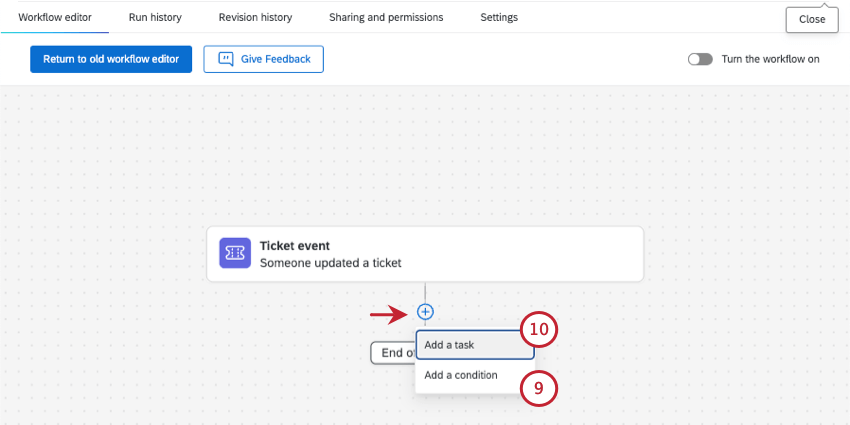
- If desired, click the plus sign (+) and choose to Add a condition. Conditions determine when your workflow fires. See the setting conditions for a ticket event section for more details.
- Click the plus sign ( + ) and then Add a task. See Defining Tasks for more information about each available task.
Setting Conditions for a Ticket Event
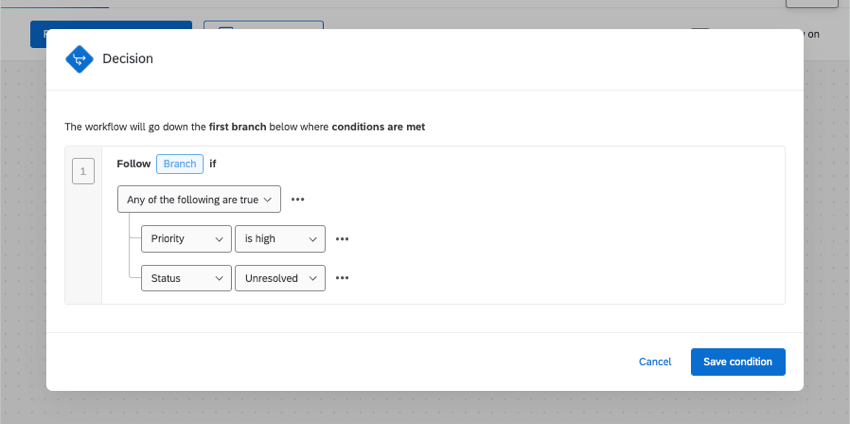
Conditional statements apply All or Any to drive filtering criteria. In “all” conditions, every condition listed below must be met. It is similar to joining statements by “and.” In “any” conditions, any of the conditions can be met, but not all have to be. It is similar to joining statements by “or.”
Example: In this example, only one of the two conditions has to be met for the workflow to the triggered.
The conditions you set for a ticket event can be based off of various tickets features and workflows.
- Priority: The priority of the ticket.
- Owner: The person who owns the ticket.
- Status: The status of a ticket.
- Team: The team that owns the ticket.
- Root Cause: The root cause assigned to a ticket. This will be empty if a root cause wasn’t set when creating the original ticket task.
- Ticket Data: The data included in the ticket.
- Follow Up Details: The follow up details included in the ticket.
Qtip: Only follow up questions can be used for creating conditions. Follow up details from ticket feedback surveys is not supported, and you cannot add those questions under conditions.