
Load Data to Conversational Analytics Task
What's on this page
About the Load Data to Conversational Analytics Task
The Load data to Conversational Analytics task allows you to take chat and email data that’s previously been imported by a data extractor task and save that data into a Chat Data project or Email Data project. Once you’ve loaded your data into a chat or email project, you can analyze your data within Qualtrics.
This task can be used with the following extractor tasks:
- Extract data from NICE CXone
- Extract Data from Genesys Task
- Salesforce Extractor
- Extract data from SFTP files
- Extract data from Amazon S3
Qtip: SFTP and Amazon S3 can only be used to load call transcripts to voice projects, not audio files. To learn more, see Call Transcript Data or Extracting Conversational Data from Files.
For more information on using this task within an Omnichannel Listening program, see Omnichannel Listening Management.
Qtip: This task can be created in the workflows tab of a Chat Data or Email Data project, or as a stand-alone workflow.
Qtip: This task can be used in either a scheduled workflow or an ETL workflow. For information on general limits that apply to ETL workflows, see Workflow Limits.
Setting Up a Load Data to Conversational Analytics Task
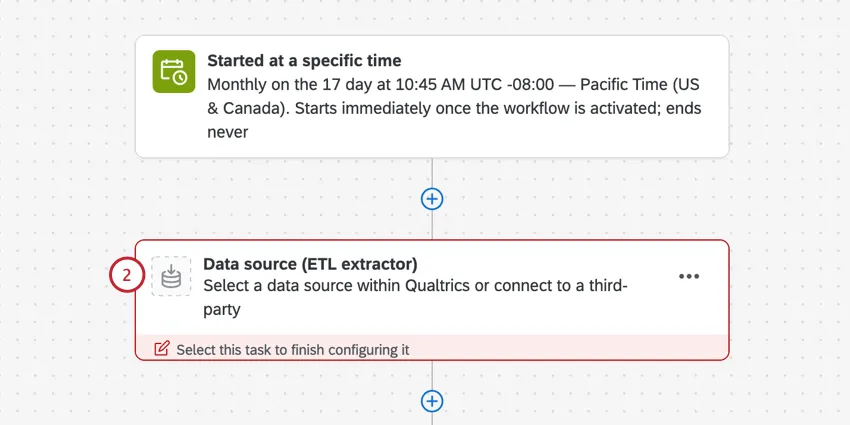
Create a workflow. You can create either a scheduled workflow or an ETL workflow.
If you’re creating a scheduled workflow, configure a schedule. If you’re creating an ETL workflow, you must first set up a data extracting task before you can use the Load data to Conversational Analytics task. Select Data source (ETL extractor). See using Workflows tasks to build ETL workflows for more information.
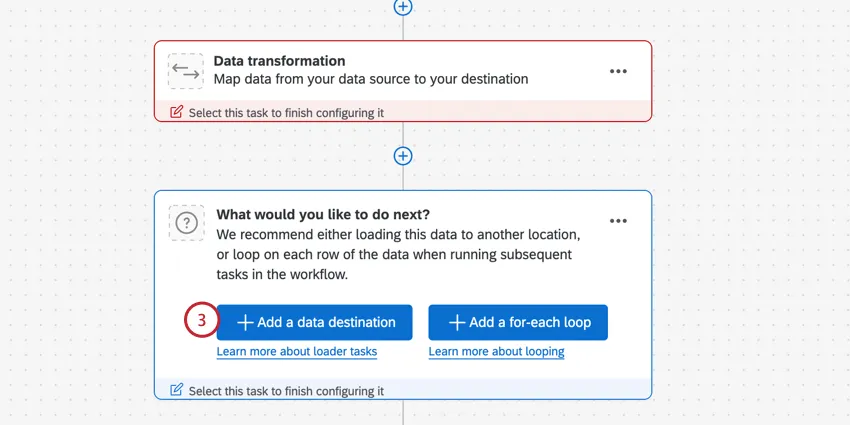
Click Add a data destination.
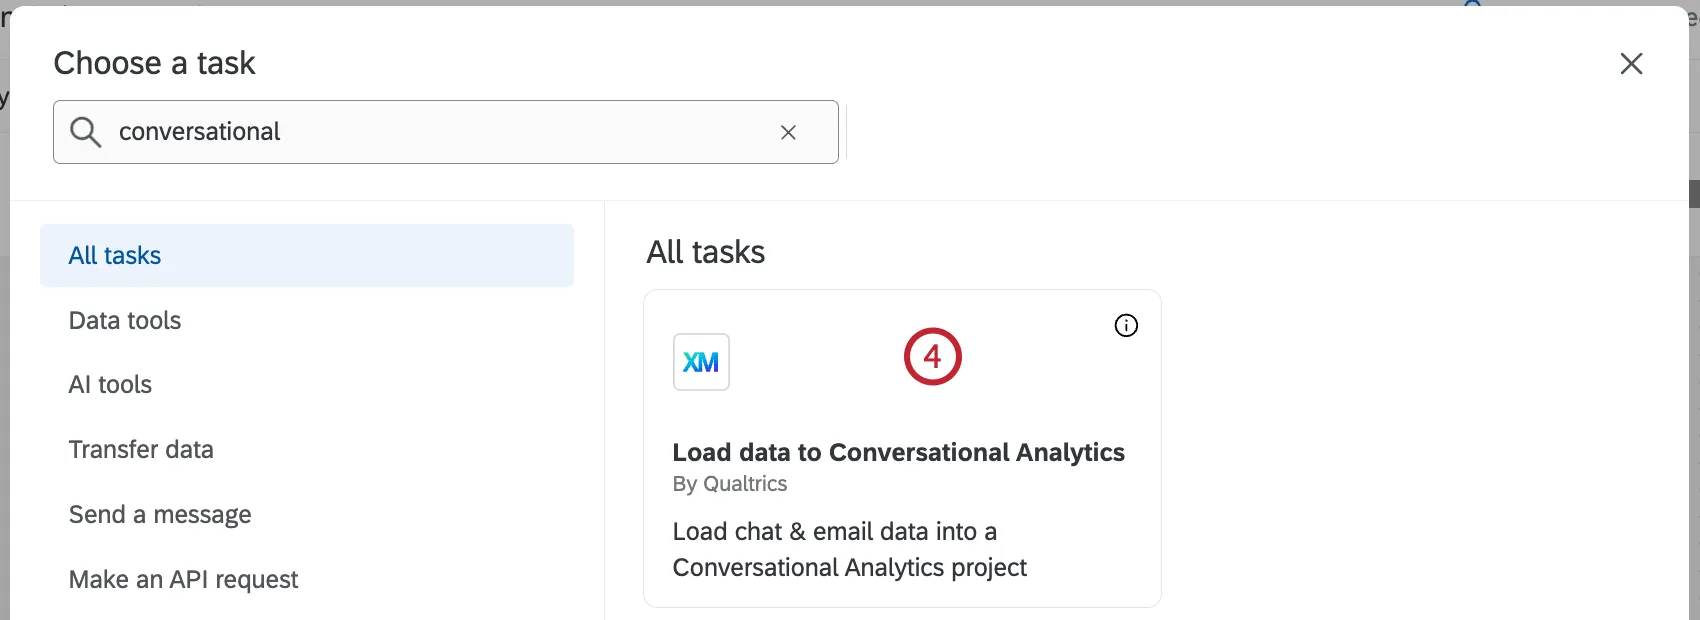
Select the Load data to Conversational Analytics task.
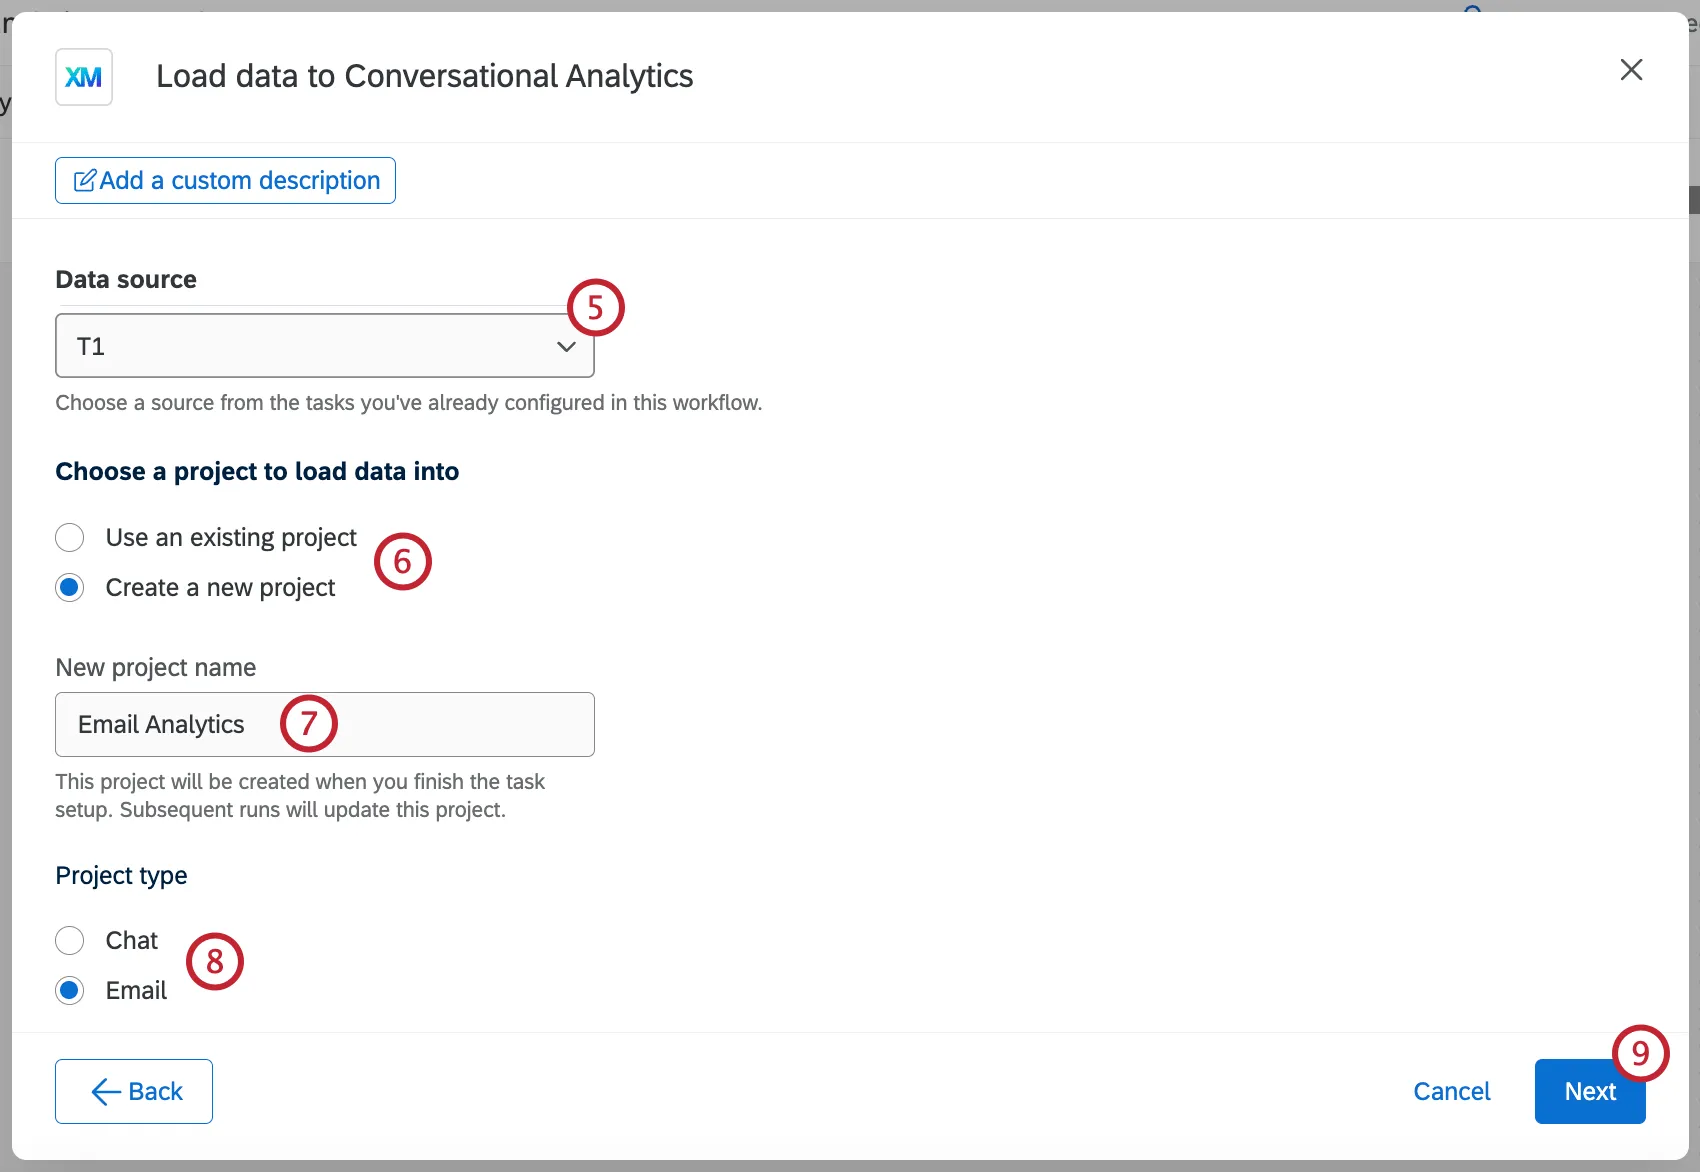
Choose the source task that contains your data.
Qtip: For file size limits on data extractor tasks, see ETL Workflow Limits.
Choose a project to save the data into, or create a new project from scratch.
If you are creating a new project, enter a project name.
If you are creating a new project, select the project type:
- Selecting Chat will create a Chat Data project.
- Selecting Email will create an Email Data project.
- Selecting Call transcript / Voice will create a Voice project.
Click Next.
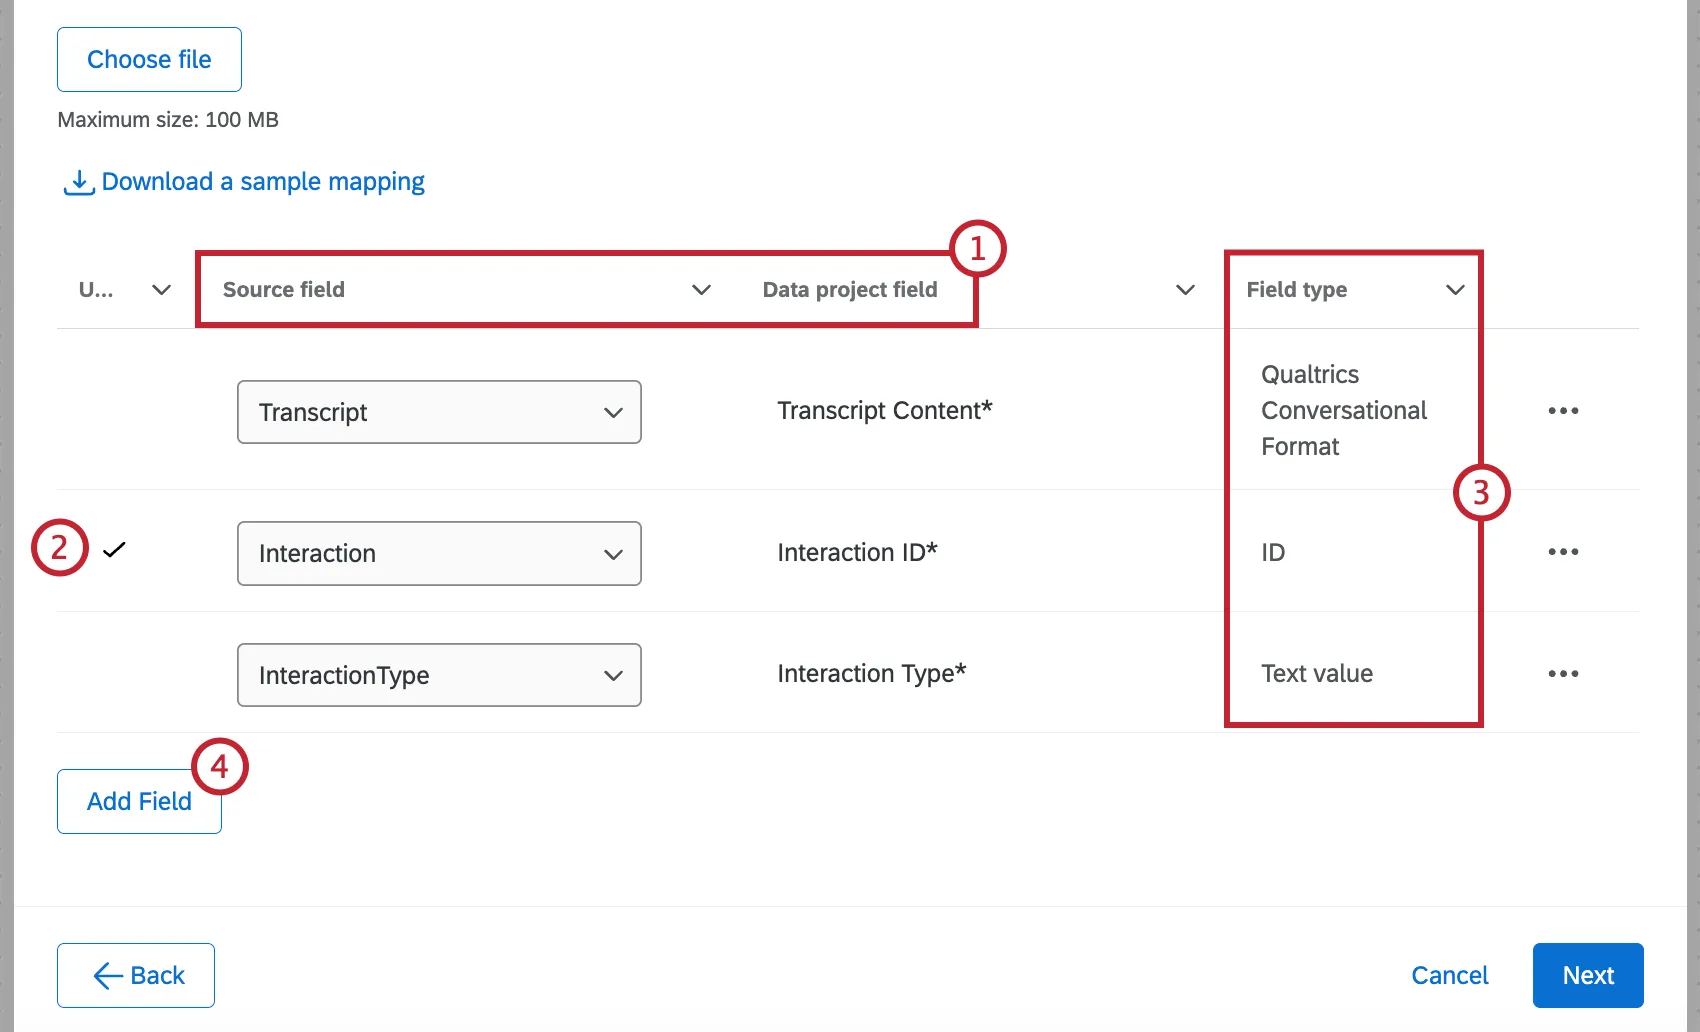
Now you’ll map your Source fields to your Data project fields. The source field is how the field appears in your data extractor task, while the data project field is how the field appears in your chat or email data project. For detailed steps, see Mapping Source Fields to Data Project Fields.
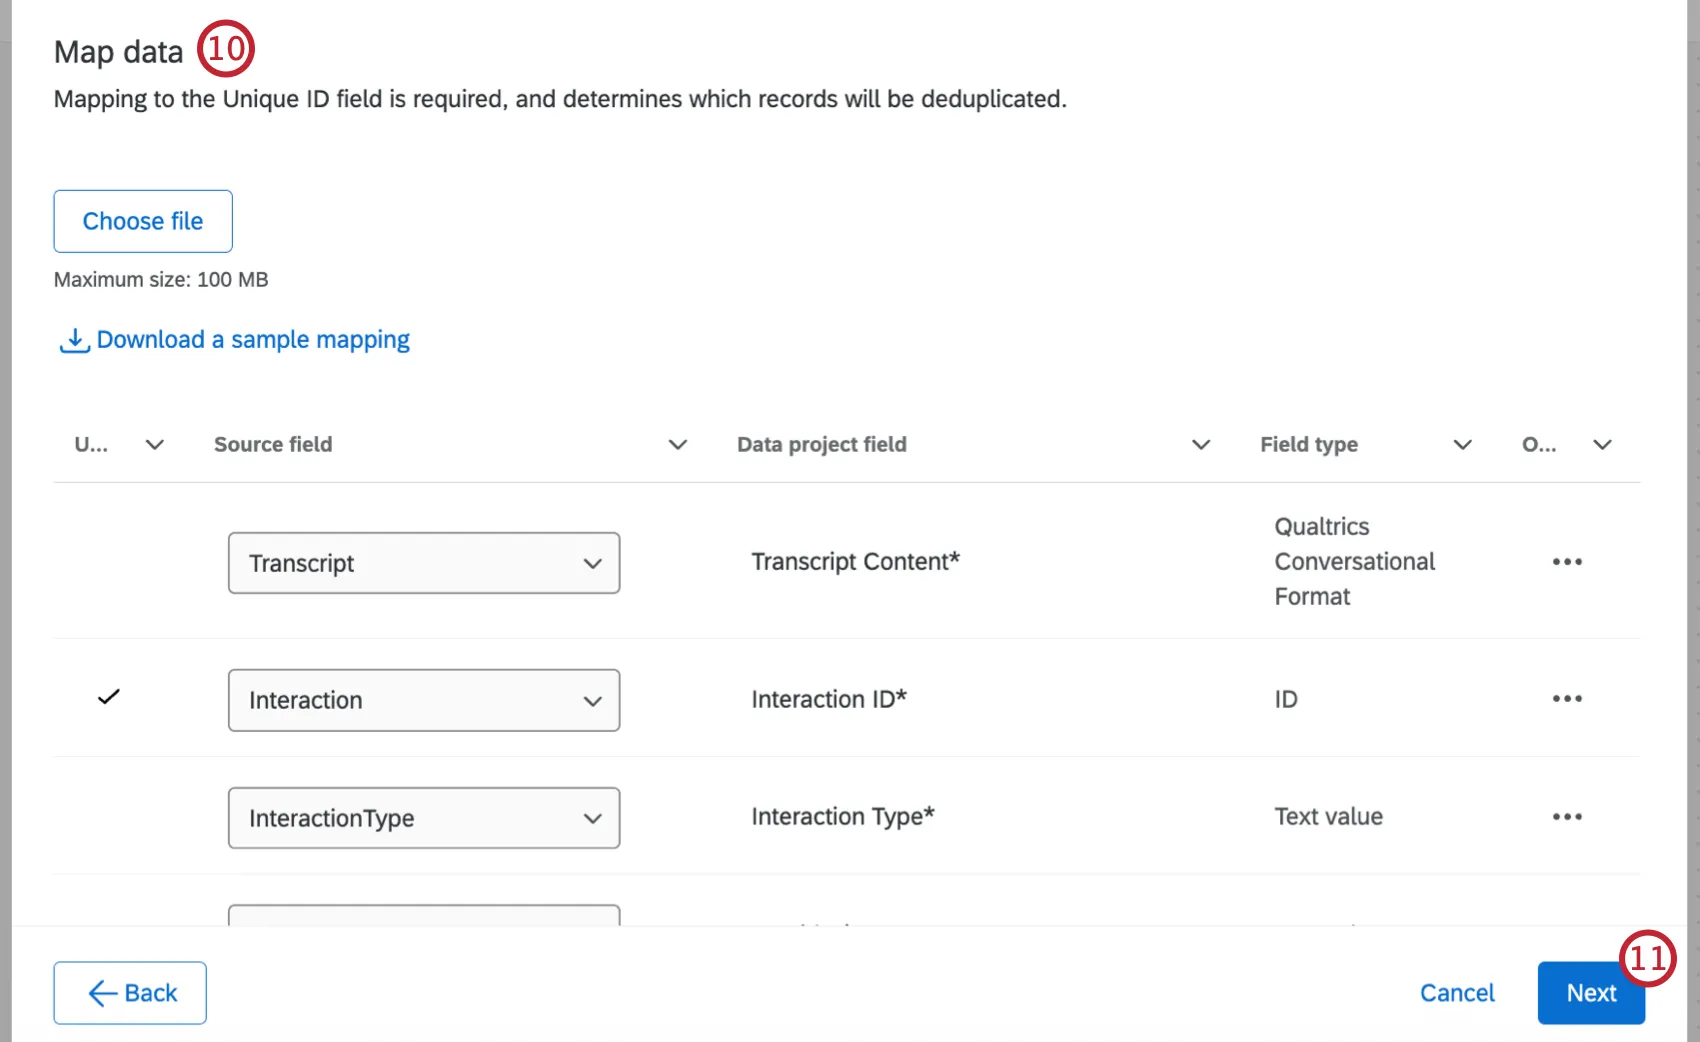
Qtip: The InteractionID field is automatically marked as the Unique ID field. Entries within your project will be deduplicated by this field.
Qtip: For information on how to format date fields, see Date Field Format (CX).
Click Next when you’ve finished setting up your mapping.
Save your workflow.
Mapping Source Fields to Data Project Fields
The source is the data pulled from your data extractor task. The data project is the existing or new Chat Data, Email Data, or Voice Data project you’re uploading the data to.
Qtip: If you are mapping fields to an existing project, you cannot edit field types. To change field types, you can find the project on the Projects page and edit it directly.
If you are mapping fields to a new project, it will be created immediately. When you edit this task, you will be able to edit field mappings, but you won’t be able to choose different field types.
Qtip: Make sure to delete any fields you don’t want to appear in your new project.
Qtip: Not every field will have an equivalent. You can delete a field if it doesn’t exist in both sources.
Uploading Field Mappings
For new or existing projects, you can choose to upload field mappings instead. See Uploading Field Mappings for step-by-step instructions. Note that although this section talks about imported data projects, the functionality is the same for Chat Data, Email Data, or Voice Data projects.
Mapping Field Values
In addition to mapping fields to each other, you can also map individual values. See Mapping Field Values for step-by-step instructions.
That's great! Thank you for your feedback!
Thank you for your feedback!