-

Qualtrics Platform -

Customer Journey Optimizer -

XM Discover -

Qualtrics Social Connect
AI Response Task
About the AI Response Task
The AI response task enables you to run prompts using a generative language model, and integrate the responses into your workflows. This allows you to build workflows that enable scenarios such as summarizing text, extracting information from text, generating responses based on text, generating code, classifying text, translating text, and more.
This task runs similarly to the OpenAI Tasks, but it uses AWS as the subprocessor, and the data does not leave the Qualtrics ecosystem.
Usage Limits
There is a limit to the amount of times this task can be run, per month, across all users in the same license. This limit resets on the first of the month.
Expect a minimum of 2,700 task executions per month. This baseline is calculated assuming a large average request size of 4,000 tokens (about 3,000 words). If your average task is smaller, then you will be able to run significantly more executions.
You can think of tokens as the building blocks of your text. On average, 1 token is equal to about 0.75 words. The total token count of a task includes your input text and the generated output. The number of tokens a task requires depends on the length and complexity of the input. In general, short multiple-choice questions and answers are very token-efficient, while detailed, open-ended questions use more tokens to generate a response.
If you reach your monthly usage limit, then the AI response task will fail when it attempts to run. You can view failed tasks in your workflow run history; the task’s JSON output will contain an error about the limit.
Setting Up an AI Response Task
- Follow the instructions to create a new workflow. Most of the time, this will be an event-based workflow.
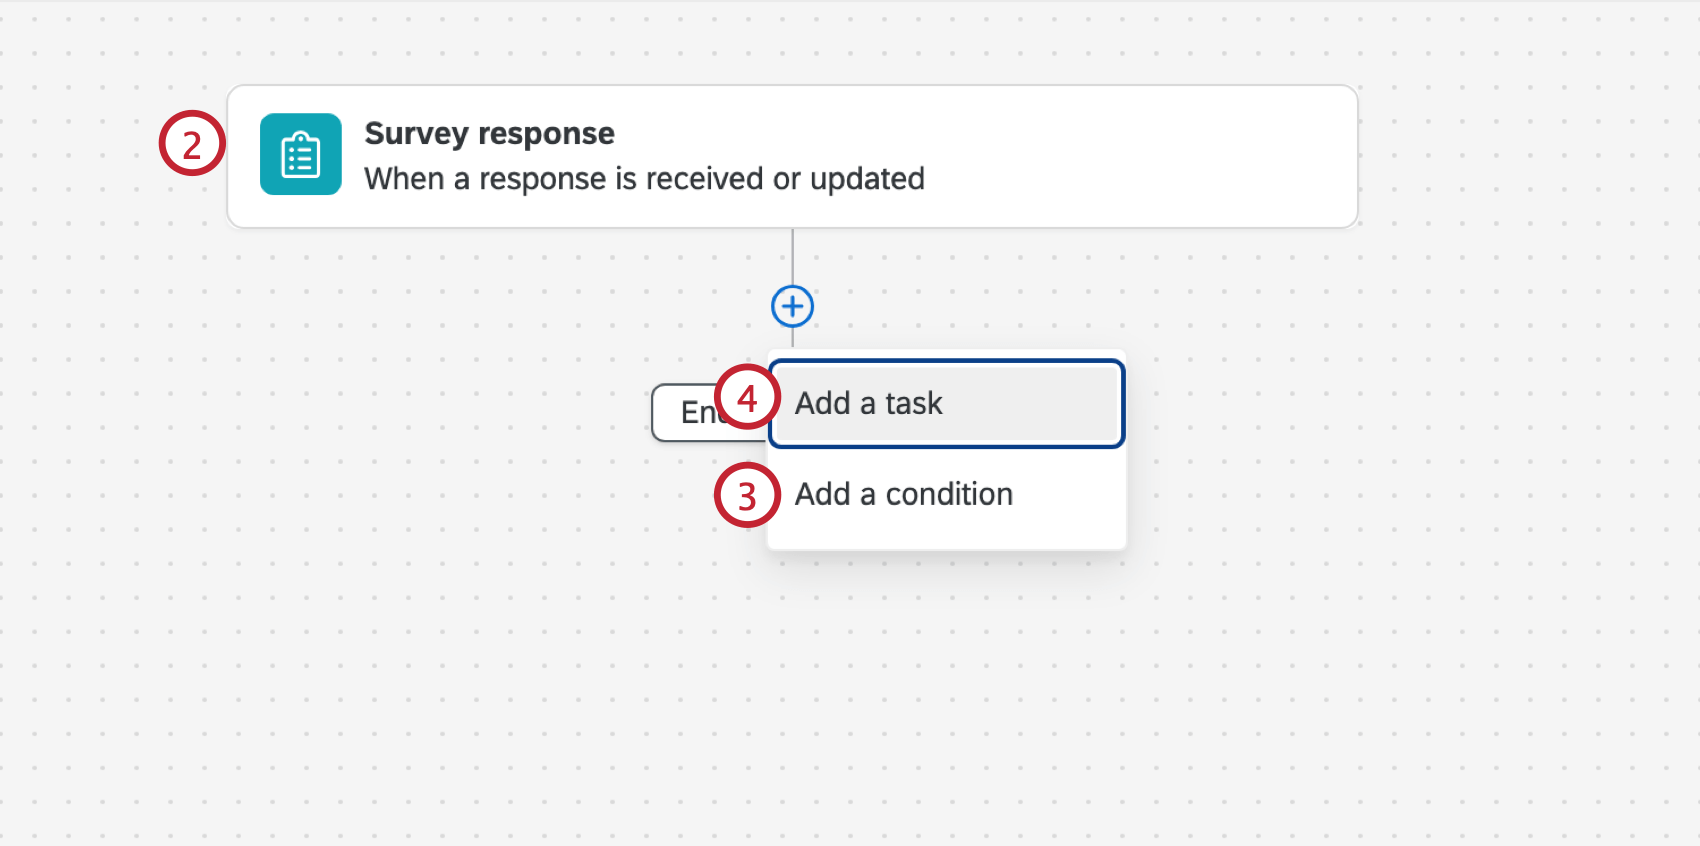
- Set up the trigger for your workflow. Often, you’ll begin your workflow with a survey response event, which starts the workflow when you receive a new survey response.
 Qtip: Other common events include the ticket event, third party events (such as the Zendesk and Salesforce Workflow Rule events), and dataset record events for online review data.
 - Click the plus sign ( + ) and select Add a condition to add conditions to your workflow, which determines when the workflow triggers.
Example: For example, if you want to respond to only negative customer feedback, you add a condition based on the response’s sentiment.
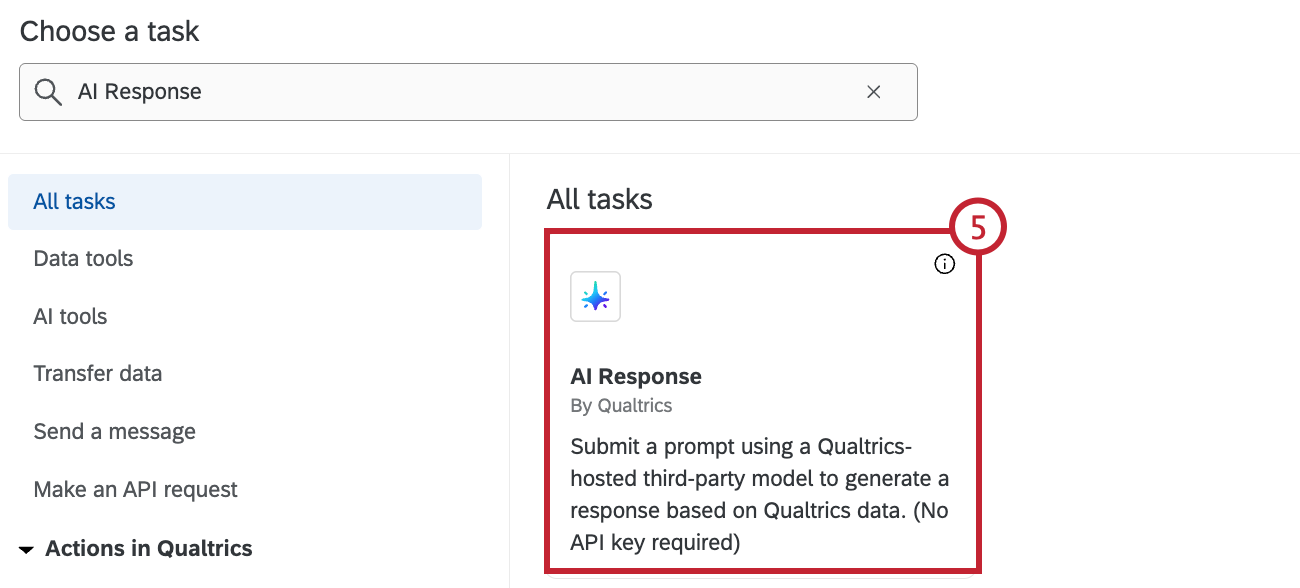
- Click the plus sign ( + ) and select Add a task.
- Select AI Response.
- If you want to create your own prompt from scratch, enter a prompt in the text box. You can attach files or use piped text from other tasks in your workflow.
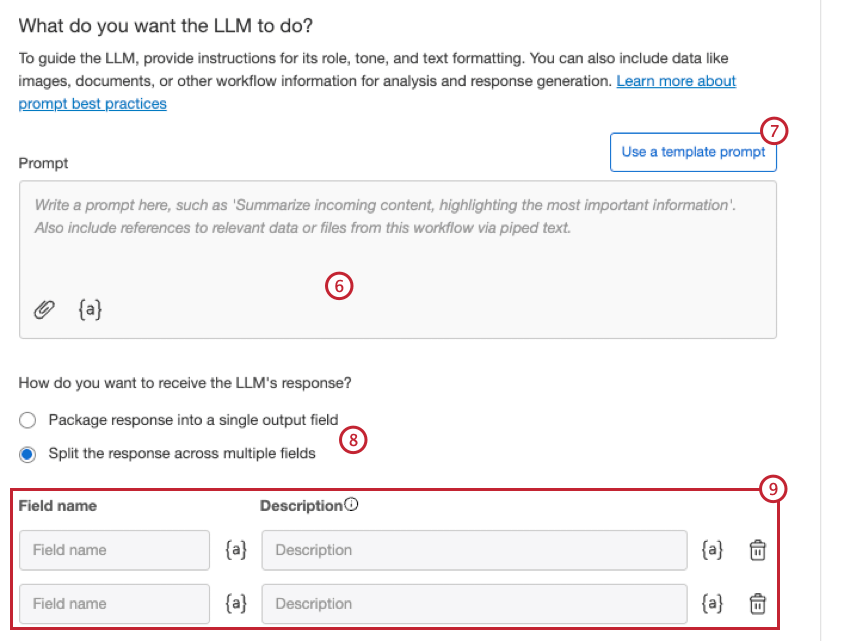
- If you want to use a template, select Use a template prompt and select the prompt you want to use. You can edit any of the pre-existing templates later for your own purposes. The following templates are available:
- Summarize text: Summarizes the incoming text to highlight what’s most important.
- Compose a reply to customer feedback: Reply to reviews, complaints, and more with a professional tone.
- Categorize text: Create a list of categories and assign them to incoming text.
- Translate text: Translate text from one language into another.
- Describe image: Describes an incoming image.
- Extract text from image: Extracts text from an incoming image.
- Analyze document: Analyzes an incoming document.
- Extract key points: Extracts key points from a document.
Attention: Selecting a template prompt will replace the current prompt you have, and cannot be undone. - Select how you want to receive the response.
- Package response into a single output field
- Split the response across multiple fields
- If you chose to split the response across multiple fields, enter a name and description for each field.
- If your prompt includes piped text and you want to test your prompt with data, select Enter test data.
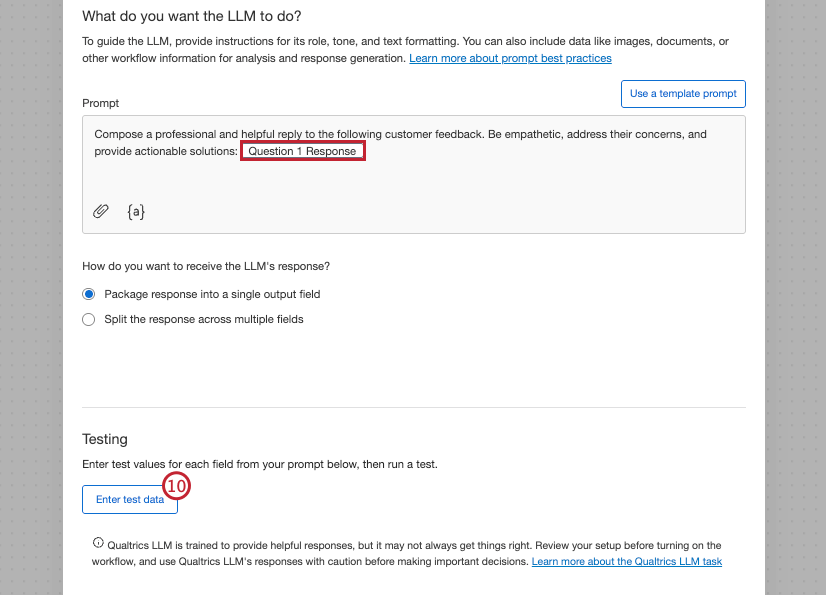
- Enter a test value for the field(s).
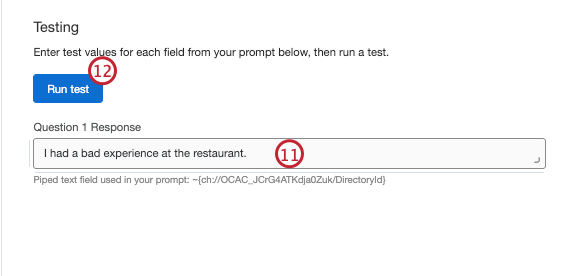
- Click Run test.
- Review the test response.
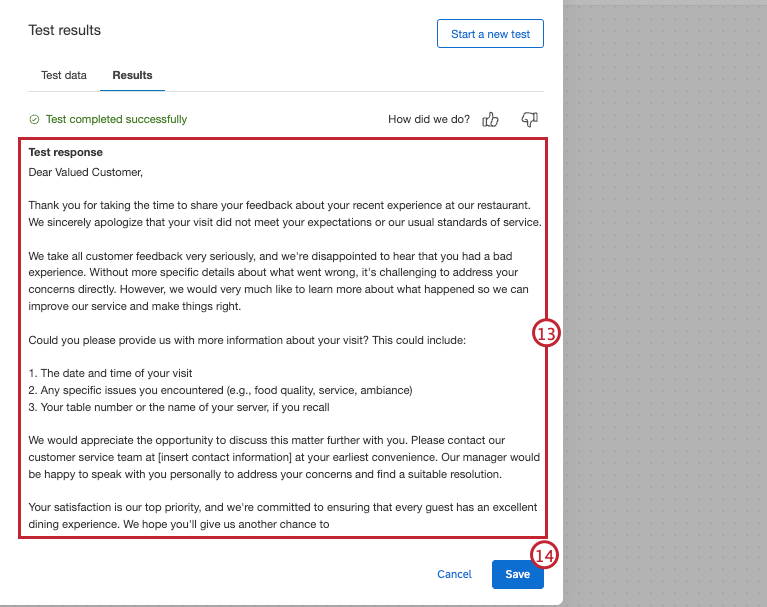
- When you’re satisfied with the test configuration, click Save.