-

Qualtrics Platform -

Customer Journey Optimizer -

XM Discover -

Qualtrics Social Connect
Generating a Parent-Child Hierarchy (CX)
Qtip: CX Hierarchies are only available to CX licenses with tickets included. If you’re interested in this feature, reach out to your Account Executive.
Qtip: CX Hierarchies and EX Hierarchies are very similar, but have some key differences. If you are an EX client, please see Generating a Parent-Child Hierarchy (EE) instead.
About Parent-Child Hierarchies
Parent-Child hierarchies are the most commonly used kind of hierarchy. They are the best option if your HR data is formatted so you have a list of employees’ IDs and the managers each employee reports up to.
Qtip: Not sure what type of hierarchy fits your HR data best? Check out a basic comparison of your options on the Hierarchies Basic Overview page.
Generating a Parent-Child Hierarchy
- Prepare a file of users for a Parent-Child hierarchy.
- Import your users file by following the steps on the linked support page.
- Navigate to the User Admin tab.
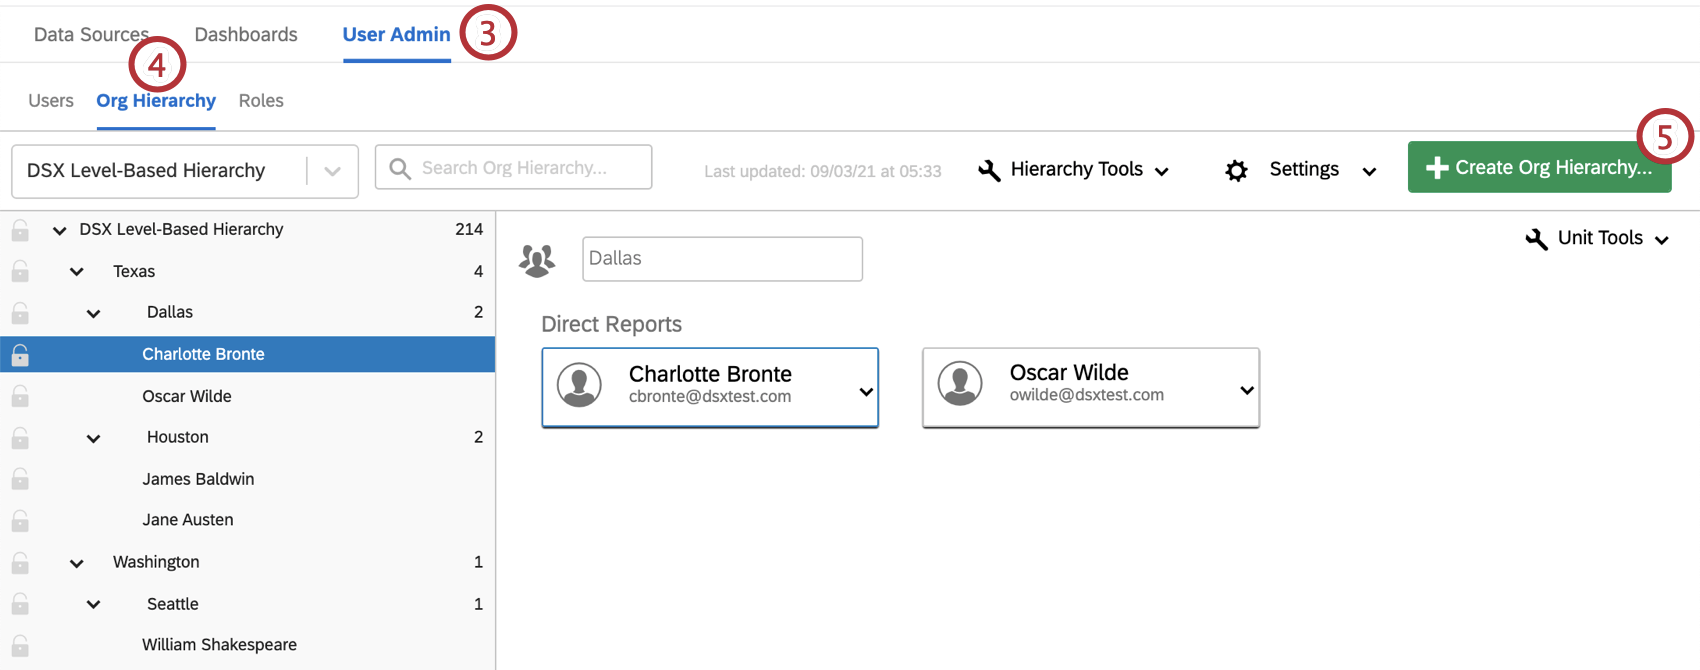
- Navigate to the Org Hierarchy section.
- Click Create Org Hierarchy.
- Type a Name for your hierarchy.
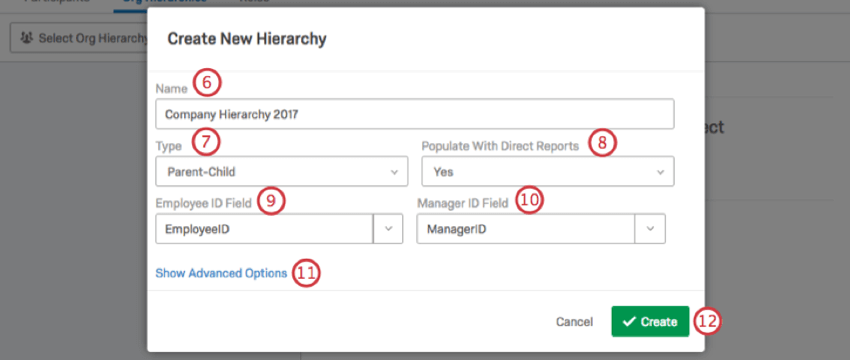
- Under Type, select Parent-Child.
- Under Populate With Direct Reports, select Yes.
Qtip: The “No” option is more useful for some EX clients, due to a special question type and survey-build specific to engagement projects. We do not advise using the “No” option to build CX hierarchies, and for EX clients only in rare cases.
- Under Employee ID Field, type out or select the name of your Employee ID metadata name.
Qtip: Employee ID Field, Manager ID Field, and any other field where you are entering metadata must match the original user file you uploaded. This means spelling, spacing, and capitalization must be exactly the same!
- Under Manager ID Field, type out or select the name of your Manager ID metadata name.
- If you’d like, select Advanced Options. See the section below for more details.
- Click Create.
Advanced Options
If you click Advanced Options, you will have several additional options when building your Parent-Child hierarchy.
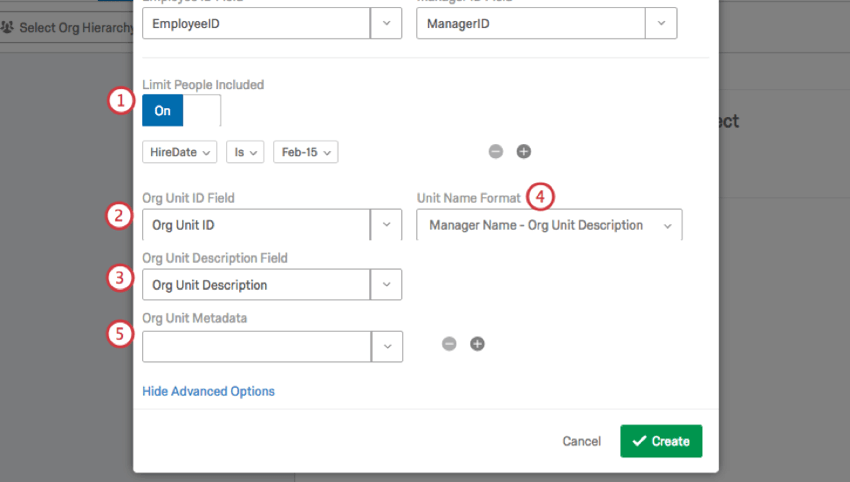
- Limit People Included: If you would like to limit the people included in the hierarchy based off of a metadata value, turn this option On. In the example above, only users from a certain hiring date are being included in the hierarchy.
Attention: At this time, you should only use one condition with the “limit people included” setting. Including multiple conditions can cause your hierarchy generation to fail.
- Org Unit ID Field: If you have chosen to Populate With Direct Reports, enter your Org Unit ID here.
- Org Unit Description Field: If you have chosen to Populate With Direct Reports, enter your Org Unit Description here.
- Unit Name Format: If you have loaded the Org Unit Description, you can include this in your unit names.
- Org Unit Metadata: If there are any other metadata that are unit-specific, add them here. You can add multiple fields at a time by clicking the plus (+) sign to the right of the field.