
Unit Tools (EX)
What's on this page
Qtip: This page describes functionality available to Engagement and Pulse projects, but not Lifecycle or Ad Hoc Employee Research projects. For more details on each, see Types of Employee Experience Projects.
About Unit Tools
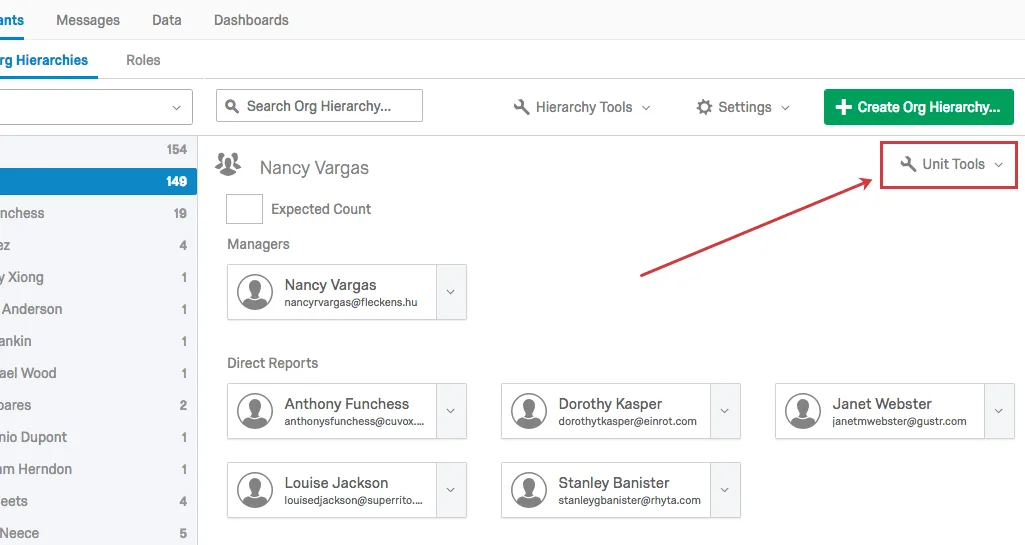
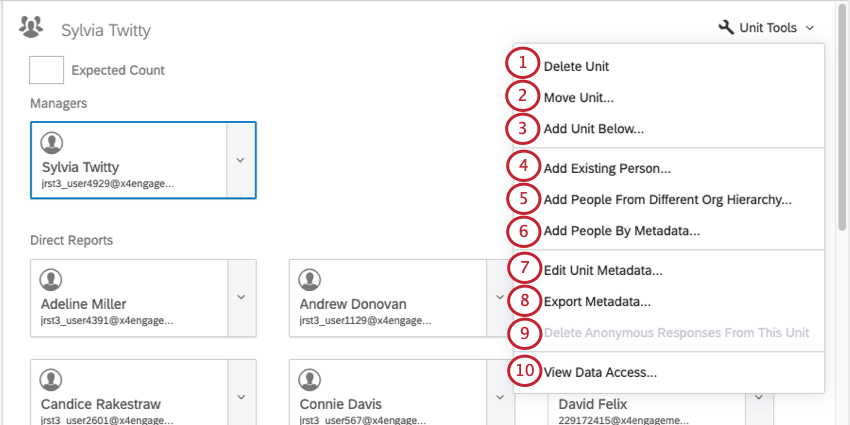
Unit Tools allow you to adjust your units on a unit level. These can be found in the upper right-hand corner of a selected unit when in the Org Hierarchies section of the Participants tab.
Attention: Unit tools are helpful for adjusting how existing participants are arranged in a hierarchy. If you are creating an org hierarchy from scratch, we recommend you create a participant file with all of your org hierarchy information and then upload that file to Qualtrics. See Preparing Your Participant File for Import for more information.
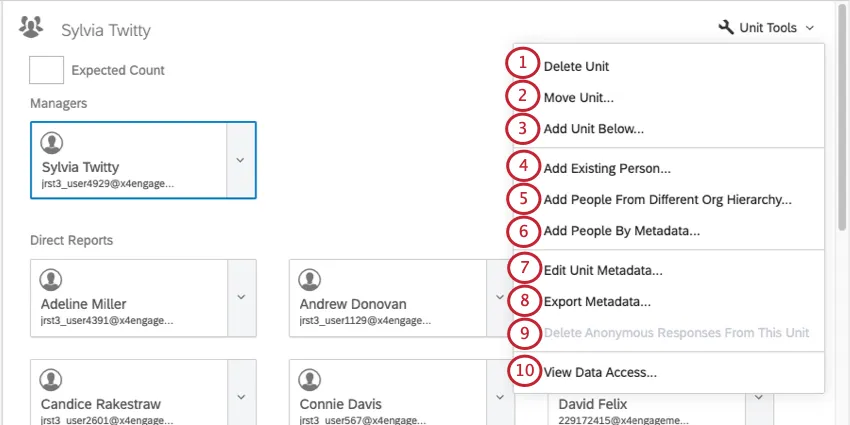
List of Unit Tools
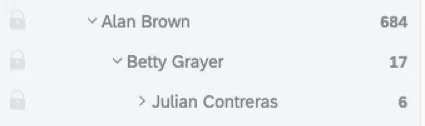
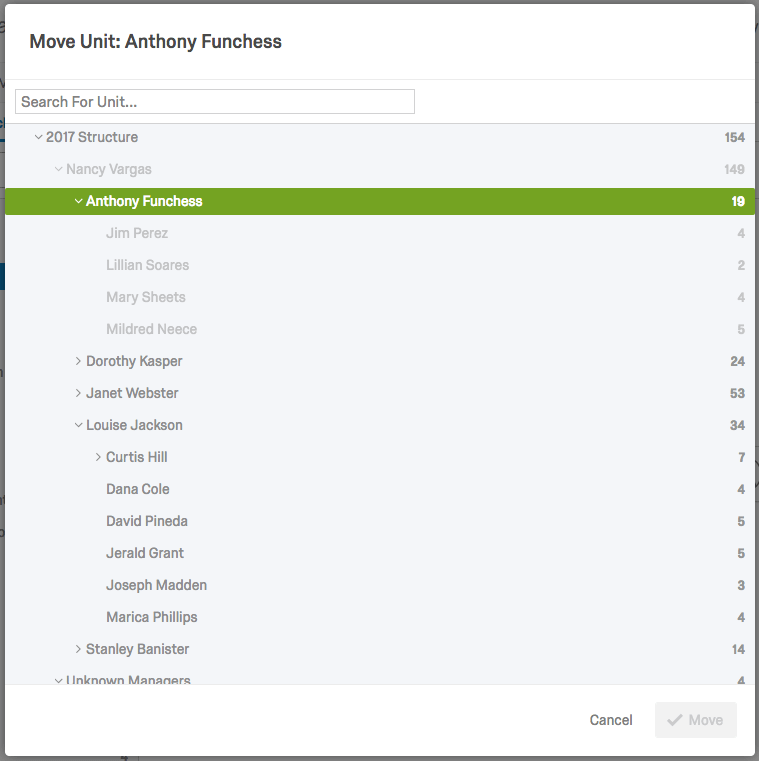
Example: Alan’s unit is at the top of the hierarchy. You cannot delete that unit because it would break the hierarchy. However, Alan has a manager who reports to him named Betty, and she has a manager who reports to her named Julian. There is no unit under Julian, so you could delete his unit. Deleting Julian’s unit would move him and his direct reports to Betty’s unit.
Qtip: Hierarchy updates will reflect the latest adjustment to the hierarchy, whether that hierarchy was edited manually with this editor or using an imported file. Therefore, if you were to later import your participant list again to update metadata or for some other reason, and manual moves were not reflected in the participant list, this could potentially revert the hierarchy to what it was before you made any manual changes. Any files you want to import must contain all of the metadata fields used to generate the original hierarchy (e.g., EmployeeID, ManagerID, Unit Name, etc.) in order to trigger a hierarchy update. You can find instructions on how to do that in the Adding Participants support page.
- For Parent-Child hierarchies, specify whether the new unit has a manger, and specify who that manager is. You can search any existing person by name or username. The window will display a preview of the unit name and the manager’s ID. To complete, select Add.
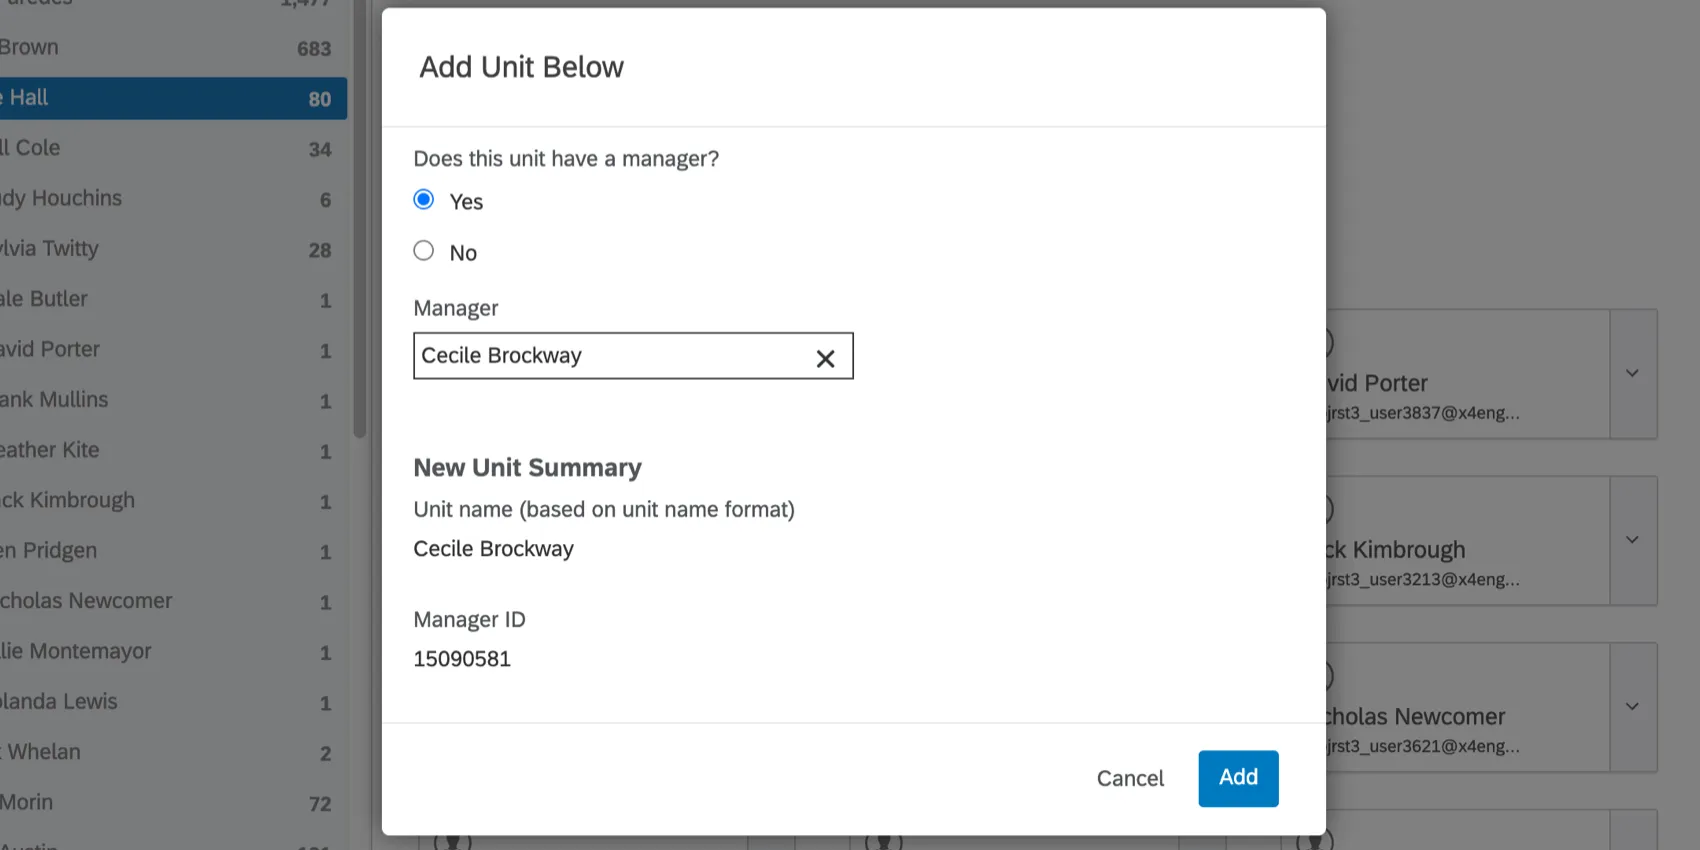 Qtip: For Parent-Child Hierarchies, if you select a person who is already a manager of an existing unit, a unit where this person is the secondary manager will be created. You will not be able to make them a primary manager of the new unit until they’re removed from the original unit.
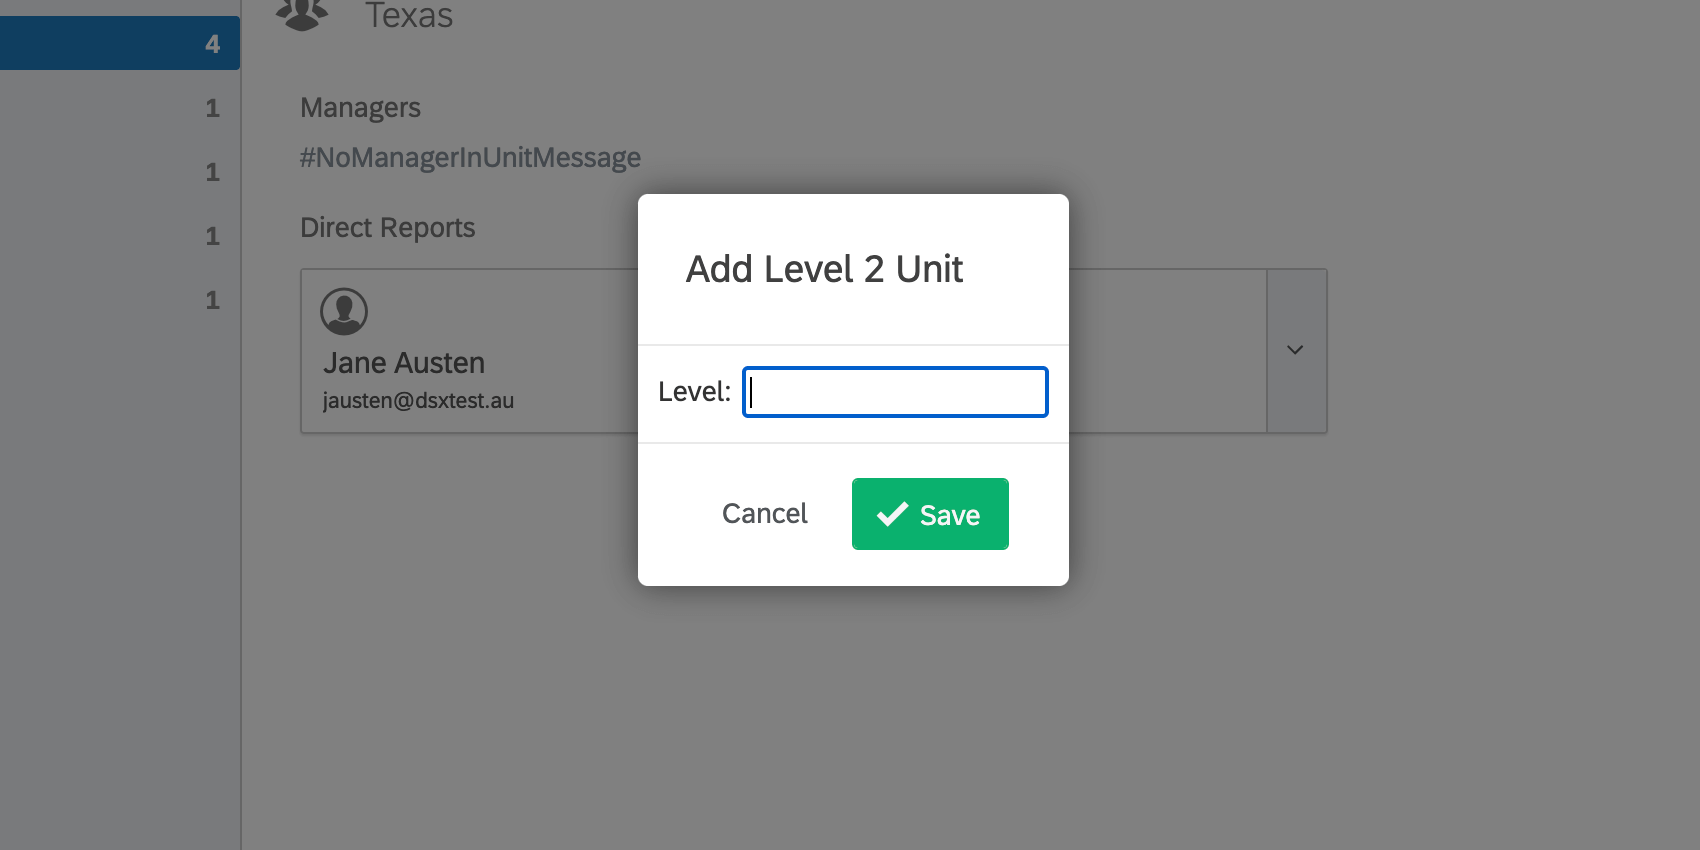
- For Level-Based hierarchies, give the unit a name in the Level field and select Save.
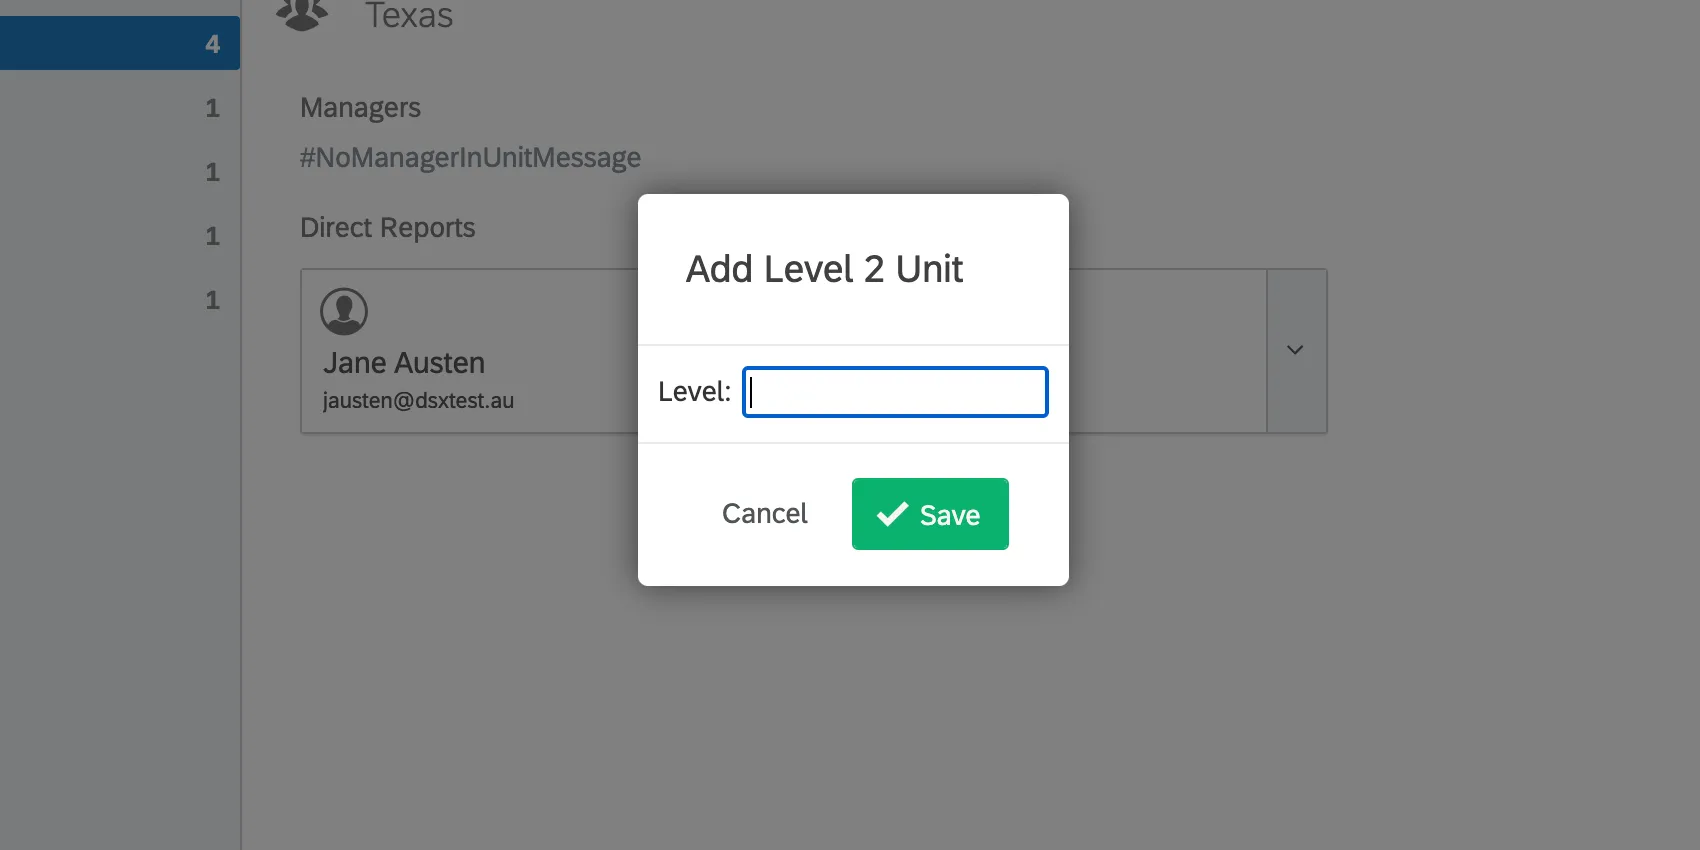 Qtip: For Level-Based hierarchies, you will be unable to add units beyond your current levels (e.g., if your hierarchy has two levels, you won’t be able to add a unit under your Level 2 unit).
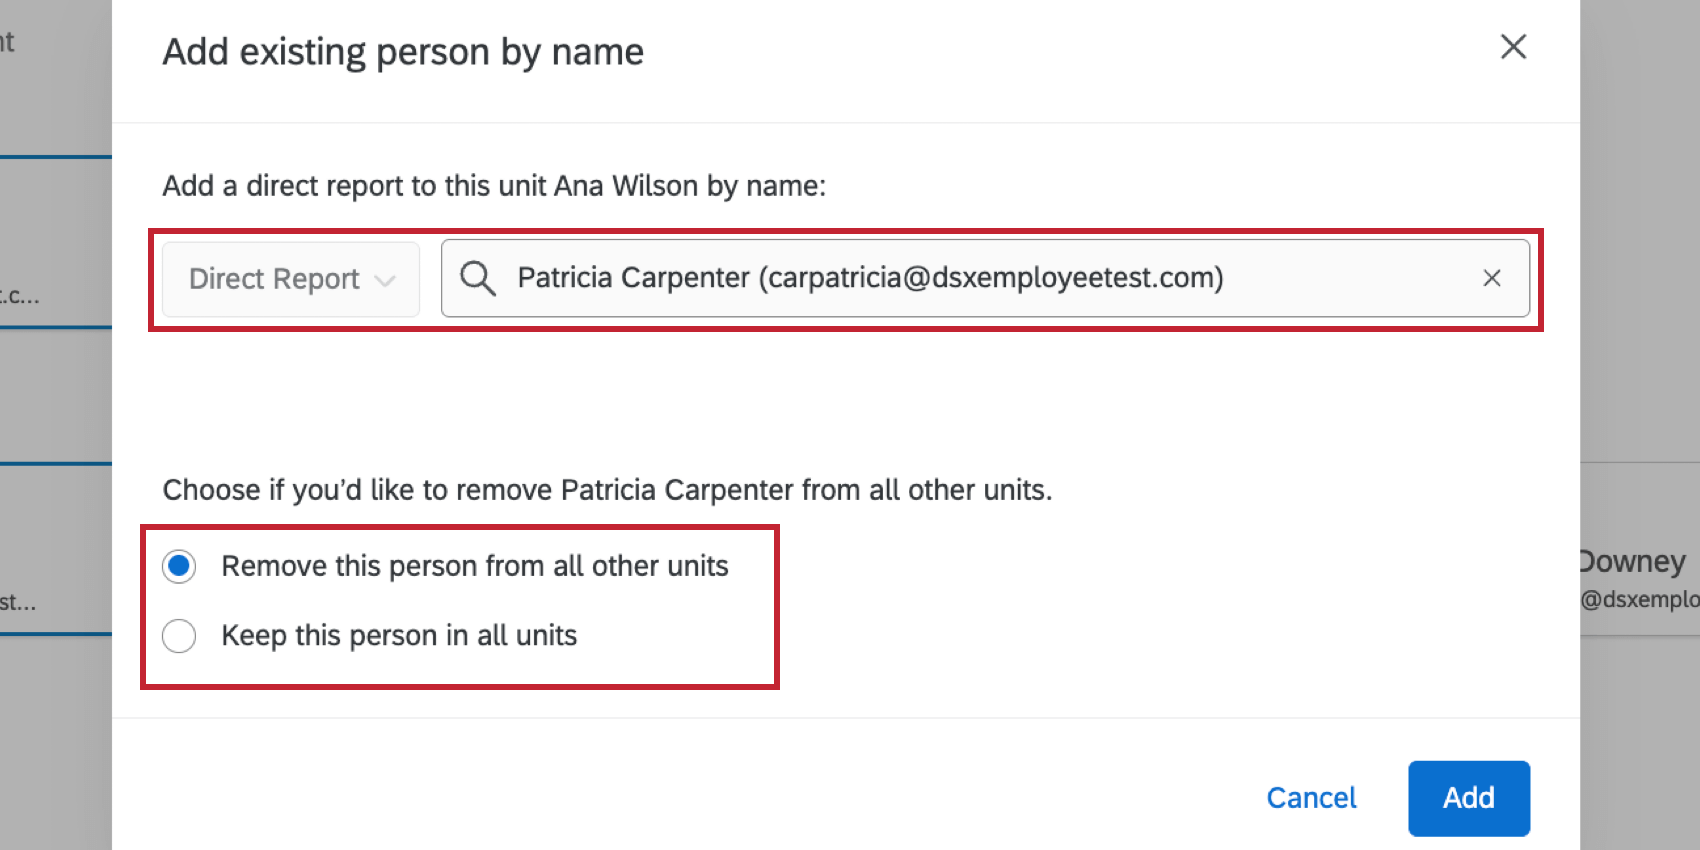
Then, choose if this person should remain in other hierarchy units:
- Remove this person from all other units: The user is removed from all other units and the new unit will be their only location in the hierarchy. Qtip: If you’ve added a delegate and removed them from other units, then they will only be removed from other units they are a delegate in (they will remain in any other units as a manager or direct report).
- Keep this person in all units: The user remains in any units they’re already in. Qtip: If a direct report appears in multiple units in the hierarchy, then their response will be included in the dashboard when filtering down to any of those units. Note that their response will not be duplicated in the dataset.

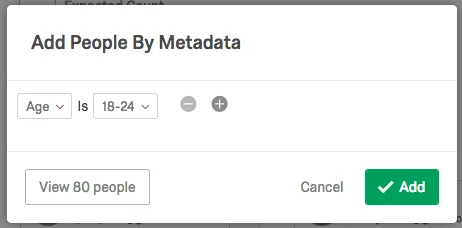
Qtip: Before selecting add, you can view and verify all individuals that your conditions are filtering for by selecting View [#] People.

Attention: This option only allows you to change metadata that was not used to configure your hierarchy. You will be unable to edit any metadata fields that were used in the generation of your hierarchy.
Qtip: This option will only be available for Parent-Child hierarchies.
Qtip: This option only appears if the anonymous link is enabled for the project.
FAQs
I've already uploaded my participant file and collected data, but I need to make a change to my hierarchy. How do I do this?
I've already uploaded my participant file and collected data, but I need to make a change to my hierarchy. How do I do this?
I want to set up my Parent-Child hierarchy to use unit names rather than assigning manager names to hierarchy units. How do I do this?
I want to set up my Parent-Child hierarchy to use unit names rather than assigning manager names to hierarchy units. How do I do this?
I uploaded my participant list and generated a Parent-Child hierarchy. I received an error message that reads “Circular Dependencies.” Why did I receive this message and how do I fix this?
I uploaded my participant list and generated a Parent-Child hierarchy. I received an error message that reads “Circular Dependencies.” Why did I receive this message and how do I fix this?
I uploaded my participant list and generated a Parent-Child hierarchy. Why do I see some units labeled “Unknown Manager” and how do I fix this?
I uploaded my participant list and generated a Parent-Child hierarchy. Why do I see some units labeled “Unknown Manager” and how do I fix this?
Can I automate changes to my Engagement org hierarchy?
Can I automate changes to my Engagement org hierarchy?
To learn more about automating employee directory changes, see Load Users into EX Directory.
That's great! Thank you for your feedback!
Thank you for your feedback!