-

Qualtrics Platform -

Customer Journey Optimizer -

XM Discover -

Qualtrics Social Connect
Google Calendar Task
About the Google Calendar Task
Automate your scheduling process by linking Qualtrics to your calendar. The Google Calendar task allows you to automatically create and cancel Google Calendar events based on survey responses.
Connecting a Google Calendar Account
Before you can use the Google Calendar task, you must connect a Google Calendar account for Qualtrics to schedule events with. Accounts may be added by Brand Administrators for other users in the brand to use, or by individual users for their personal use.
Adding an Account as a Brand Administrator
If you are a Brand Administrator, follow the steps in this section to add a Google Calendar account for some or all users in your license to use.
- Using the navigation menu in the top-left, go to Admin.
- Go to Extensions.
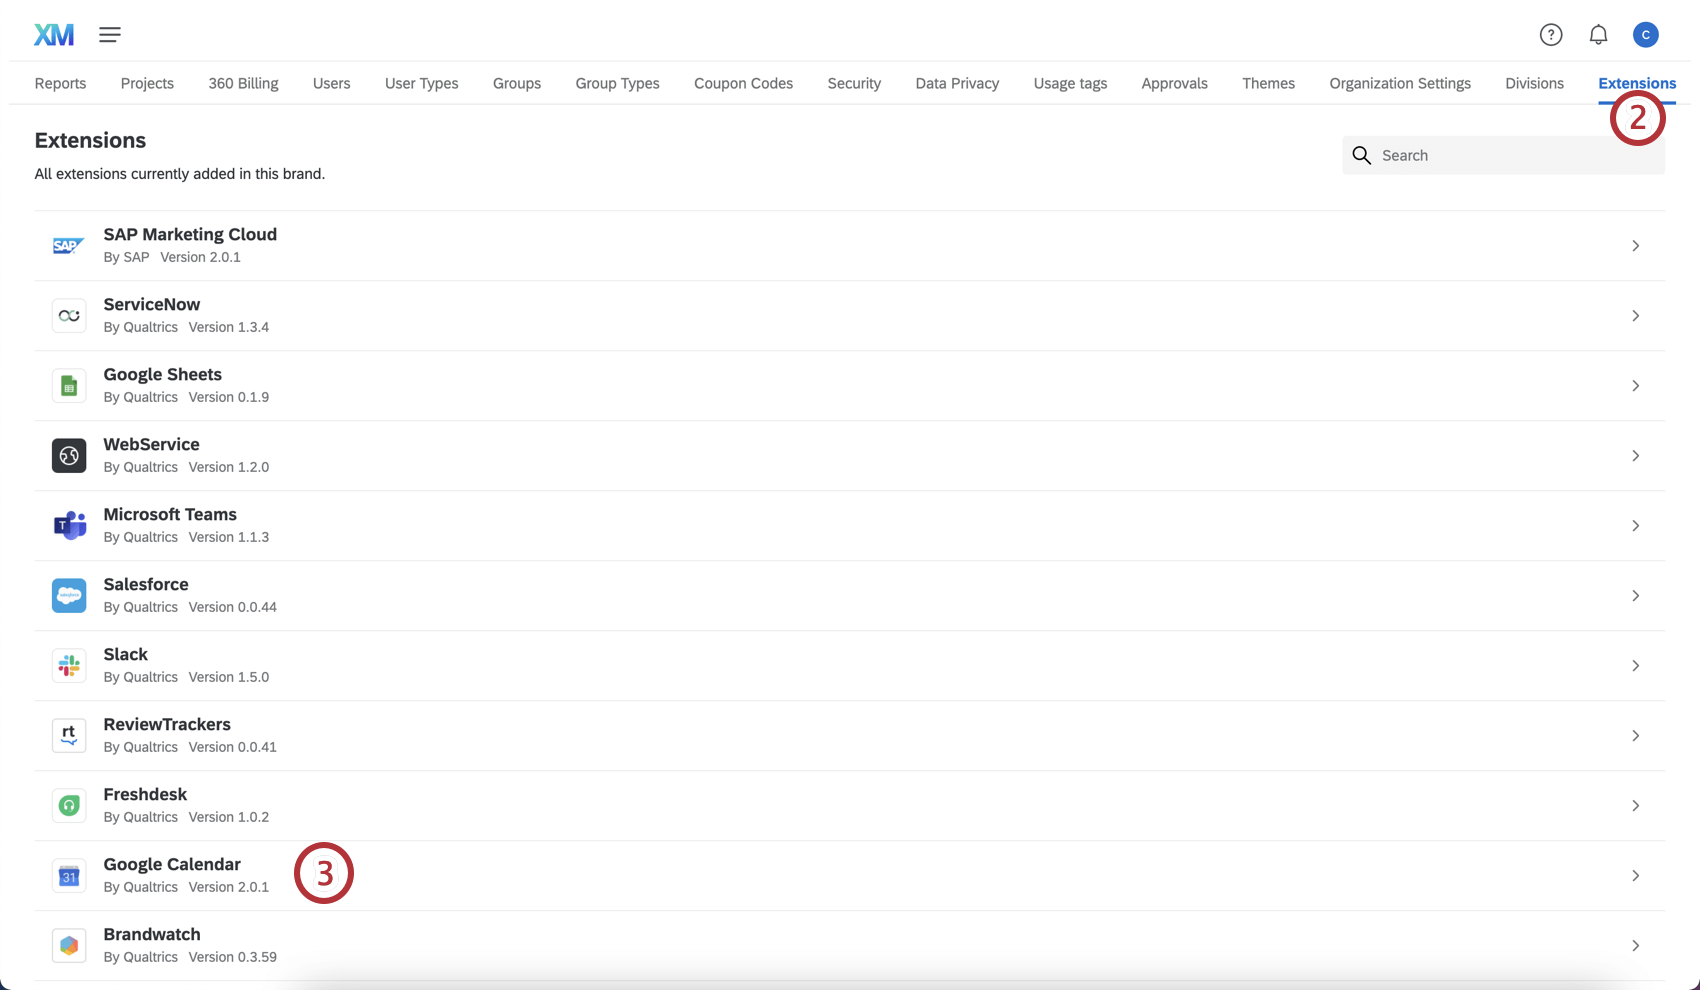
- Click the Google Calendar extension.
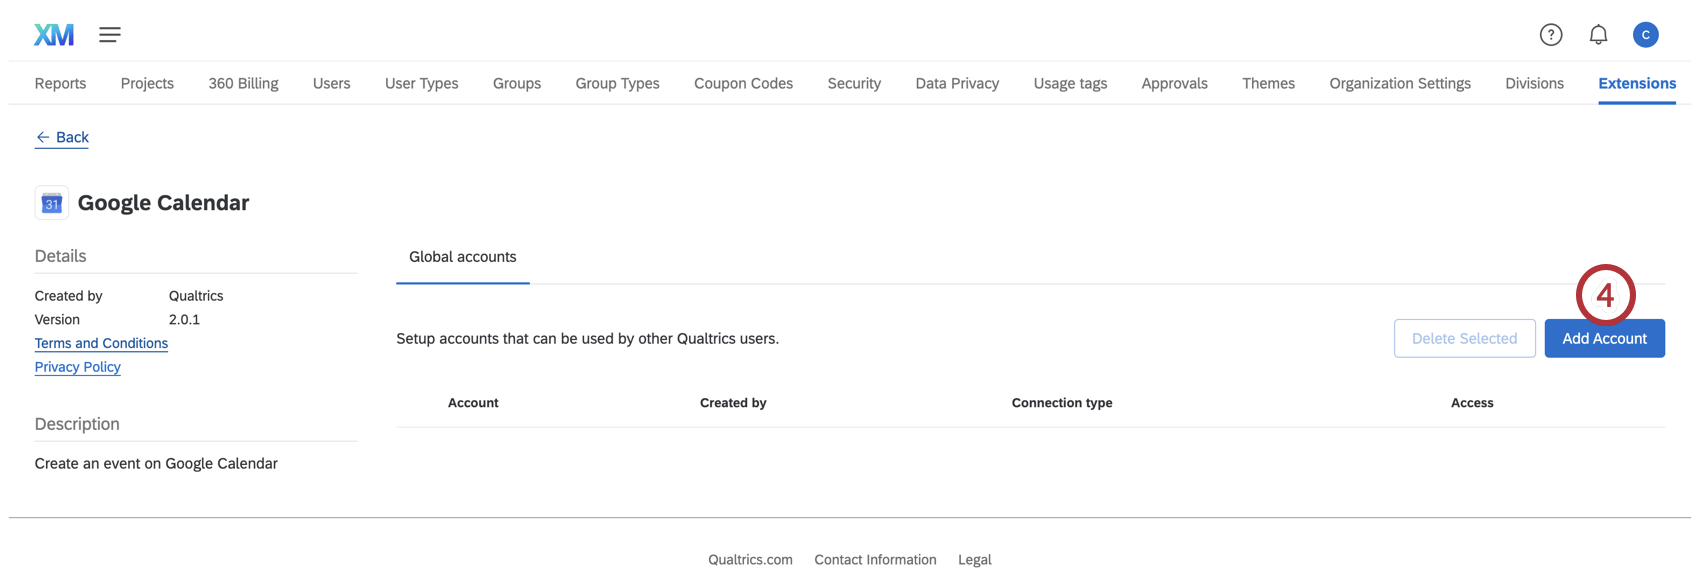
- Click Add Account.
- Give the account a name. This name is used for organizational purposes and to identify the account.
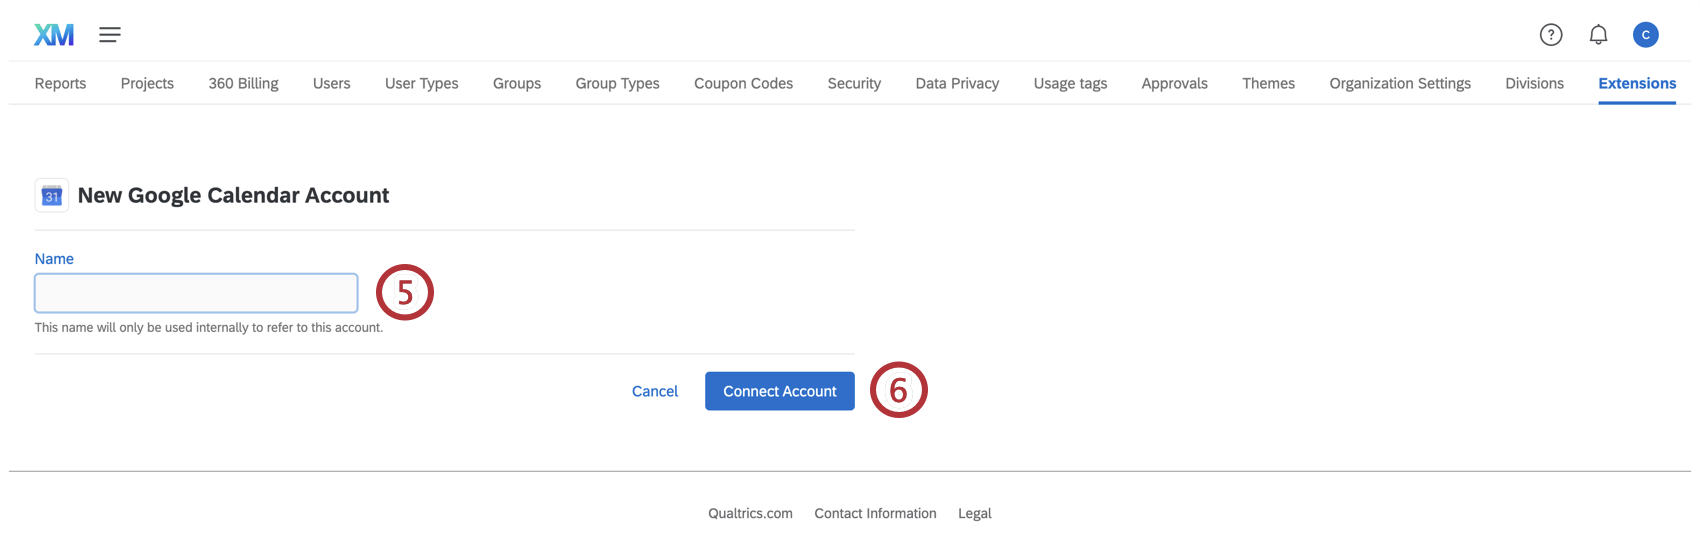
- Click Connect Account.
- Proceed to log in to your Google Calendar account.
For more on managing which users have access to this account, see Determining Who Can Use an Extension Account.
Adding an Account as an Individual User
Follow the steps in this section to add a Google Calendar account for your personal use. Only you will be able to use the account that you connect.
- Follow the steps in Creating a Google Calendar Task section until you get to the step where you select an account to use.
- Click Add user account.
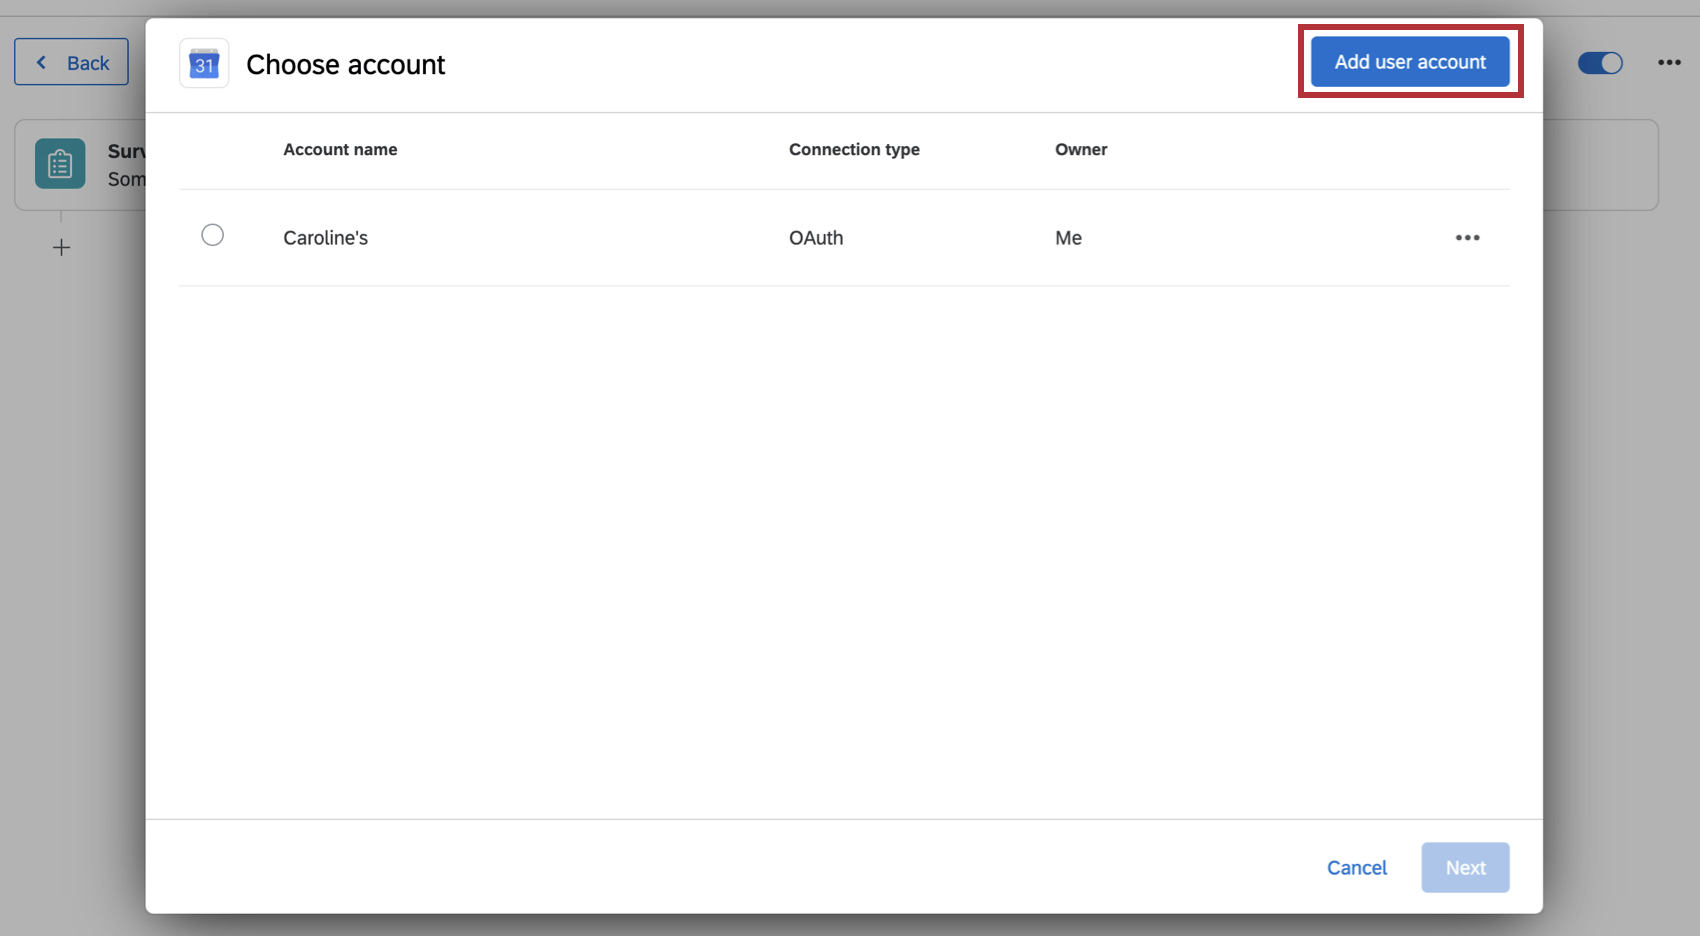
- Give your account a name. This name is used for organizational purposes and to identify the account.
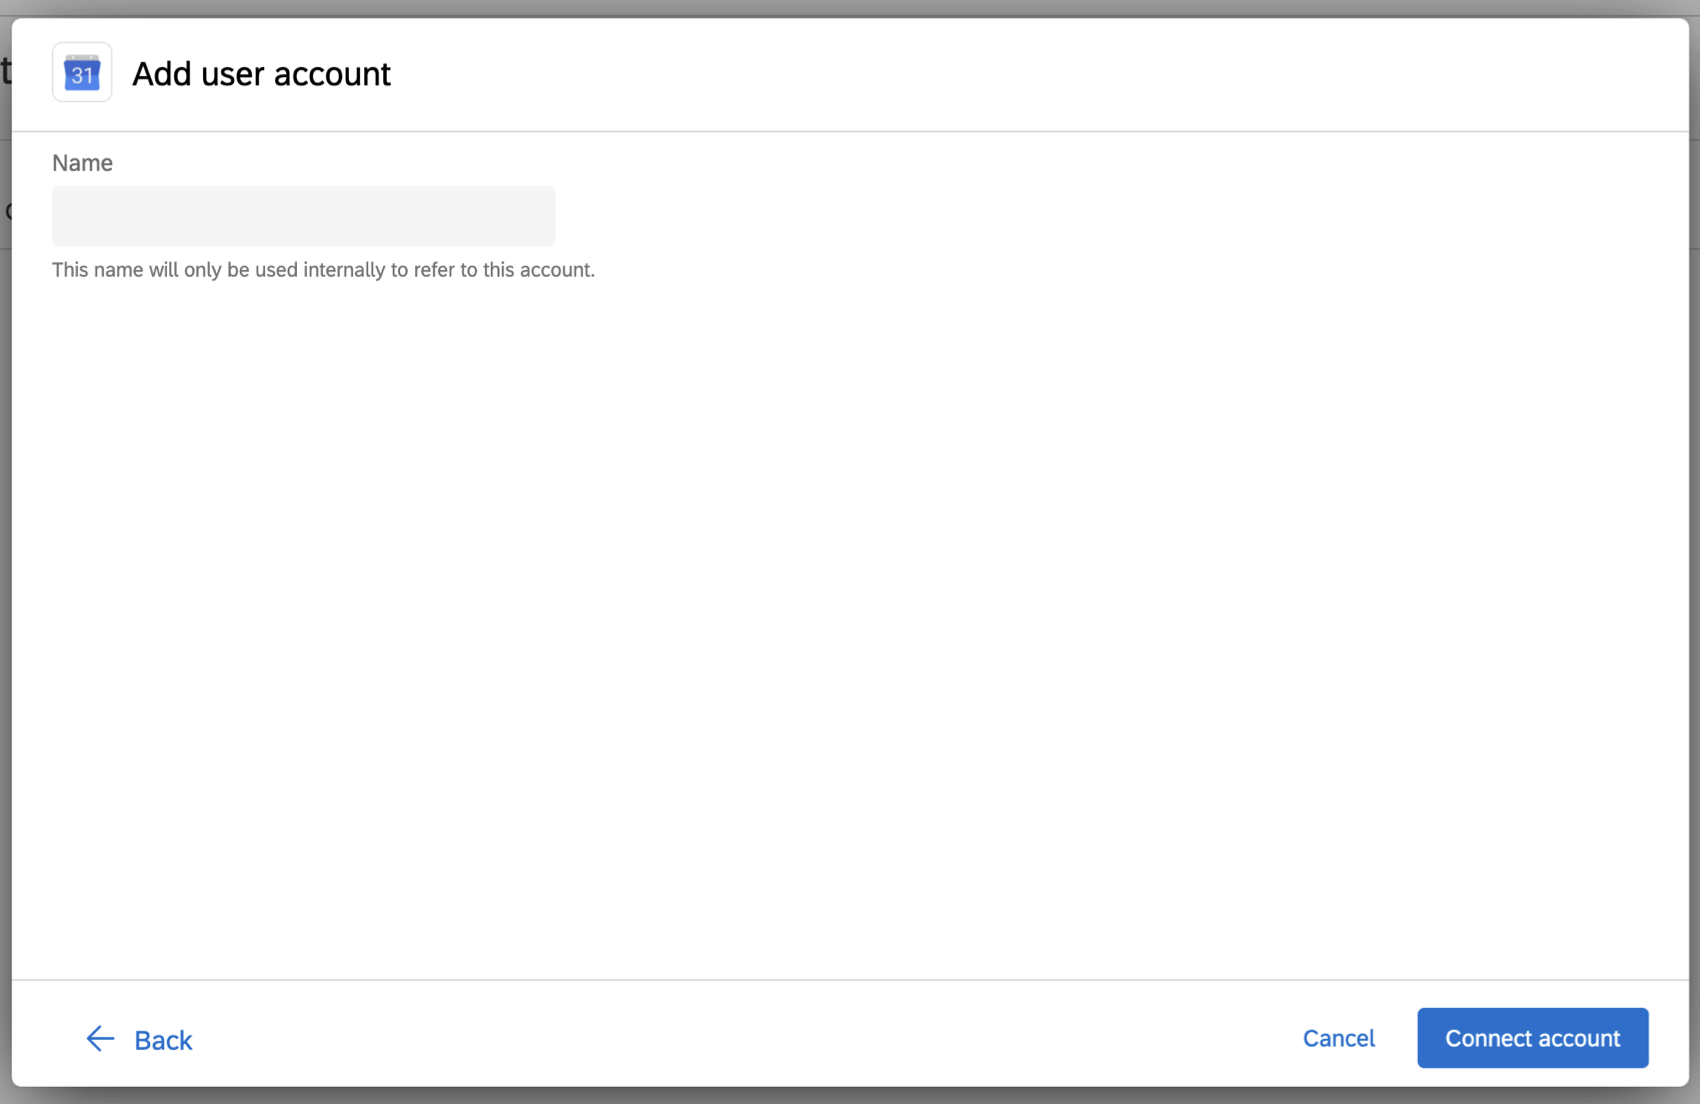
- Click Connect Account.
- Proceed to log in to your Google Calendar account.
Setting up a Google Calendar Task
Creating a Google Calendar Event
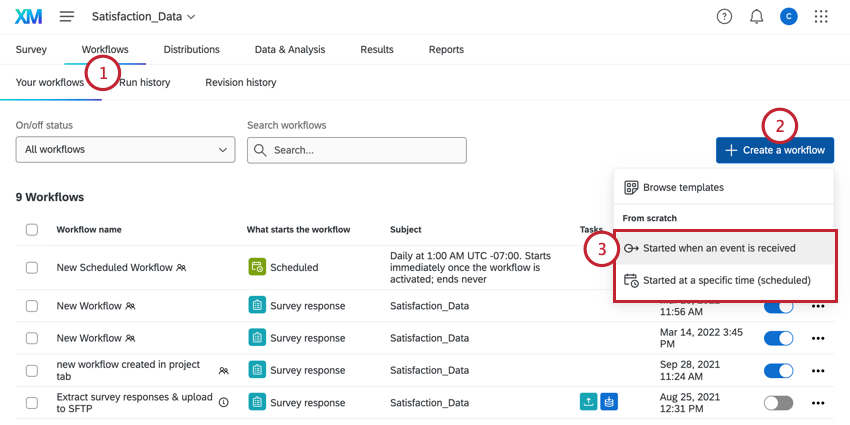
- Navigate to the Workflows tab of a project, or the stand-alone Workflows page.
 Qtip: To link this to a particular survey’s responses, we recommend starting in the Workflows tab of a survey.
 - Click Create a workflow.
- Create either a scheduled or event-based workflow. See Scheduled vs. Event-Based Workflows for more information.
Qtip: To automatically use this survey’s responses to add events to your Google Calendar, this should be an event-based workflow.
- Determine the schedule for your workflow (if scheduled) or choose the event that begins the workflow (if event-based).
 Qtip: To start the workflow based on a survey response, set up a survey response event.
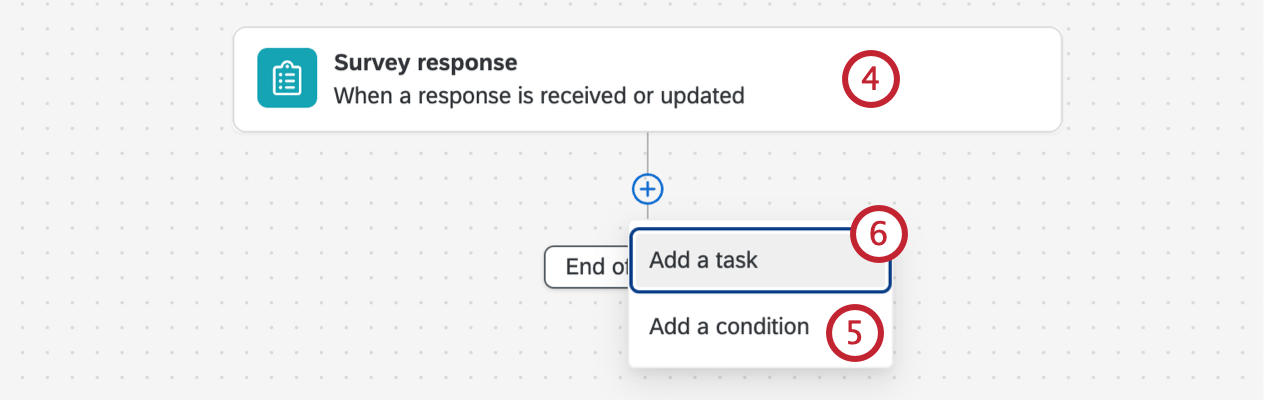
 - If desired, click the plus sign ( + ) then Add a condition to add conditions to your workflow, which determines when the workflow runs.
- Click the plus sign ( + ) and then Add a task.
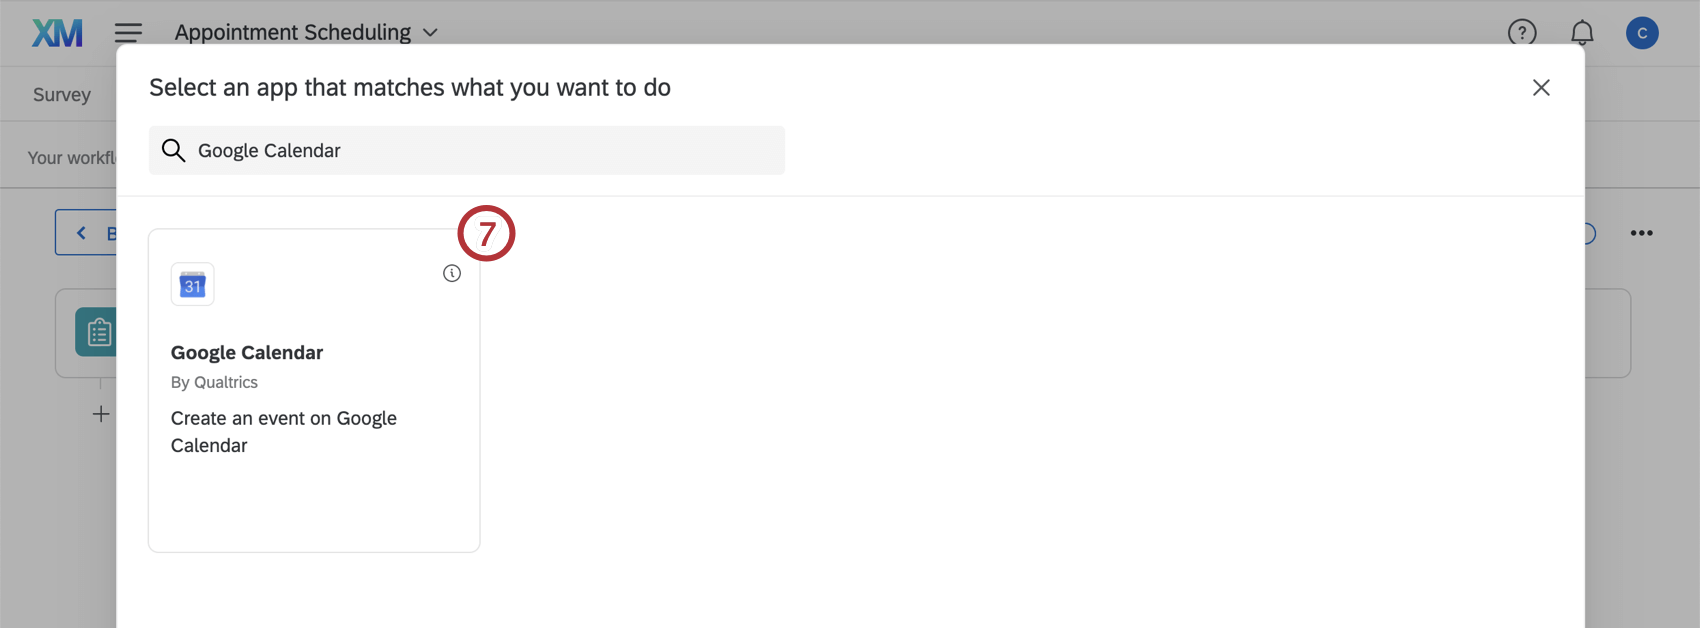
- Select Google Calendar.
- Select Create event.
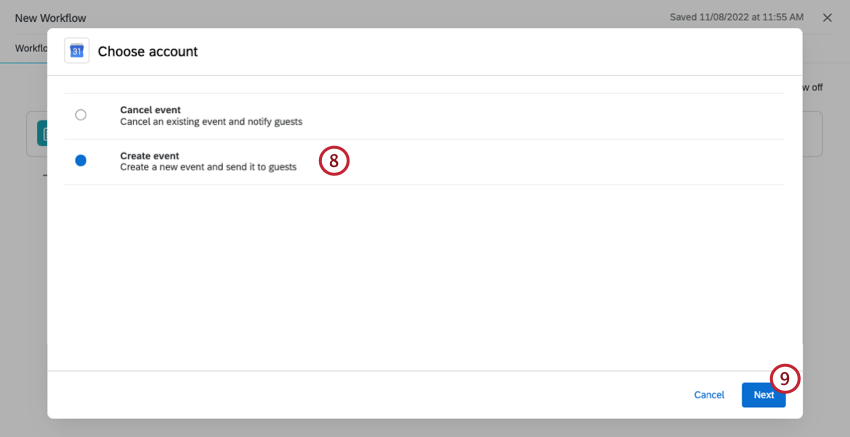
- Click Next.
- Choose the Google account to modify calendar events in. Any accounts added by Brand Administrators, as well as accounts you’ve added yourself, will be listed here.
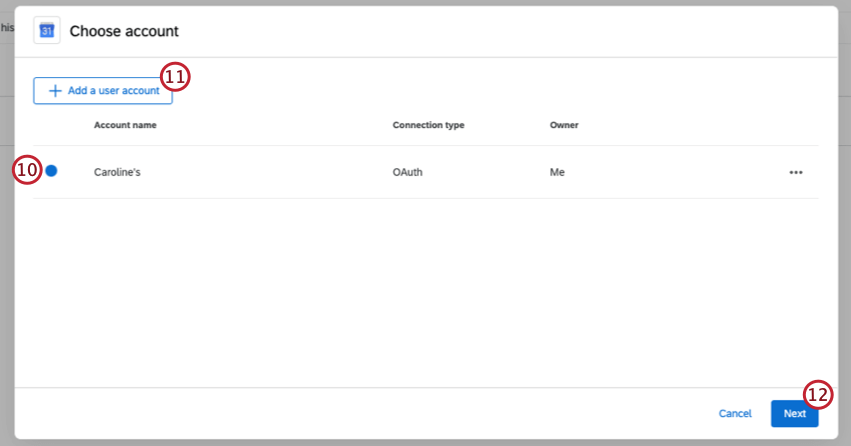
- If you want to add new account credentials, click Add new account and follow the steps in the Connecting a Google Calendar Account section.
- Click Next.
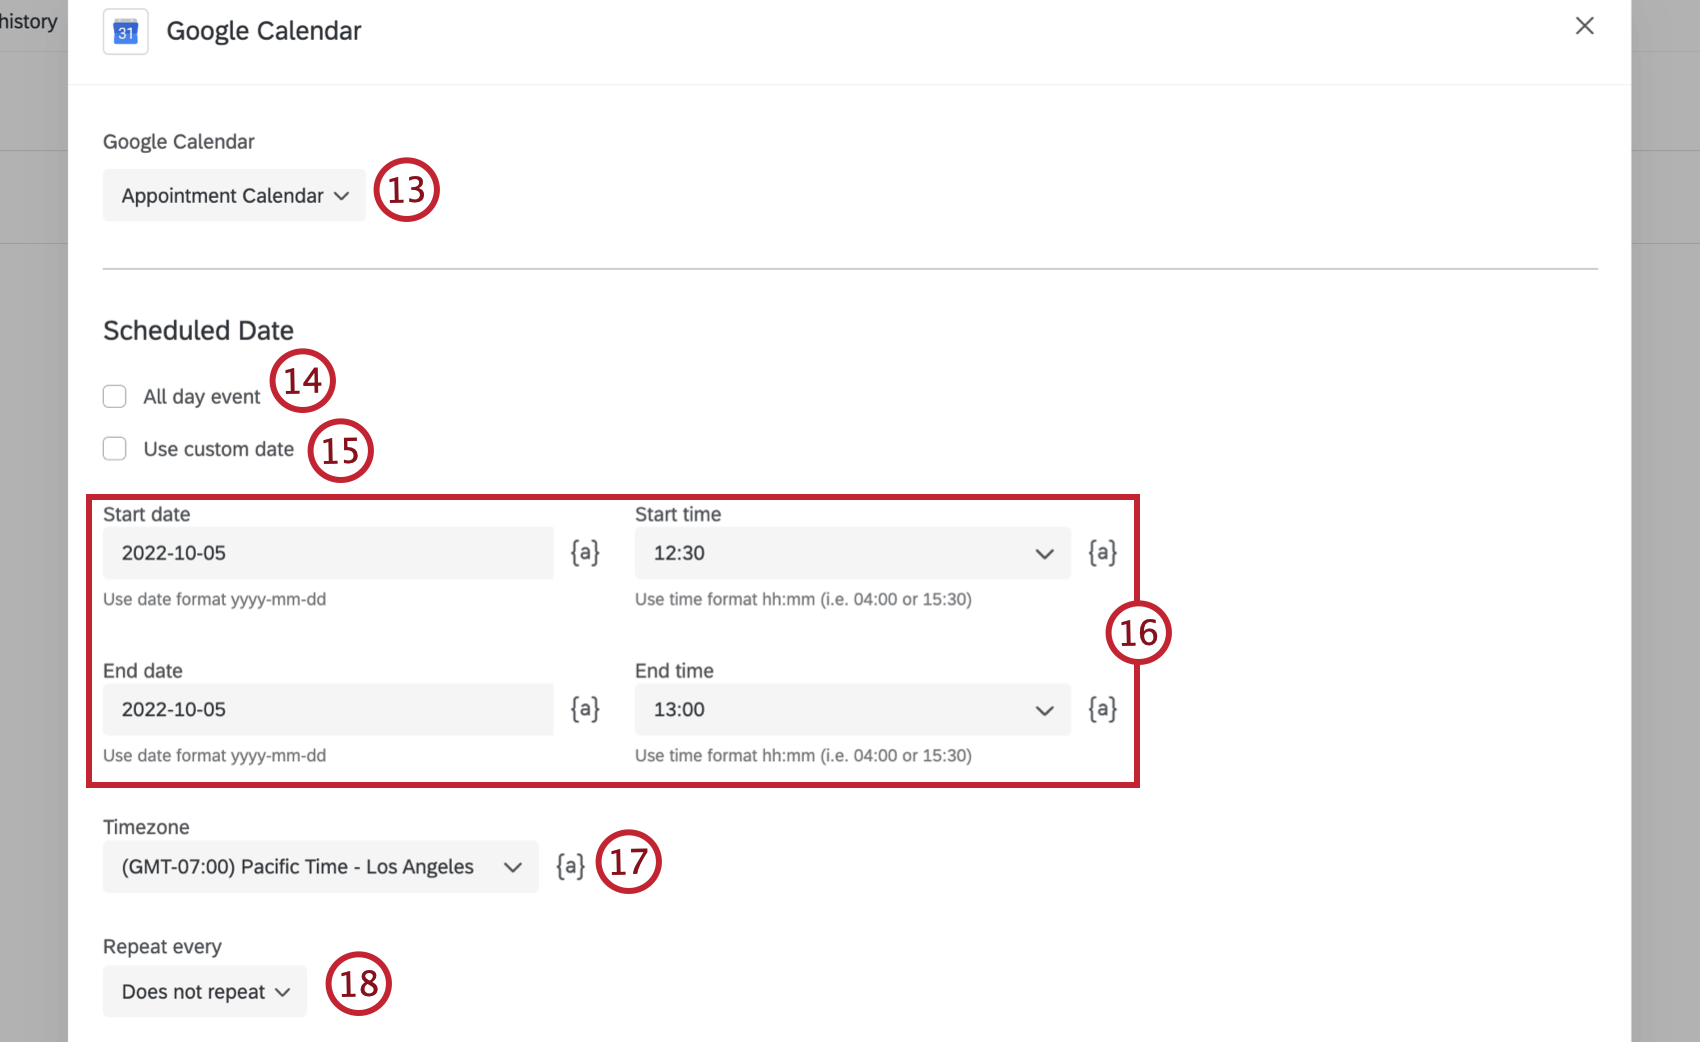
- Select a Google Calendar from the dropdown.
 Qtip: You can only select calendars that you are the owner of.
 - Select All day event if the event will last all day. When this option is selected you do not have to select a start time or end time.
- Select Use custom date if you want to use a date format other than yyyy-mm-dd.
- Specify a start date and end date for the event. If the event is not an all day event, specify a start time and end time.
Qtip: Dates should be in the format yyyy-mm-dd, and times should be in the format hh:mm.Attention: End dates are exclusive. If you are scheduling an event to be from April 1-2, you will need to select an end date of April 3 when configuring your event.
- Select the time zone for the event.
- Choose how often the event should repeat.
- If desired, add guests to the calendar event by typing in a comma-separated list of emails.
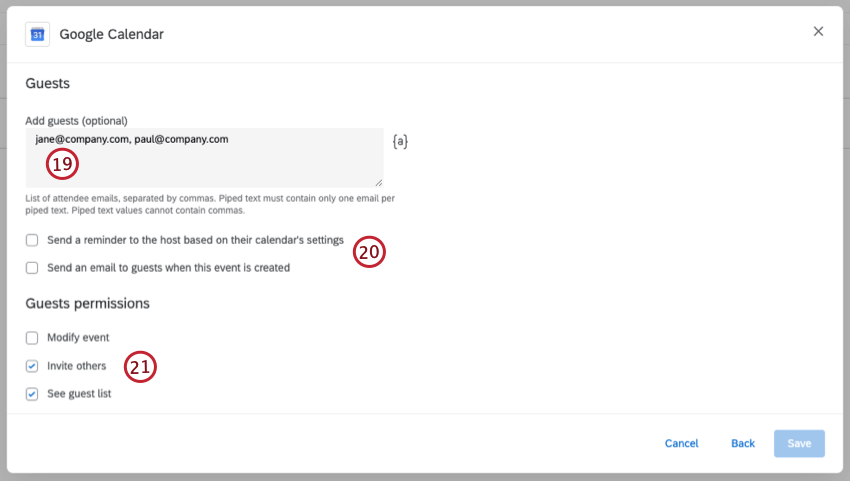
- Choose if you want to send a reminder to the host based on their calendar’s settings, or send an email to guests when the event is created.
- Select the permissions you want your guests to have by checking the appropriate boxes.
- Modify event: Give guests the ability to edit the event. This is disabled by default.
Attention: If you don’t give guests the Modify event permission, they can’t change the event’s date or time on their own calendar.
- Invite others: Give guests the ability to add other guests to the event. This is enabled by default.
- See guest list: Give guests the ability to see which other guests are added to the event. This is enabled by default.
Qtip: If you select Modify event, both Invite others and See guest list will be selected by default. - Modify event: Give guests the ability to edit the event. This is disabled by default.
- Add an event title. If desired, you can also add a description and location.
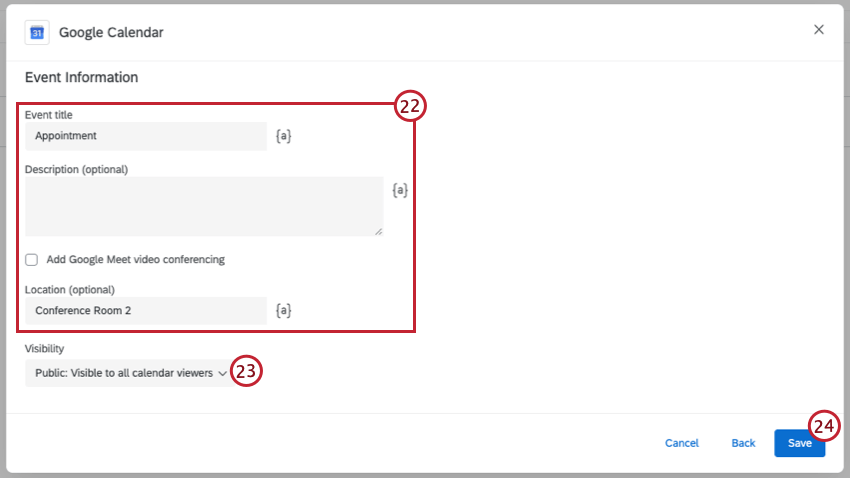 Qtip: Selecting Add Google Meet video conferencing will add a “Join with Google Meet” button to the calendar invite.
 - Select the calendar visibility for this event.
- When you’re finished adding all your fields, click Save.
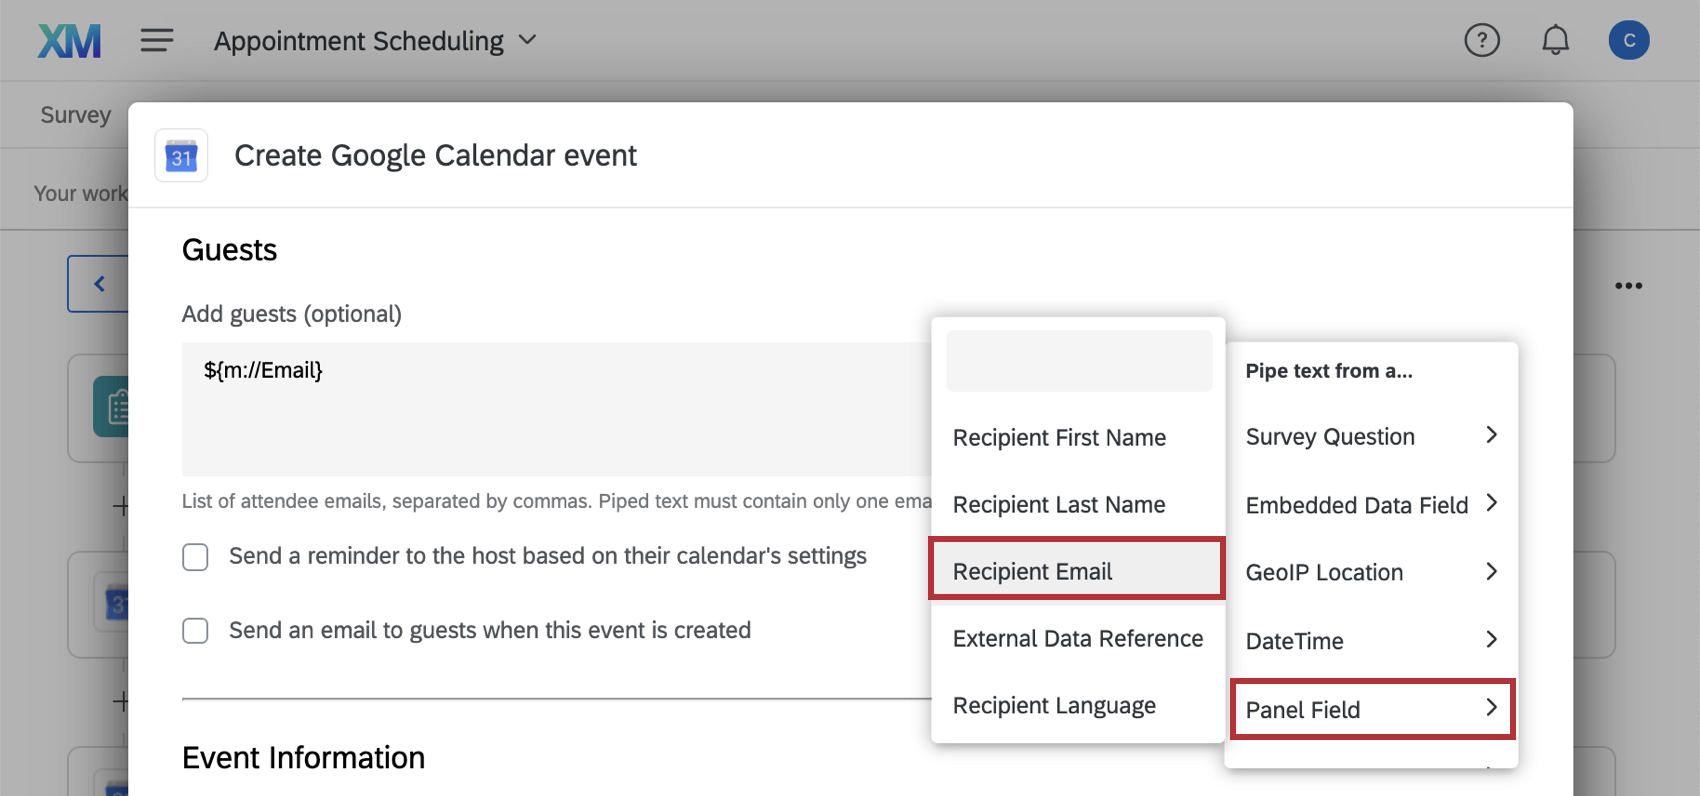
Using Piped Text
When creating a Google Calendar event you also have the option to use piped text for any of the fields. This allows you to customize calendar events based on information specific to each respondent, instead of using the same information for each respondent. Click the {a} icon next to a field to pipe in text from the survey. The available fields for piped text are the following:
- Survey Question: The response to a specific survey question.
- Embedded Data Field: The value of a specific embedded data field.
- GeoIP Location: The location information of a respondent.
- DateTime: A specific date or time.
Qtip: When piping in a date, it should be in the format yyyy-mm-dd. - Panel Field: The value of a specific directory field.
- Quota: The count of a survey quota.
Cancelling a Google Calendar Event
Cancelling an event involves many of the same steps as creating a new calendar event.
- Follow the steps 1-7 in Creating a Google Calendar Task section until you get to step 8, where you select which Google Calendar task you would like to use.
- Select Cancel Event.
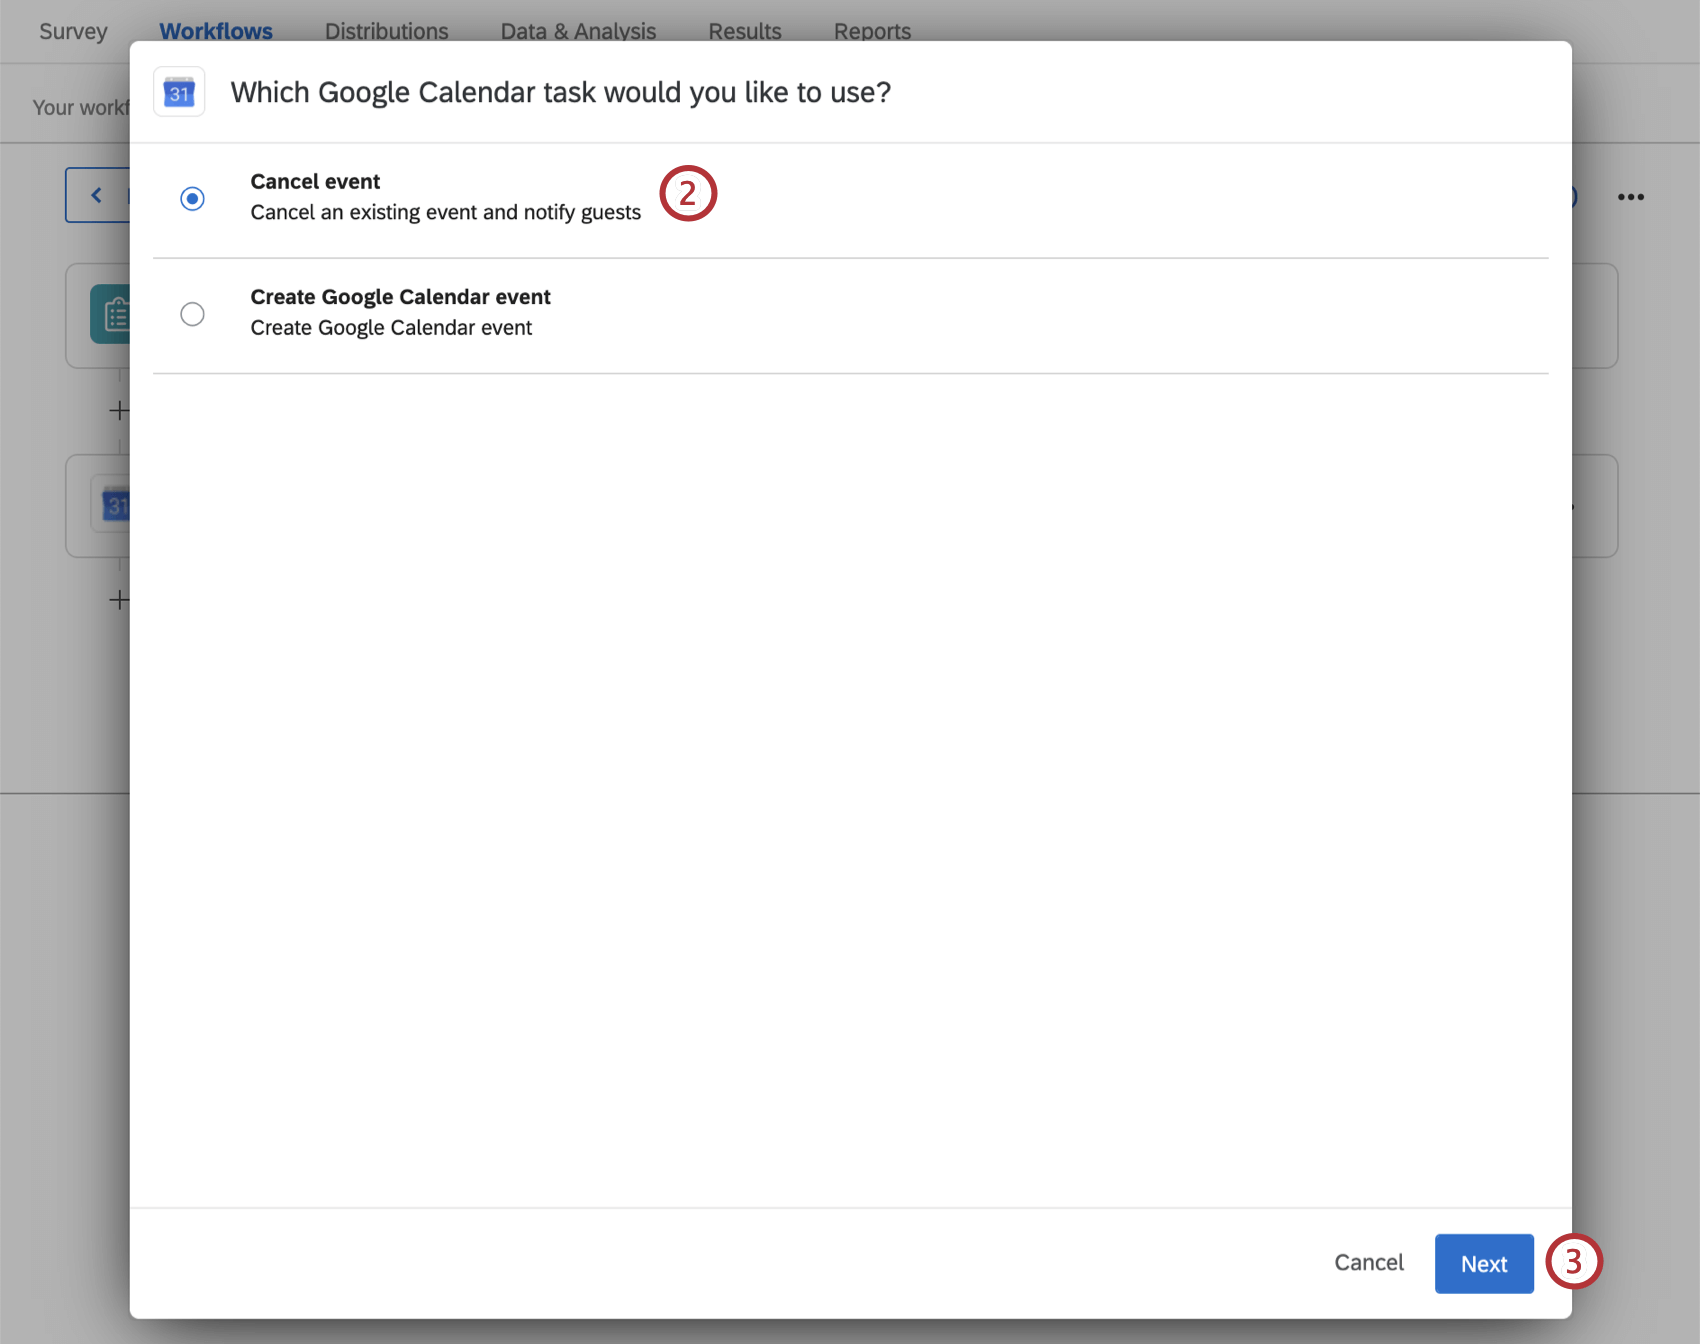
- Click Next.
- Choose the Google account to modify calendar events on. Any accounts added by Brand Administrators, as well as accounts you’ve added yourself, will be listed here.

- If you want to add new account credentials, click Add new account and follow the steps in the Connecting a Google Calendar Account section.
- Click Next.
- Select a calendar.
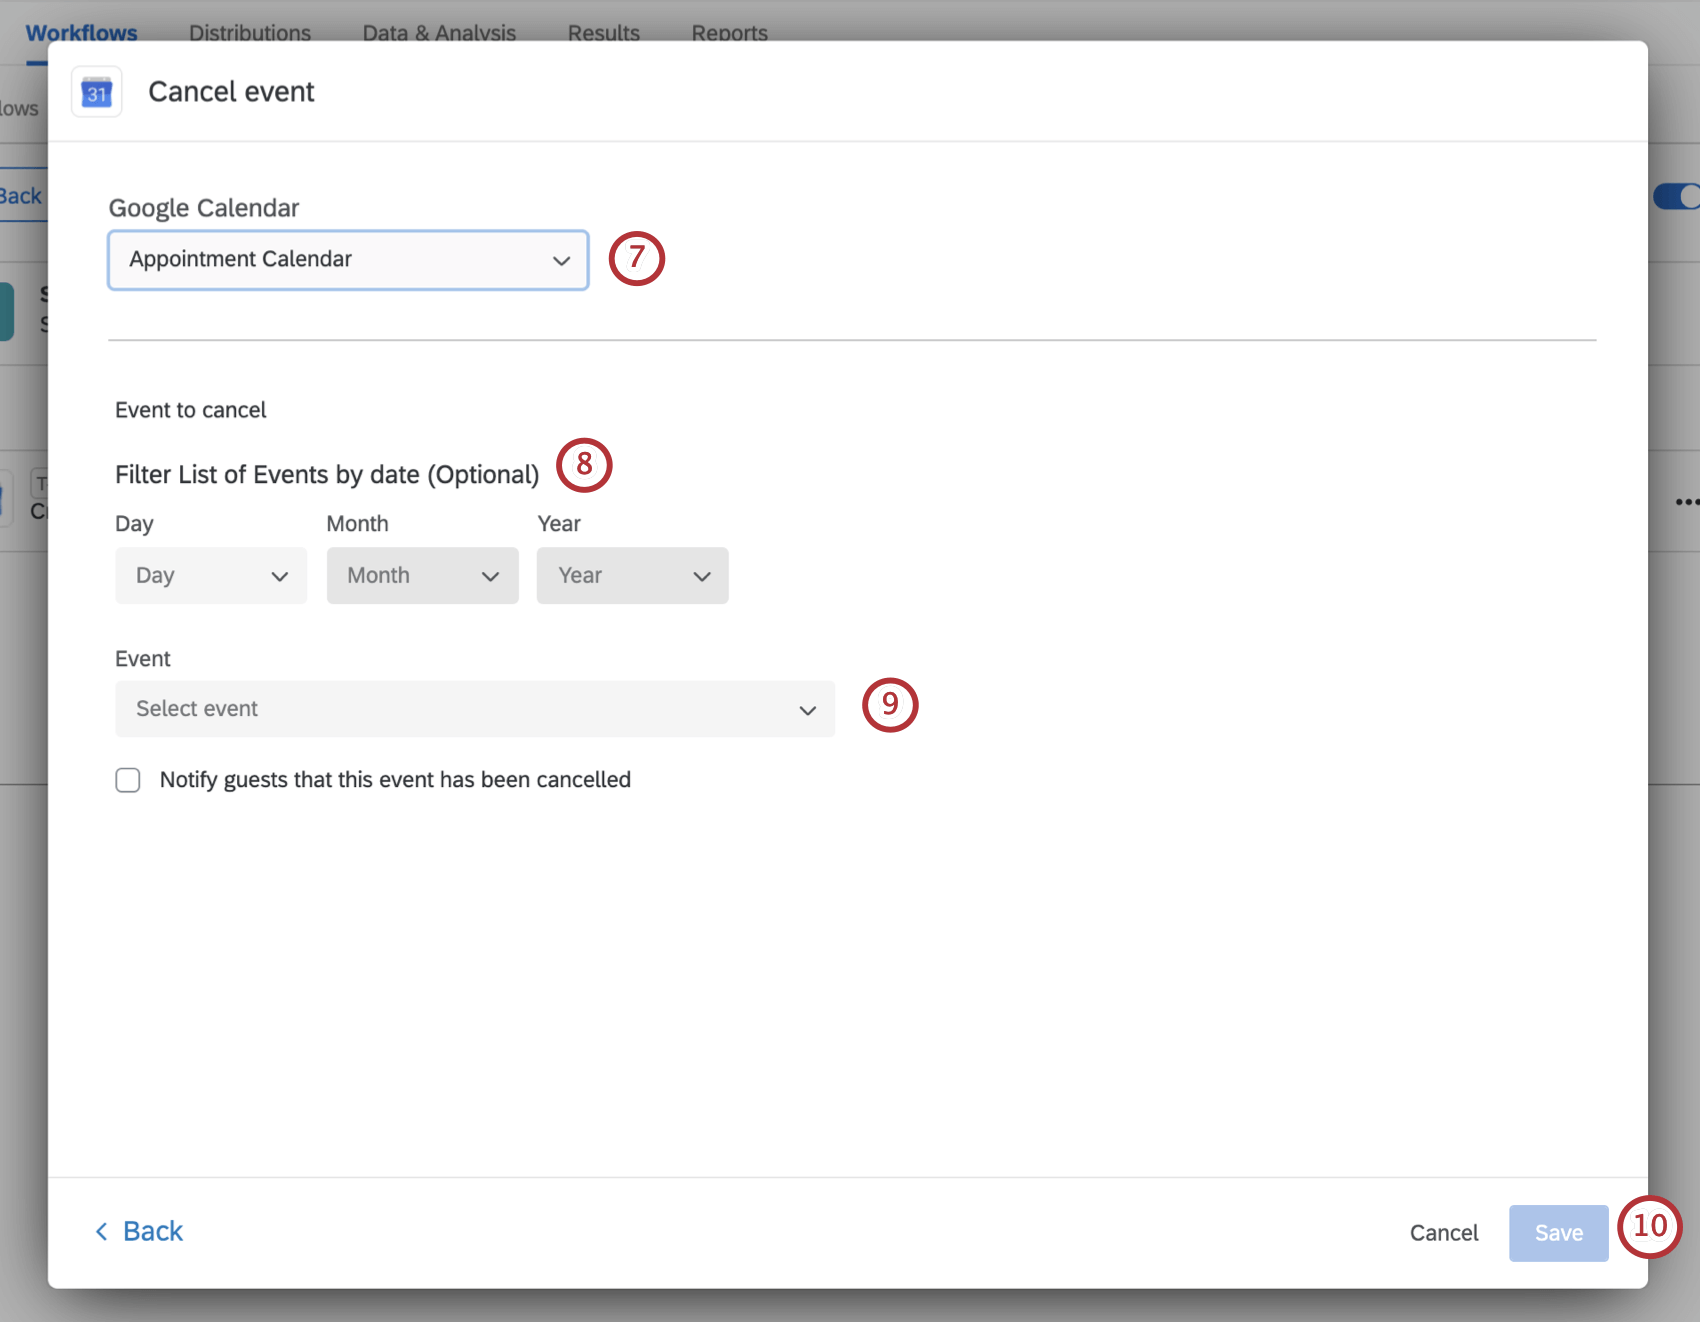
- If desired, select a specific date to only show events that occur on that date. If no date is selected the event dropdown will display all events for the selected calendar.
- Select the event to be cancelled. Check Notify guests that this event has been cancelled if you want guests to receive an email about the cancellation.
- Click Save.