
Screen-Out Management
What's on this page
About Screen-Out Management
What happens when a respondent doesn’t meet your qualifications for completing the survey? By default, all responses that are submitted, regardless of which questions are answered, are saved and considered “Complete”. All collected responses will count toward any response limit on your license.
In addition to the default behavior, there are 3 alternative methods to handle screened out respondents:
- Save all responses, but flag those that are screened out with embedded data for easier identification and filtering in the results.
- Discard screened out responses so they are not saved and do not count toward any response limit on your license.
- Discard screened out responses, but keep a tally of how many respondents screen out at different points in the survey (also known as “Incidence Reporting”, this method is an add-on feature not included in the standard Qualtrics license).
This page further details the default behavior for screened out responses and outlines these methods of managing screen outs in the survey flow.
Recording Screened Out Responses
By default, Qualtrics records any respondent who makes it to an ending point in the survey as a complete response. This includes respondents who answer all questions, as well as those who answer a few questions and then are sent to the end of the survey with skip logic, display logic, or branch logic. All these responses are included in the results and in the downloaded dataset, and are considered “complete” responses. See more on what would not be considered a “complete” response on the Incomplete Survey Responses page.
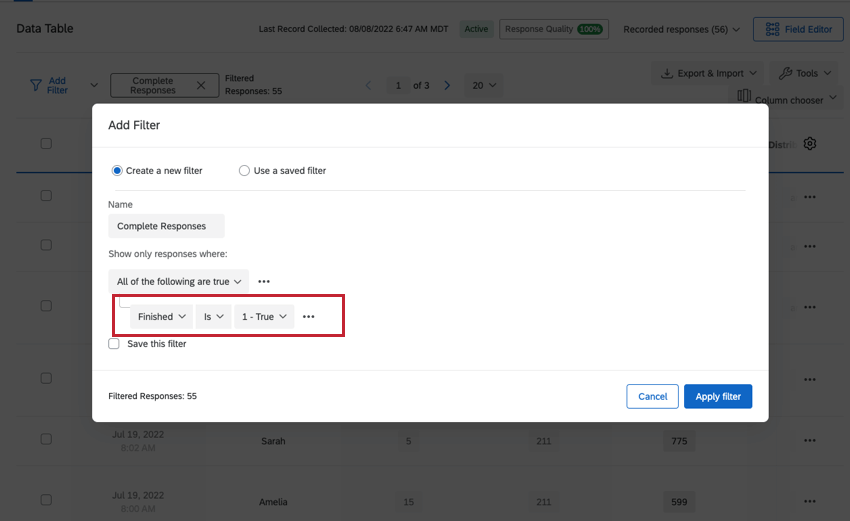
Example: In this image, the filter only shows those whose “Finished” status is “True”. After selecting “Apply filter”, only the completed responses will be shown in the data table.

The number of responses indicated above (52) refers to any respondent who made it to an ending point in the survey.
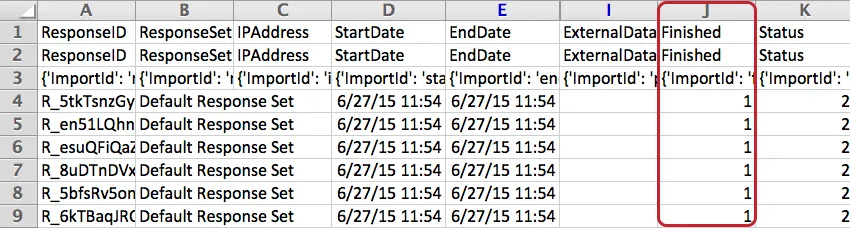
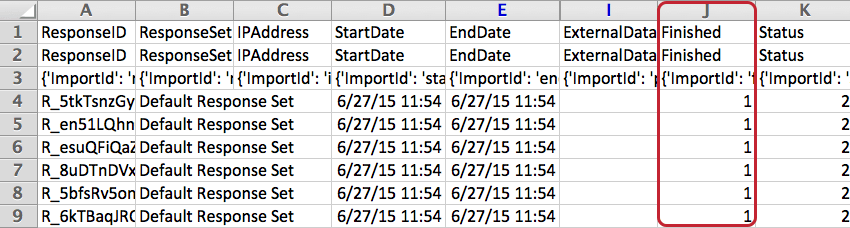
In the Finished column of the downloaded survey data, “1” refers to any respondent who made it to an ending point in the survey. Columns F, G, and H are hidden to make the screenshot more readable.
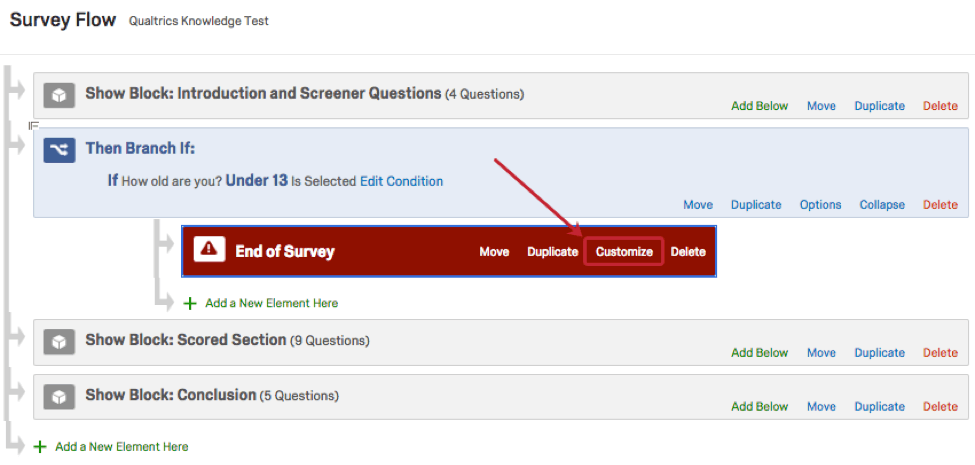
Screening Out Respondents in the Survey Flow
Methods for managing screened out responses—such as flagging, deleting, and tallying screen outs—are all handled in the survey flow. To use any of these methods, you’ll first need to screen respondents out using the survey flow. This process consists of 2 steps:
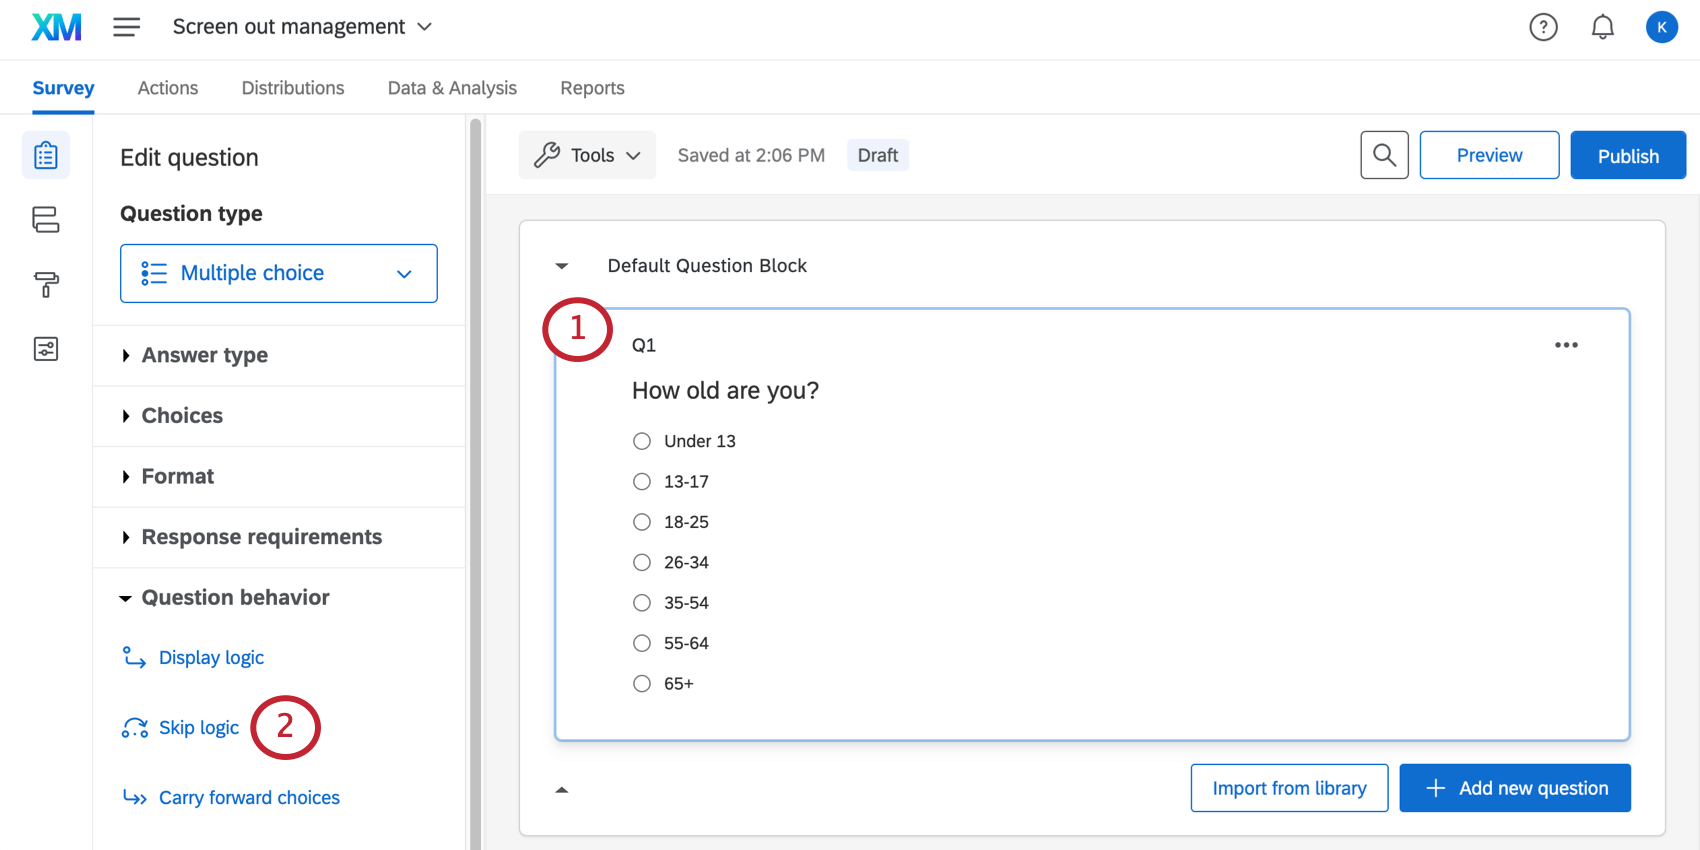
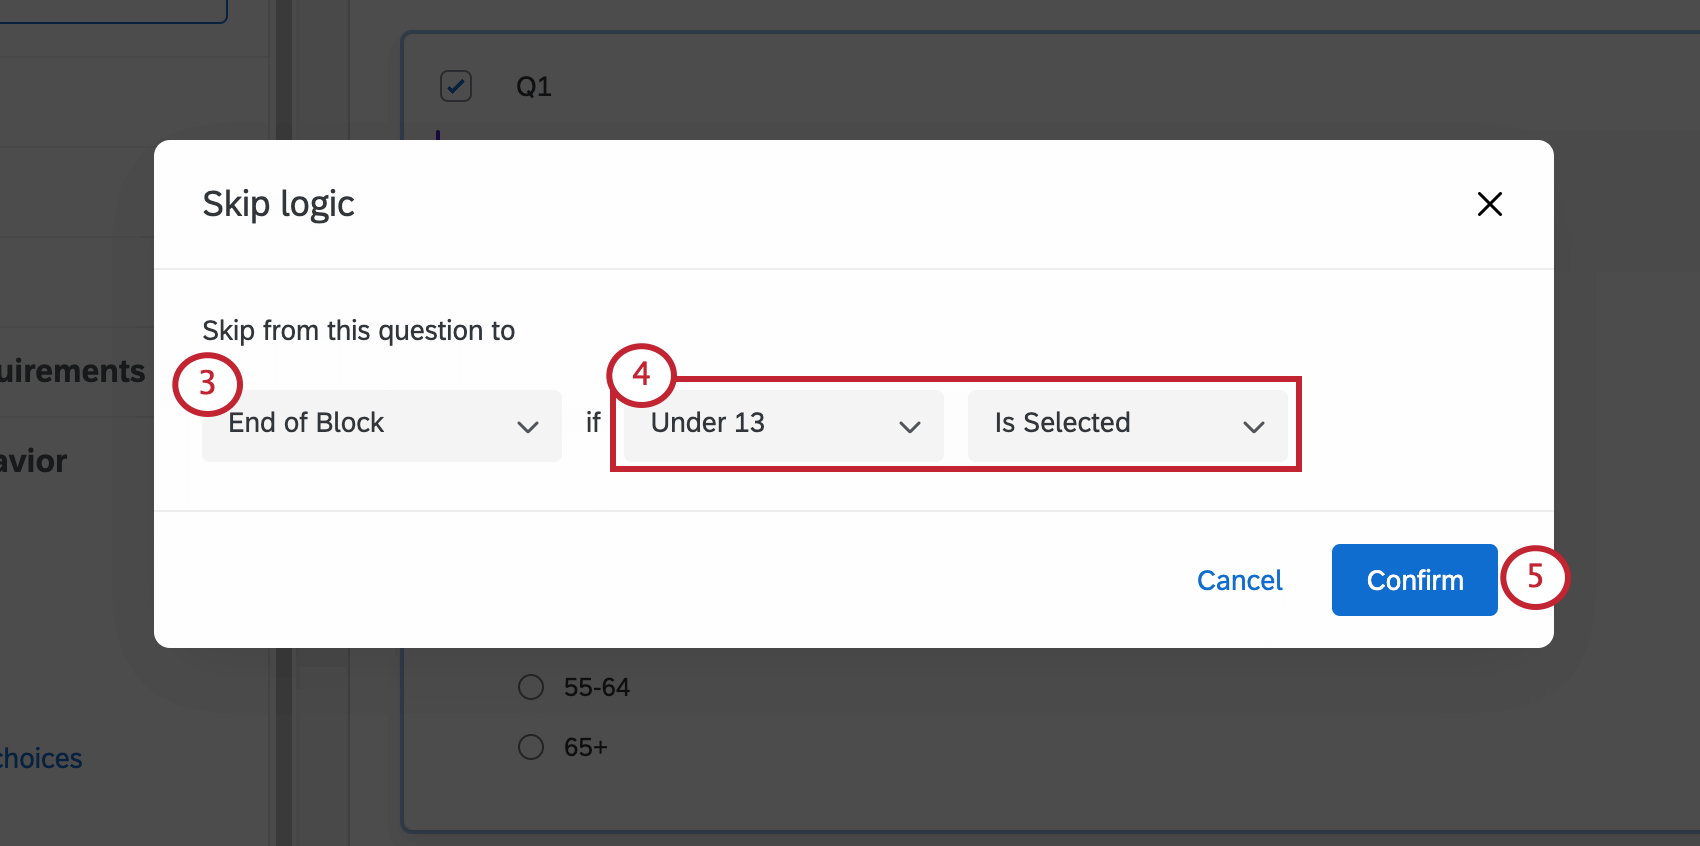
To skip respondents to the end of a question block
Qtip: Skipping screened out respondents to the end of the question block makes it easier to end the survey immediately when a respondent no longer qualifies for the survey. It also saves the respondent the time they would have spent answering the rest of the questions in that block.
Qtip: If you don’t need to delete, flag, or tally screened out responses, but instead would like them recorded in the dataset just like any other response, you can choose to skip respondents to End of Survey instead of End of Block and ignore all of the steps below.
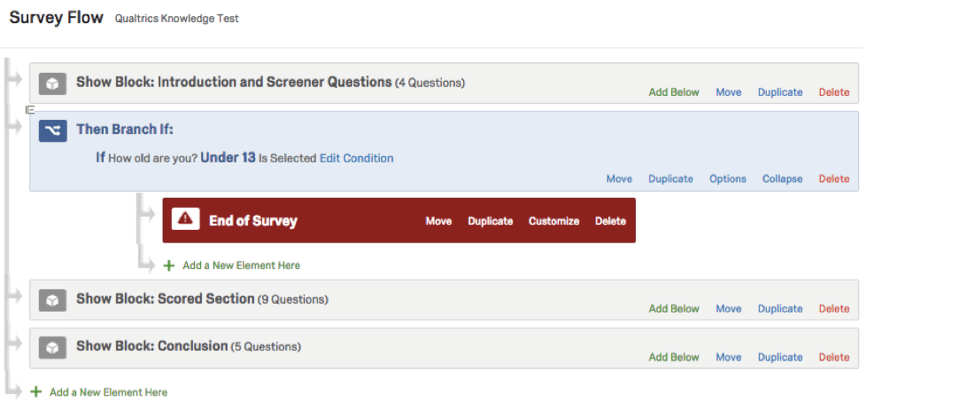
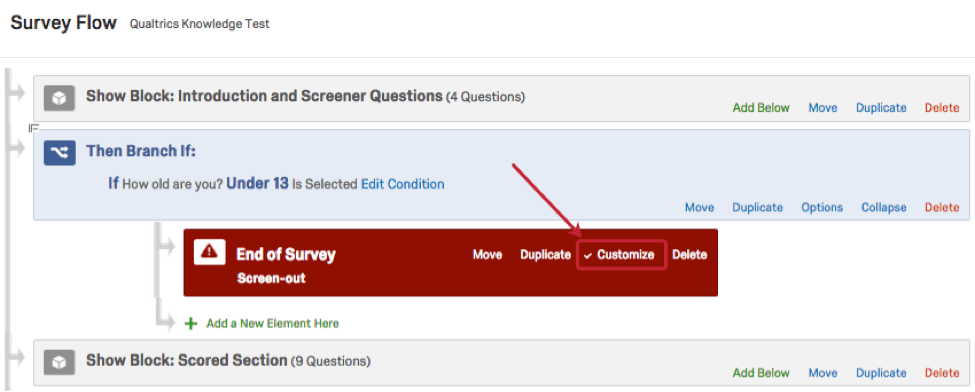
Branching Respondents Out of the Survey
Now that screened out respondents have been skipped past the questions they no longer qualify for, we can use the Survey Flow to screen them out of the survey.
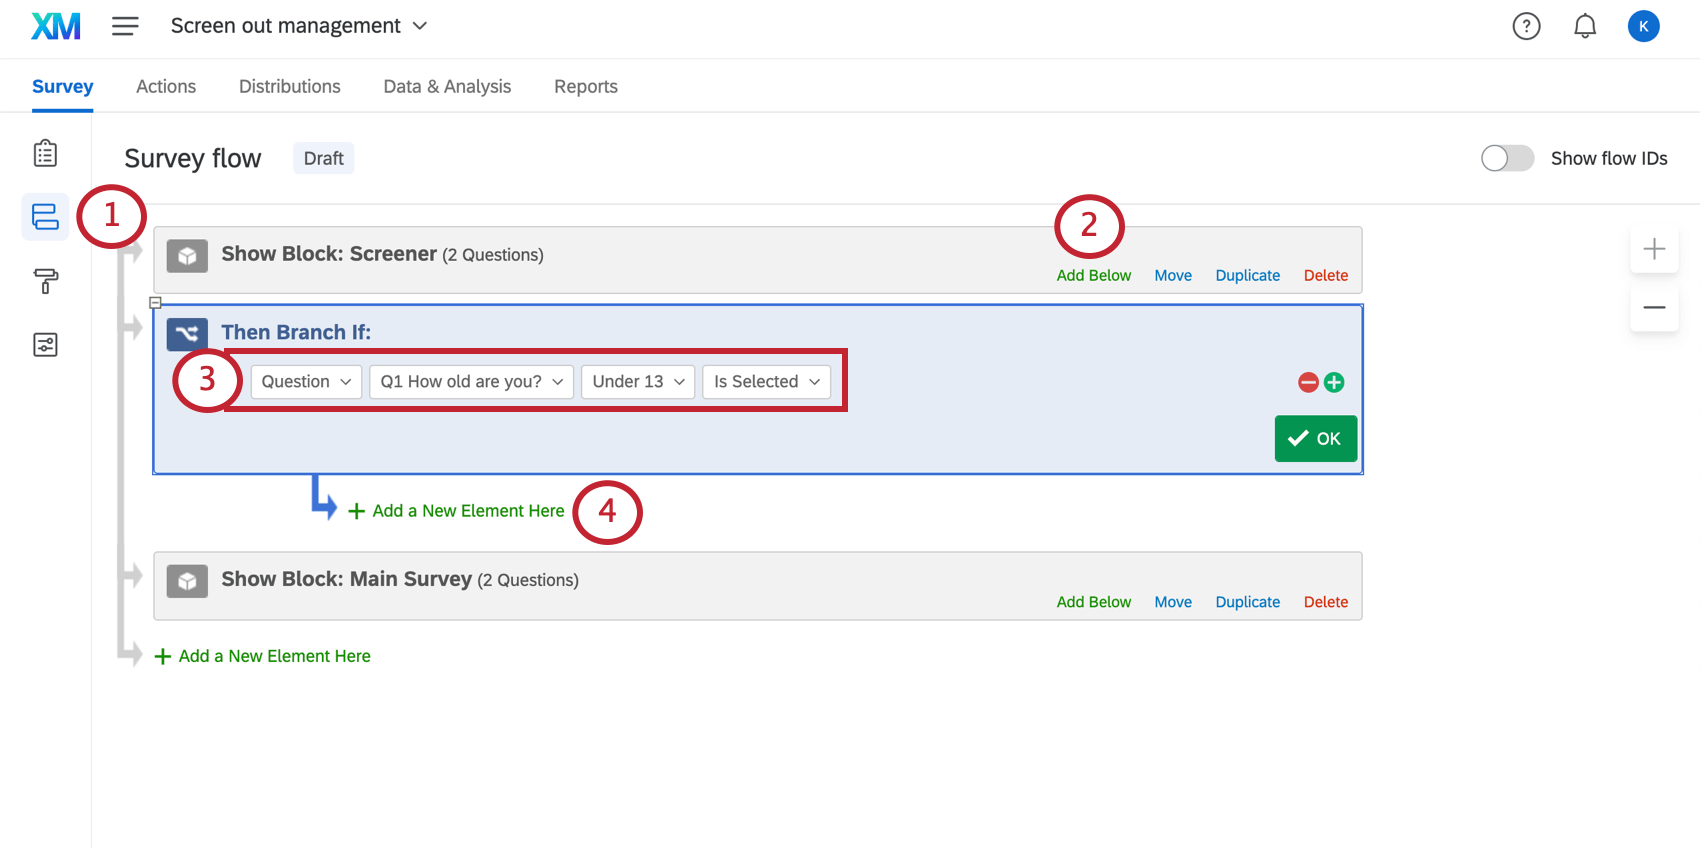
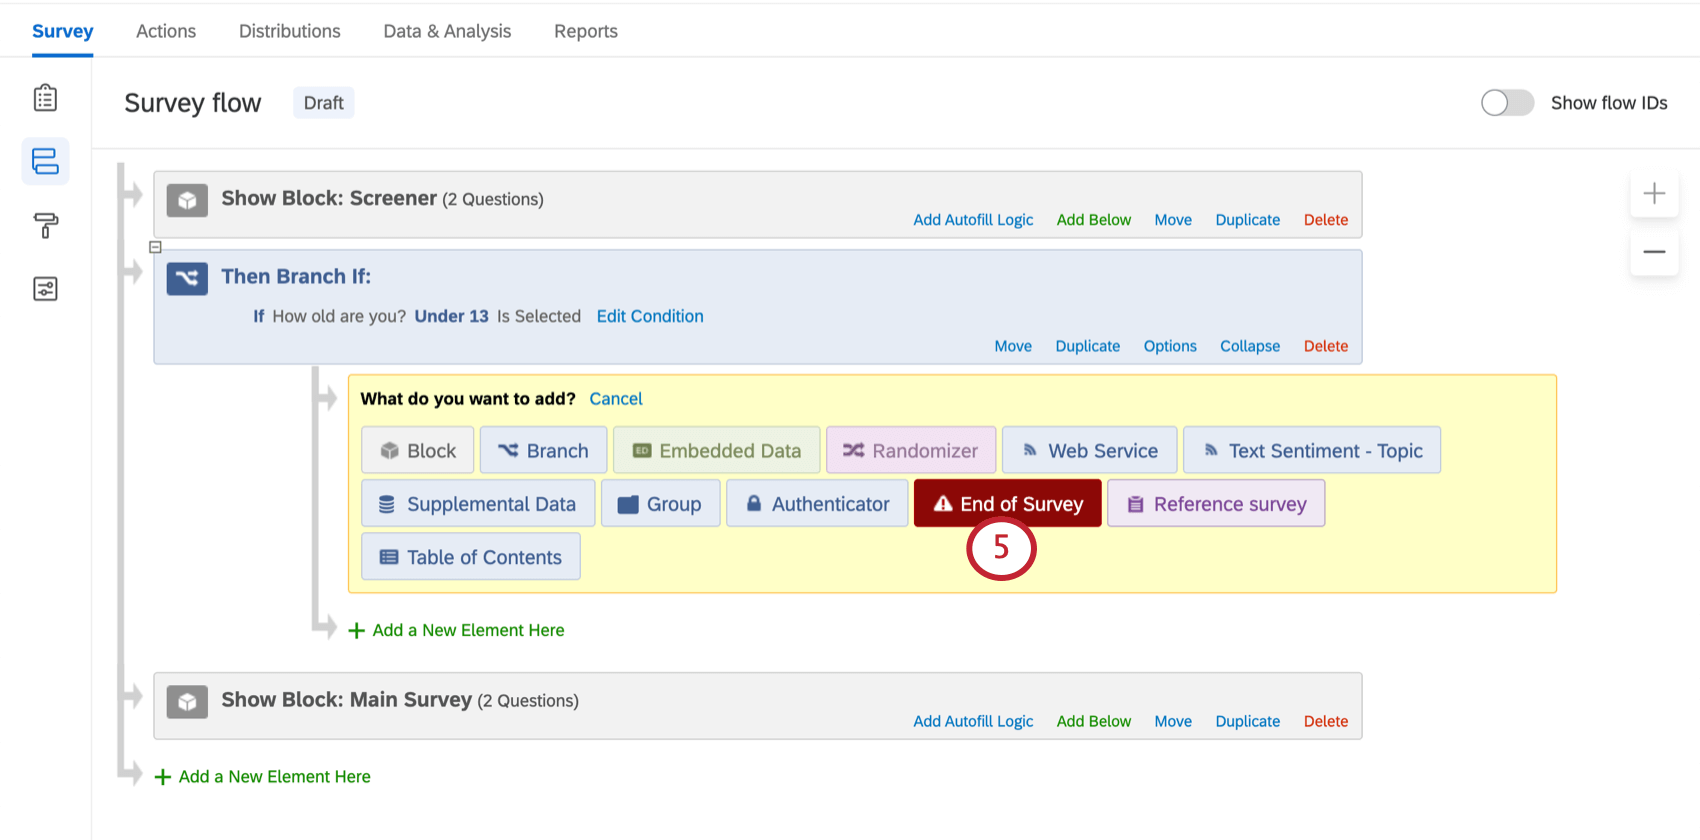
With the steps above, respondents are now screened out in the survey flow rather than with just skip logic. This method opens up the options to flag, delete, or tally these responses. See the following sections for more information on how to implement these options.
Flagging Screened Out Responses
One common scenario for handling screened out responses is to save them in the dataset and flag them with embedded data for easy identification and quick data filtering.
Embedded data is any information you choose to save with survey responses in addition to the answers to the survey questions. In this case, you might save an embedded data field with the name “Response Type” and set it equal to “Partial”, “Screened Out”, or “Complete”, depending on where the respondent exits the survey.
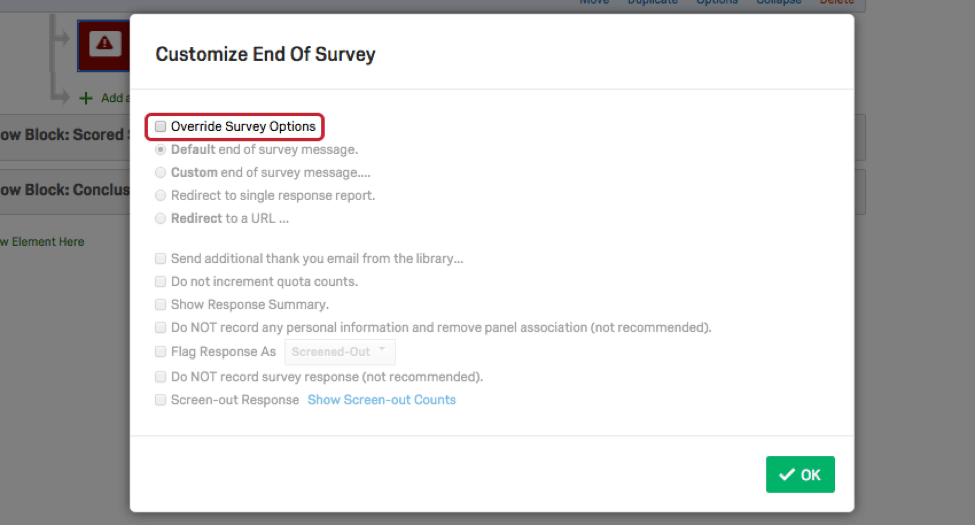
To flag screened out responses
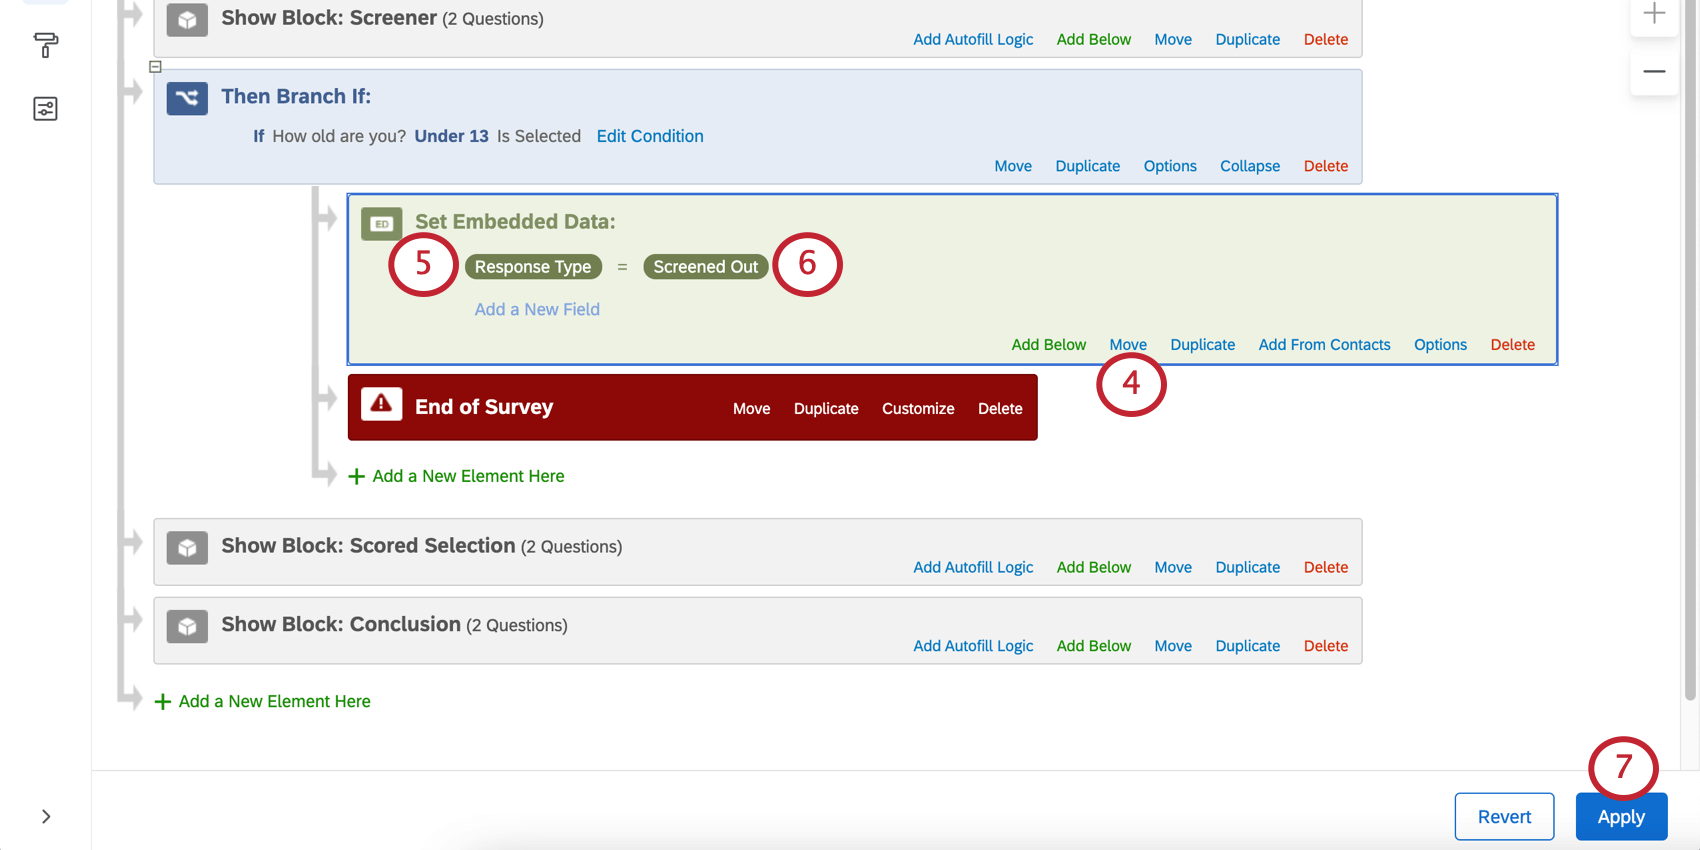
In the results, embedded data is reported along with the survey questions. In the example above, a field called “Response Type” will be included in the data, with entries of “Screened Out” for respondents who completed the survey this way.
Qtip: If you just want to flag screen outs and you don’t need to mark partials and completes (or any other fields), you can use the Flag Response As option in the end of survey element and set it to Screened-Out.
Embedded data can also be placed at other points in the survey flow to track other places where respondents leave the survey.
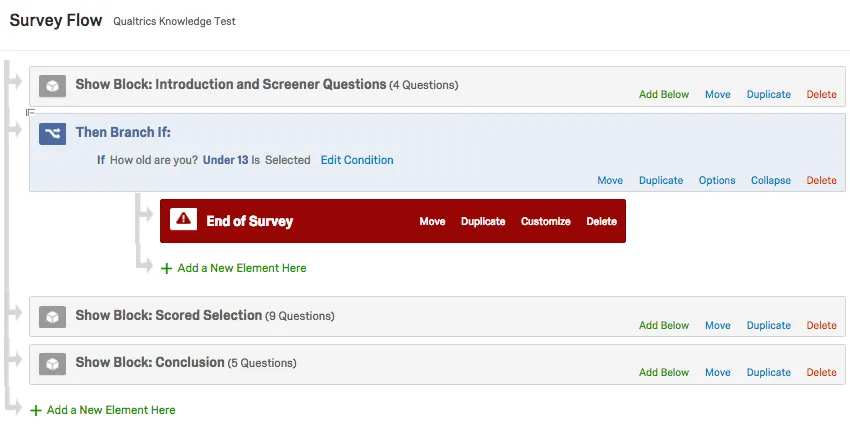
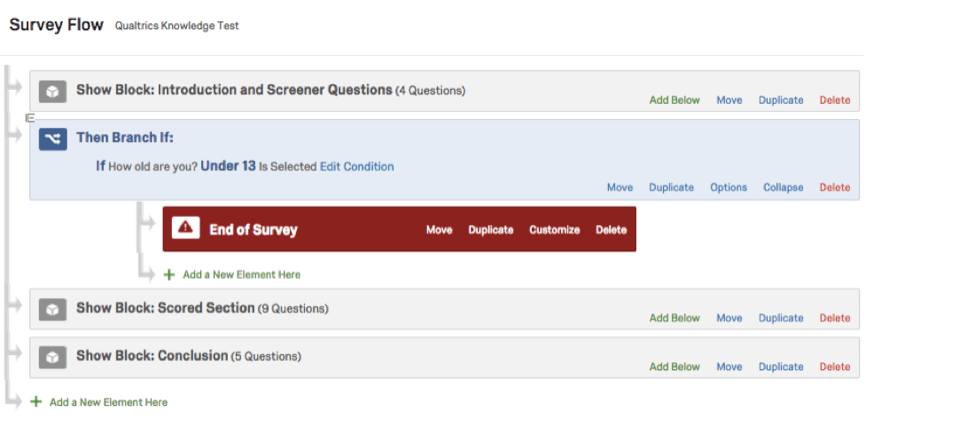
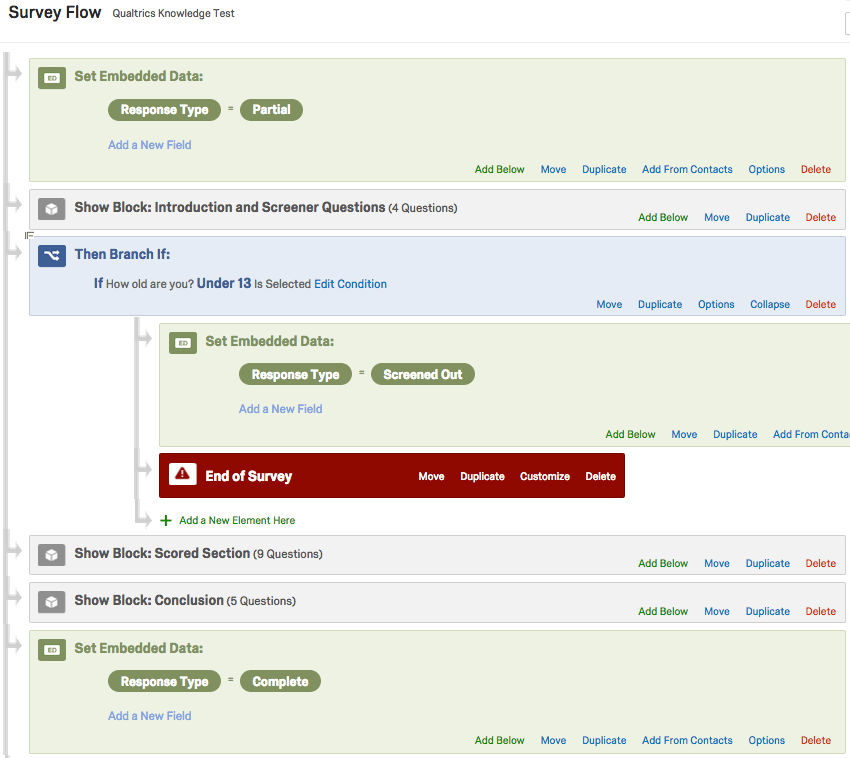
Example of flagging responses
Let’s say we want to assign values of Partial, Complete, and Screened Out to our respondents. Our survey flow might look something like this:
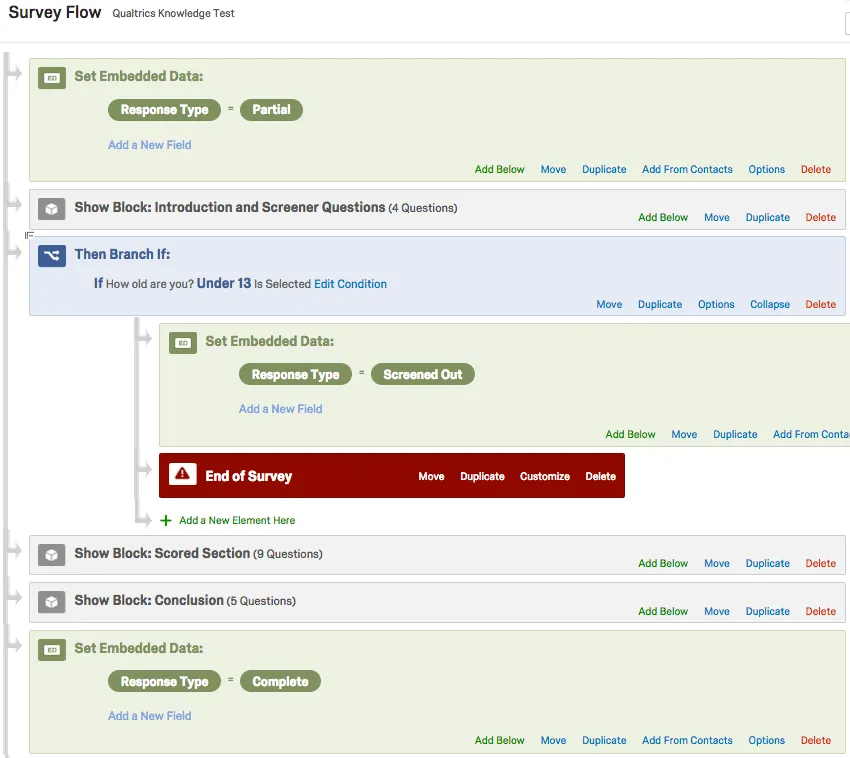
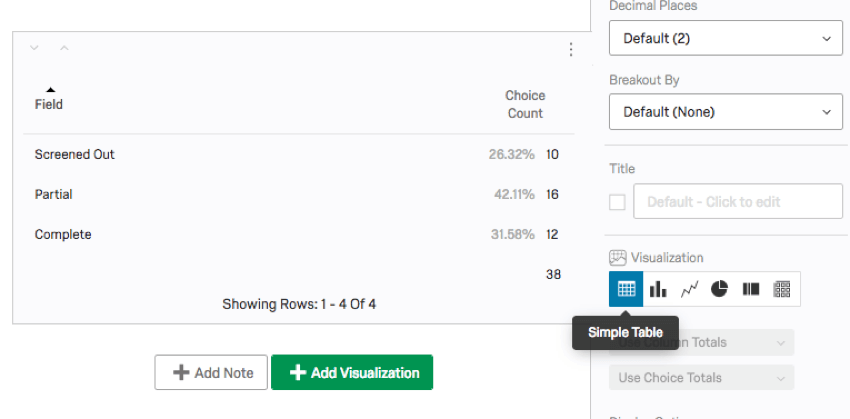
All respondents at the start of the survey are assigned a “Response Type” of “Partial”. Those who are screened out after the screener questions have “Response Type” changed from “Partial” to “Screened Out”. Those who either finish the entire survey have “Response Type” changed from “Partial” to “Complete”. Those who do not finish the survey will remain with a “Response Type” of “Partial”.
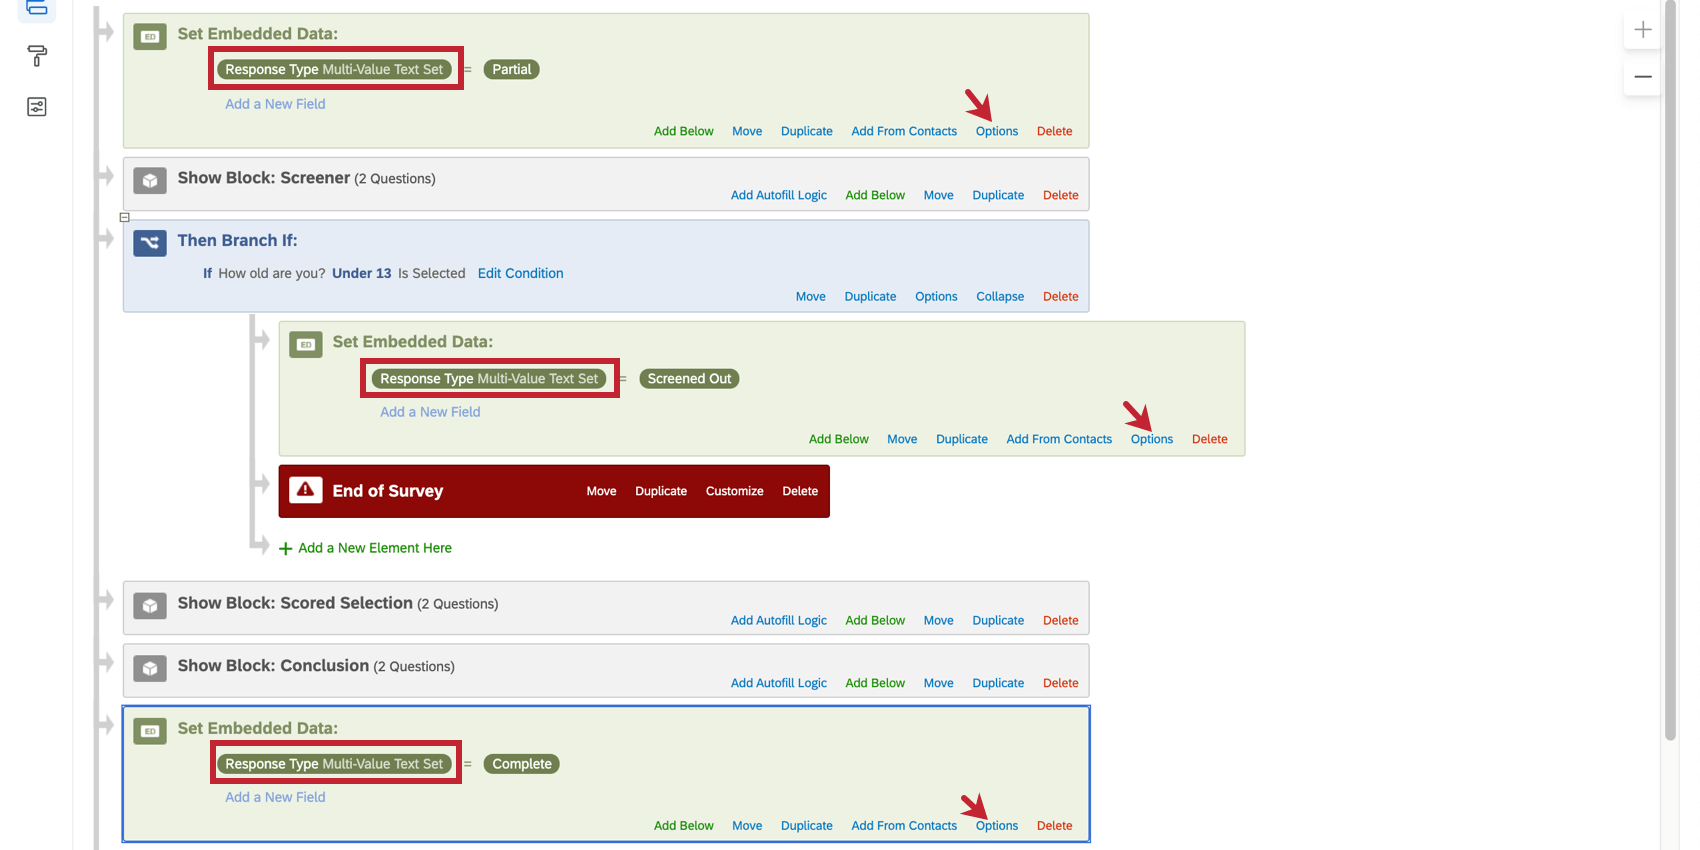
The last step is to make sure you change your embedded data type to Multi-Value Text Set.

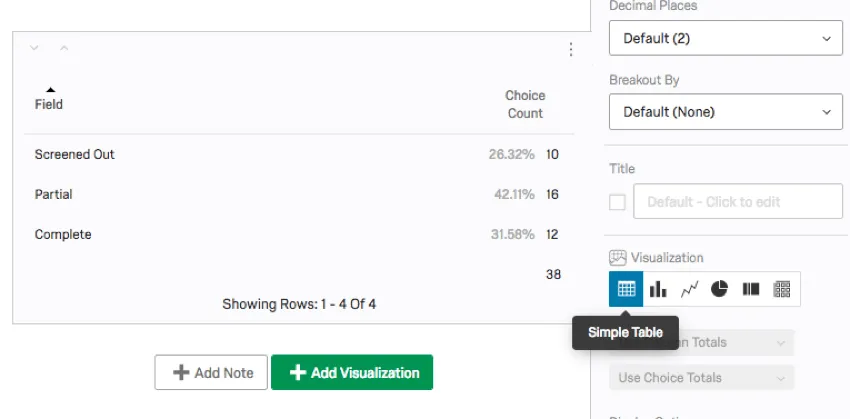
With the above Survey Flow, a table such as the following visualization could be included in your Reports, outlining how many respondents fall into each of the three categories.
Discarding Screened Out Responses
In some situations, you may not want to save the responses of those who are screened out of the survey. Discarding these responses ensures they do not count toward any response limits on your license.
Warning: Responses that are not saved cannot be retrieved later. Use this method with caution.
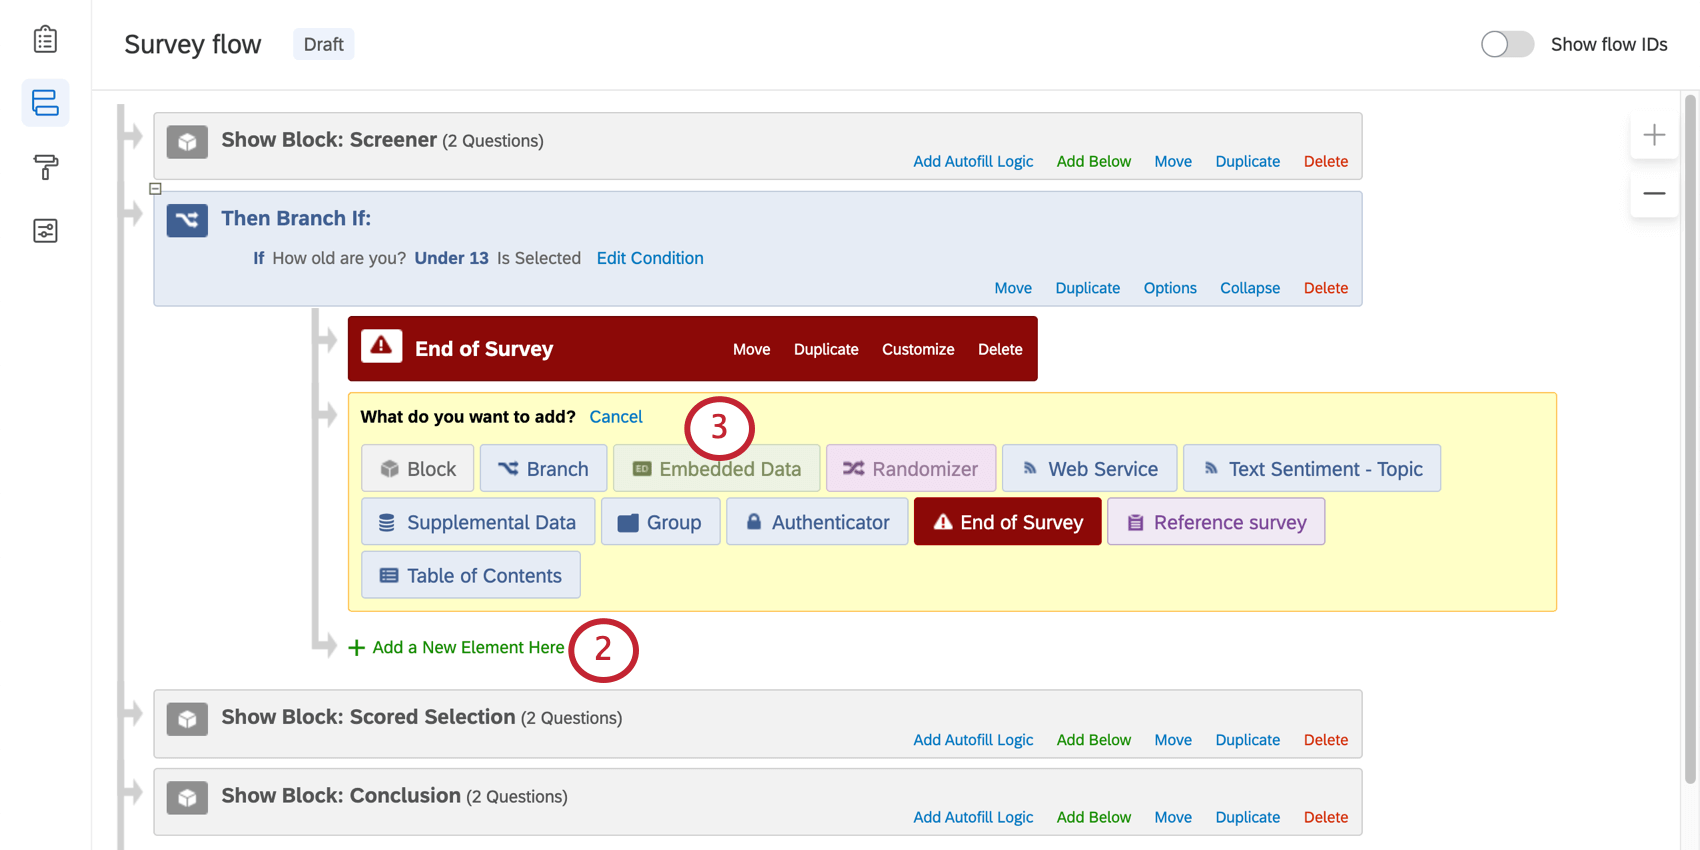
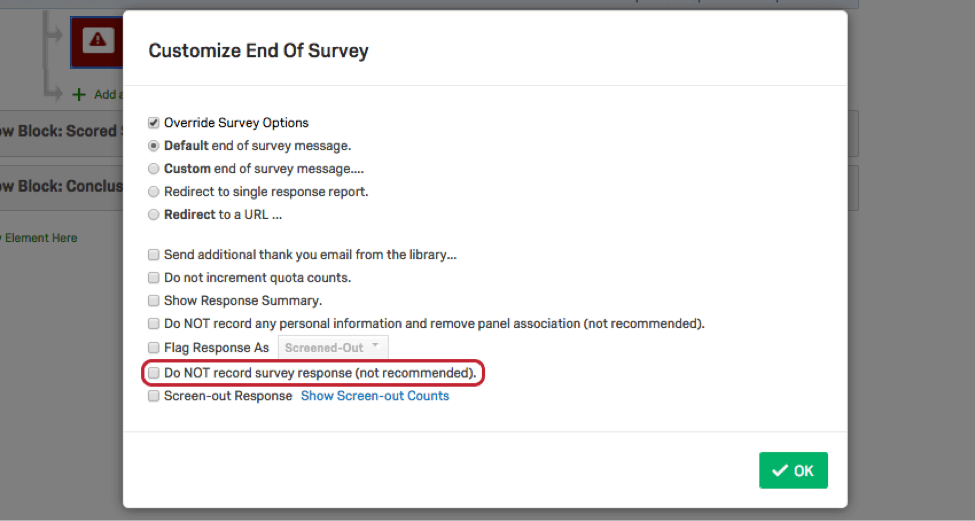
To discard screened out responses

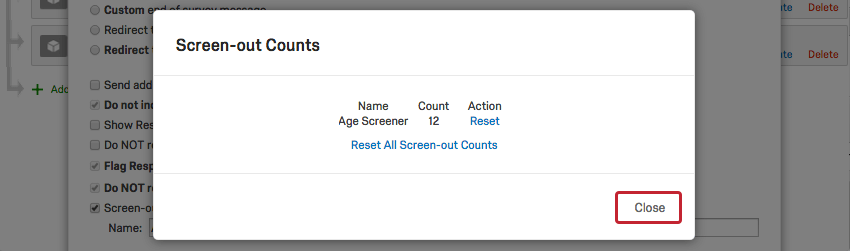
Tallying Screened Out Responses
Tallying represents the best of both worlds—screened out responses are not saved in the results, helping to limit the total response count needed for each project, and a tally is provided that identifies how many respondents screened out at each point.
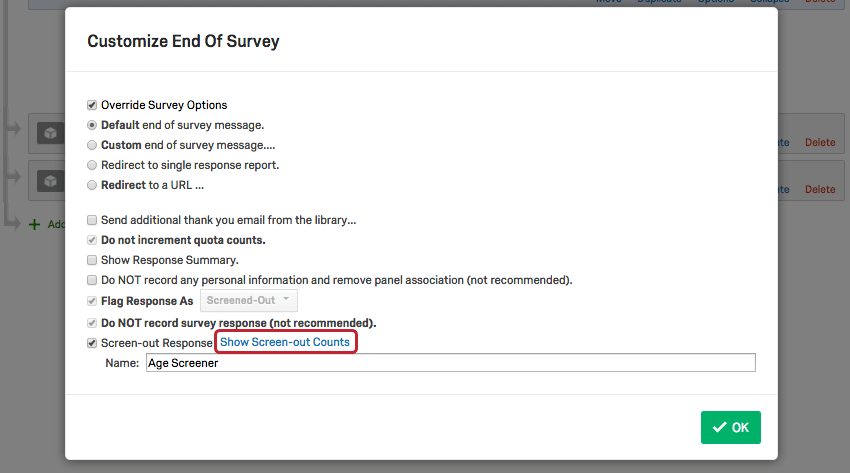
This option, known as Incidence Reporting, is not included in the standard Qualtrics license. You can check if it is available for your account by following the steps below. If you have access to the “Screen-out Response” option in step 3, your account has Incidence Reporting enabled.
Qtip: If you do not have Screen-out Response as an option, please contact your Account Executive.
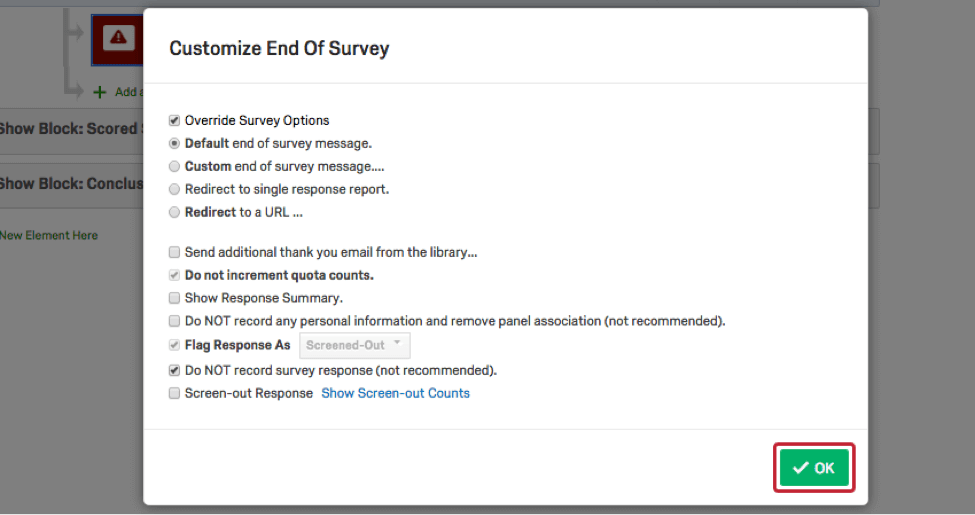
To tally screened out responses

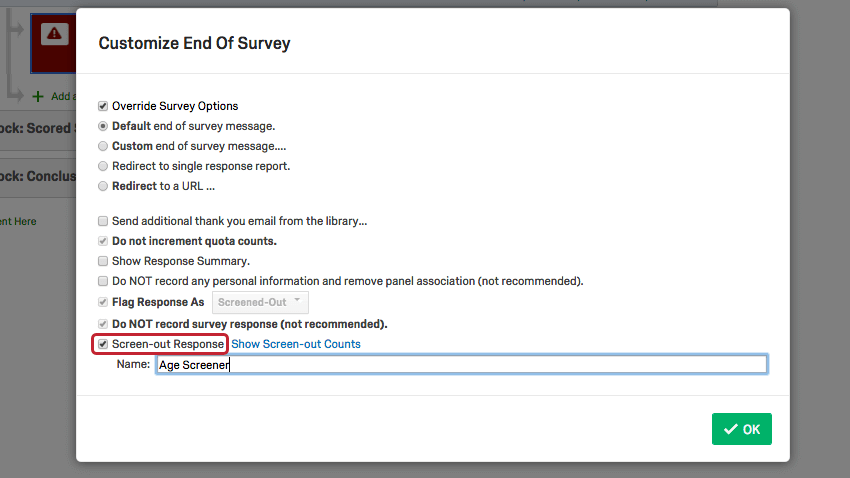
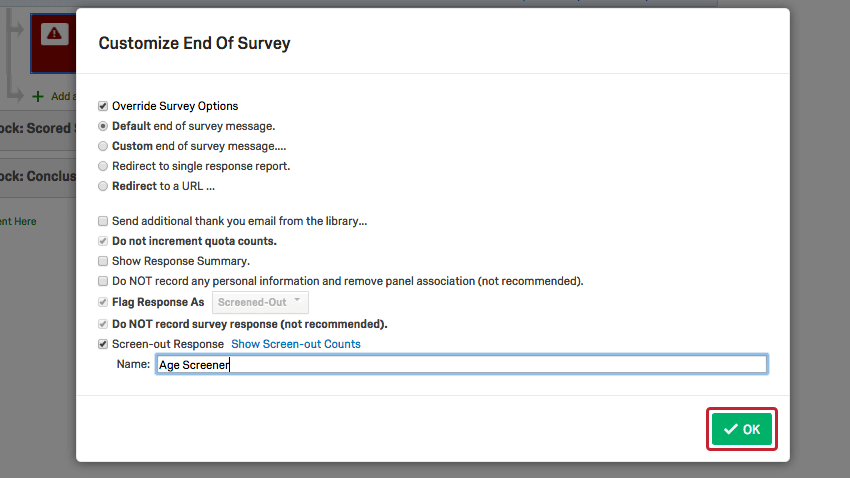
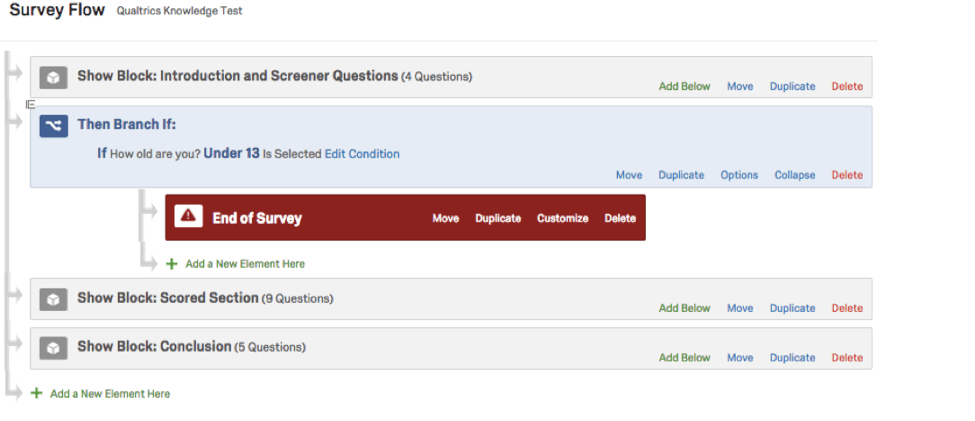
Answers for respondents finishing the survey at this point will not be saved, but a tally of these respondents will be kept.
The steps above show the creation of one general screen-out point to capture all respondents who exit the survey. To tally why each respondent screened out, follow the steps in Screening Out Respondents in the Survey Flow and the steps above, but create a separate Branch for each screen out condition, each with a different screen out name.
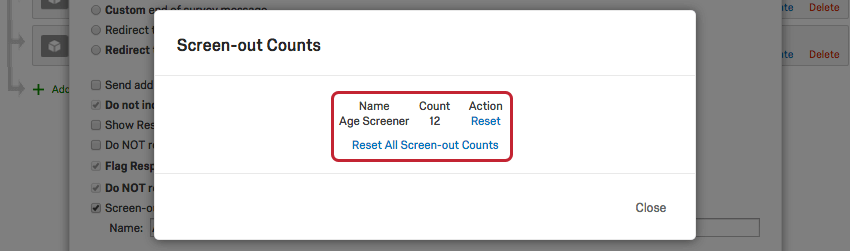
To view your screen-out counts
Using Screen Outs with the Qualtrics Mailer
If you email your survey through Qualtrics and you screen-out responses in the survey flow (either by tallying screened-out responses or discarding screened-out responses), then you can identify which contacts were screened-out.
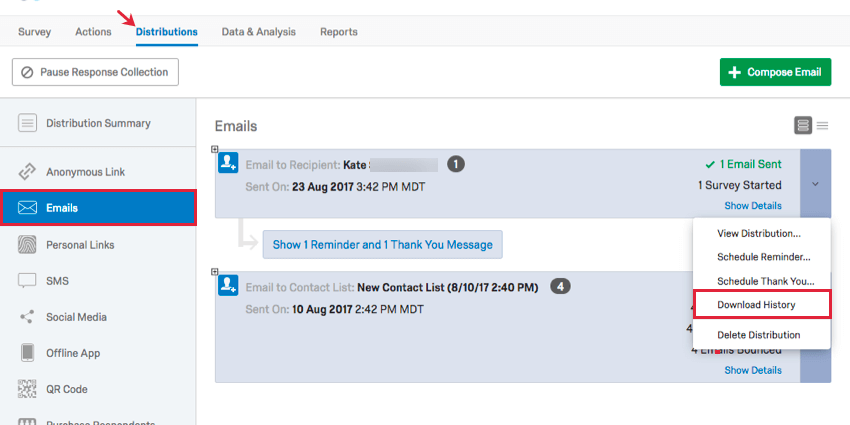
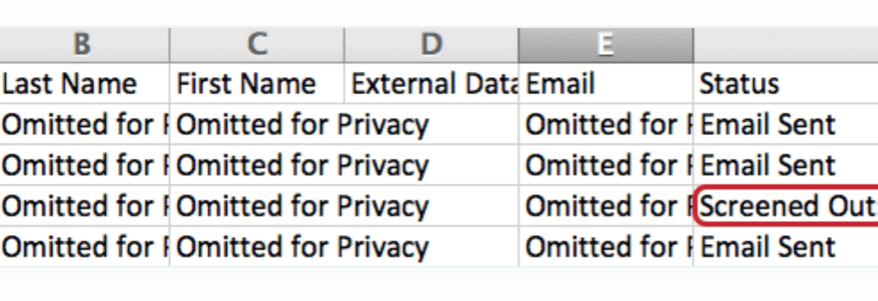
The distribution history provides a list of all contacts you emailed the survey to, as well as a number of other details. The Status column indicates who was screened out.
Types of Projects this Feature Is Available In
Not all features of screen-out management are included in all licenses by default. However, when these features are enabled, they can be used with the following project types:
That's great! Thank you for your feedback!
Thank you for your feedback!