

Saving Filters in Dashboards
What's on this page
About Saving Filters in Dashboards
Filtering (CX|EX) is a great way to narrow the results shown in your dashboard, gaining new insights to how different demographics have responded to your survey, and to see how different variables are related. Sometimes, the filters we build are complicated by necessity, and we will want to reuse them later. You can save the filters in your dashboard, so that you don’t need to rebuild them from scratch every time.
Filters can be saved even by users who do not have editing power over the dashboard. Saved filters only appear to the user who has created them, so the list of saved filters will never get crowded with content irrelevant to a user.
Types of Compatible Dashboards
Qualtrics has a few types of dashboards available. This feature can be found in the following dashboards:
- Dashboard projects (i.e., CX Dashboards)
- Results Dashboards
- Employee Engagement
- Lifecycle
- 360
- Pulse
- Ad Hoc Employee Research
- Employee Journey Analytics
- Brand Experience
Please note that not all licenses include this feature or all of these types of dashboards.
Saving New Filters
Qtip: You can add up to 20 filters on your dashboard.

To create a new saved filter:
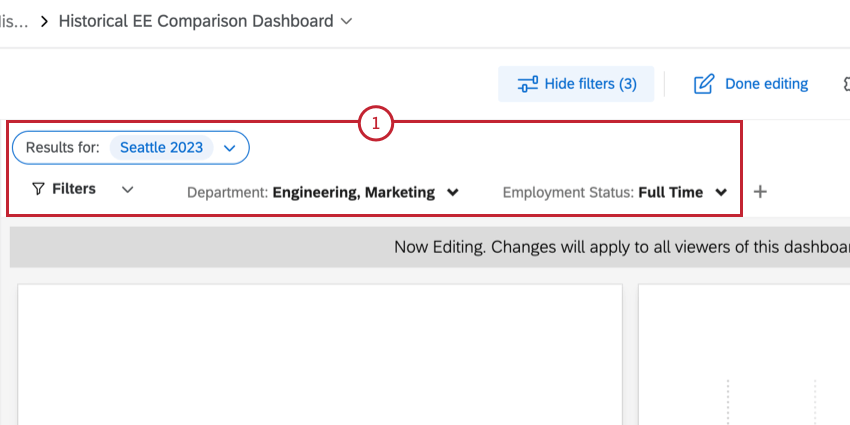
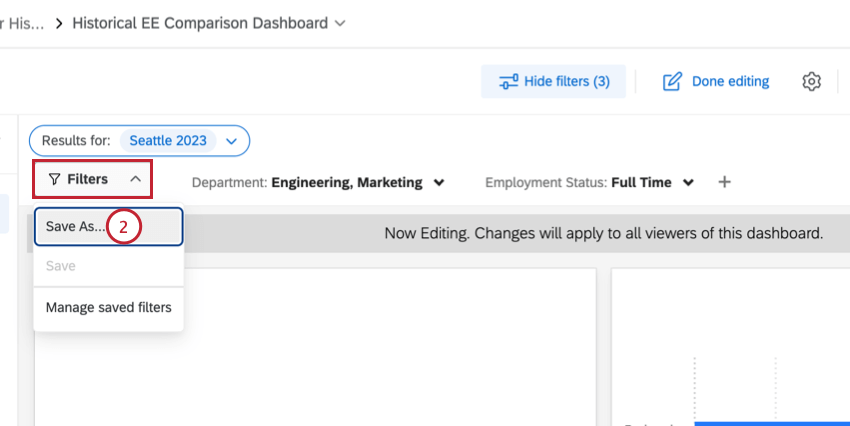
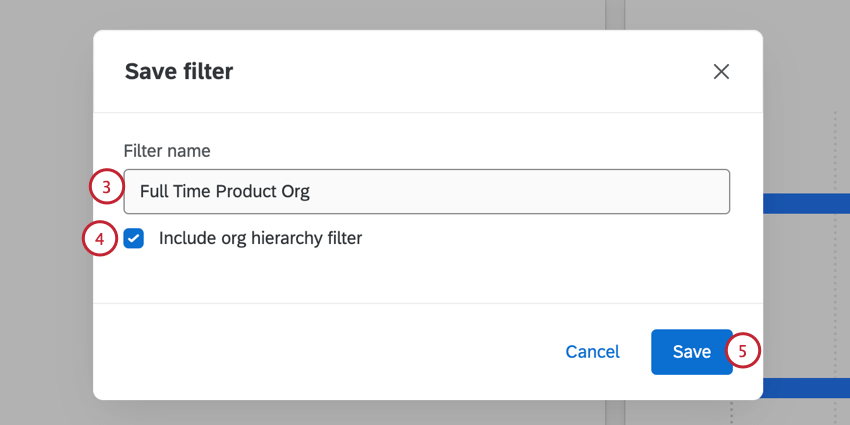
Selecting Saved Filters
Once you’ve created a filter, click the Filters dropdown and select it from your list of saved filters to reuse it. Use this same dropdown and re-click a filter to deselect it.
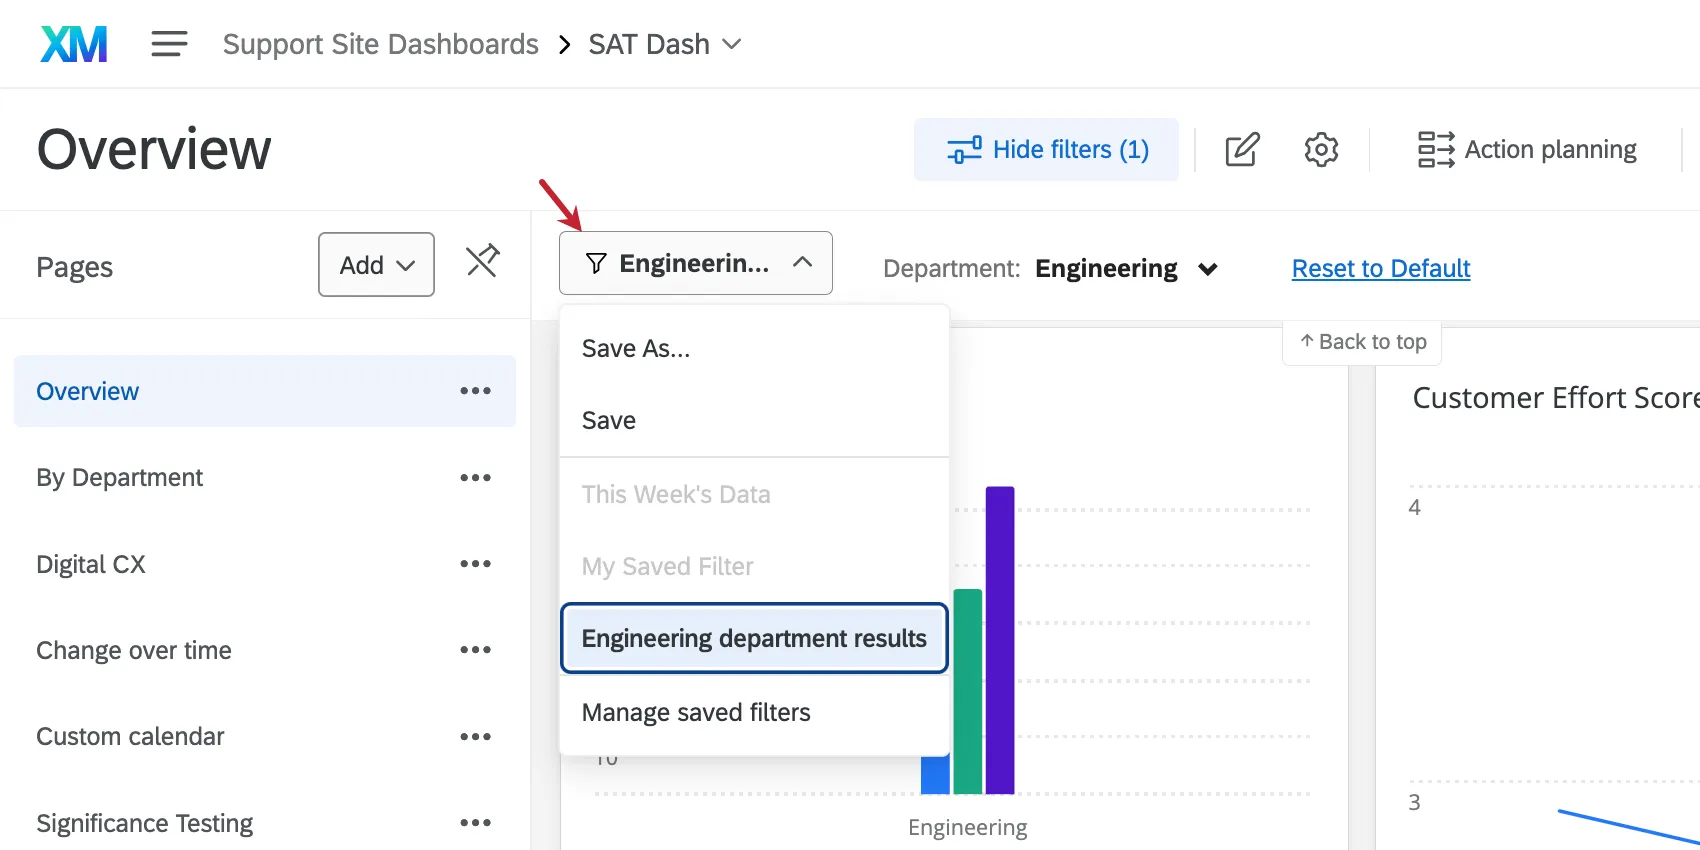
Filters are listed in alphabetical order by name. You can only select one saved filter at a time.
When viewing the dashboard, if a saved filter is grayed out, it means the parameters needed to use that filter aren't available for the current dashboard page.
Example: On page 1 of your dashboard, there are filters for employment and marital status. You save a filter that isolates divorced people who are unemployed. Page 2 of your dashboard has a filter for marital status, but not employment status. The unemployed divorcees filter would be grayed out.

Example: Page 3 of your dashboard has an advanced filter. You adjust this advanced filter and save it for later. Page 4 of the dashboard has basic filters available, but no advanced filter. Because of this, you can't apply the advanced filter you saved earlier, so it would be grayed out.
In editing mode, filters with missing parameters aren't grayed out. By selecting a saved filter, all of the needed parameters will be added. So in this case, in editing mode, you could select your unemployed divorcees filter, and the employment status filter would automatically get added to page 2.
Saving Changes to Filters
Sometimes you may want to modify an existing filter. To do so, select it from the Filters dropdown. Then make the desired changes to the filter.
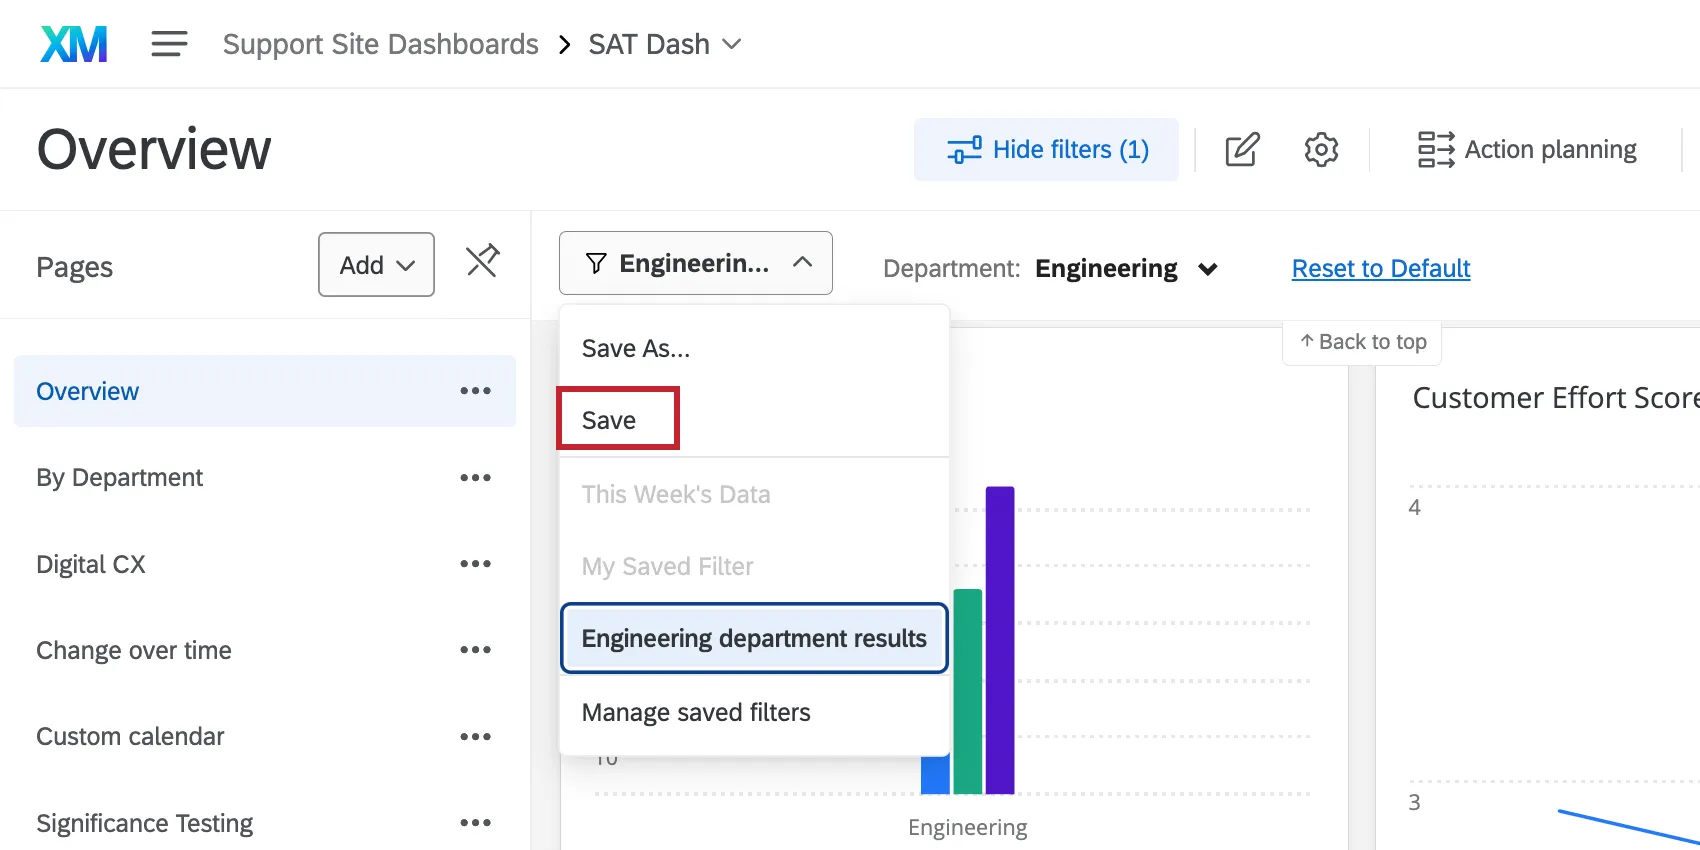
Qtip: If you want to create a new, additional filter, choose Save As instead.
Managing Saved Filters
Selecting Manage Saved Filters allows you to rename your existing filters, or delete them.
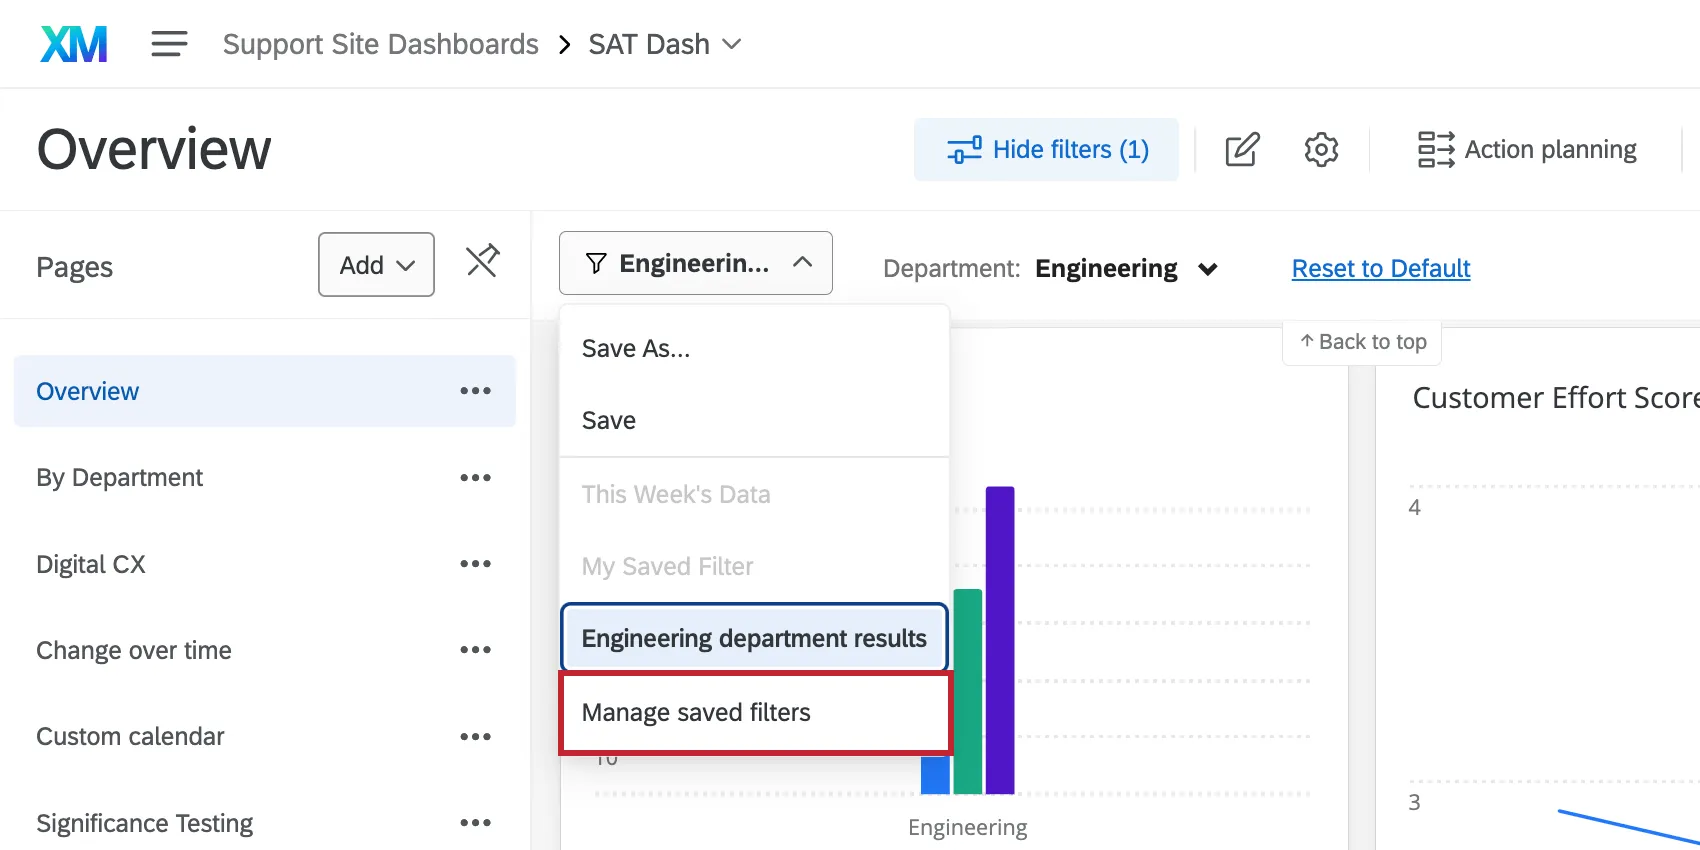
The following window will show each of your filters by name. Click a filter to expand it and see the fields involved. Use the dots in the upper-right to delete or rename the filter.
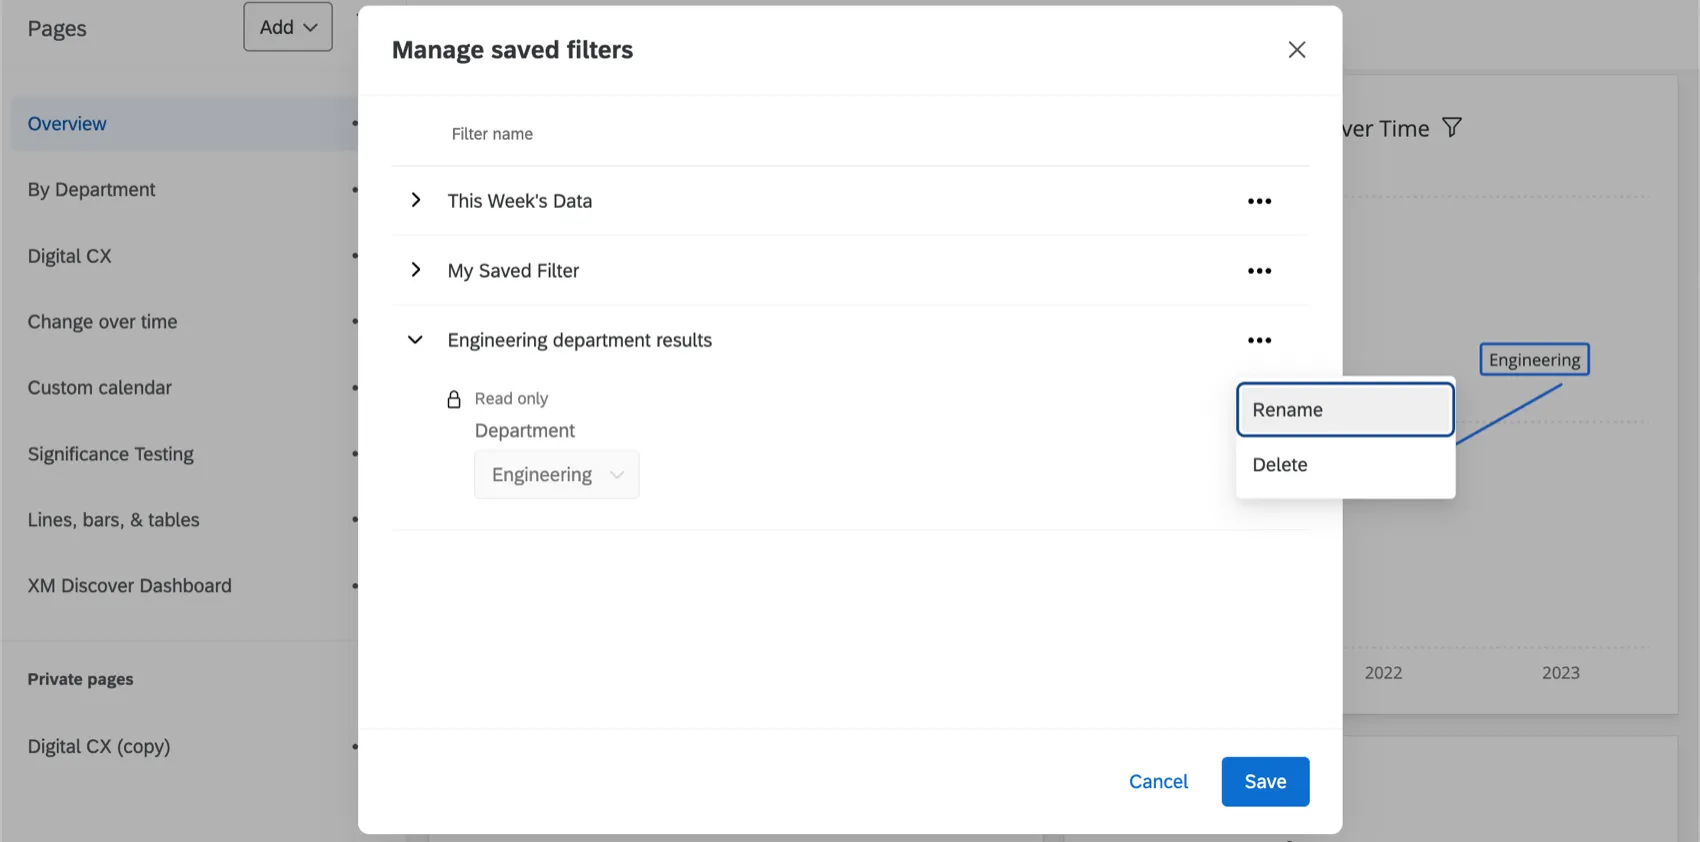
Click Save to save these changes.
Multiple Datasets in the Same Dashboard (CX)
CX Dashboards can have multiple datasets in the same dashboard. This means you can filter dashboard pages using fields from different datasets, and even using linked dataset fields. This impacts how you save, manage, and apply dashboard filters.
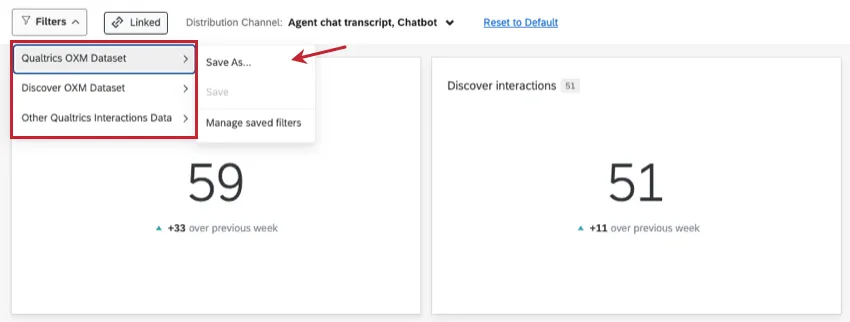
For more details, see Using Linked Filters.
That's great! Thank you for your feedback!
Thank you for your feedback!