-

Qualtrics Platform -

Customer Journey Optimizer -

XM Discover -

Qualtrics Social Connect
Imports (Course Evaluations)
About Imports in Course Evaluations
In the Imports section of the Directories tab within course evaluations, you can populate your directory with imported student and instructor data. Imports can either be done in bulk using a CSV, or automated to pull directly from your learning management system using an SFTP server.
For more information on the Directories tab, see Directories Tab (Course Evaluations). For an overview of course evaluations, see Course Evaluations Overview.
Creating an Automated Import
Automated imports allow you to import data from your server on a recurring basis. After establishing an SFTP connection between Qualtrics and your server, files of course data will be automatically imported to Qualtrics.
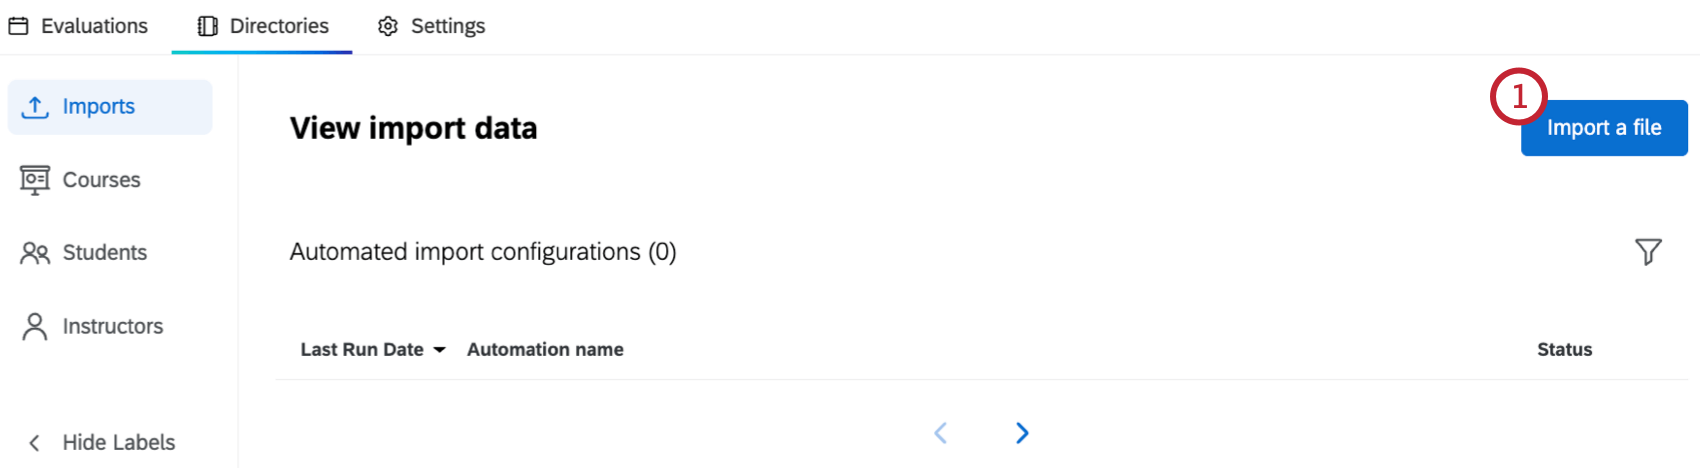
- Click Import a file.
- Enter a name for the import.
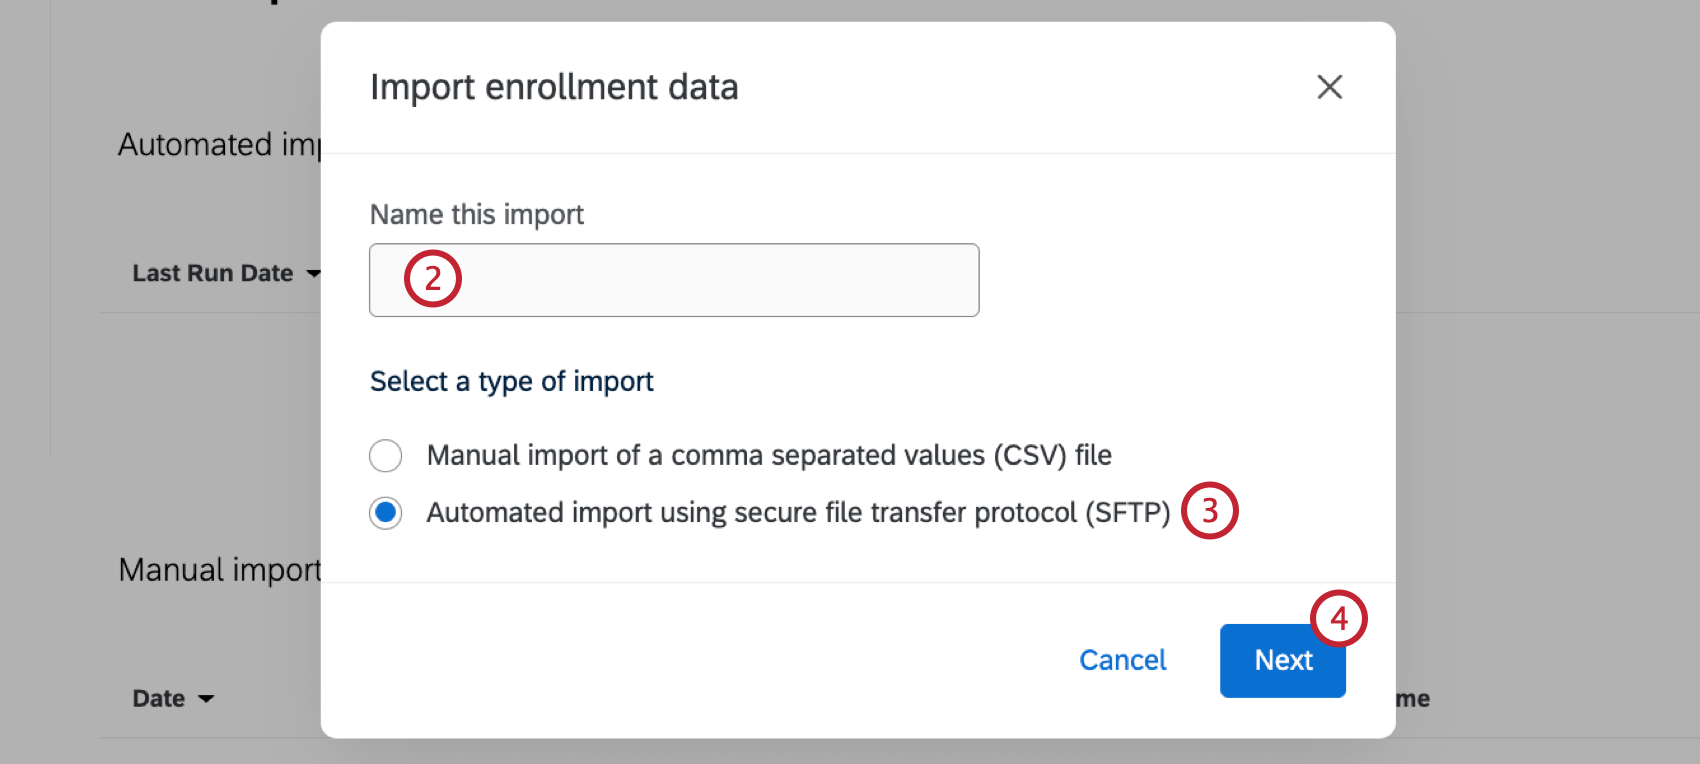
- Select Automated import using secure file transfer protocol (SFTP).
- Click Next.
- Only Qualtrics hosted SFTP servers can be used, so the Host URL field will be automatically populated.
- Enter the Username for the STP server.
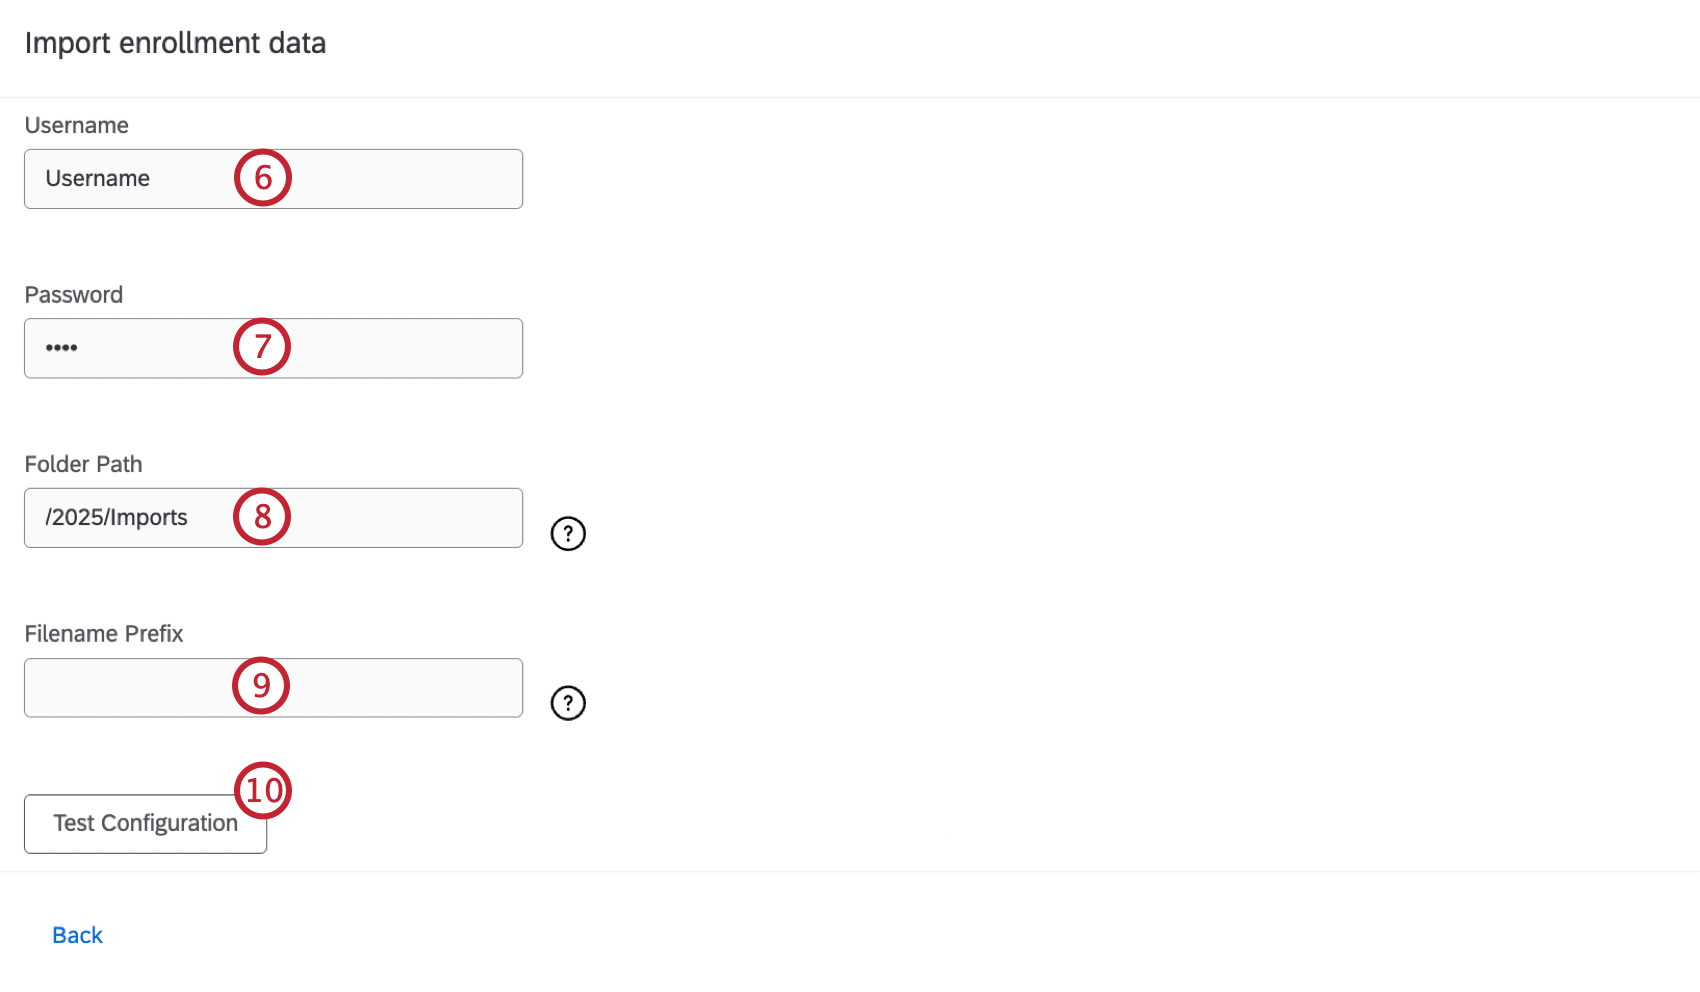
- Enter the Password for the STP server.
- Enter the Folder Path. This should point to the folder you want your files pulled from. The folder should be within your user’s home folder. Sub-folders will not be checked.
Qtip: An “Archive” folder will be automatically added inside the configured folder to hold previously processed files.
- Enter a Filename Prefix. This is the prefix format each file must follow to be imported. Leave this blank if you want to import all files within the designated folder.
- If desired, click Test Configuration. This will test the connection between Qualtrics and your SFTP server.
- Click Select a file to upload a file that contains the expected headers for your imports.

- Select a date format from the dropdown. This is only required if your enrollment file contains a date field.
- If desired, select Overwrite included courses. This will delete all enrollment and embedded data information not included in this file for the courses you are uploading. Any data that exists in the directory for these courses but not included in the file will be deleted.
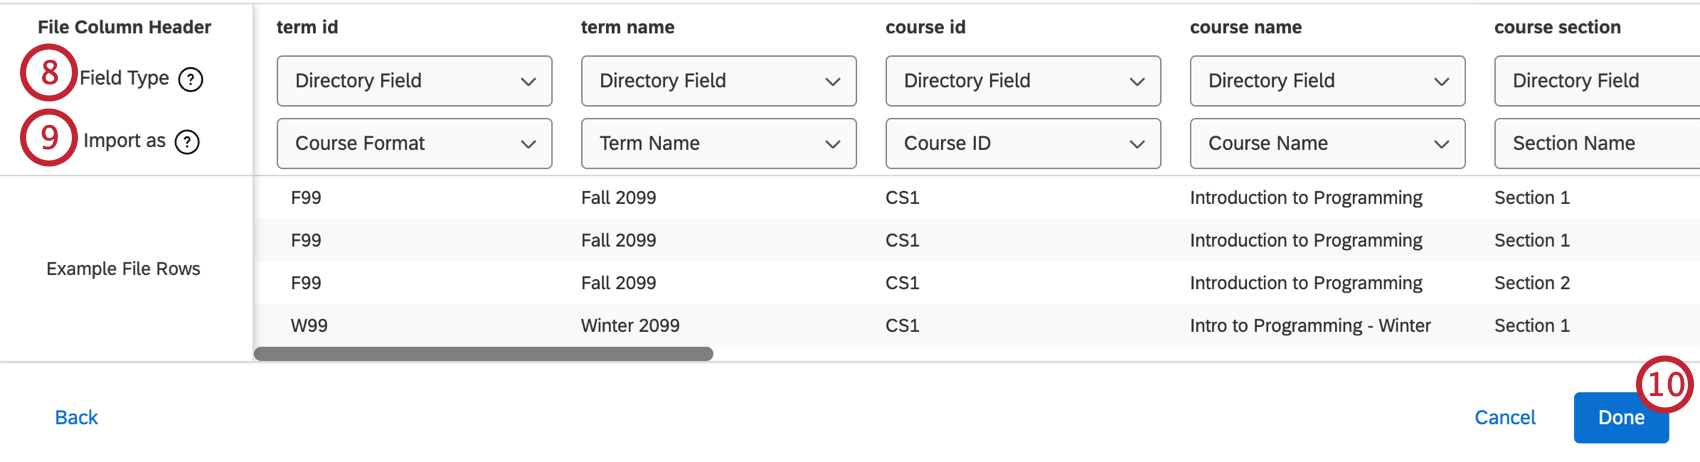
- Review the expected headers from your file. Use the top row of dropdowns to select a Field Type for each field:
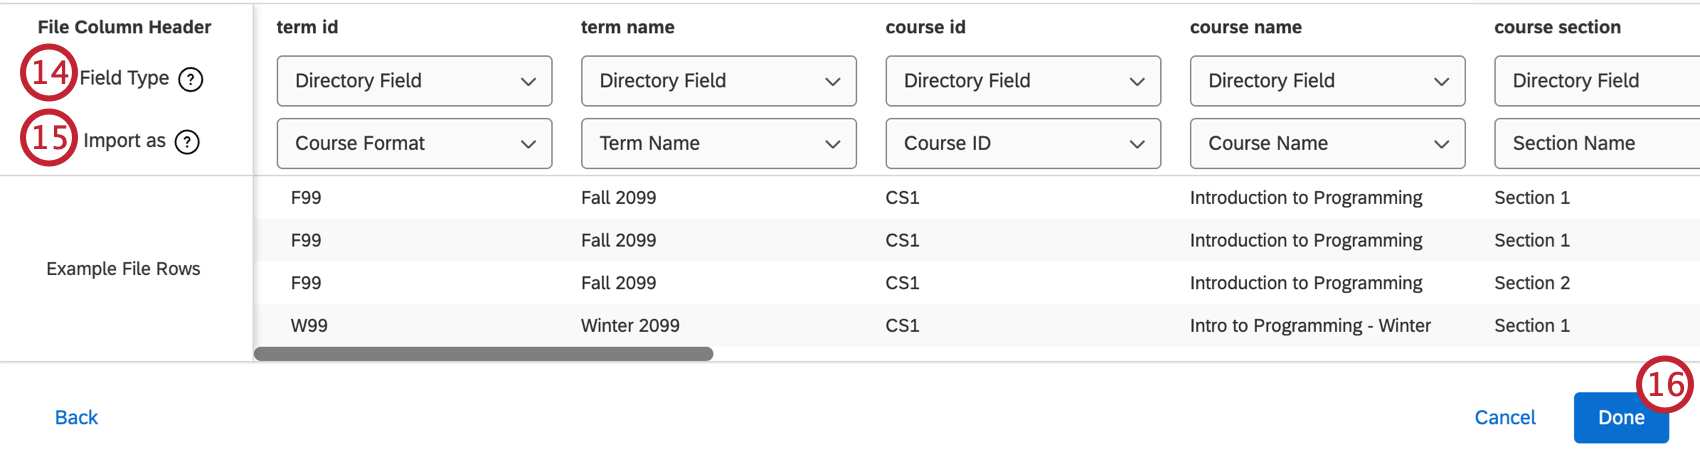
- Directory Field: A field known and expected by Qualtrics Classroom.
- Embedded Data: Fields unique to your institution.
- Qualtrics will automatically map the fields in your file to existing Course Evaluation fields. You can change the mapping of any column using the dropdowns in the Import as row. When you’re importing a Directory Field you can select from one of the fields expected by Qualtrics Classroom. When you’re importing an Embedded Data field, you can choose from the following:
- Course Data: Data related to a course.
- Student Enrollment Data: Data related to student enrollment in a course.
- Teacher Enrollment Data: Data related to teacher enrollment in a course.
- Click Done.
Creating a Manual Import
Manual imports allow you to import files as needed to add new course information. Your data will be imported to Qualtrics when you manually upload a file.
- Click Import a file.
- Enter a name for the import.
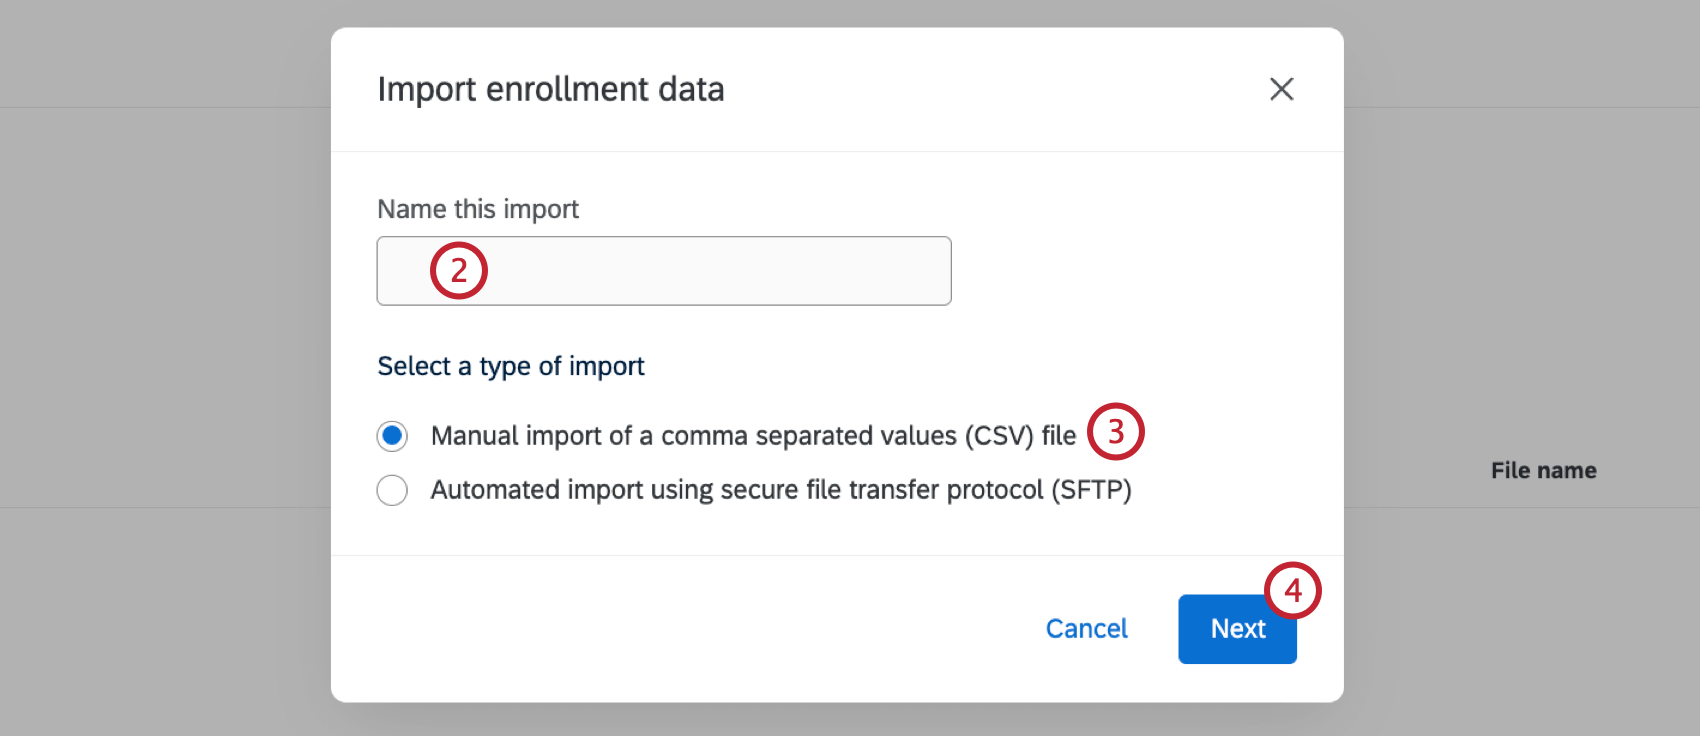
- Select Manual import of a comma separated values (CSV) file.
- Click Next.
- When your file is ready, click Select a file and upload your file.
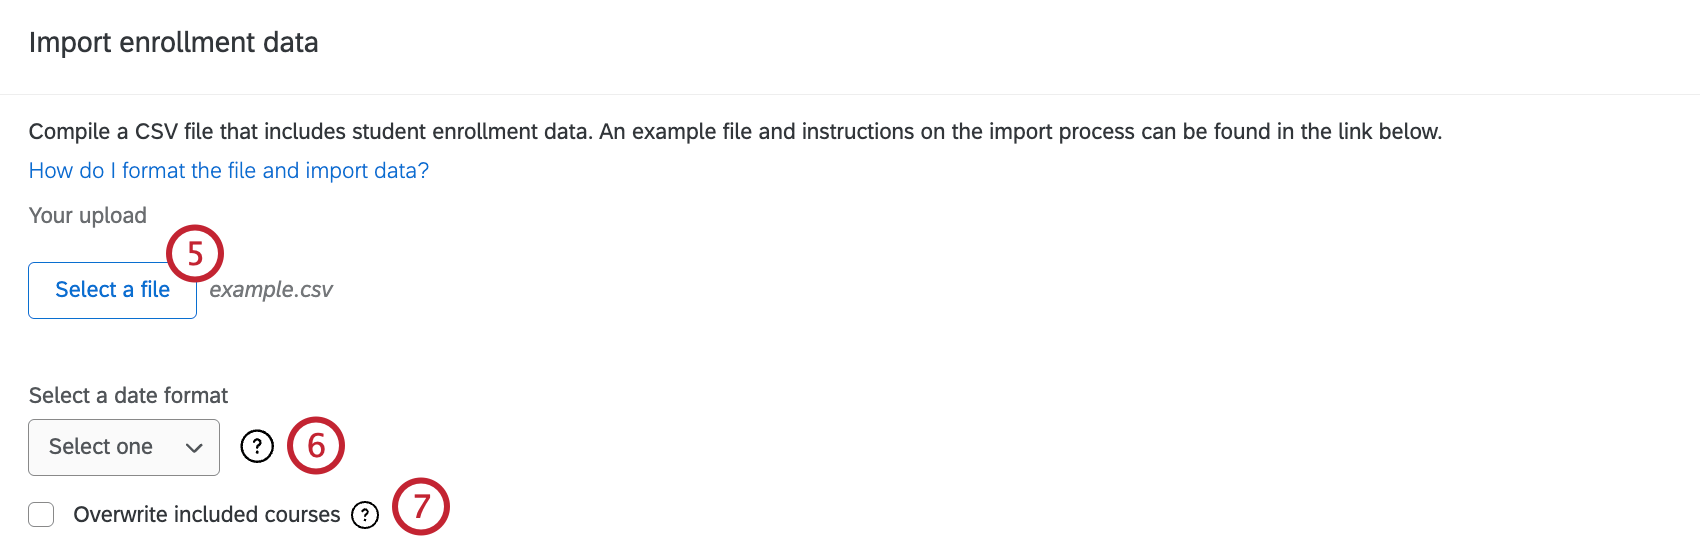
- Select a date format from the dropdown. This is only required if your enrollment file contains a date field.
- If desired, select Overwrite included courses. This will delete all enrollment and embedded data information not included in this file for the courses you are uploading. Any data that exists in the directory for these courses but not included in the file will be deleted.
- Review the expected headers from your file. Use the top row of dropdowns to select a Field Type for each field:
- Directory Field: A field known and expected by Qualtrics Classroom.
- Embedded Data: Fields unique to your institution.
- Use the dropdowns in the Import as row to select how each field will be imported. When you’re importing a Directory Field you can select from one of the fields expected by Qualtrics Classroom. When you’re importing an Embedded Data field, you can choose from the following:
- Course Data: Data related to a course.
- Student Enrollment Data: Data related to student enrollment in a course.
- Teacher Enrollment Data: Data related to teacher enrollment in a course.
- Click Done.
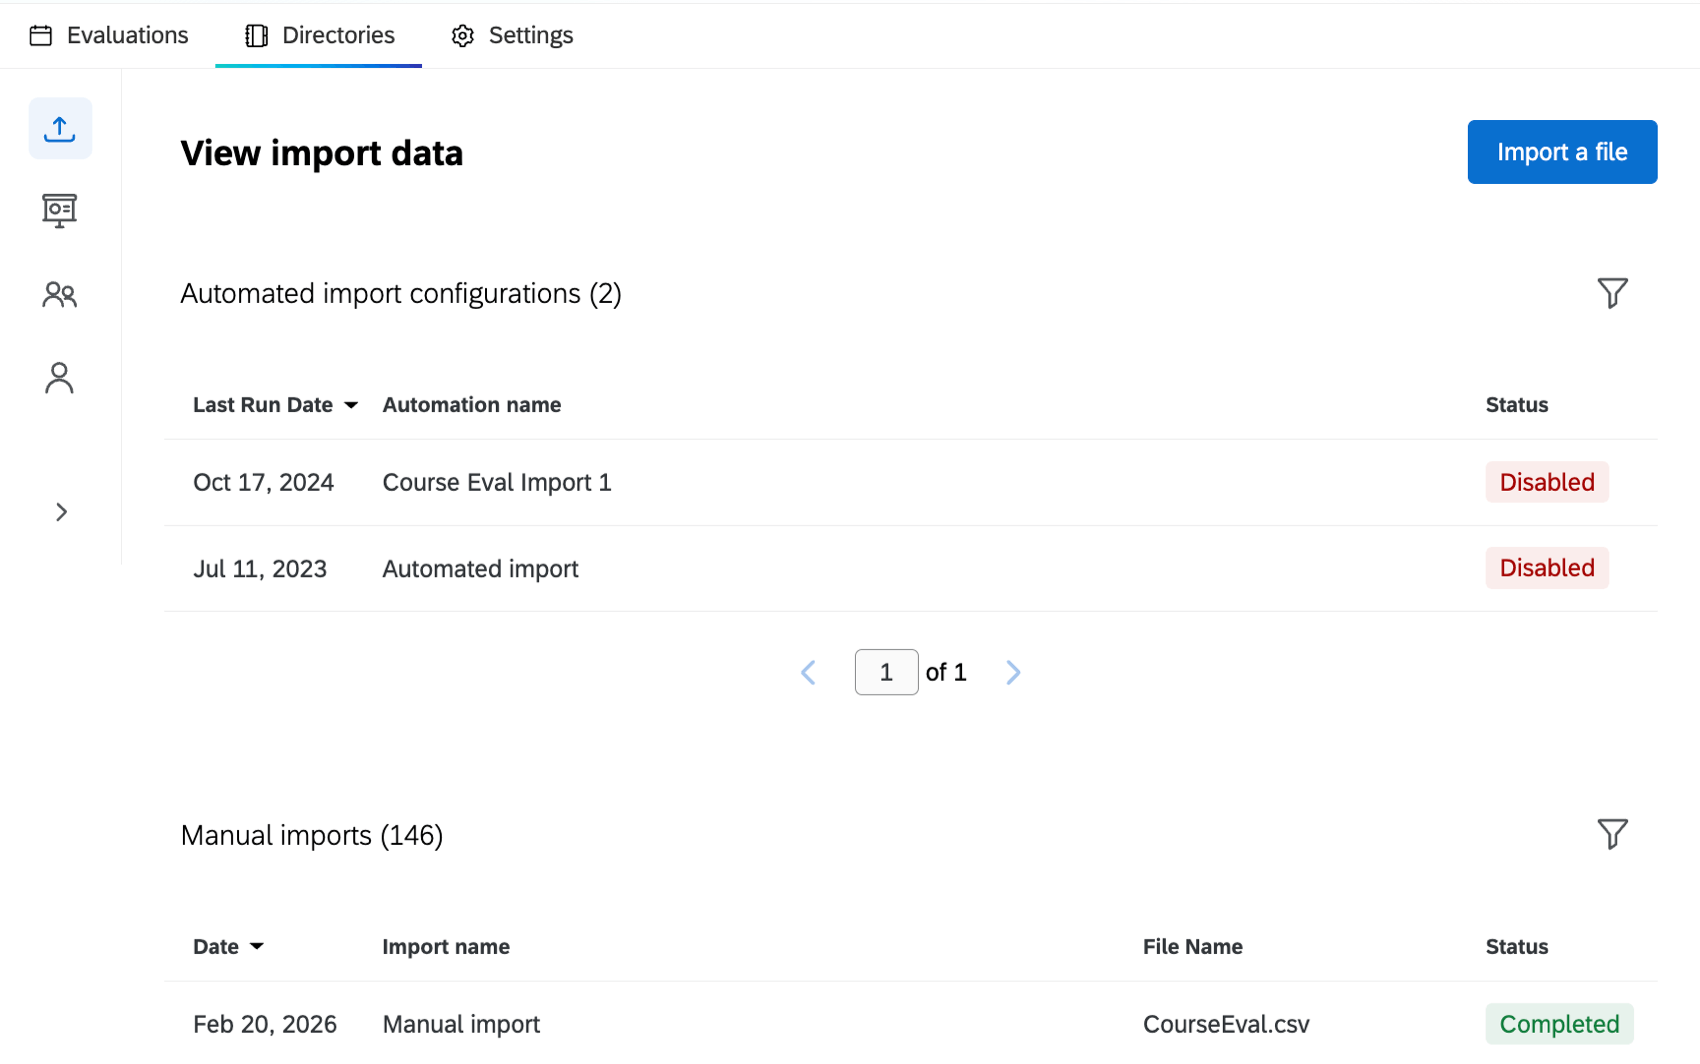
Viewing and Managing Imports
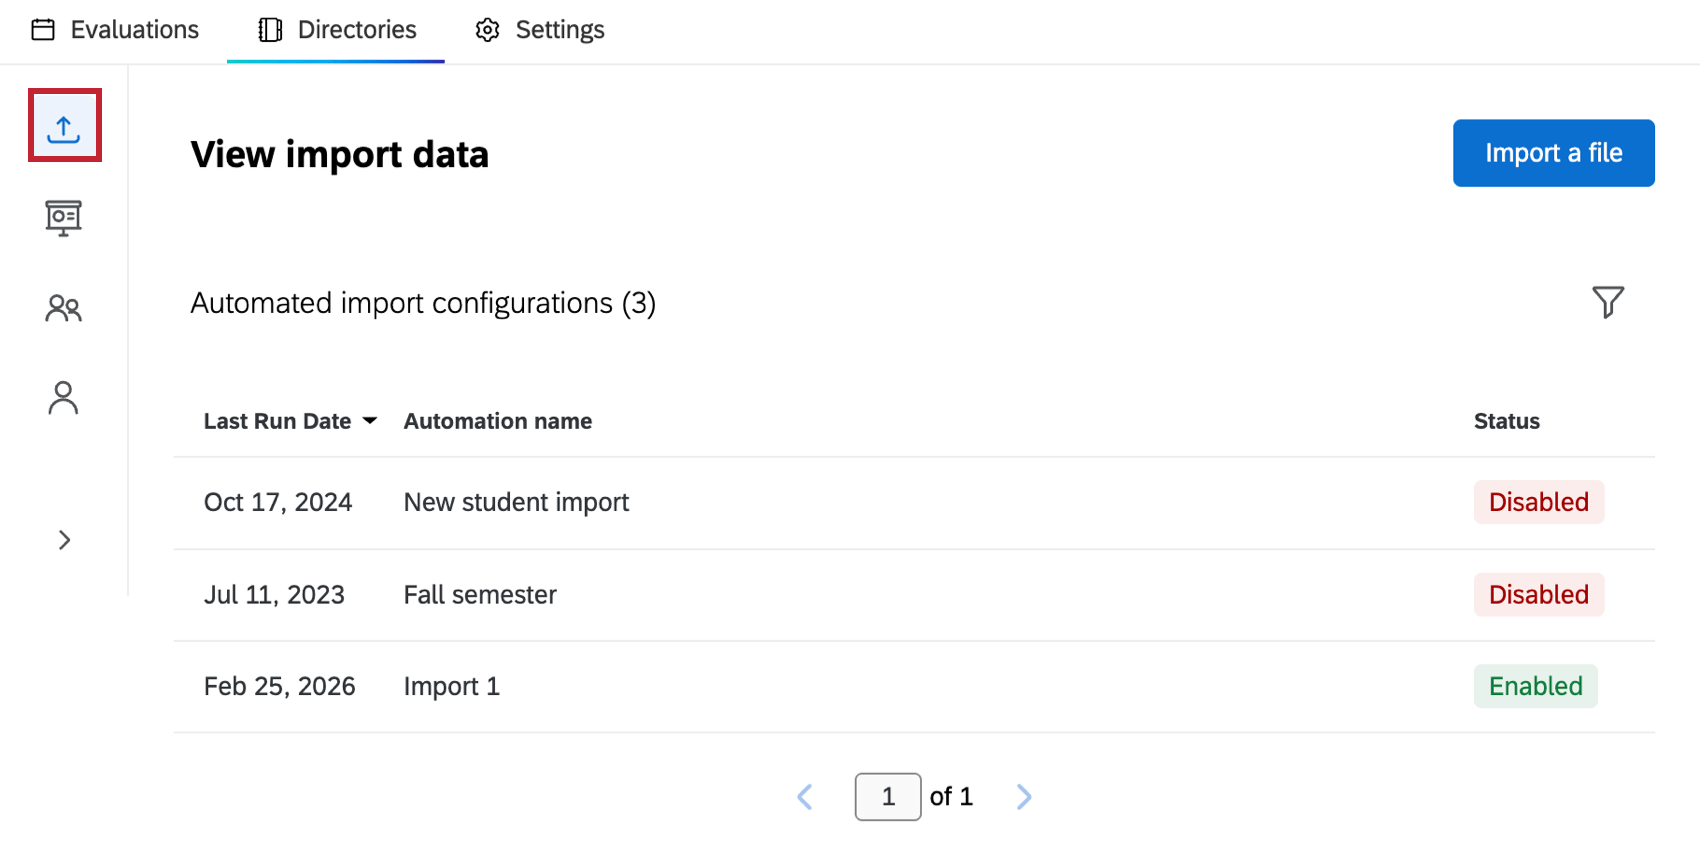
Once you’ve imported courses, you can view and manage existing imports on the Imports page.
Automated Imports
Click an automated import to view all the files imported by this automation. You can perform the following actions on your automated import:
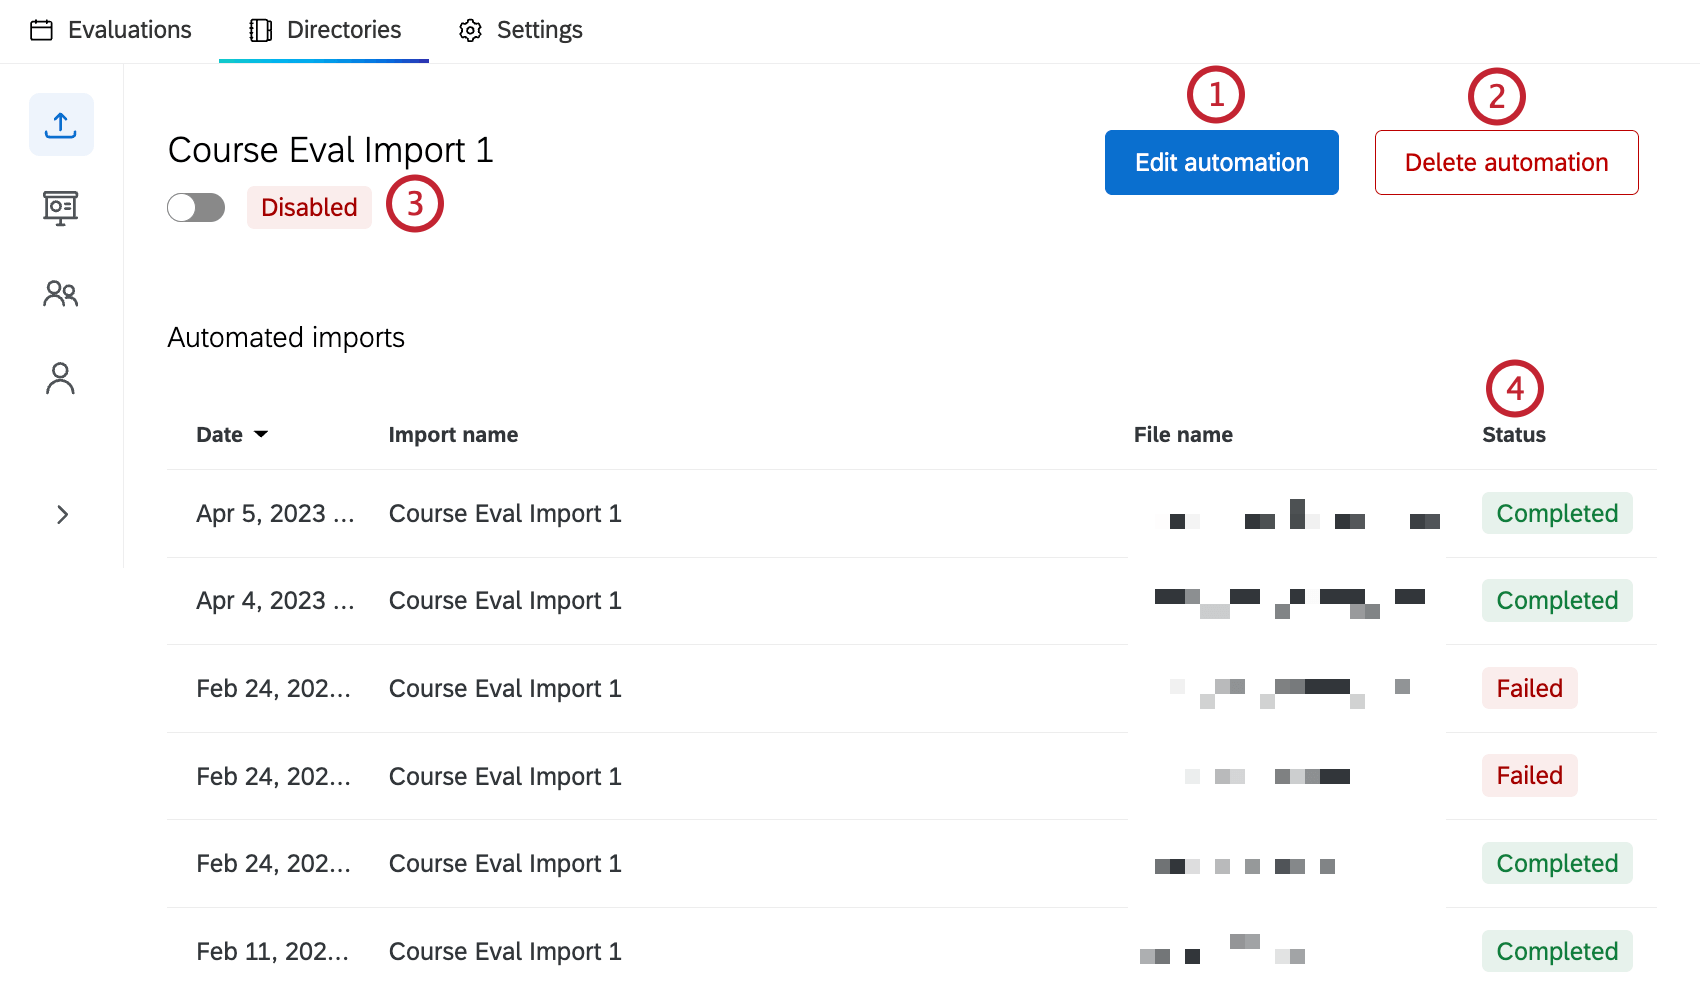
- Edit automation: Edit the automation.
- Delete automation: Delete the automation.
- Enable/disable automation: Turn the automation on, or disable it so it doesn’t import any future files.
- Status: View the status of each file import.
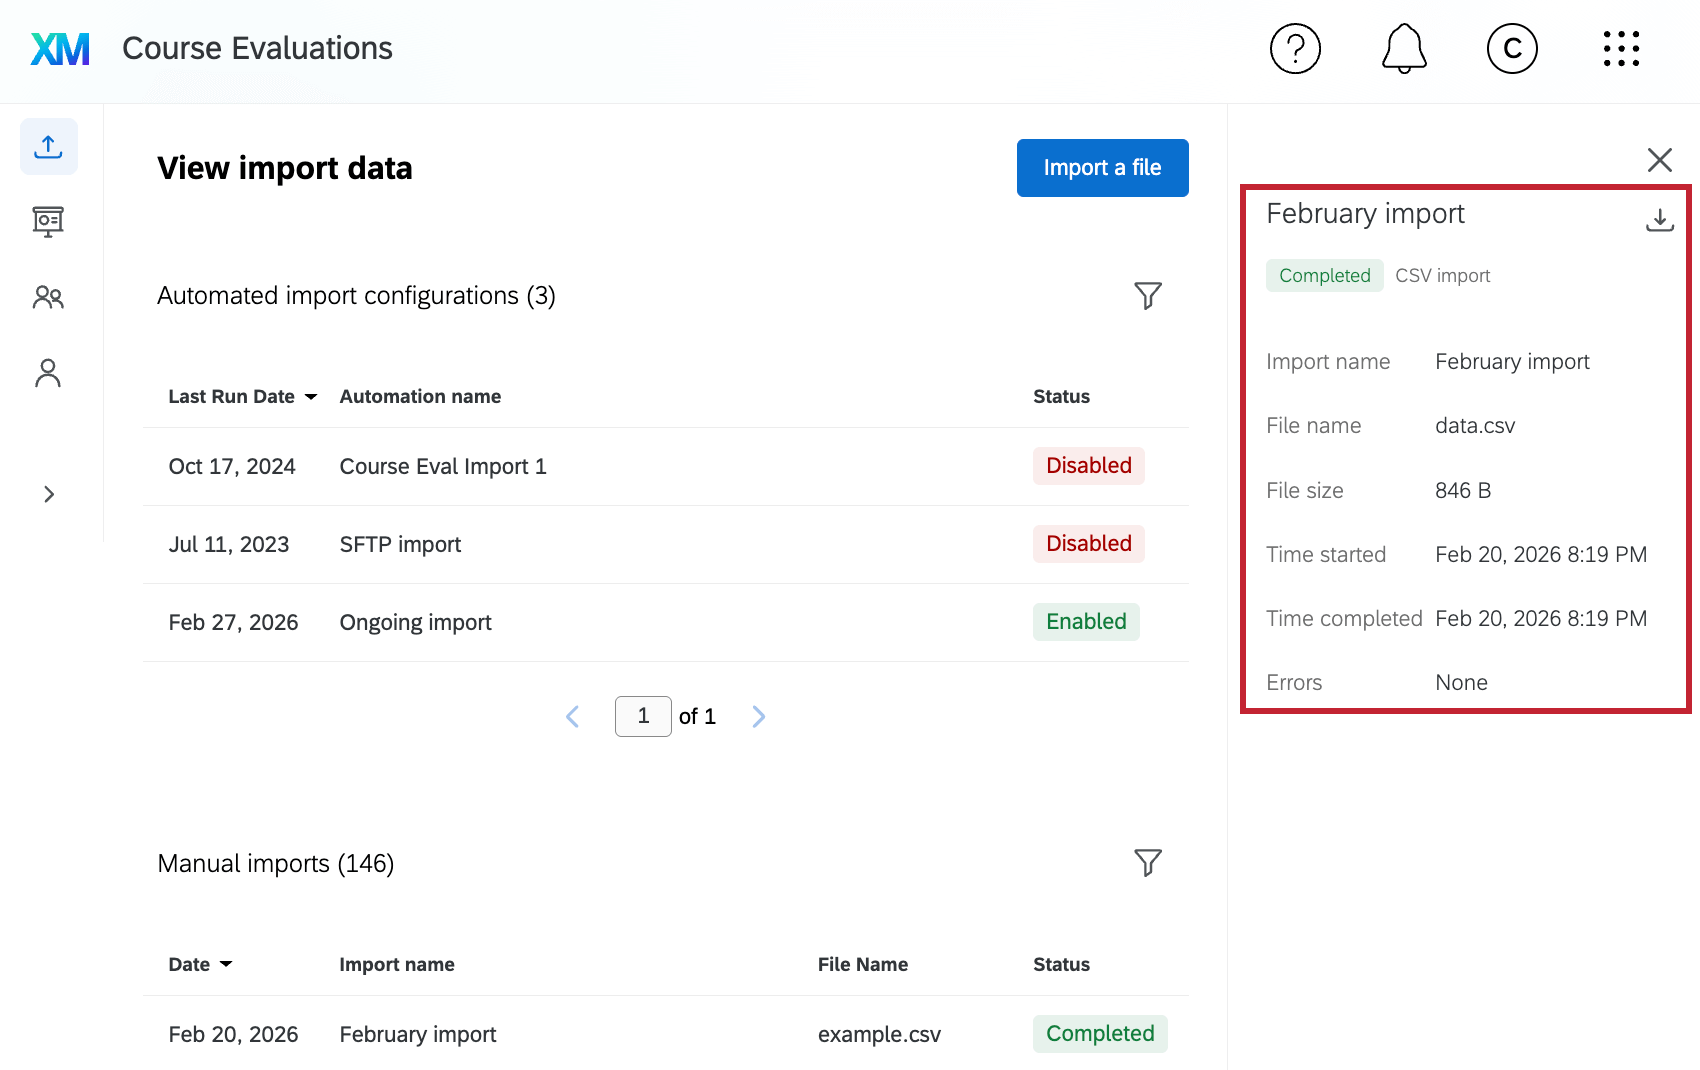
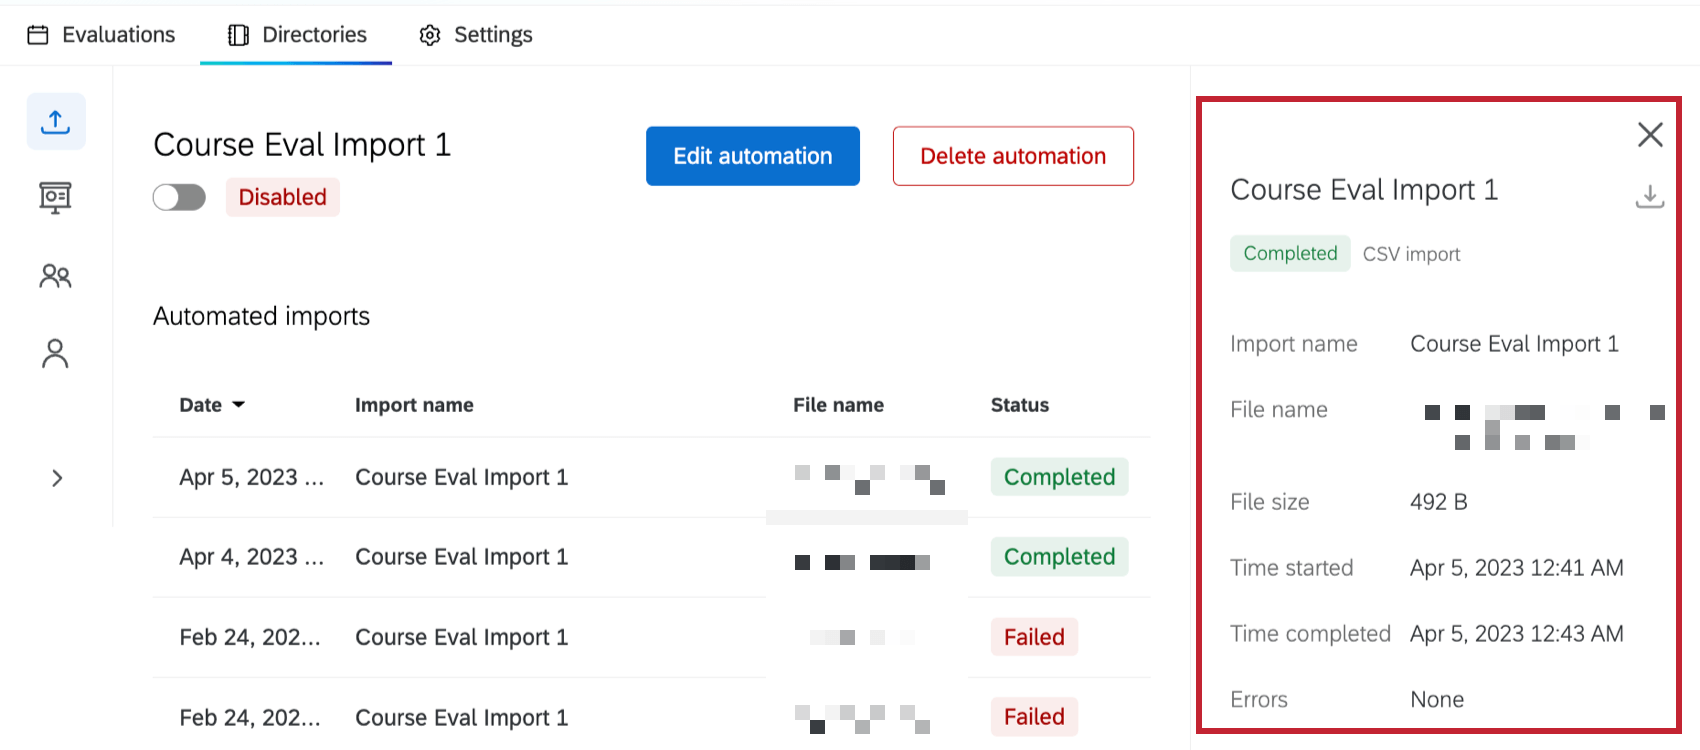
Click an individual import within the automation to view more information about the automation run including the file size, time started, and time completed. You can also download the CSV file that was imported.
Manual Imports
Click a manual import to view more information about it, including the import name, file size, time started, and time completed. There are no additional editing options for manual imports.