
Freshdesk Task
What's on this page
Qtip: If you’re interested in purchasing this extension, check it out on the XM Marketplace!
About the Freshdesk Task
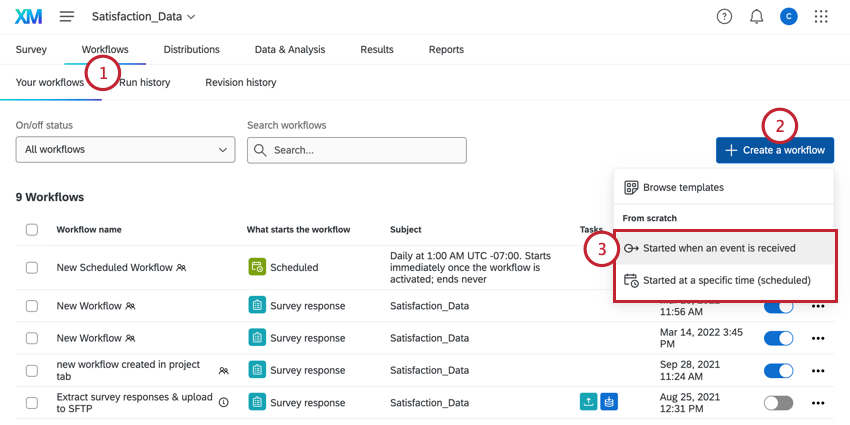
Events triggered in Qualtrics can create Freshdesk tickets. Maybe you’re interested in flagging low CSAT ratings to your managers; maybe you want to build a Qualtrics survey explicitly for product bug escalations that creates Freshdesk tickets. You can do all this and more by using the Workflows tab of your survey.
Qtip: This page explains how to use Qualtrics to create and update Freshdesk tickets. For more on processes set up on the Freshdesk side, see Freshdesk’s support portal.
Qtip: Are you curious how actions in Freshdesk can trigger tasks in Qualtrics, such as a CSAT survey that goes out when Freshdesk tickets are resolved? Check out our JSON Event page for an example on integrating with Freshdesk.
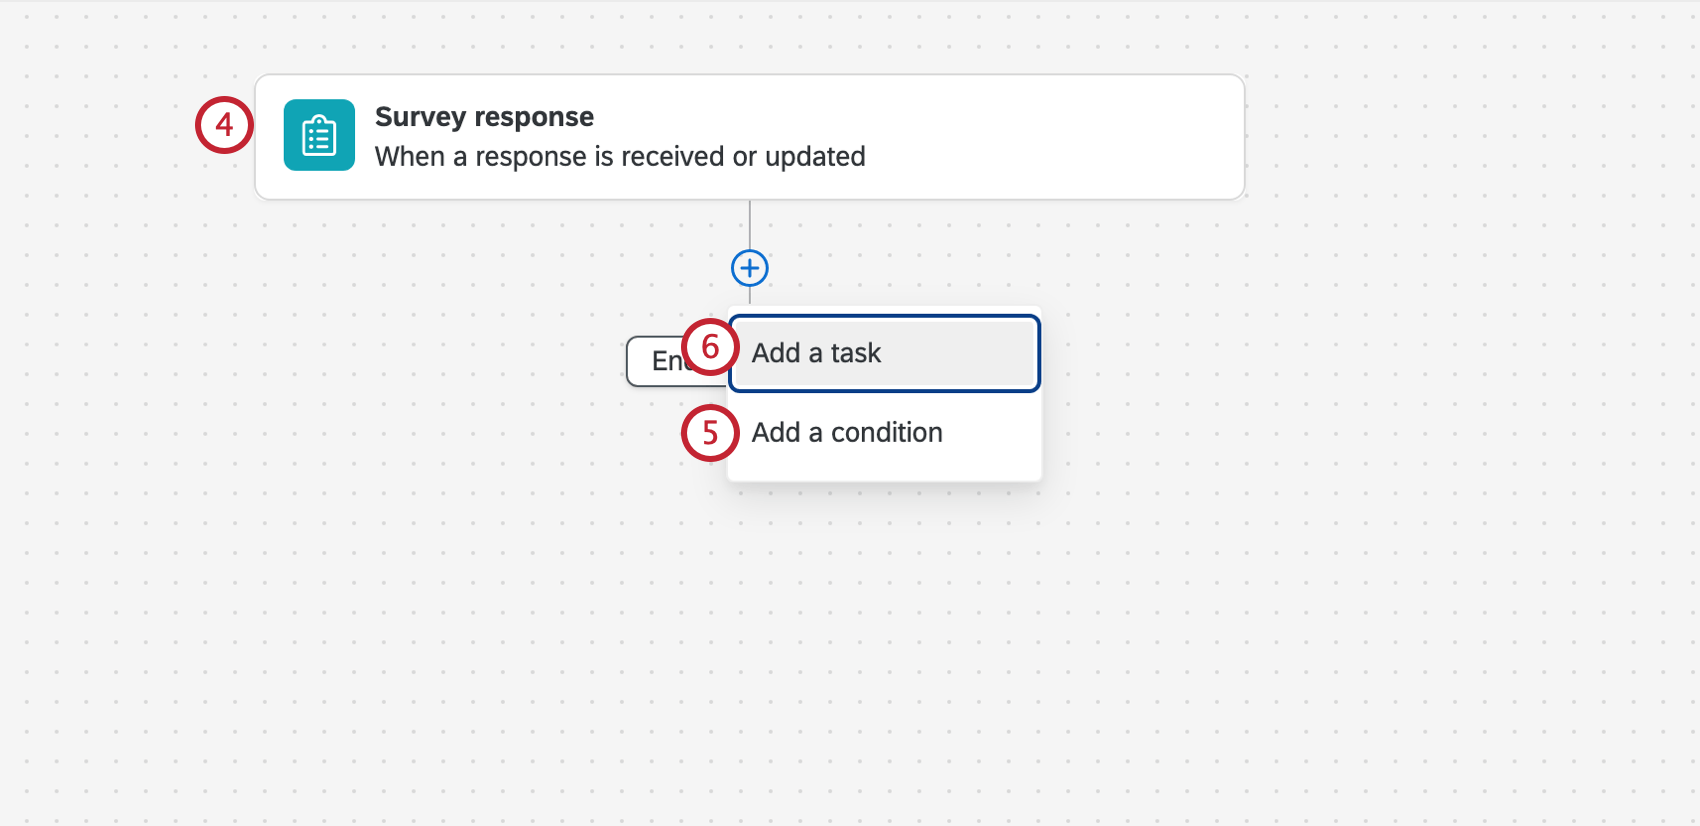
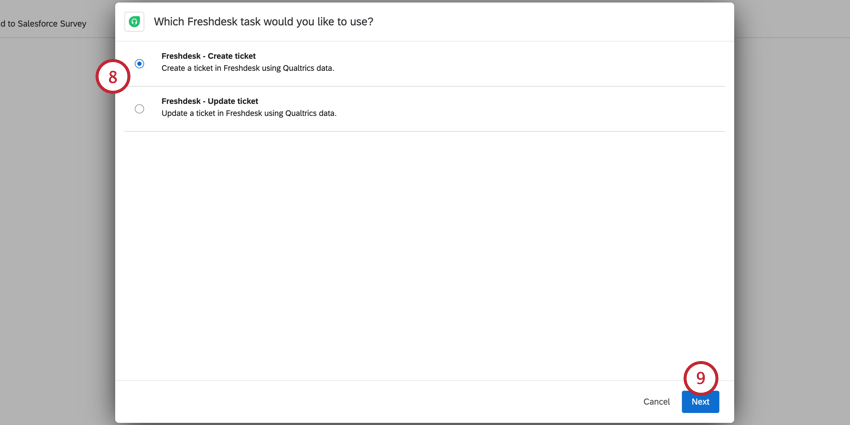
Setting Up a Freshdesk Task

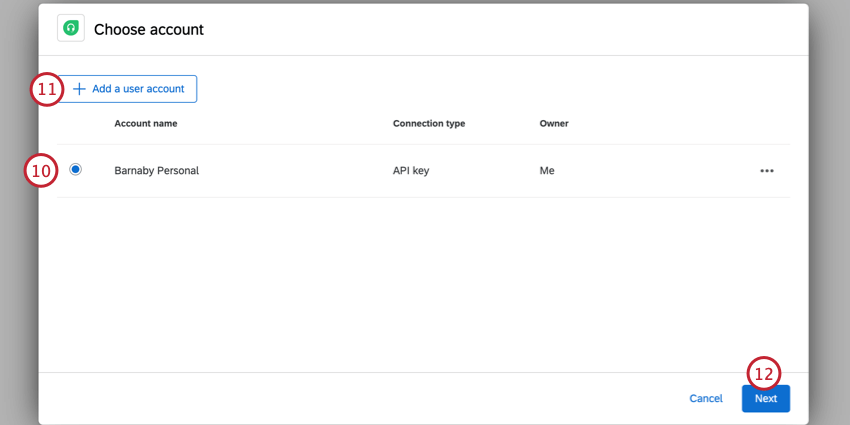
Qtip: You’ll be able to select any accounts you’d previously connected to Qualtrics, along with any accounts configured by Brand Administrators in Extensions.
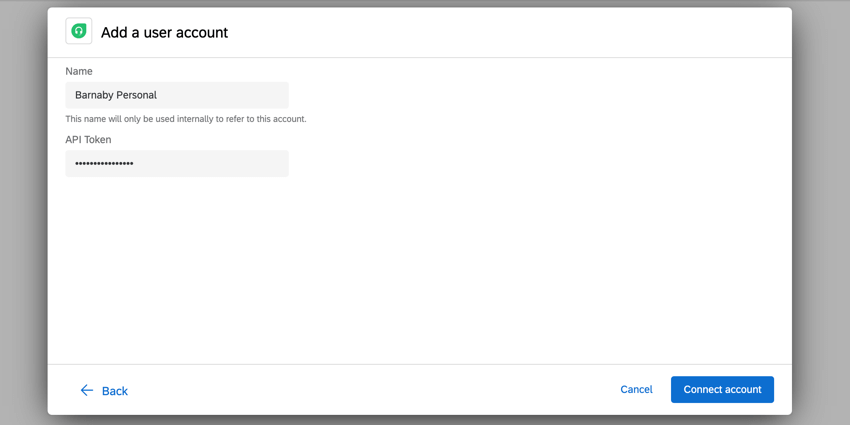
Qtip: After clicking Add a user account, you’ll be asked to give your account a name and to enter your account’s API token. This API token must be Base64 encoded. See this Freshdesk help page for information on finding your Freshdesk API token.

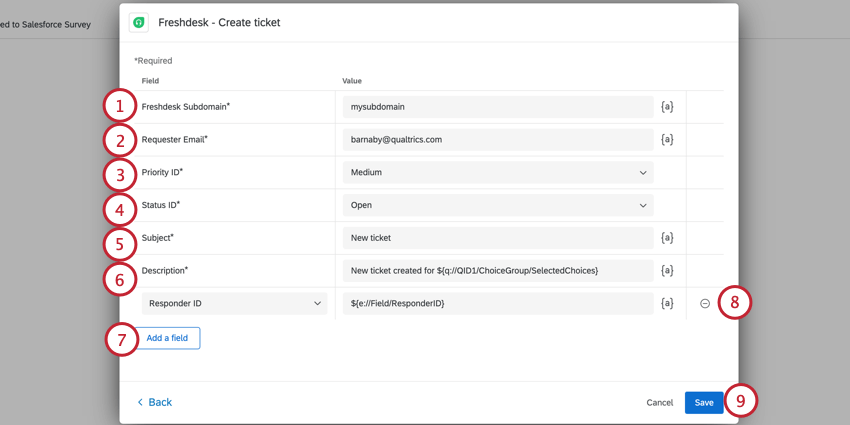
Creating a Freshdesk Ticket
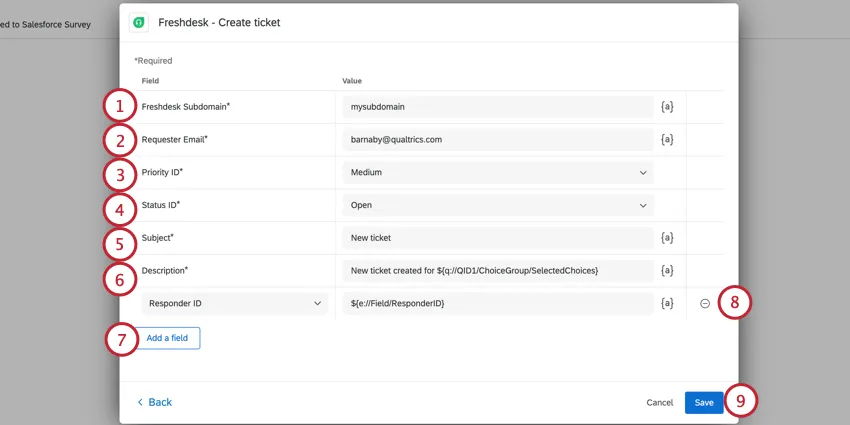
Qtip: If the email belongs to the survey respondent, you can use the piped text menu ( {a} ) to select the email address used in the contact list (Recipient Email under Panel Field). If you included a question in your survey asking for the email address of the respondent, you can use the Piped Text menu to select the specific survey question (under Survey Question).
- Responder ID: Enter the ID of the agent who should be assigned the ticket. Qtip: For more information on how to retrieve a Responder ID in Freshdesk, see their support page on Responder IDs.

- Type: Select the category type the ticket belongs in. Types help organize the different kinds of issues your support team deals with. The options are Question, Incident, Problem, and Feature Request.
- Tags: A comma-separated list of tags surrounded with quotes. For example, a ticket on using the Salesforce extension and SSO would be “Salesforce”, “SSO”. Note that the punctuation is outside the quotes.
- Custom Field Add the name and value of a custom Freshdesk field. You can add multiple custom fields.
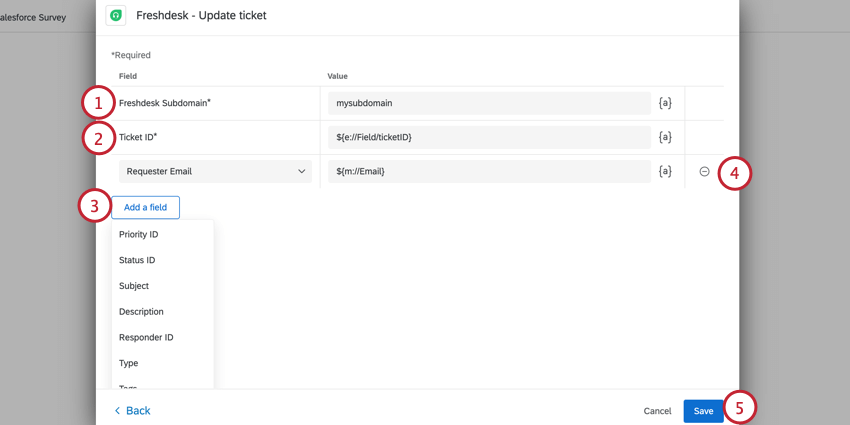
Updating a Freshdesk Ticket

Qtip: For help finding a ticket ID, reach out to Freshdesk support.
- Requester Email: Enter the email address of the customer who requested this ticket be raised. Qtip: If the email belongs to the survey respondent, you can use the piped text menu ( {a} ) to select the email address used in the contact list (Recipient Email under Panel Field). If you included a question in your survey asking for the email address of the respondent, you can use the Piped Text menu to select the specific survey question (under Survey Question).
- Priority ID: Assign a ticket priority. The options are Low, Medium, High, and Urgent.
- Status ID: Assign a status to the ticket. The options are Open, Pending, Resolved, and Closed.
- Subject: Enter the subject line of the ticket.
- Description: Add a description to the ticket.
- Responder ID: Enter the ID of the agent who should be assigned the ticket. Qtip: For more information on how to retrieve a Responder ID in Freshdesk, see their support page on Responder IDs.
- Type: Select the category type the ticket belongs in. Types help organize the different kinds of issues your support team deals with. The options are Question, Incident, Problem, and Feature Request.
- Tags: A comma-separated list of tags surrounded with quotes. For example, a ticket on using the Salesforce extension and SSO would be “Salesforce”, “SSO”. Note that the punctuation is outside the quotes.
- Custom Field Add the name and value of a custom Freshdesk field. You can add multiple custom fields.
FAQs
Do I have access to all extensions available through the Workflows templates?
Do I have access to all extensions available through the Workflows templates?
Is there a link to all Workflows events and tasks?
Is there a link to all Workflows events and tasks?
What are Workflows templates?
What are Workflows templates?
What are workflows? / Where are actions?
What are workflows? / Where are actions?
There are no changes to workflow functionality as part of this update.
How can I tell the difference between first party and third party extensions? Where do I go for support for either kind?
How can I tell the difference between first party and third party extensions? Where do I go for support for either kind?
How do I add or remove an extension from my Qualtrics account?
How do I add or remove an extension from my Qualtrics account?
That's great! Thank you for your feedback!
Thank you for your feedback!