
Sharing Workflows
What's on this page
About Sharing Workflows
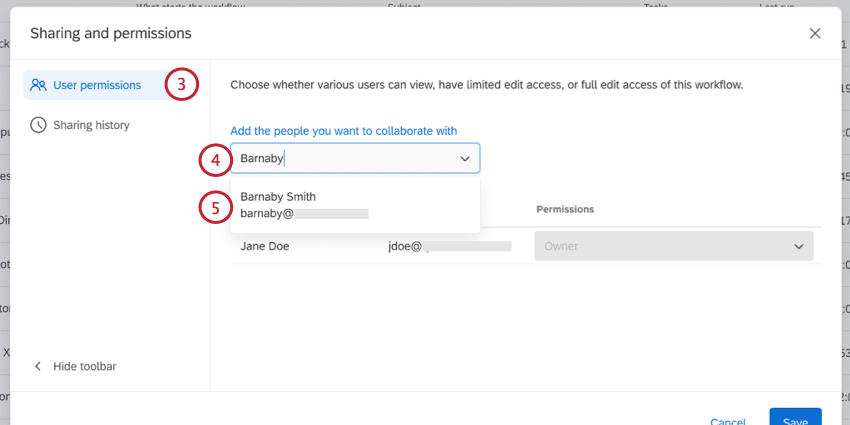
You can share your workflows with other users in your Qualtrics license to easily collaborate on your workflows. When sharing your workflow, you can choose the level of access your collaborator has. You can also view a history of each time the workflow’s sharing permissions have changed.
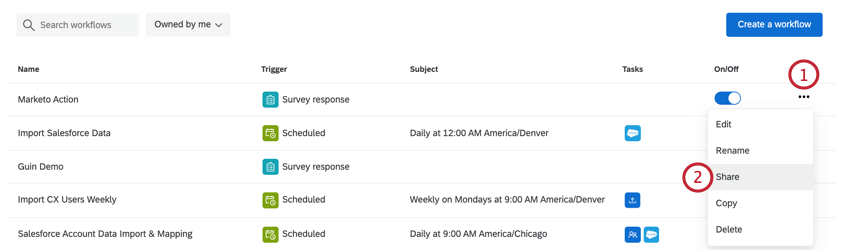
Attention: You can only share workflows from the stand-alone Workflows page. You cannot share workflows from within the Workflows tab of an individual project. If you want to share a workflow from a specific project, collaborate the project itself. See Workflow Sharing Methods for more information.
Qtip: You cannot change a workflow’s owner by sharing it. To change a workflow’s owner, see Transferring Workflow Ownership.
Workflow Sharing Methods
This section will cover the two different methods to share workflows. Read this section carefully, as the two different methods give your collaborators different levels of access to your workflows.
Sharing a Workflow
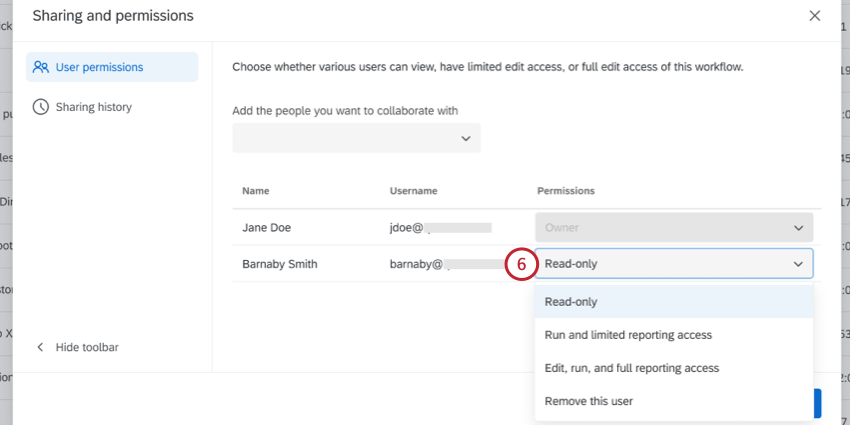
- Read-only: Grants the user view-only access to the workflow and some reporting details. See sharing permissions for more information.
- Run and limited reporting access: Grants the user ability to perform some additional functions, but not directly edit the workflow. See sharing permissions for more information.
- Edit, run, and full reporting access: Grants the user the ability to edit the workflow. See sharing permissions for more information.
- Remove this user: Revokes access from the user. See sharing permissions for more information.
Qtip: You can also access sharing settings by clicking Sharing and permissions while editing a specific workflow.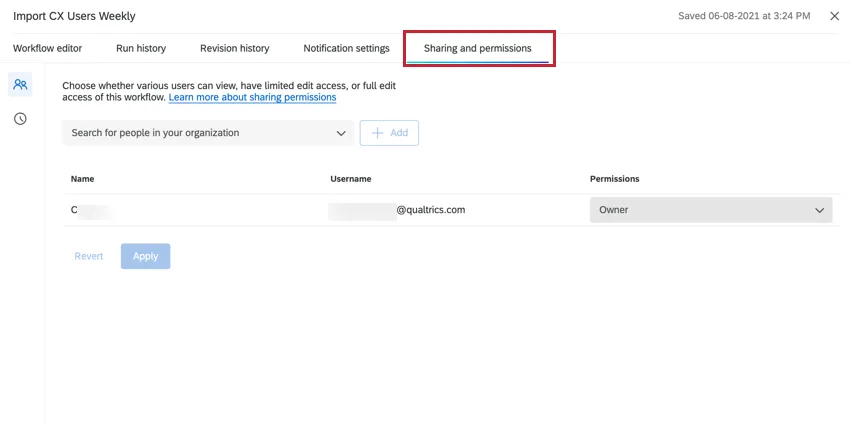
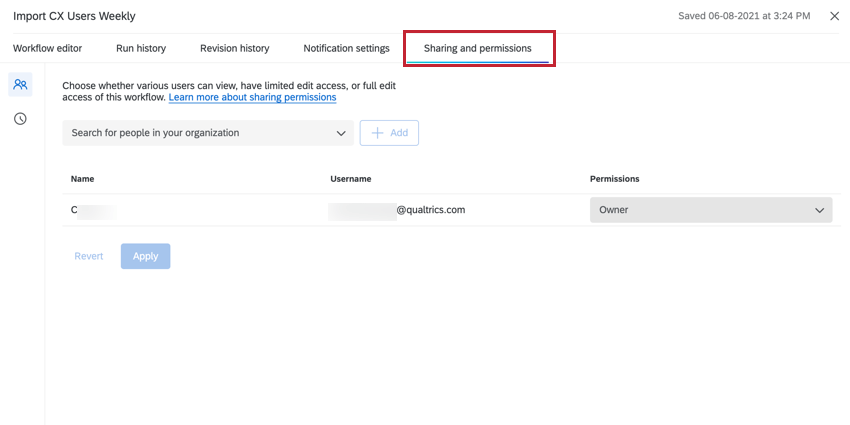
Sharing Permissions
When sharing your workflow, use the below table to determine the level of access you want to give collaborators.
| Read-only | Run and limited reporting access | Edit, run, and full reporting access | Owner | |
|---|---|---|---|---|
| View access | Yes | Yes | Yes | Yes |
| View revision history | Yes | Yes | Yes | Yes |
| View run history | Yes | Yes | Yes | Yes |
| View JSON details | No | No | Yes | Yes |
| Copy workflow | Yes | Yes | Yes | Yes |
| Run scheduled workflows | No | Yes | Yes | Yes |
| Retry workflows | No | Yes | Yes | Yes |
| Cancel workflows | No | Yes | Yes | Yes |
| Enable / Disable Workflows | No | Yes | Yes | Yes |
| Edit workflows | No | No | Yes | Yes |
| Modify workflow notifications | No | No | No | Yes |
| Delete workflows | No | No | No | Yes |
| Rename workflows | No | No | Yes | Yes |
| Share workflows | Yes | Yes | Yes | Yes |
| Remove sharing | No | No | No | Yes |
Attention: Anyone with access to the workflow can share the workflow up to their same level of access. For example, someone with Limited access can share the workflow with another user and grant them either View or Limited access.
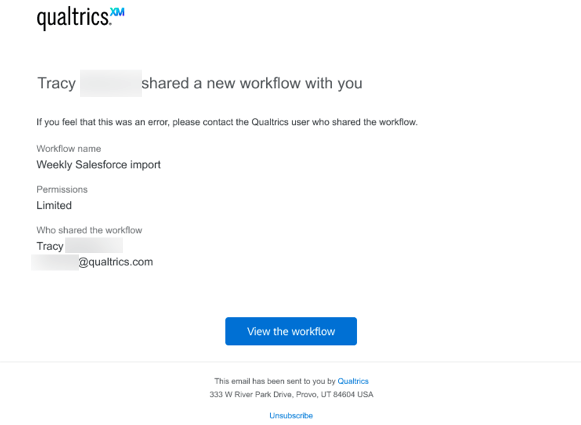
Email Notifications
An email notification will be sent when a workflow’s sharing settings are updated. Both the workflow owner and the user whose permissions were updated will receive an email letting them know of the change.

The email includes:
- Workflow name: The name of the workflow that has been shared.
- Permissions: The sharing permissions that have been given.
- Who shared the workflow: The user who shared the workflow.
Click View the workflow to be brought to the workflow in Qualtrics.
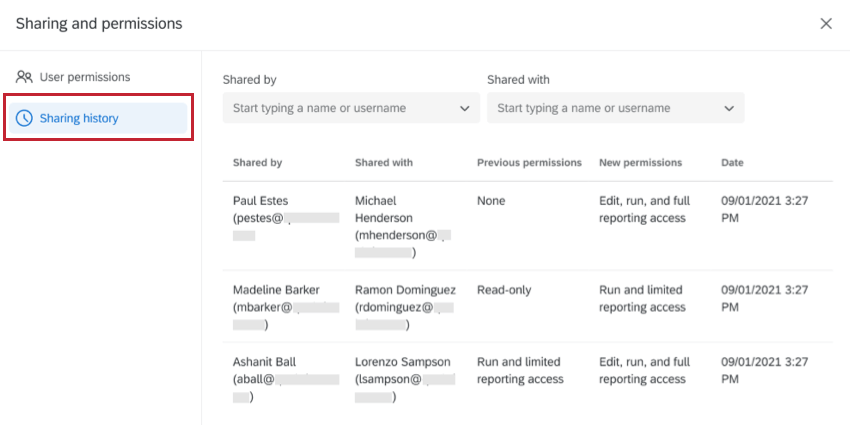
Sharing History
The Sharing history section displays a log of every time sharing permissions changed for the workflow.

This table includes:
- Shared by: The user that shared the workflow.
- Shared with: The user the workflow was shared with.
- Previous permissions: The workflow permissions the “shared with” user had before the change.
- New permissions: The workflow permissions the “shared with” user had after the change.
- Date: The date and time the change took place.
To help narrow down your log, you can use the “shared by” and “shared with” filters at the top of the page to search for a specific user.
That's great! Thank you for your feedback!
Thank you for your feedback!