
Experience Transparency
What's on this page
Qtip: This feature is only available to users on the new simplified pricing and packaging plans or customers who actively participated in the Preview Program for this feature. For more information, see Qualtrics Public Preview. If you have questions about your Qualtrics pricing and packaging plan, reach out to Account Services.
About Experience Transparency
Research shows that there are multiple benefits to displaying customer ratings and testimonials on your website. These reviews can help to improve your website’s SEO, build customers’ trust in your business, and increase transparency into how your organization handles customer feedback.
Experience Transparency projects are used to moderate and manage customer reviews for your business. A project administrator can evaluate newly collected reviews, approve or reject them, edit them if needed, and publish positive reviews directly to your website. You can also set up an appeal process, allowing named subjects to appeal reviews before they’re published.
Requirements
Data Requirements
To use this project, you’ll need your review data available in an existing CX dashboard. This can be accomplished 2 different ways:
For either data source, you’ll need the following fields available in your dataset:
- Subject ID: This is the unique ID of the person/location/product that the review is about.
- Subject Name (optional): This is the name of the person that the review is about.
- Rating: The rating score given in the review. Qtip: ALL ratings must be mapped between 0 – 5. Any conversions from other number scales must be recoded on the dashboard level.

- Rating Metric Type: The metric type (discrete vs. continuous). Discrete values means that all ratings can only be a small set of numbers, and continuous values means that ratings can be any number within a given range.
- Example of a discrete metric: {0, 0.5, 1, 1.5, …, 4, 4.5, 5}.
- Example of a continuous metric: any number between 0 and 5 (e.g., 3.14).
- Author of Review (optional): The name of the person who wrote the review.
- Review Date: The date of the review.
- Review Comment: The verbatim of the review.
- Title of the Review (optional): The title of the comment.
There are additional optional fields to include in your dataset that allow you to show replies to reviews. You can also use any custom fields from your dataset to filter your reviews in your project. These optional fields include:
- Reply to the review: The content of the review reply.
- Author of the reply (optional): The name of the author of the review reply.
- Title of the reply (optional): The title of the review reply.
- Date of the reply (optional): The date of the review reply.
- Custom fields: Any other data fields from your dataset, to be used as a filter when managing reviews. This could be other collected customer scores like NPS or CES, or other useful data like store location.
Qtip: See Recommended Mappings for information about how these fields correspond to fields in survey projects and ORM projects.
Required User Permissions
You need the following user permissions enabled for your account:
- Create Experience Transparency: This permission allows you to create a new Experience Transparency project.
- Use Experience Transparency: This permission allows you to use an Experience Transparency project after it’s created.
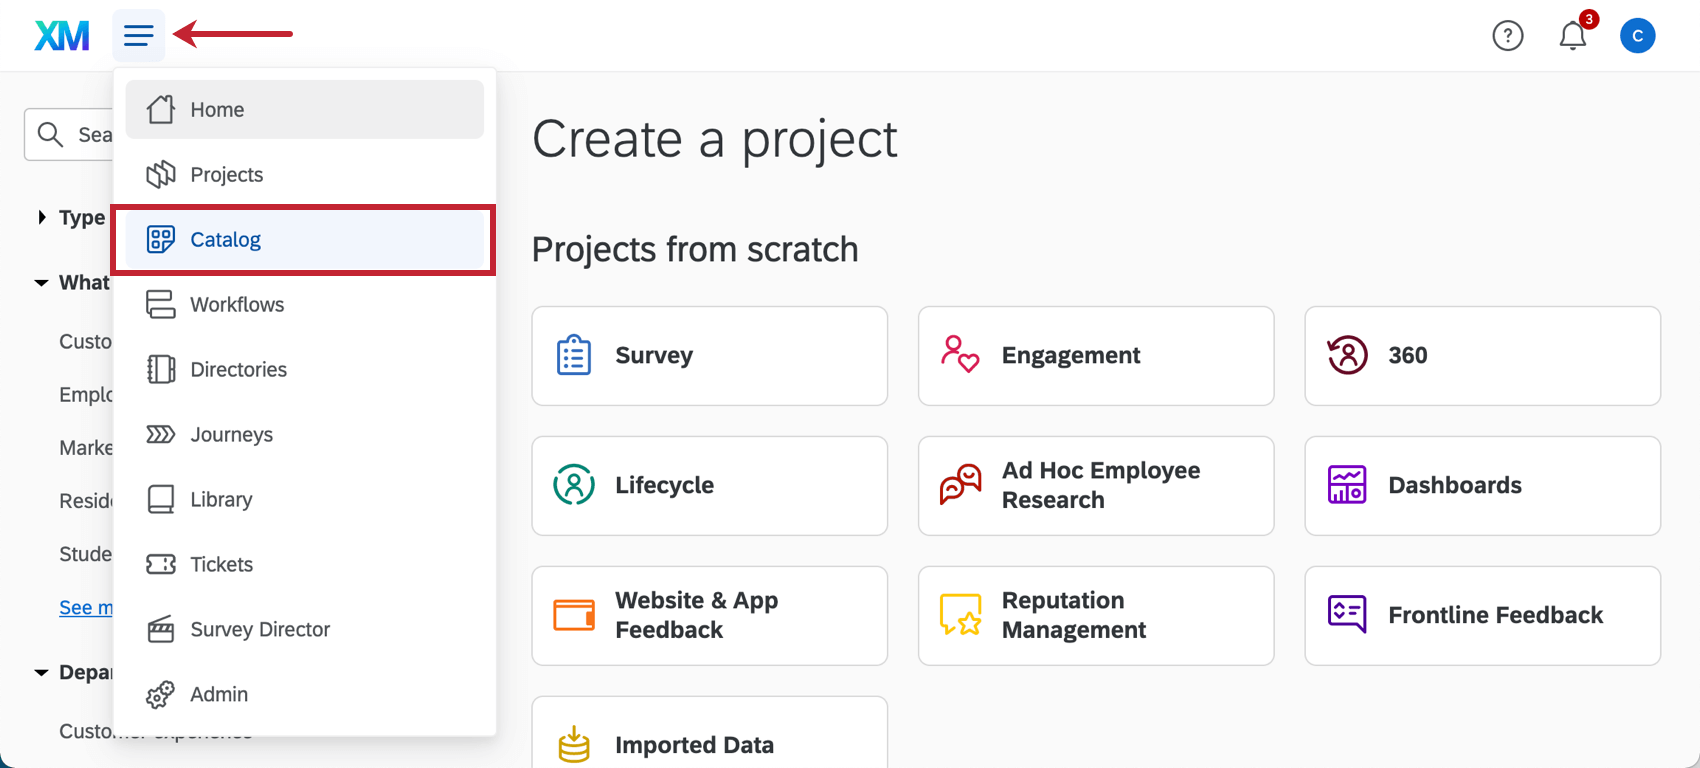
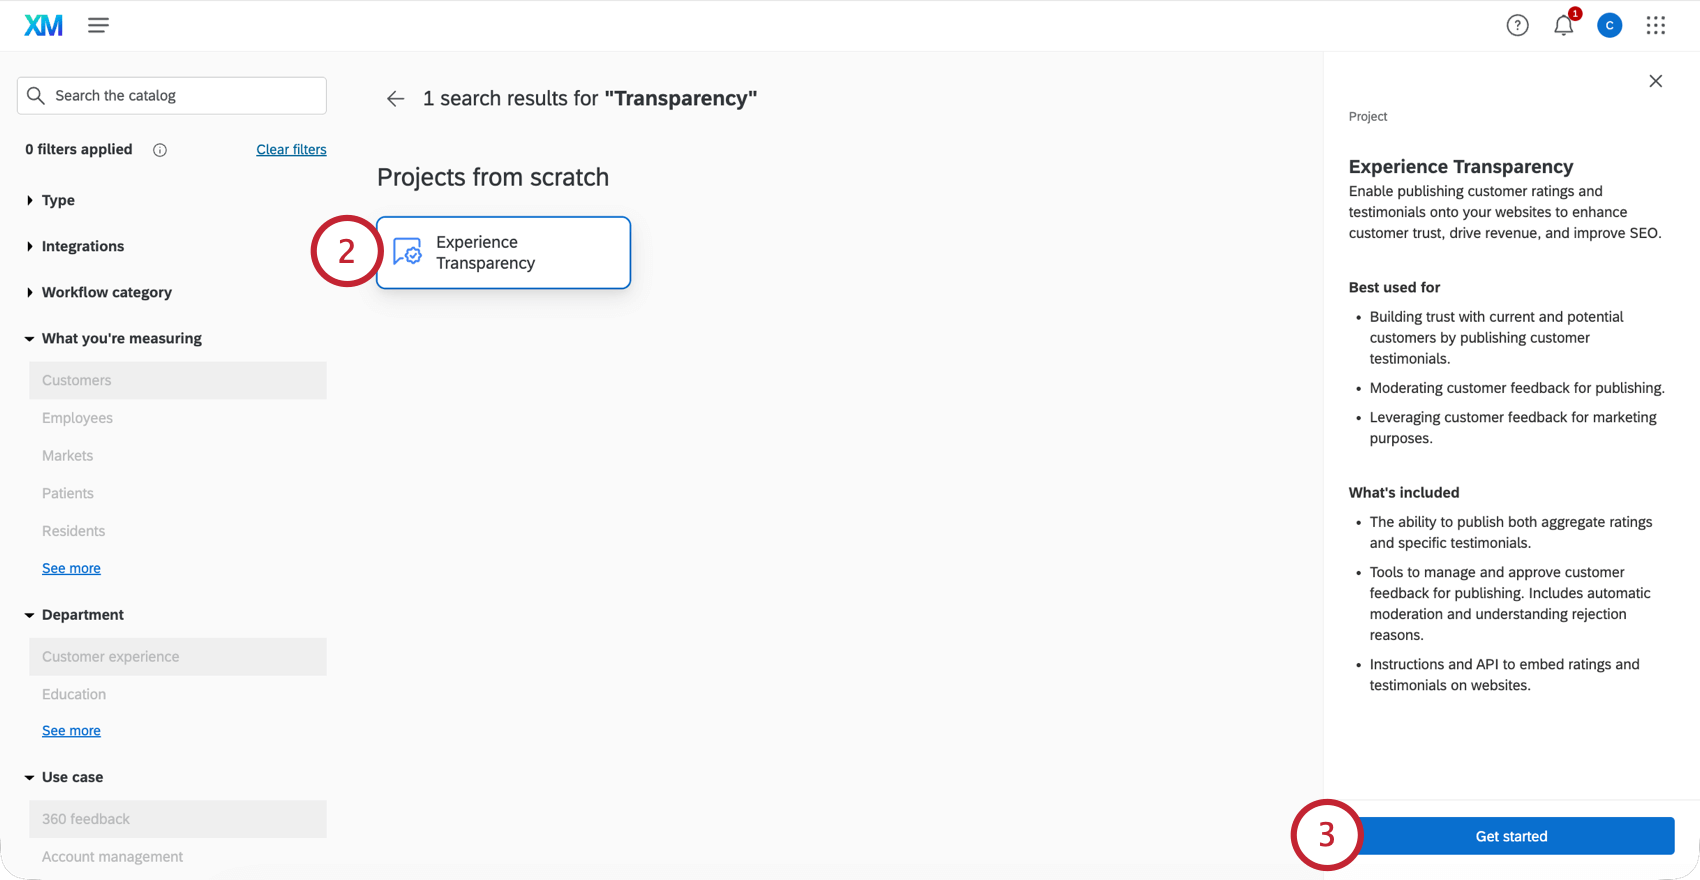
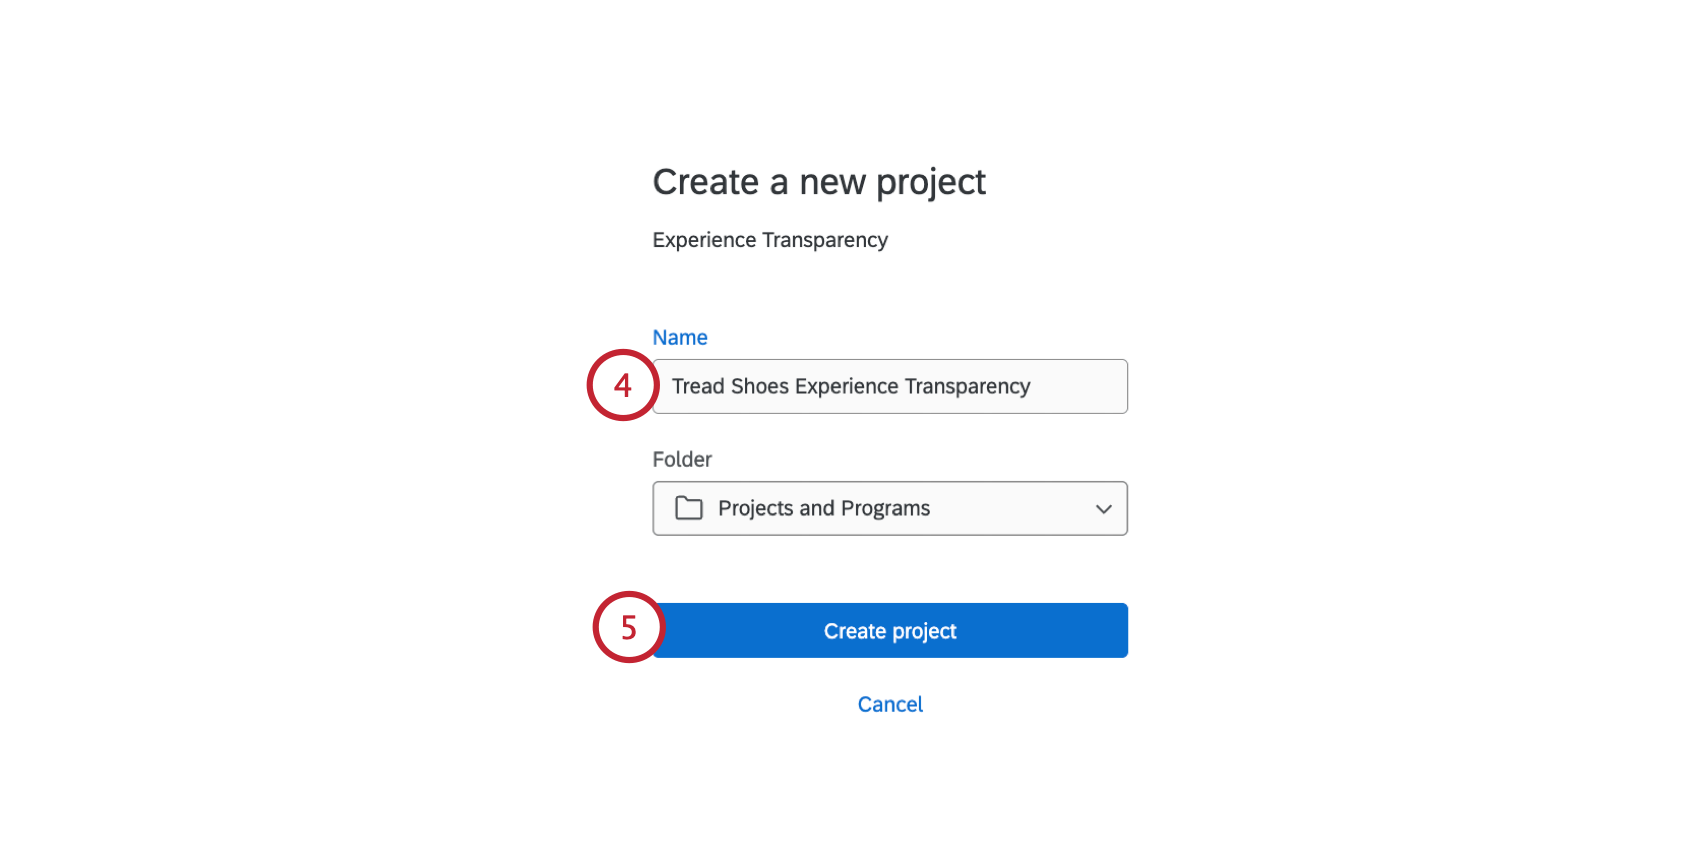
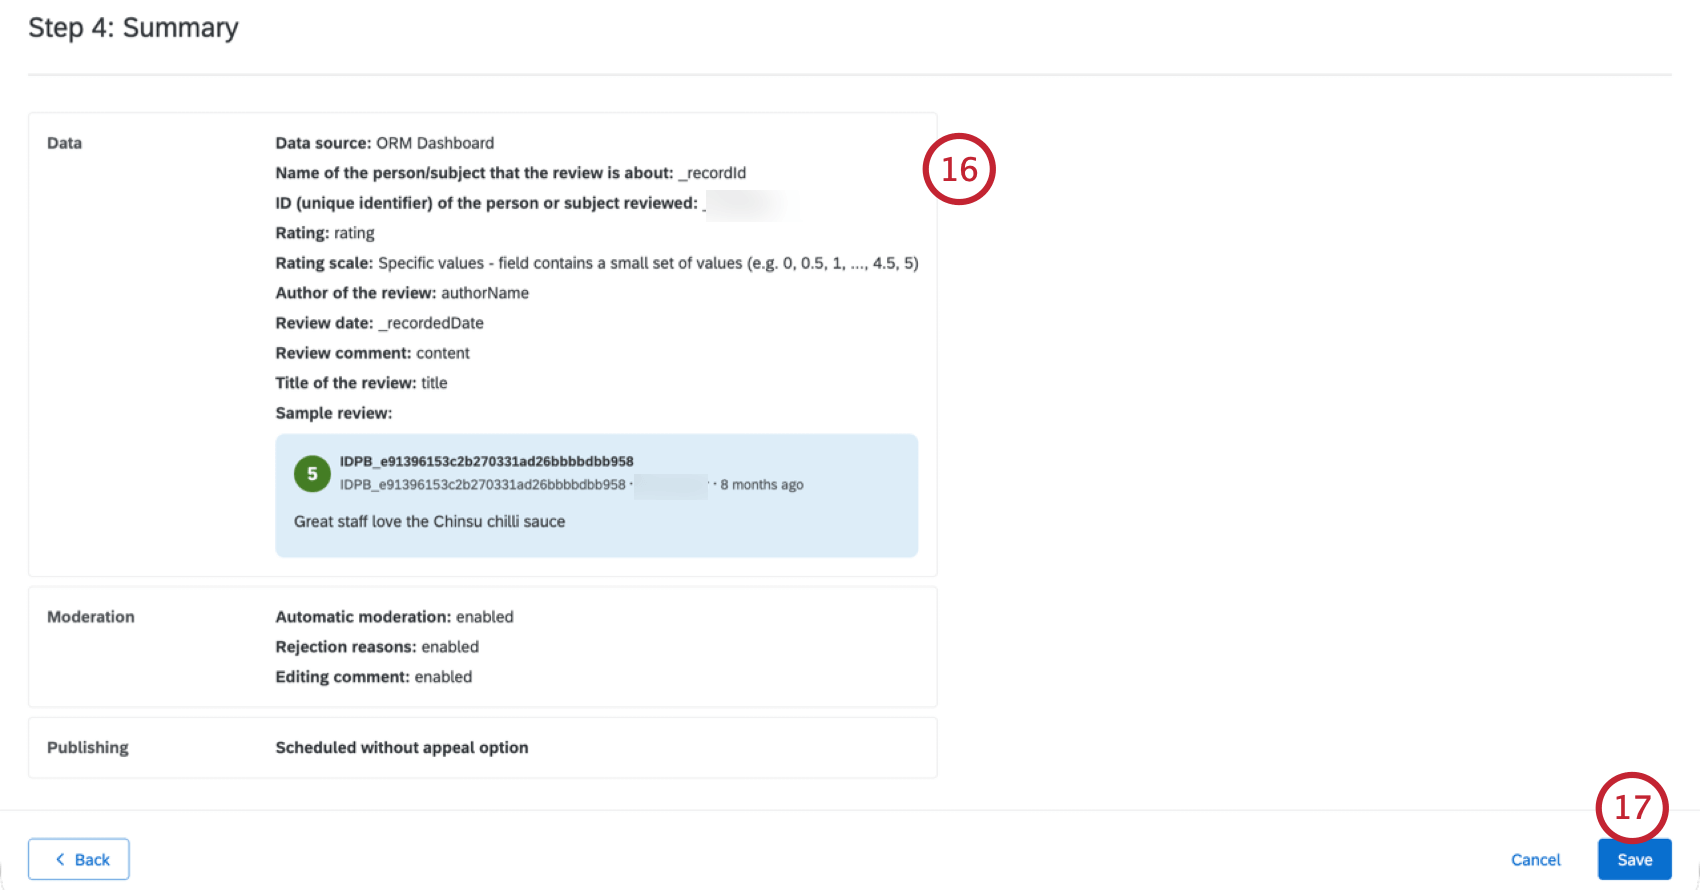
Creating an Experience Transparency Project
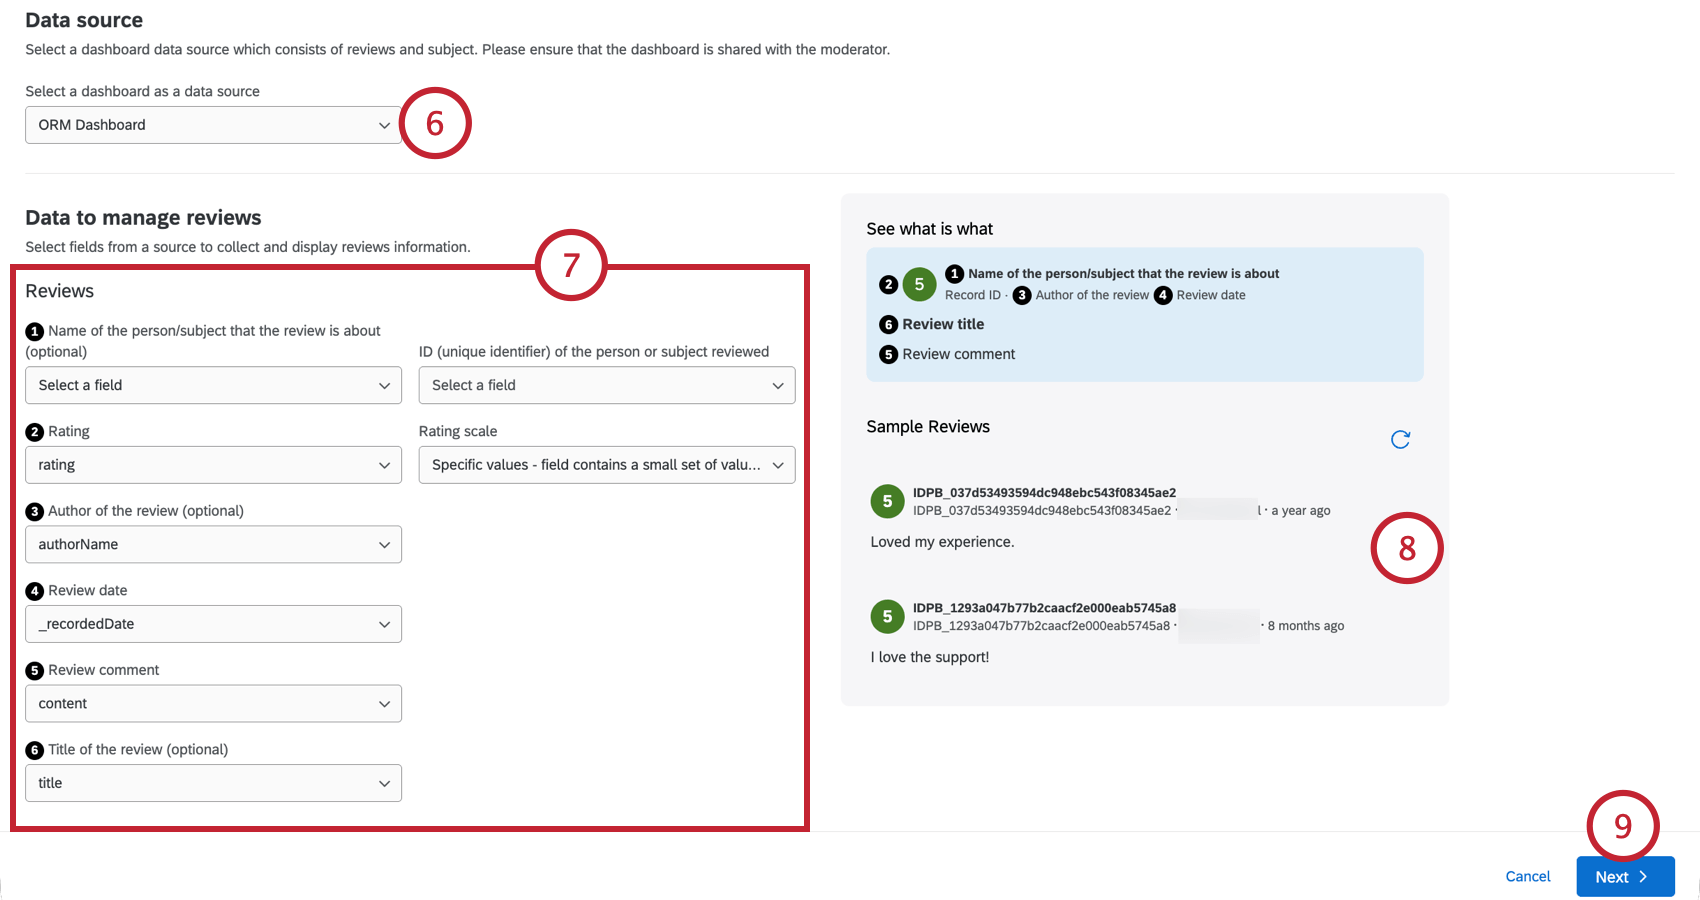
Qtip: Most fields can be remapped later. However, you cannot change “ID,” “Review date,” or “Review comment” after your project has been saved.
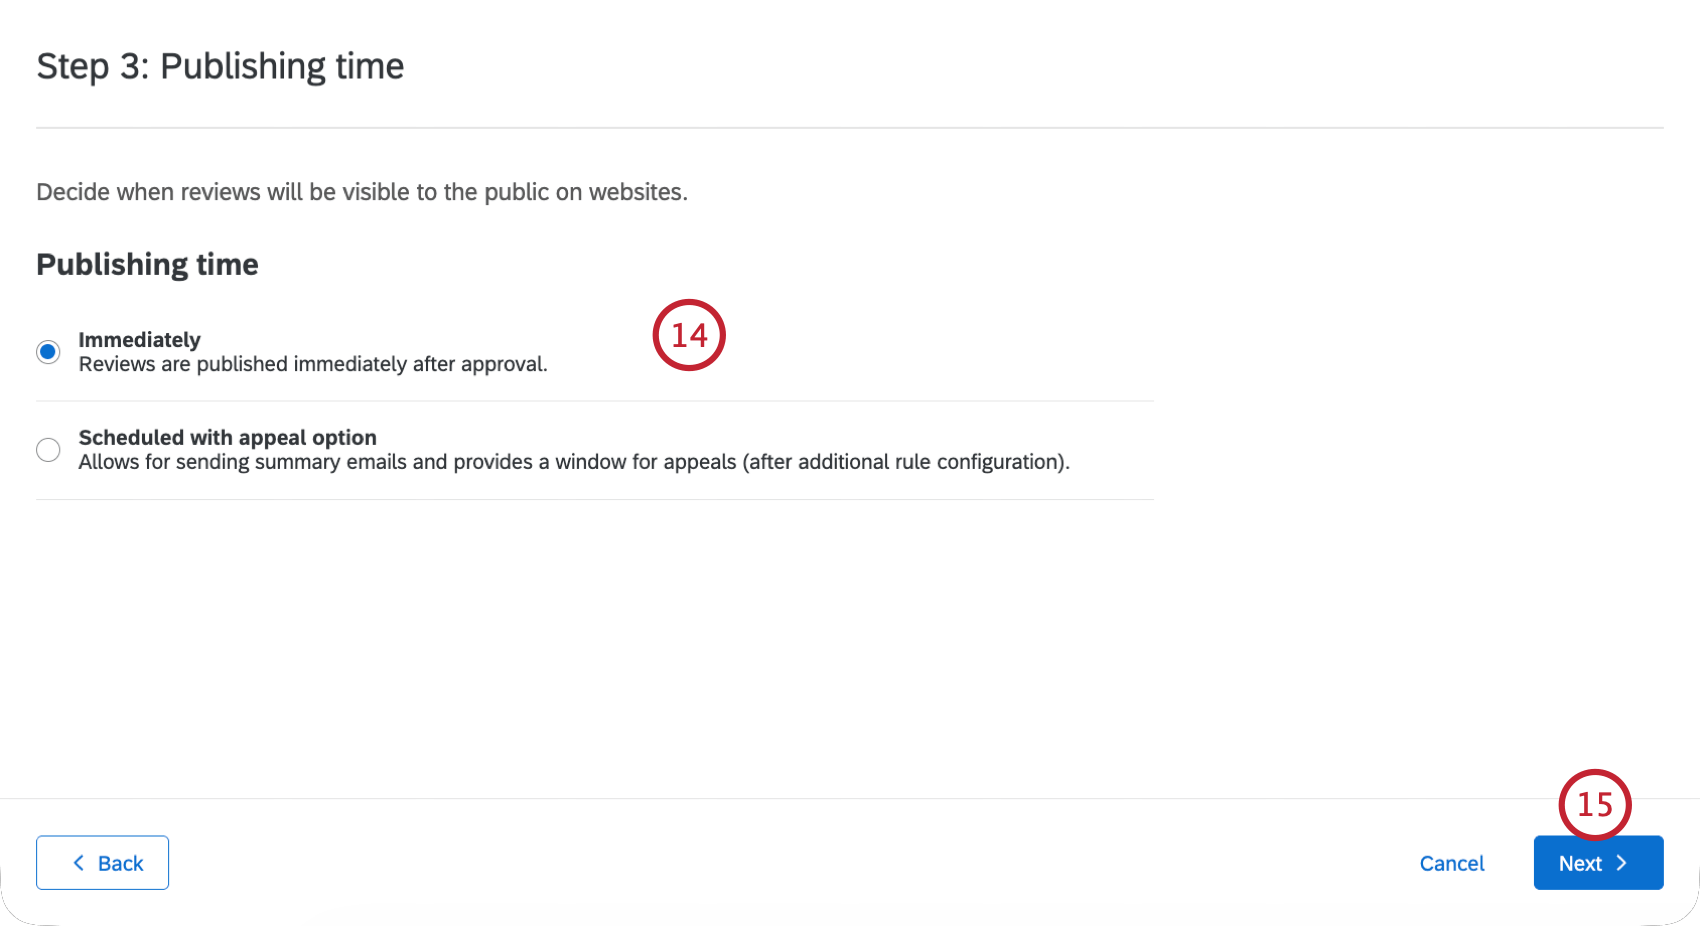
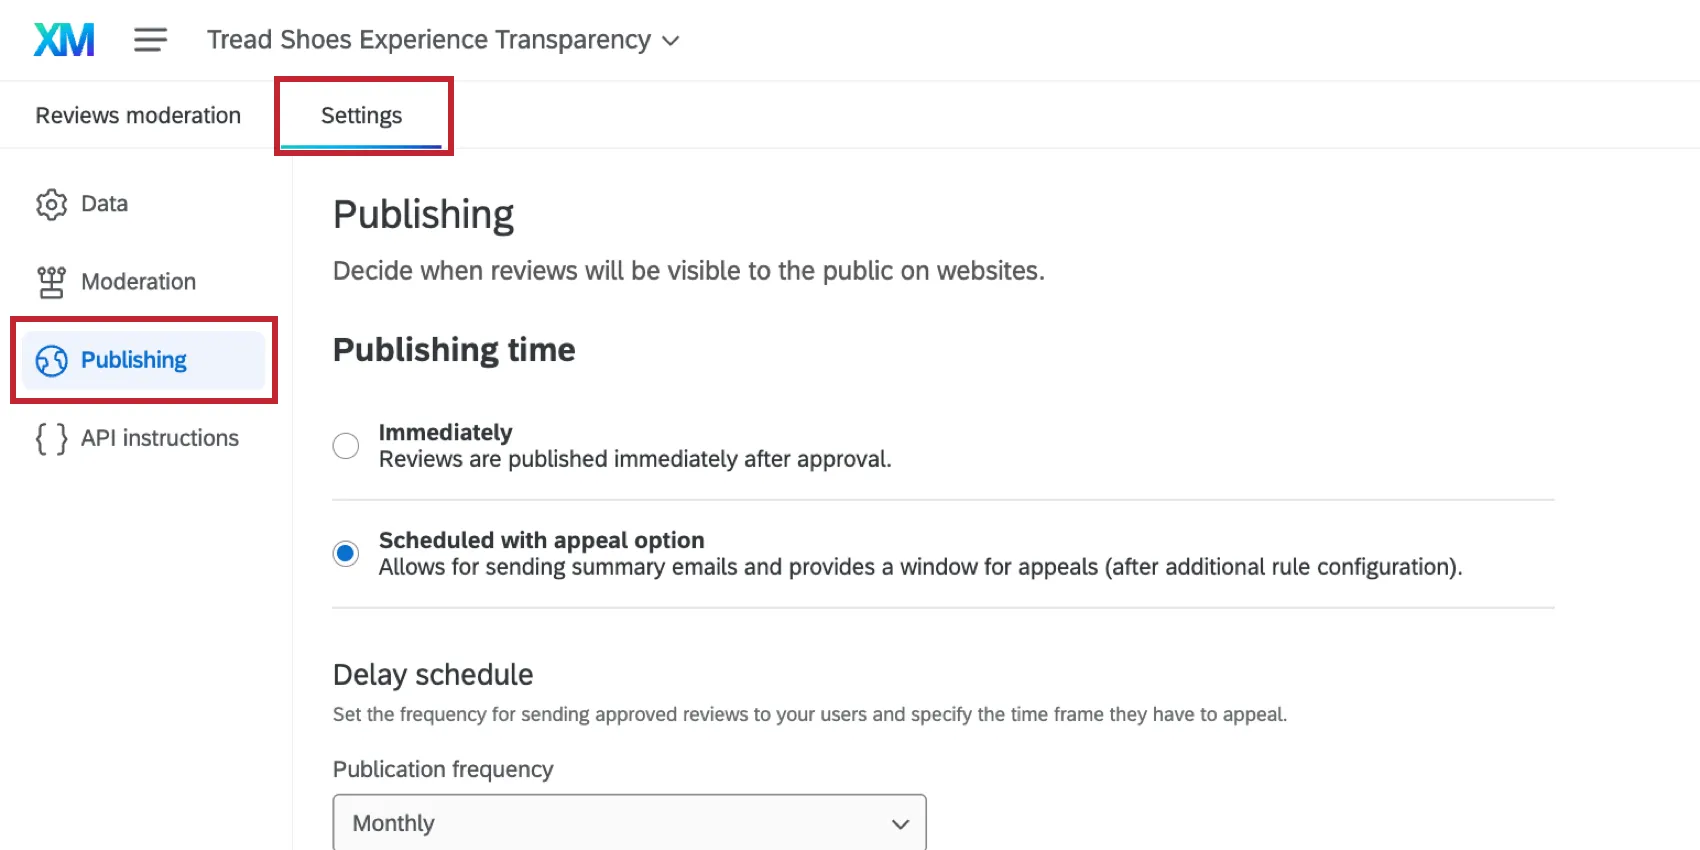
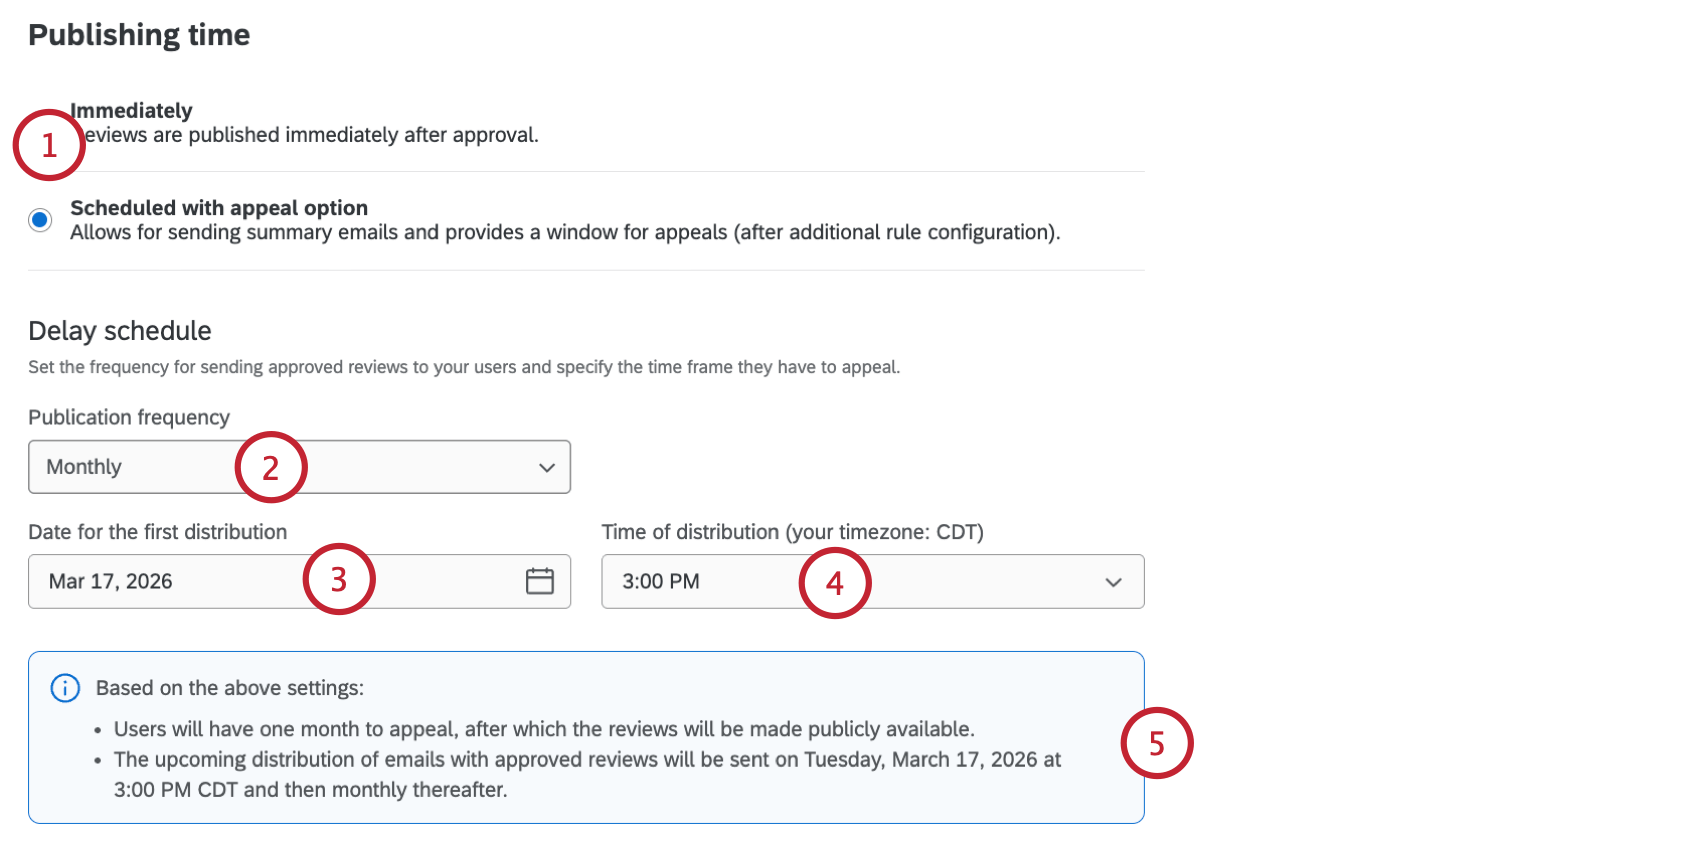
- Immediately: Reviews are published immediately after they’re approved.
- Scheduled with appeal option: Reviews are summarized and sent to mentioned subjects for appeal before approval. Reviews are published after the approval process. See Scheduling an Appeal Email for more information.
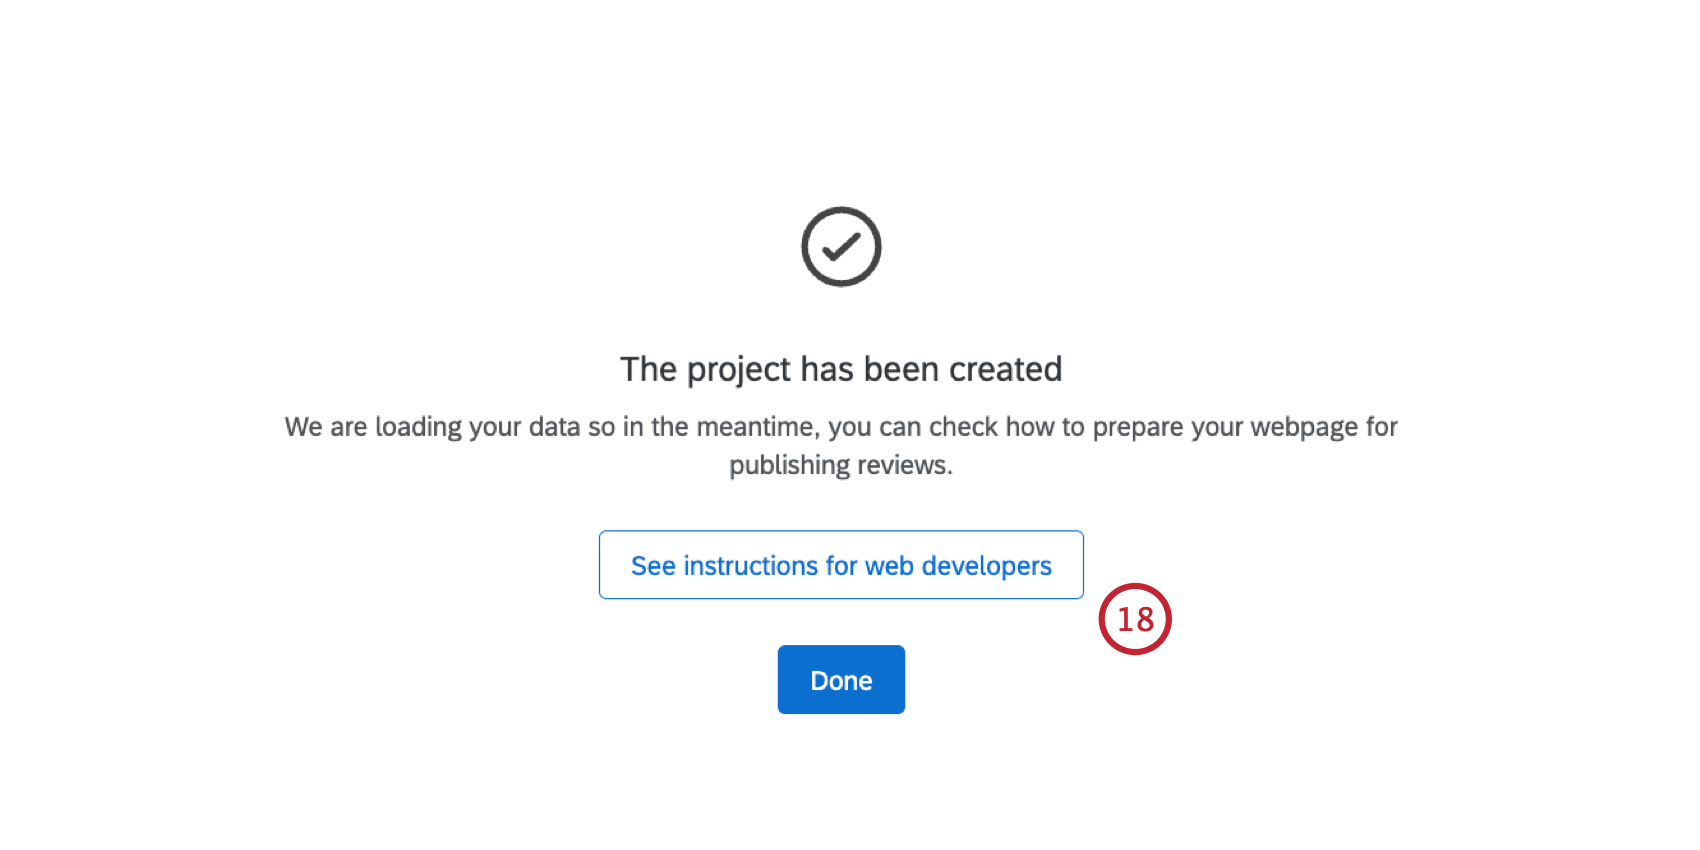
Qtip: It may take up to 24 hours for data to fully populate in your project. See Moderating Reviews for information on how to manage your reviews once they’re been loaded.
Recommended Mappings
Below are the suggested mappings to use in your Experience Transparency project. The exact fields you use may be different, depending on how your review program is set up.
This table contains 2 different suggested mappings:
- Survey Field: Use this suggested mapping if your data is in a CX survey.
- ORM Field: Use this suggested mapping if your data is in an ORM project.
| Experience Transparency Field Name | Survey Field | ORM Field |
|---|---|---|
| Name of the person/subject that the review is about | This could be an embedded data field passed from a mailing list, or a question where the customer selects or enters the subject’s name. | subjectName |
| ID (unique identifier) of the person or subject reviewed | A uniqueID that corresponds to the subject. Typically, this is built into the survey with embedded data. | subjectId |
| Rating | This must be a numerical data field, which could be from a multiple choice question or a slider question for a single rating. You can also create a custom formula if you’d like to average multiple ratings together into a composite rating. | rating |
| Rating scale | Choose if your scale is a continuous range (e.g., a slider from 0-100), or a set of discrete values (e.g., a 5-point star rating). | This field is not mapped in your dashboard. Instead, choose if your scale is a continuous range or a set of discrete values. |
| Author of the review (optional) | The review author’s name is typically passed to the survey via a mailing list, or provided directly by the author in the survey. | authorName |
| Review date | If your review is collected via the survey itself, then this will be the response’s Recorded Date. If you are using the survey to import external reviews, then you can include the original review date as a field in your dataset. | createdDate |
| Review comment | Collect the customer’s review using a text entry question. | content |
| Title of the review (optional) | Use a text entry question to allow customers to title their review. | This field is not required for ORM, so it will only be available if you’ve added it to your ORM dataset manually. |
Data Settings
Qtip: Changes to these settings may take up to 24 hours to take effect. If making changes in the Data tab, make sure to click Save at the bottom of the page.
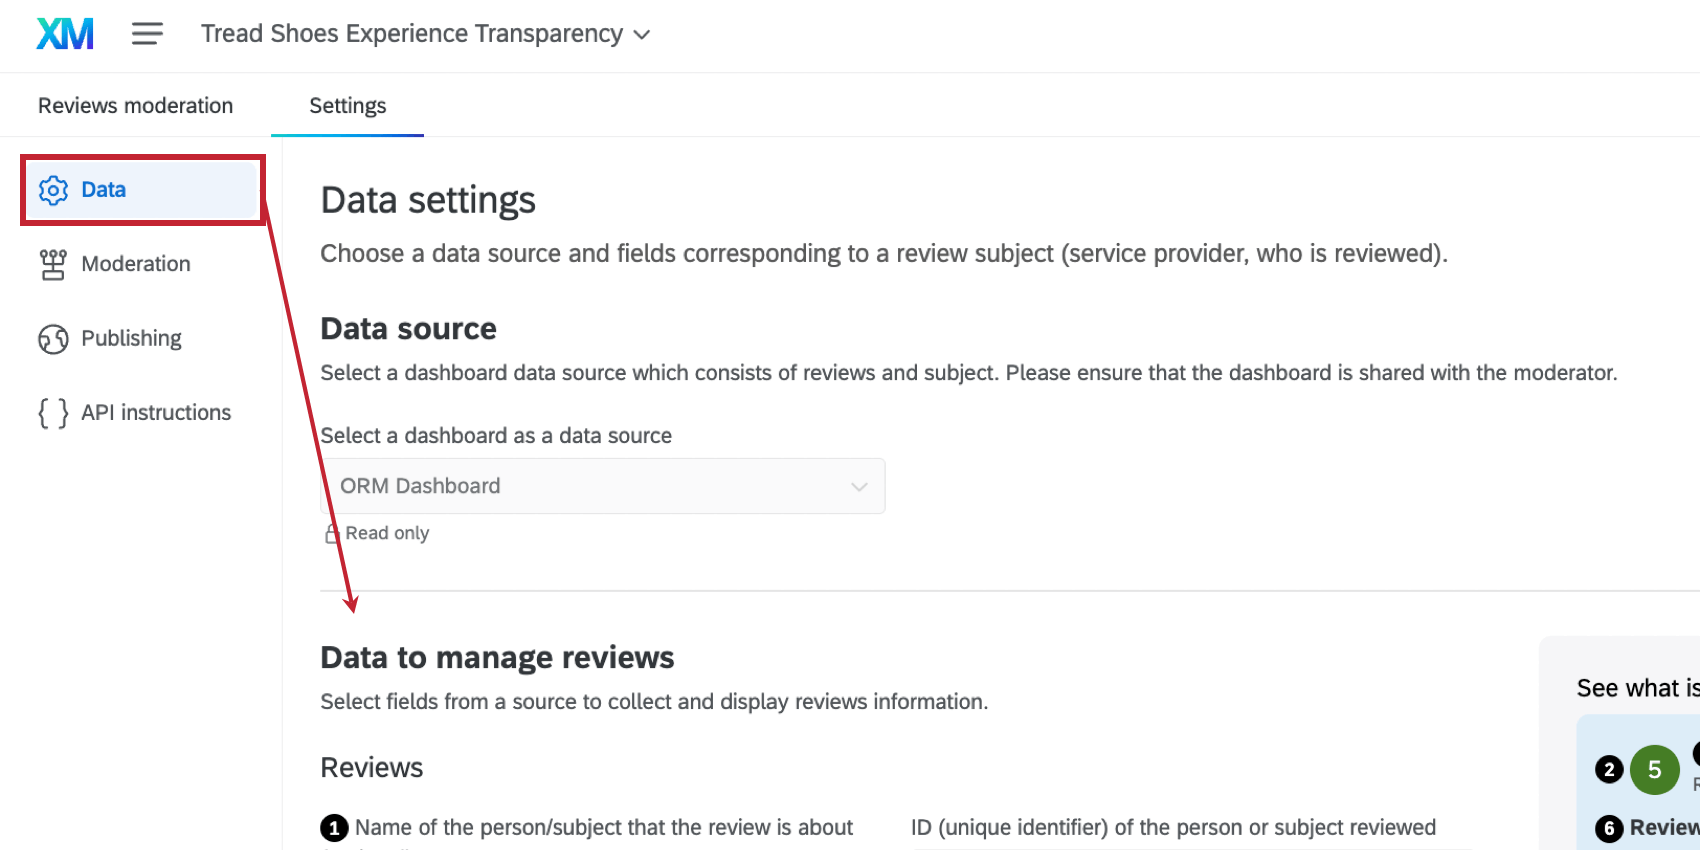
The Data section of your project’s settings lets you change the data used in your project. There are 3 different sections:
- Data to manage reviews: These are the fields used for your reviews that you selected during the initial project setup.
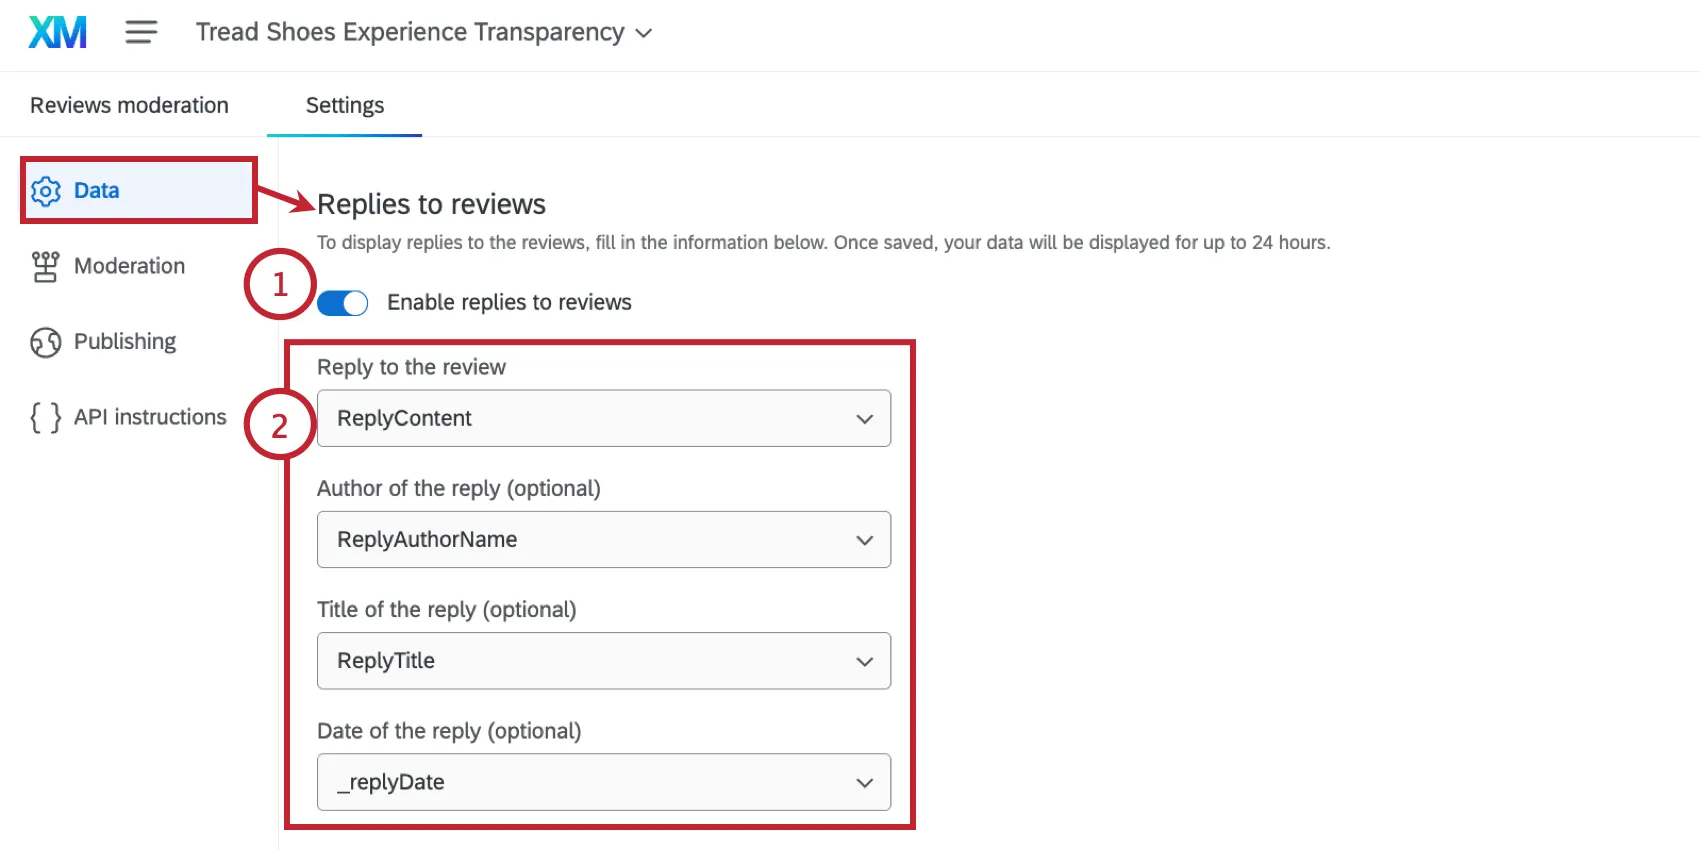
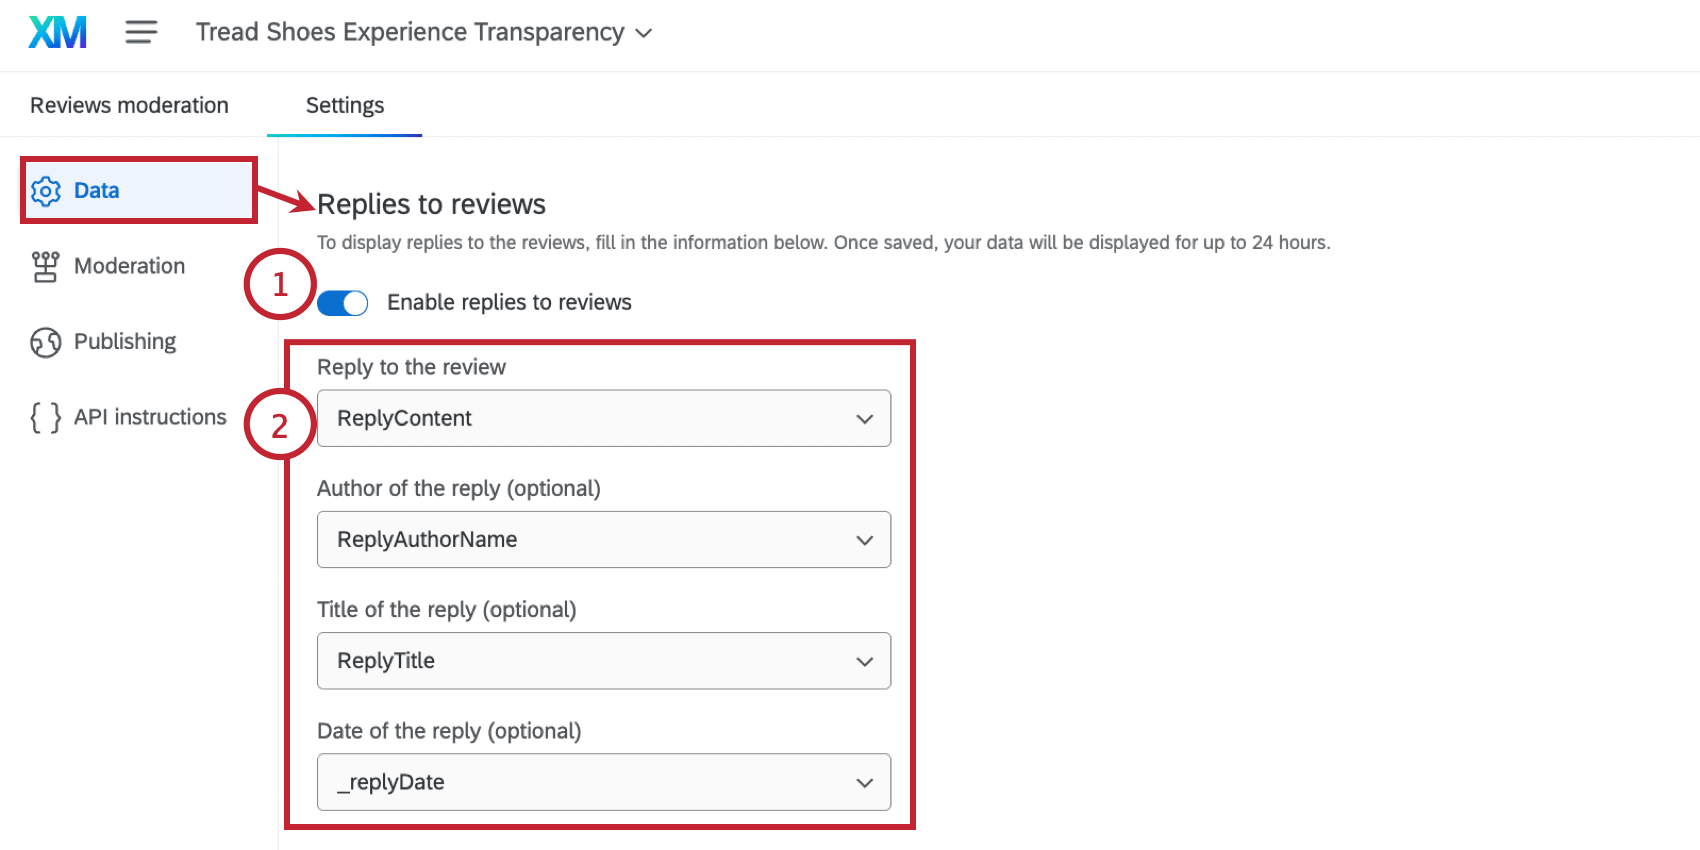
- Replies to reviews: If desired, you can map additional fields to display the replies to the original reviews.
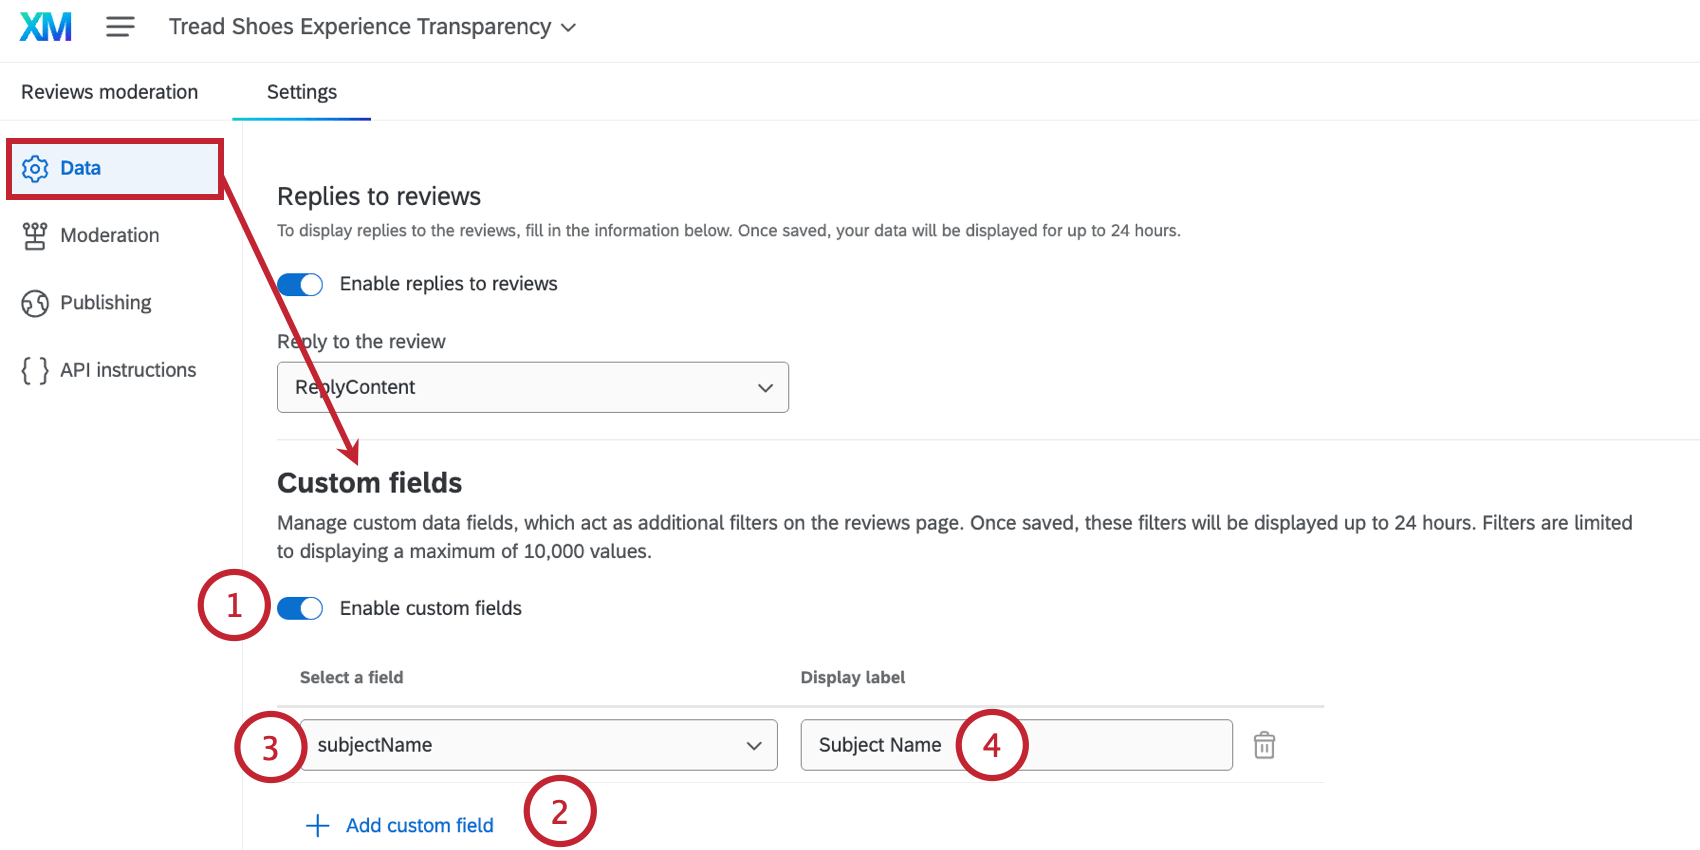
- Custom fields: Select field(s) from your dataset to use as additional filters inside your Experience Transparency project.
Data to manage reviews
You can modify some data fields used in the reviews. This is helpful if your dashboard fields have changed, or if you made a mistake in the initial setup.
To change your data fields, go to the Data to manage reviews section of your Data settings.
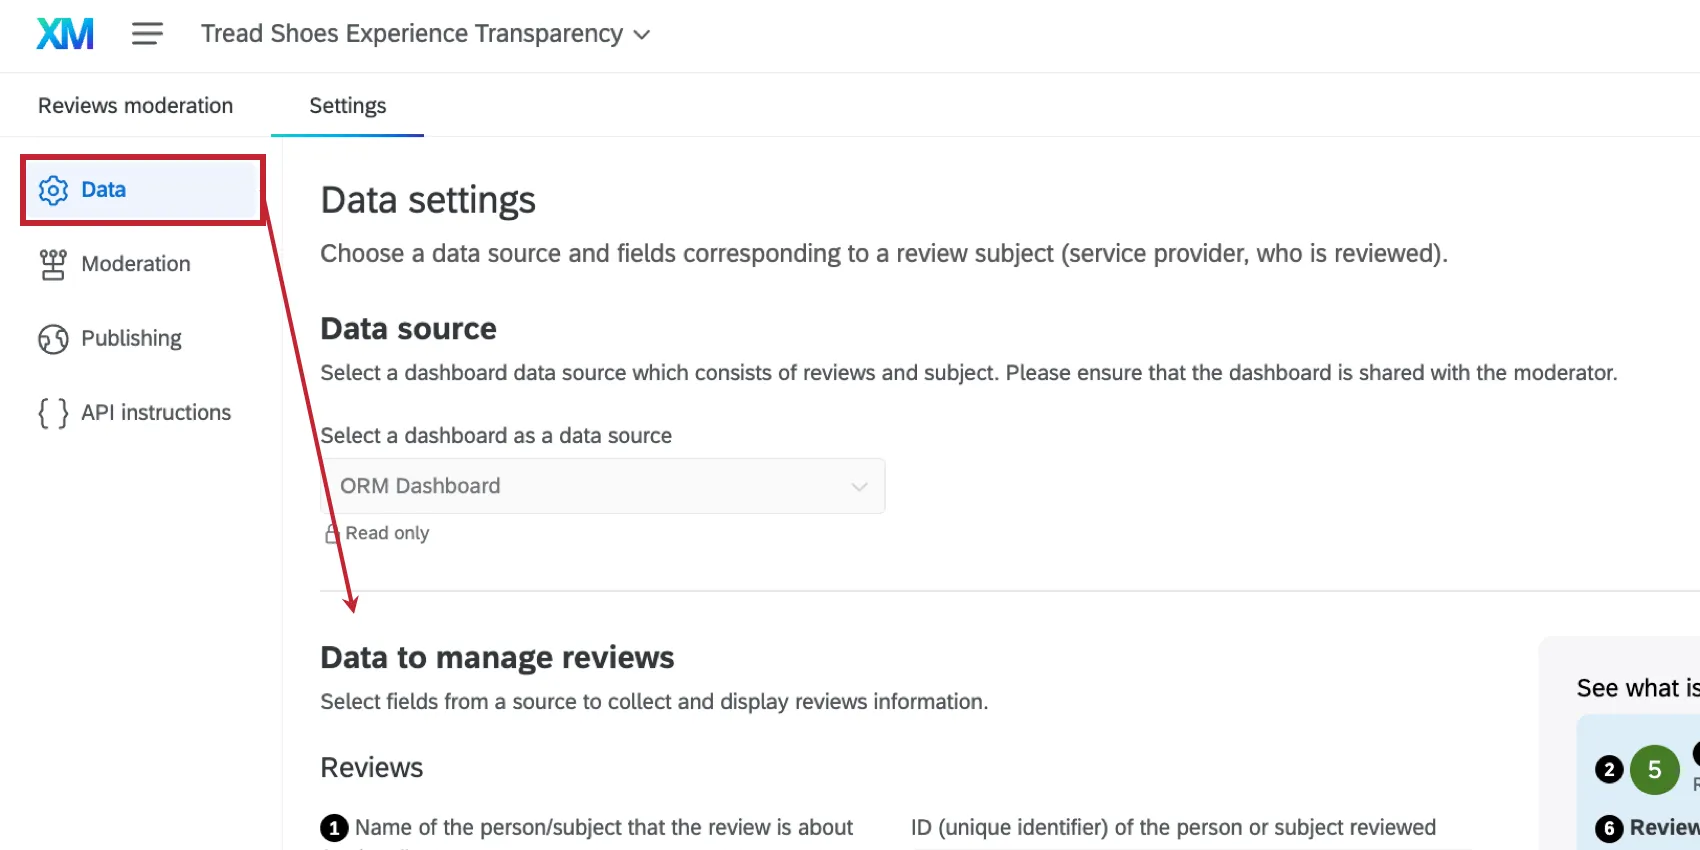
From here, you can modify the following fields:
- Name of the person/subject that the review is about
- Rating
- Rating scale
- Author of the review
- Title of the review
Qtip: Fields marked as “read-only” cannot be changed and will be grayed-out.
Replies to Reviews
You can map additional fields to display the replies to the reviews by heading to the Replies to reviews section of your Data settings.
Custom Fields
You can select fields from your dataset to use as additional filters when moderating your reviews. Go to the Custom fields section of your Data settings to get started.
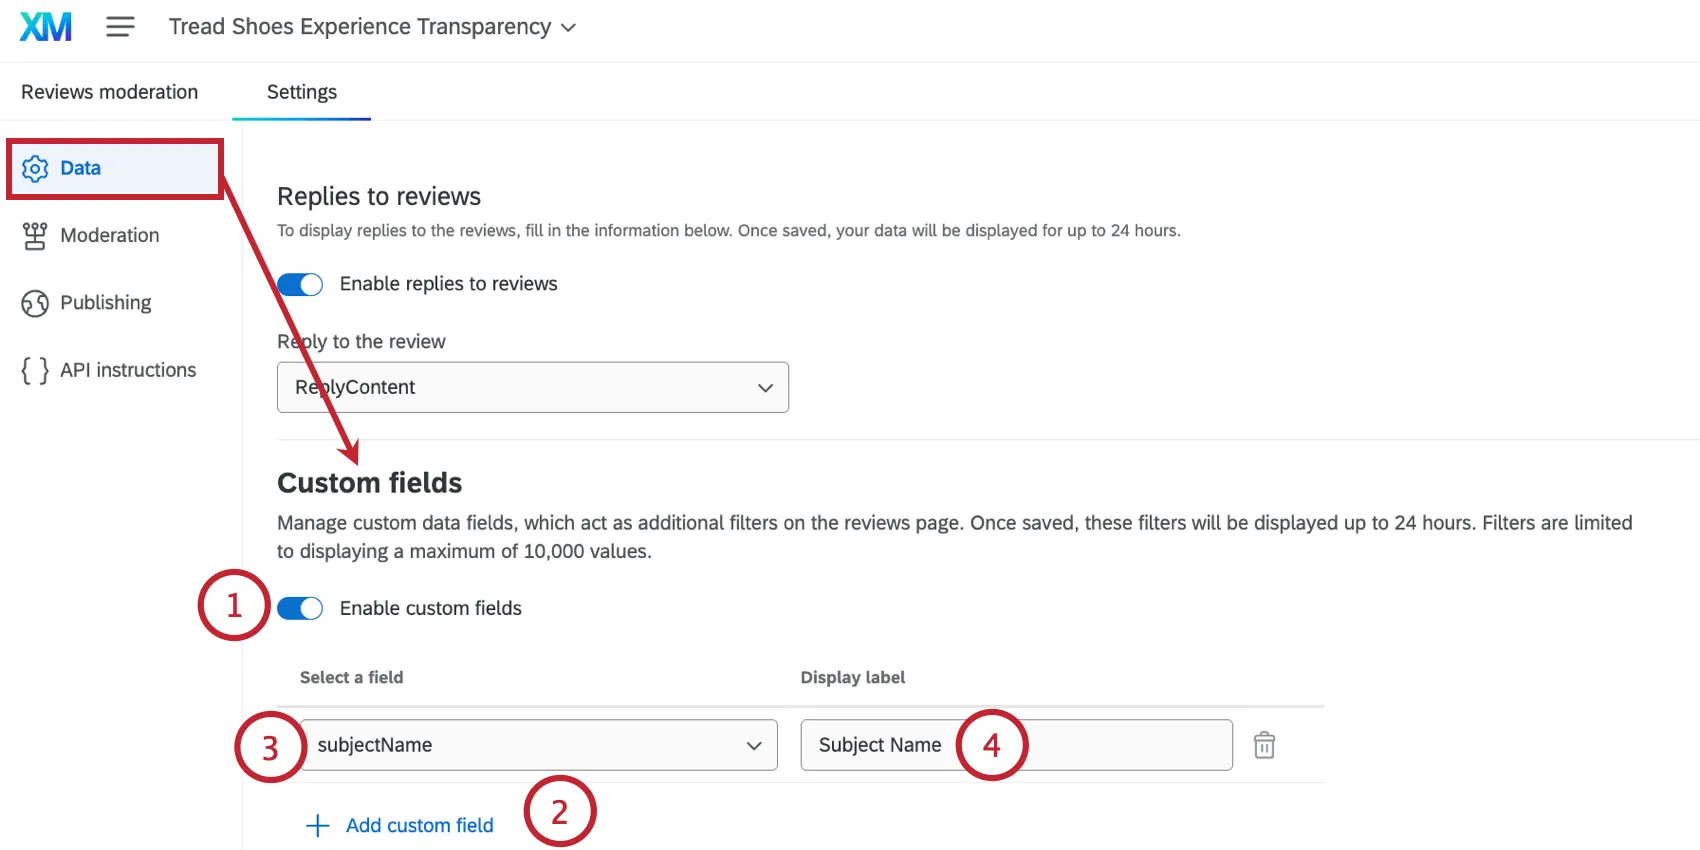
Qtip: Click the trash can icon to remove a field. You can add up to 8 custom fields.
Scheduling an Appeal Email
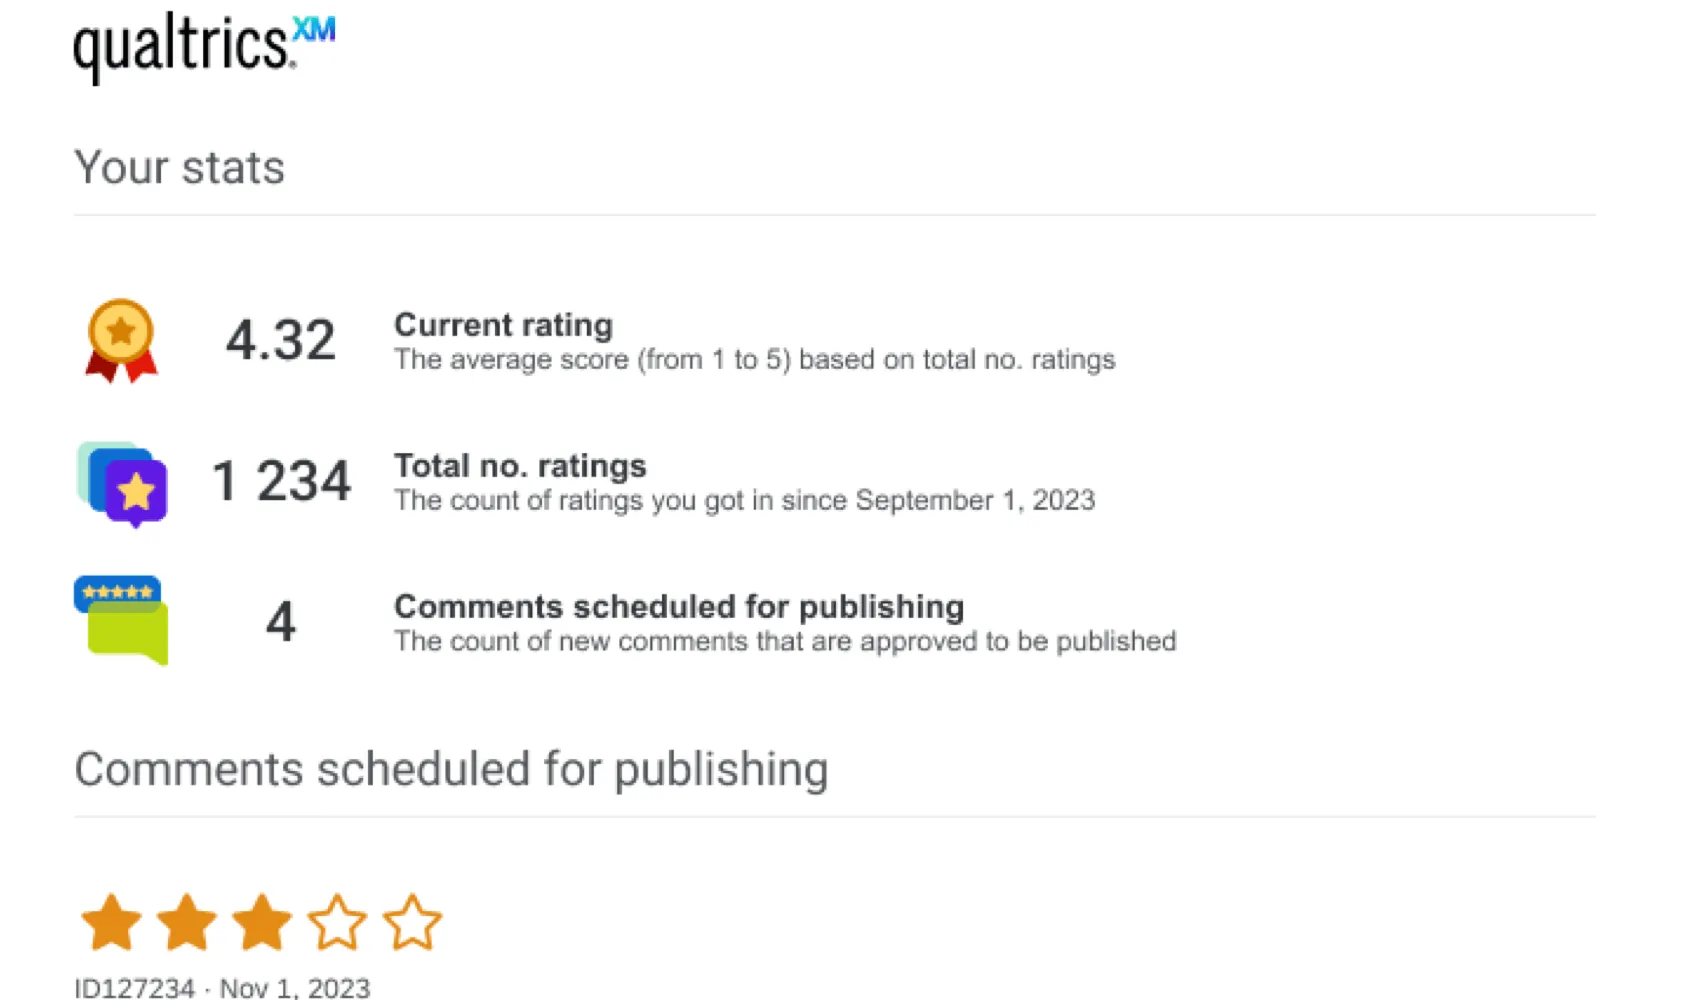
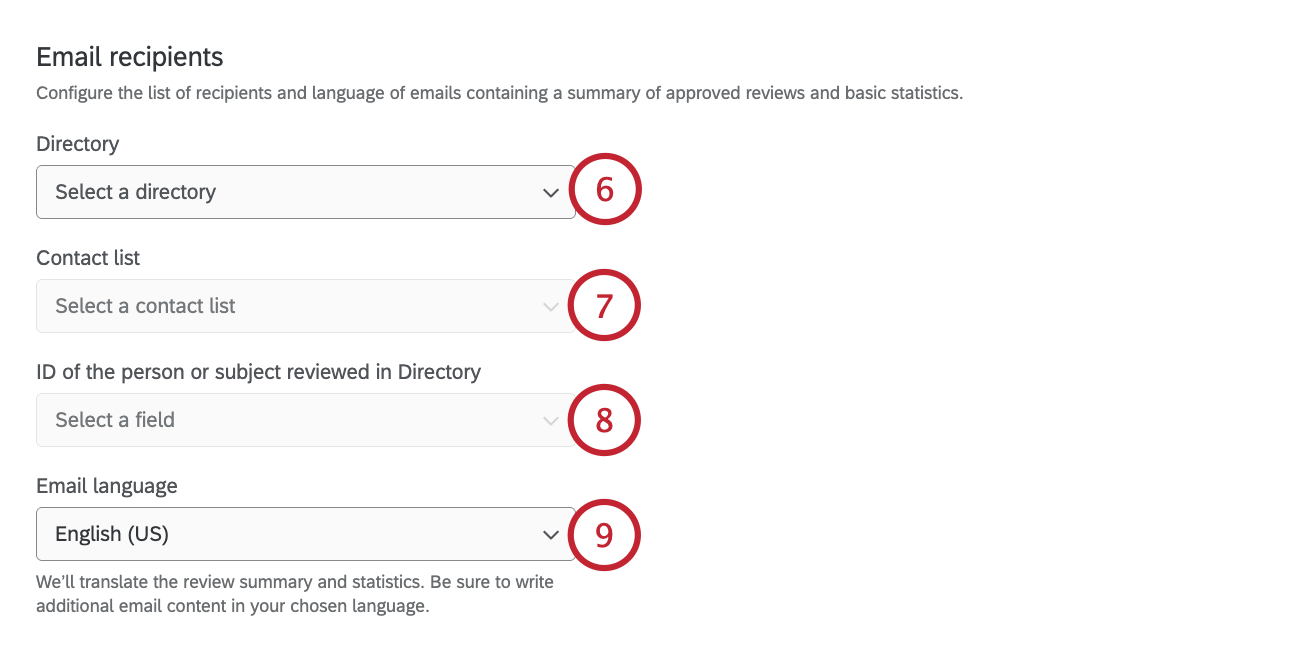
You have the option of sending a summary email to employees that covers review statistics and any recent reviews that are applicable to them. This email gives employees the opportunity to appeal a review before it is published on your website.
This email can be configured when setting up the project for the first time. You can also modify the email at any time by going to the Publishing section of your project’s settings.
Qtip: To use this option, you’ll need a mailing list containing the employees you want to receive the email. Each contact needs an identifying field that corresponds to the “Subject ID” field for a review.
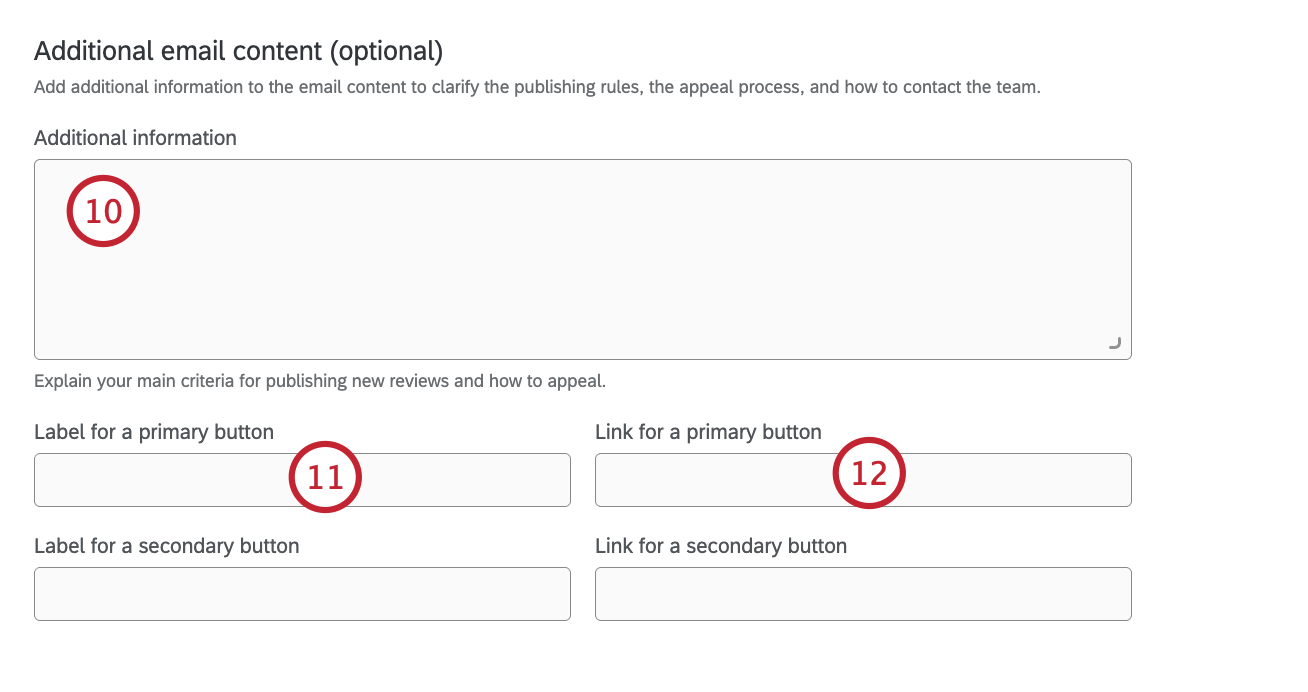
Qtip: You can use HTML to customize your message’s appearance and formatting. For security reasons, some tags are not allowed.
- Enter a URL to send recipients to a webpage.
- Enter an email address beginning with “mailto:” to send an email to the entered address.
Example: In this email, there are 2 buttons. The first button says “Provider Scorecard” and links to a dashboard so the subject can view their data. The second button says “Email us” and when clicked, drafts an email to the project’s moderator.

Qtip: If changing the settings in the Publishing tab, make sure to click Save at the bottom of the page.
Moderation Settings
There are a variety of options available to you for managing how reviews are moderated. You can set up rules to automatically moderate reviews, customize the available reasons for why a review can be rejected, and provide the ability to edit reviews to mask PII or inappropriate feedback.
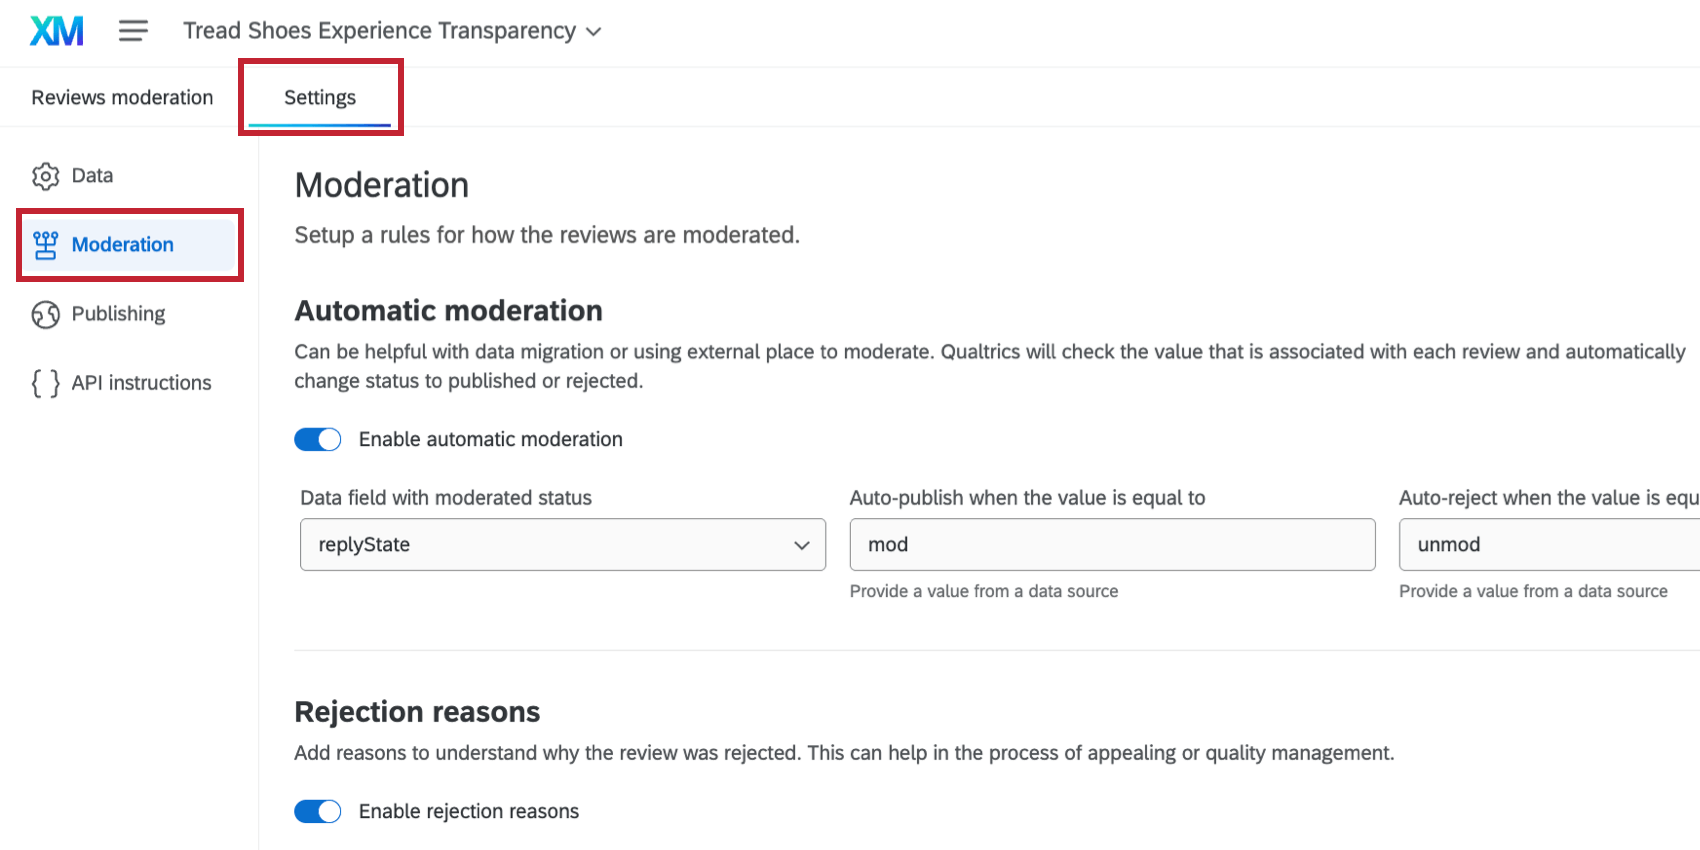
These settings can be configured when setting up the project for the first time. You can also modify them at any time by going to the Moderation section of your project’s settings.

Qtip: If changing the settings in the Moderation tab, make sure to click Save at the bottom of the page.
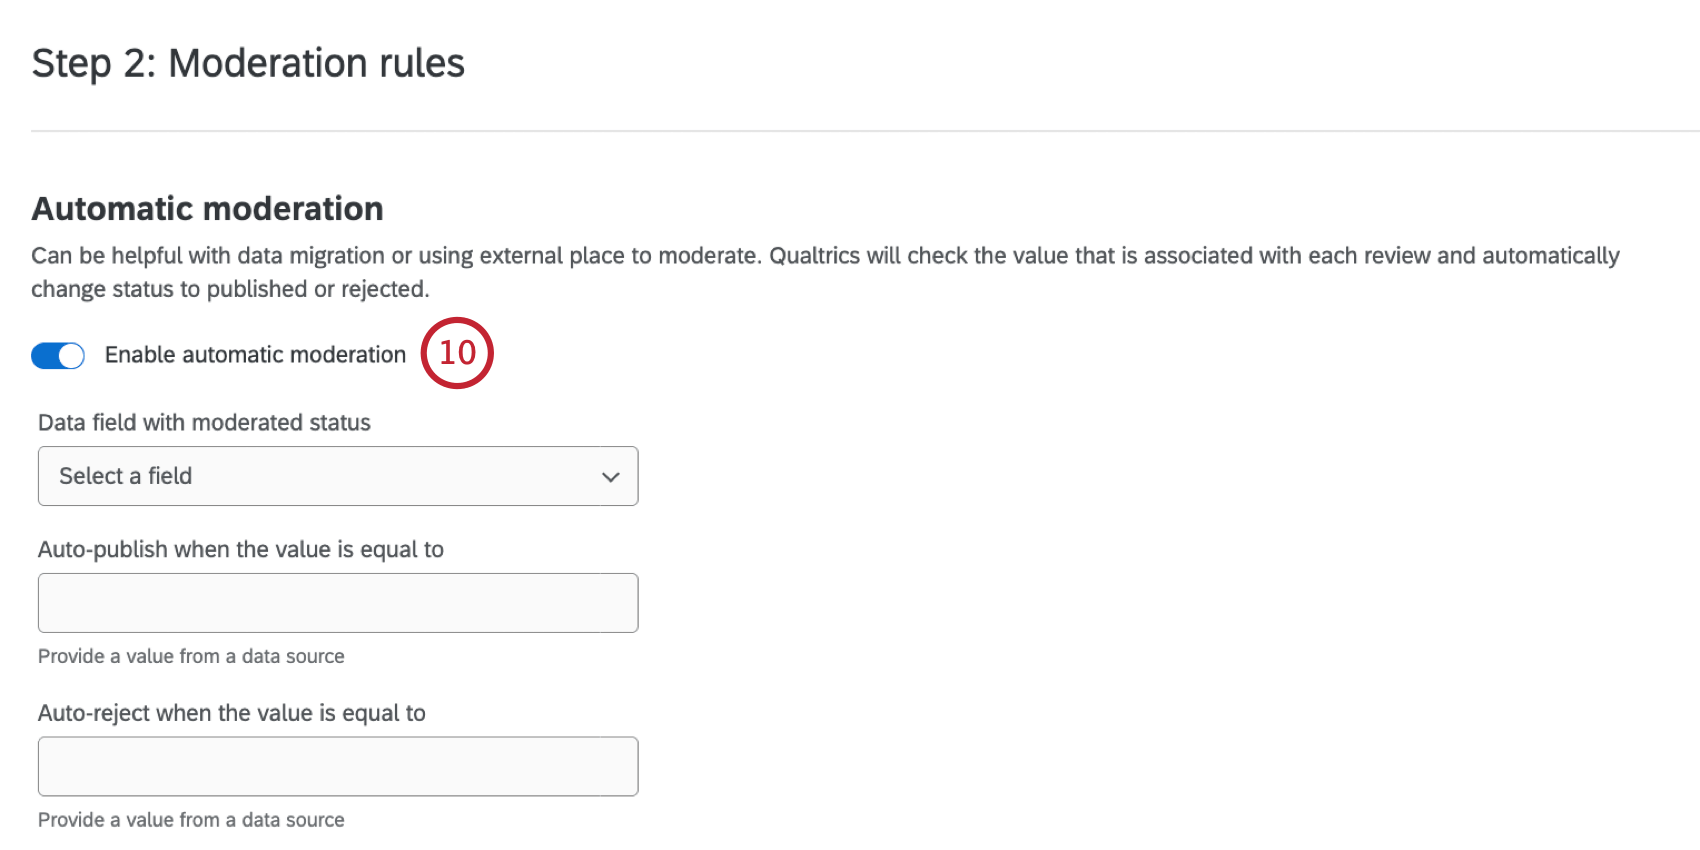
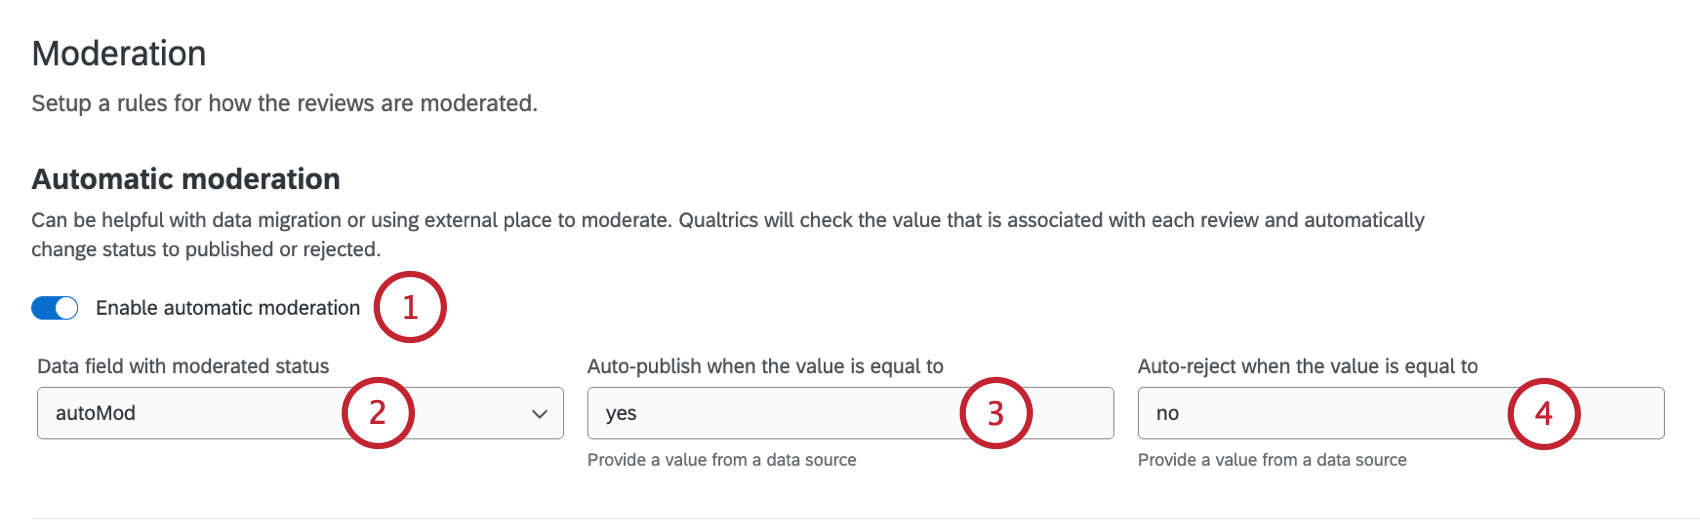
Automatic Moderation
Automatic moderation is helpful with migrating historical review data to your project, or using an external platform to moderate reviews.
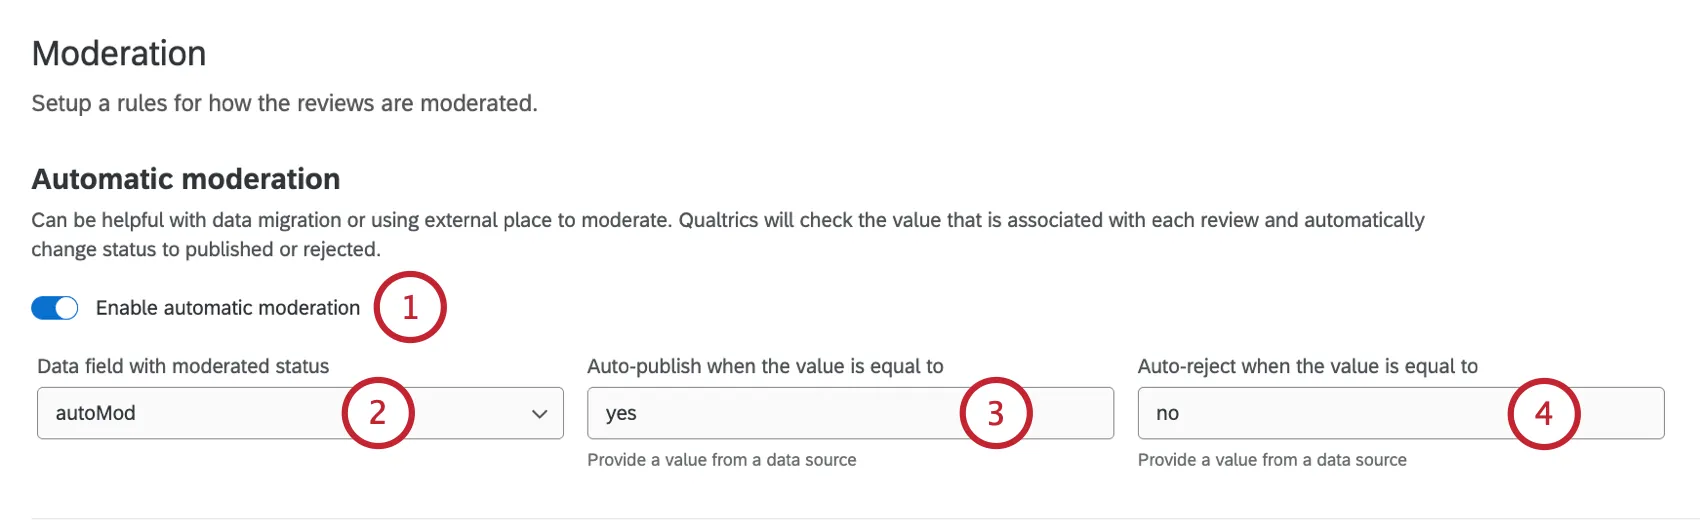
Qtip: Automatic moderation rules apply to both historical data and new incoming data. When rules are updated, allow 24 hours for the system to apply the new rules to the dataset.
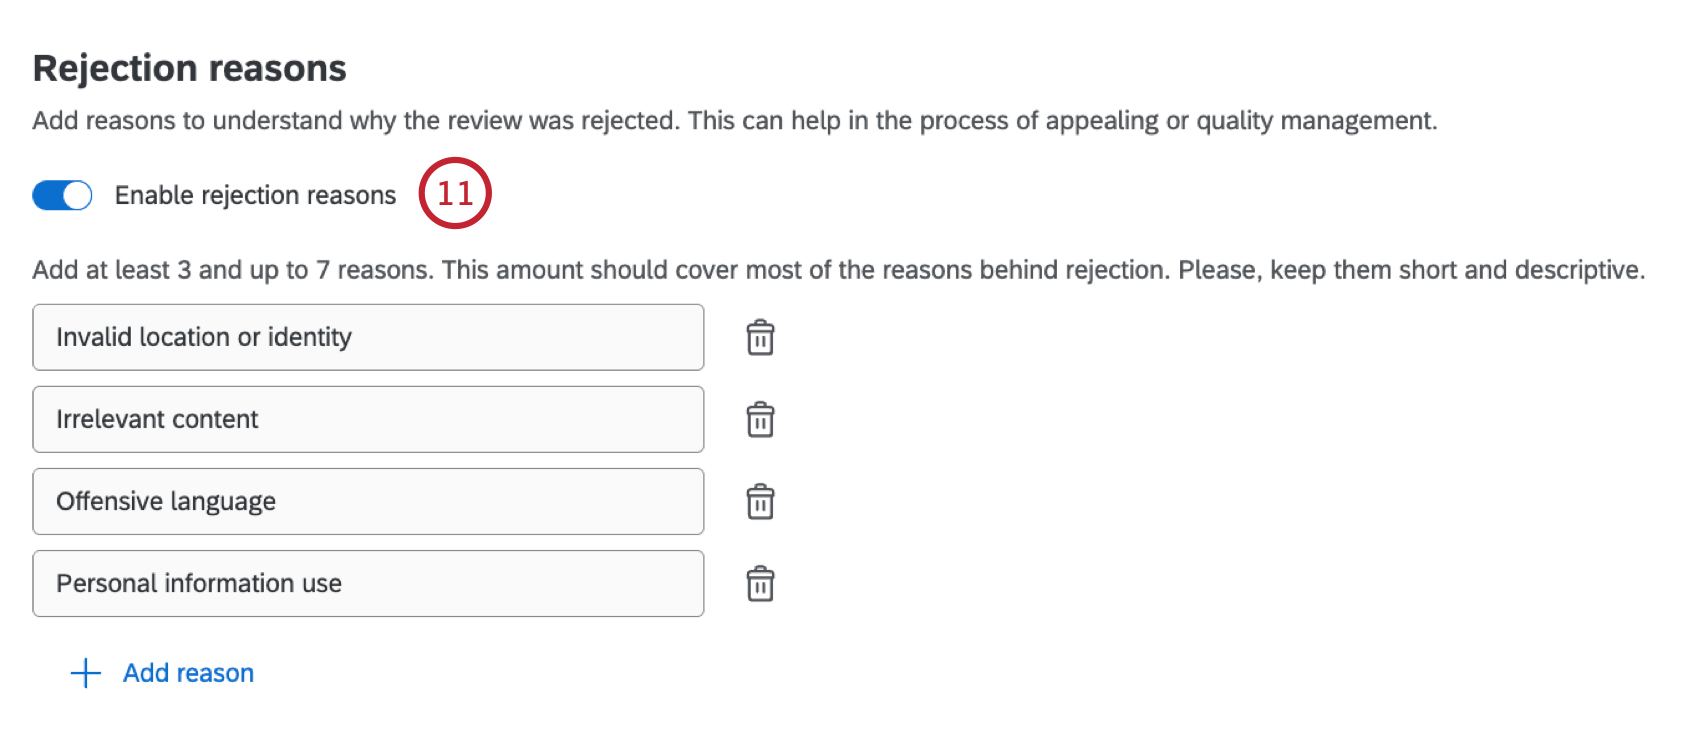
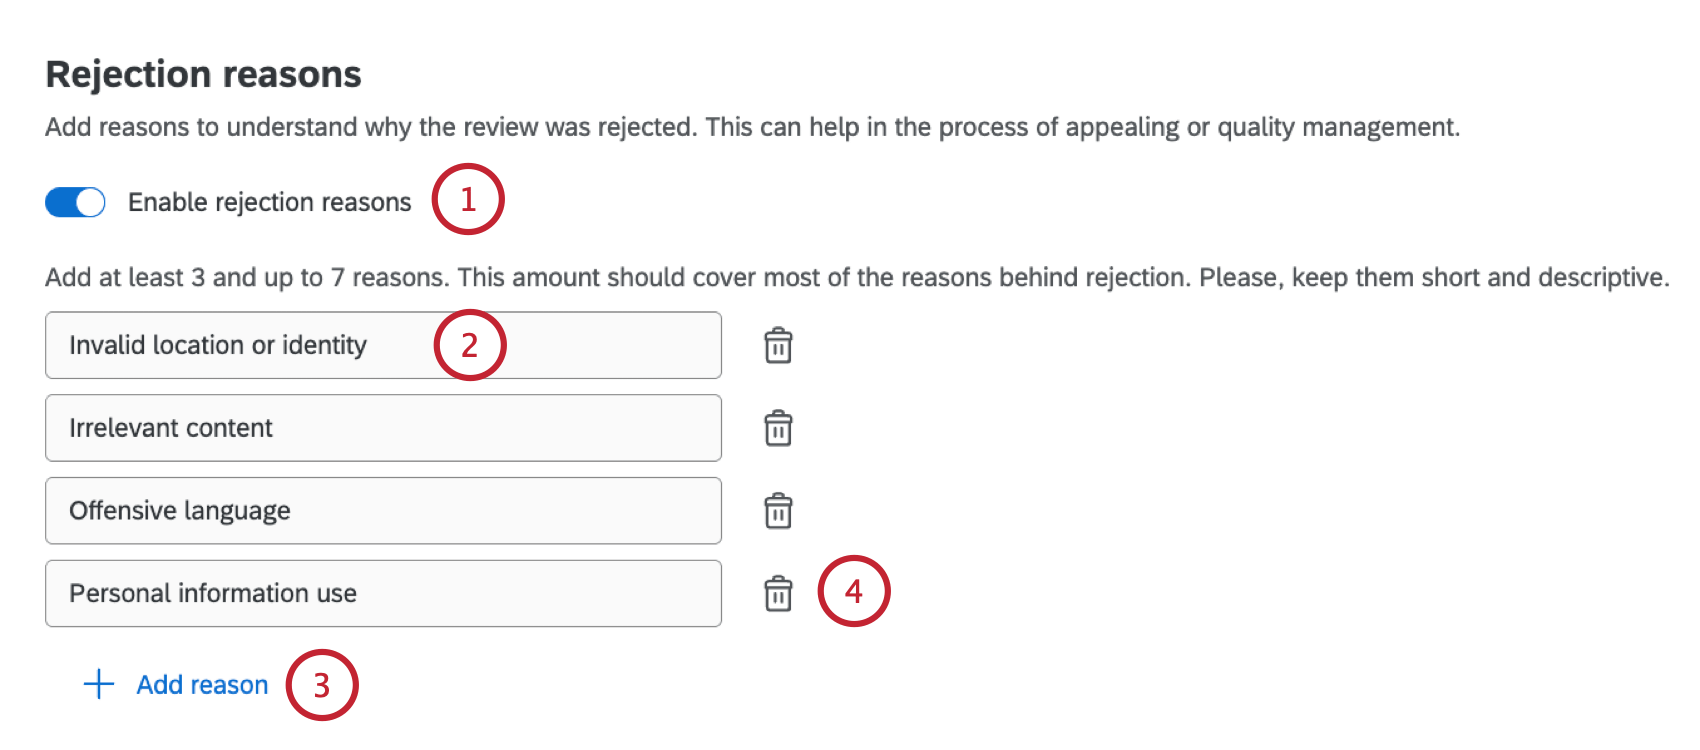
Rejection Reasons
Rejection reasons allow project administrators to select a reason why a review is rejected.
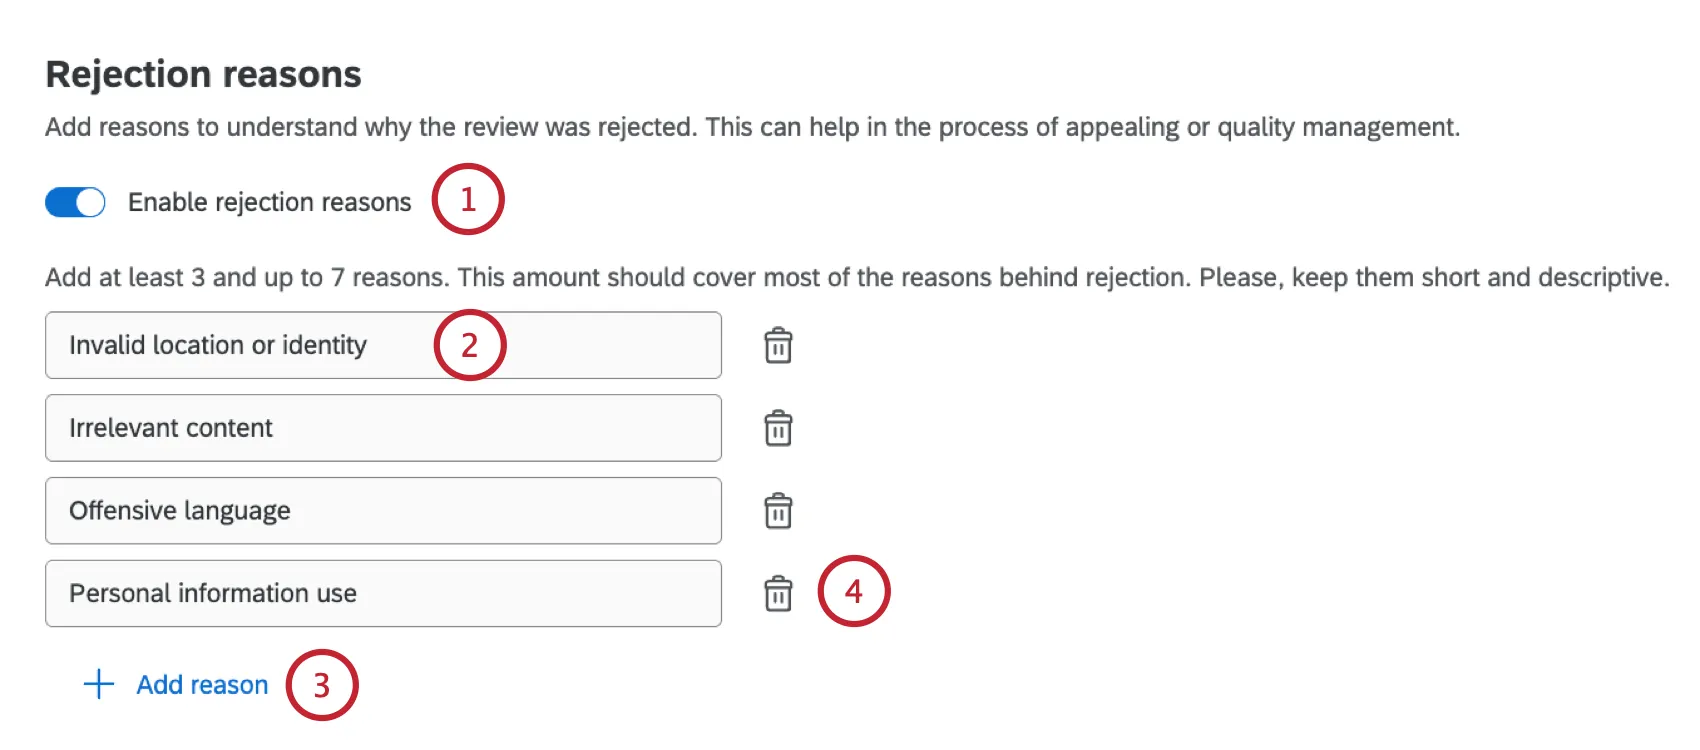
Qtip: If using rejection reasons, you need between 3 to 7 reasons. Moderators can also select an “Other reason” option where they can enter a custom reason if none of the available reasons apply.

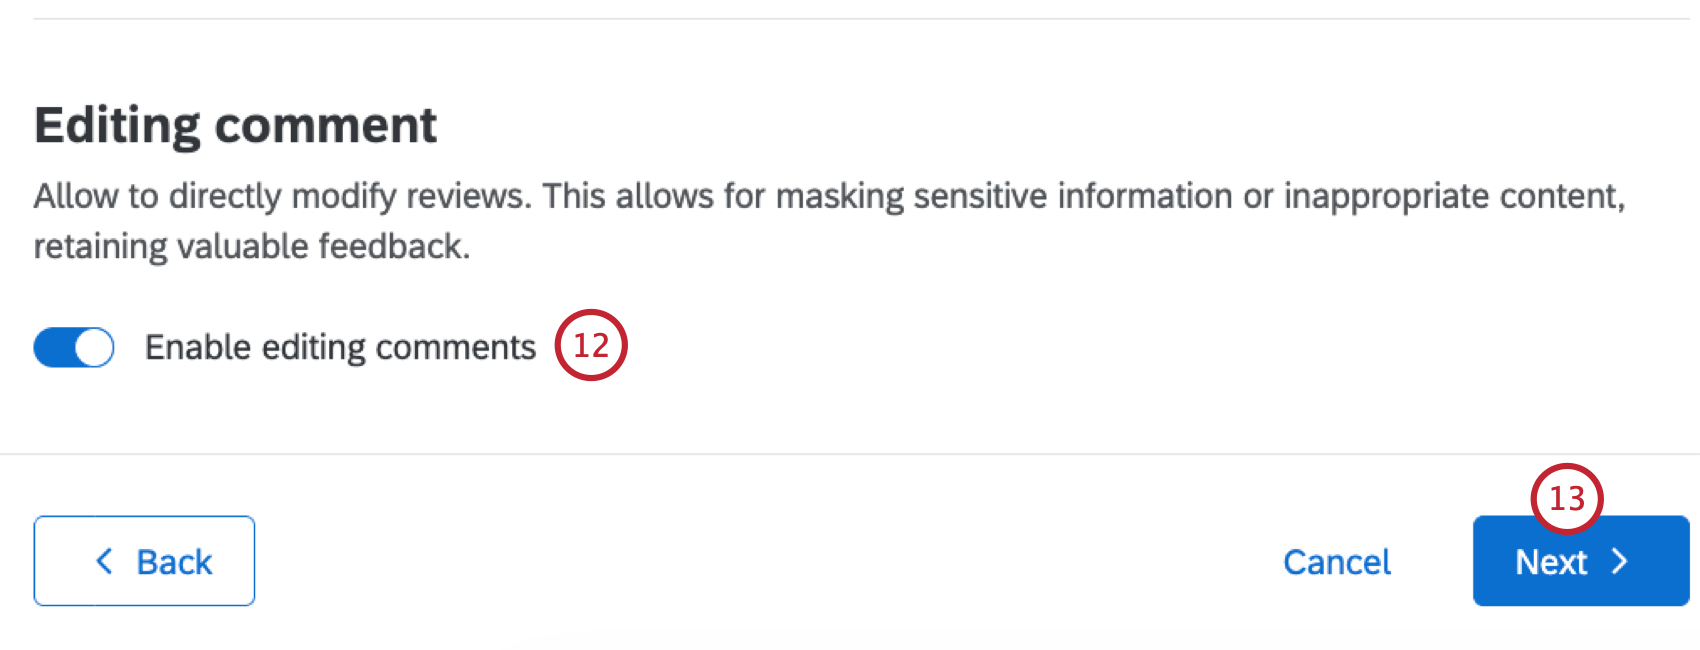
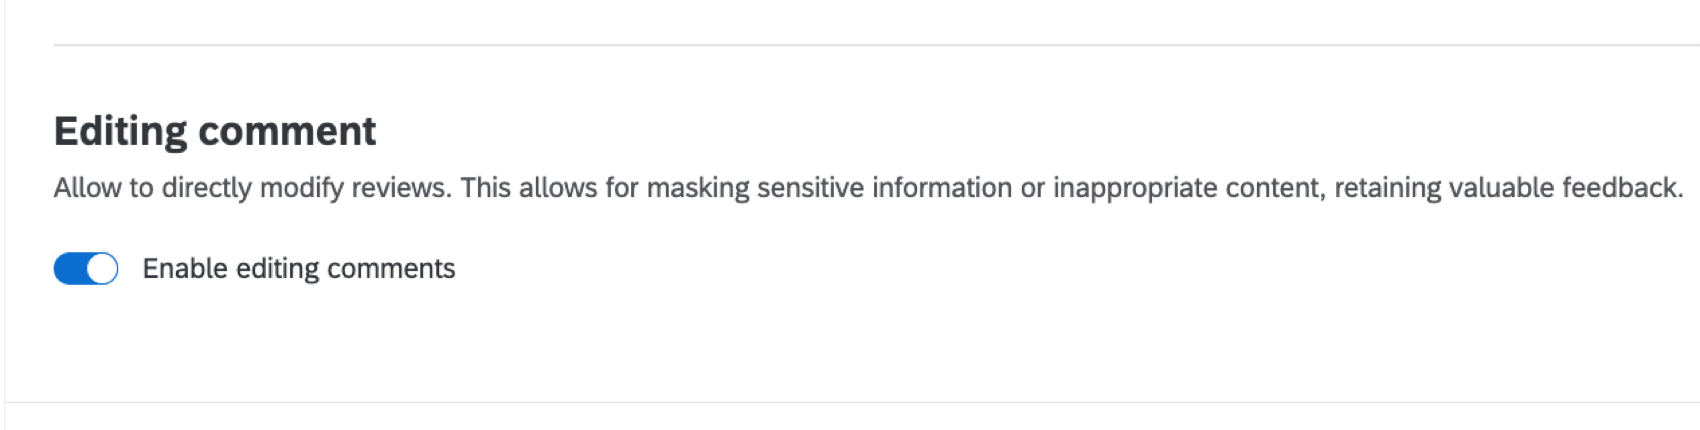
Editing Comment
The Editing comment setting allows project moderators to redact review comments. This allows them to mask sensitive information or inappropriate content. See Moderating Reviews for more information on how to redact a comment once this setting is enabled.

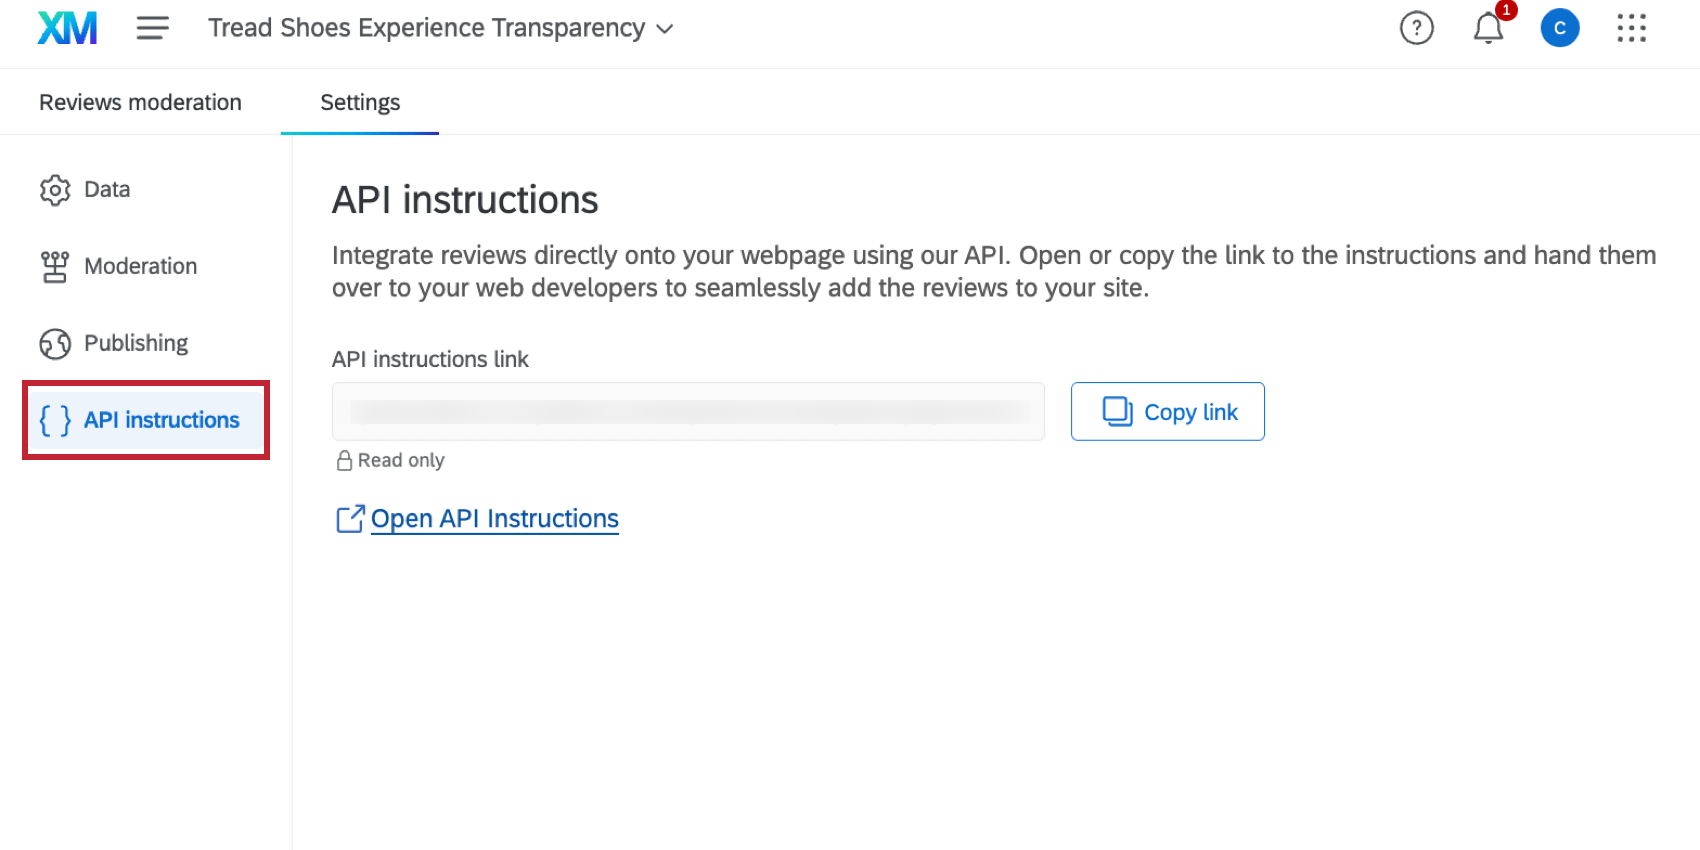
API Instructions
Attention: Custom coding features are provided as-is and require programming knowledge to implement. Qualtrics Support does not offer assistance or consultation on custom coding. You can always try asking our community of dedicated users instead. If you’d like to know more about our custom coding services, please contact your Qualtrics Account Executive.
If you are publishing reviews to your website, this is accomplished via custom API. Head to the API Instructions section of your project’s settings to get started.
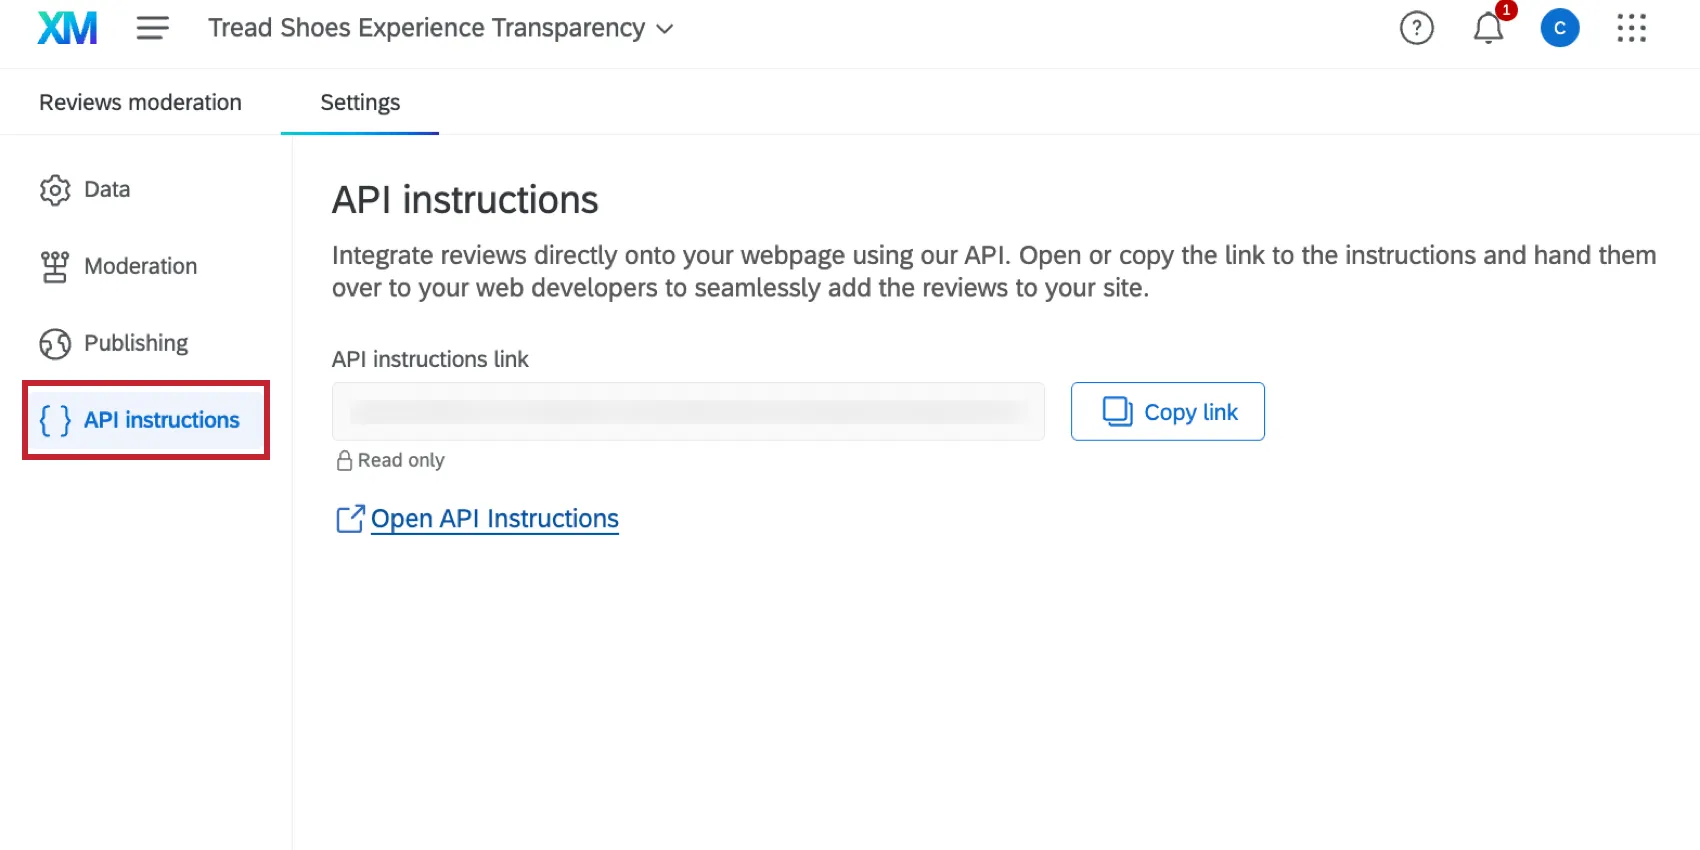
From here, click Copy Link or Open API Instructions and send the link to your web team, who will implement the API on your website to allow publishing reviews. Your web team does not need a Qualtrics account to access the instructions.
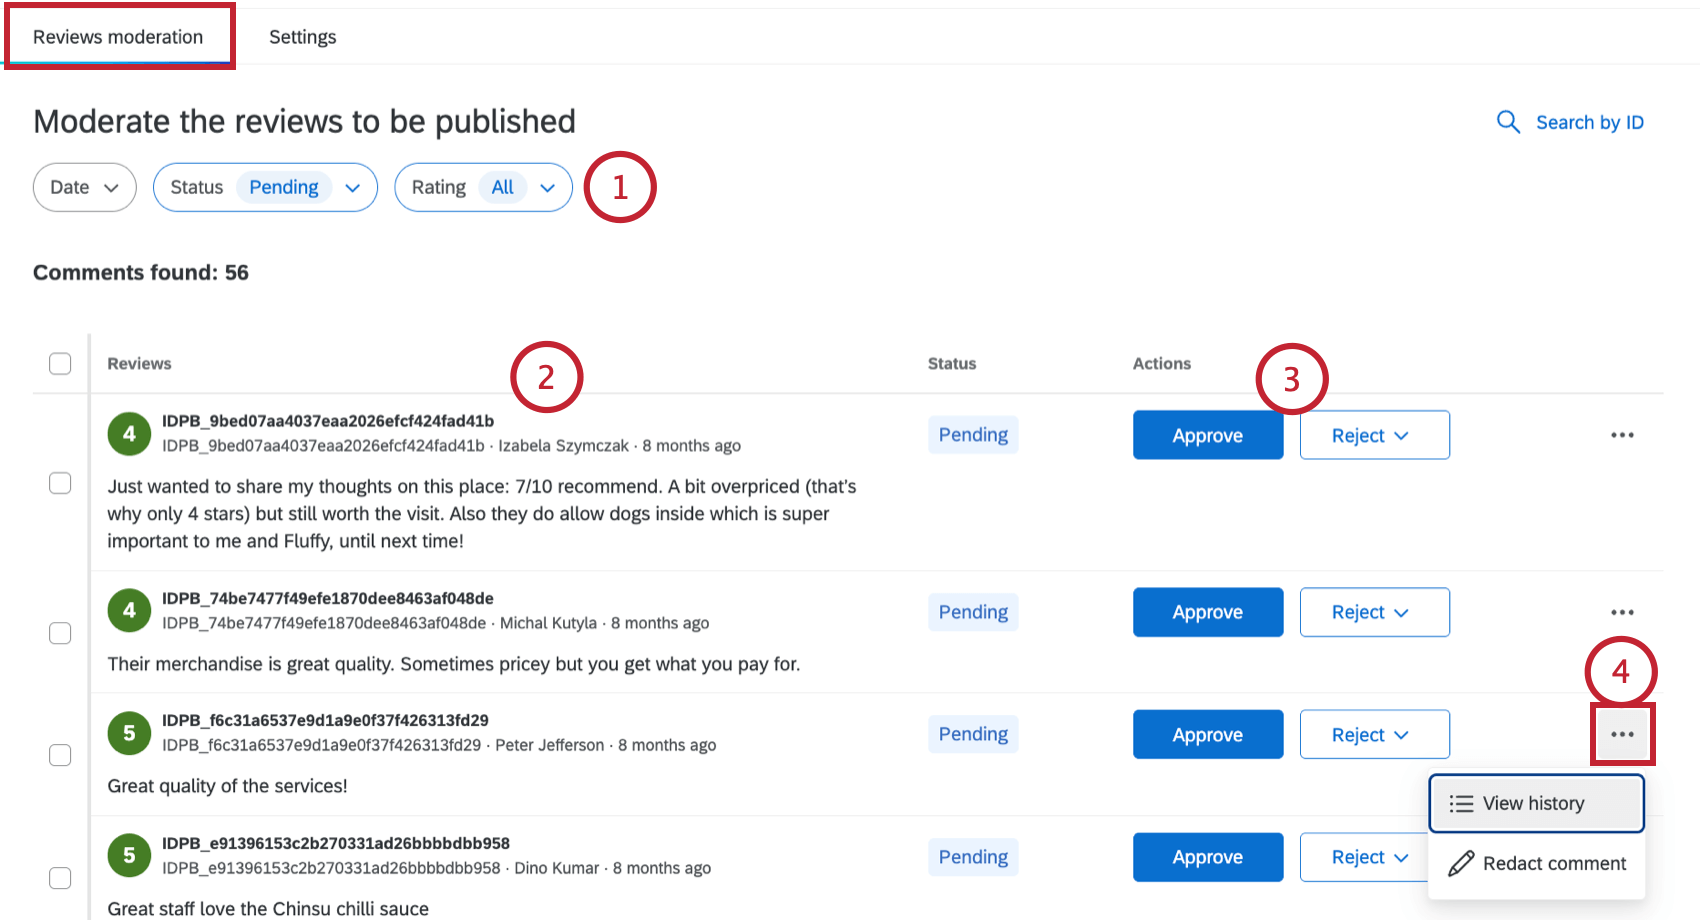
Moderating Reviews
After reviews have been ingested into your project, you can manage them from the Reviews moderation tab.

- Pending: Default status for all new comments until action is taken.
- Approved: Comment is ready for publishing (timing depends on publishing rules). Qtip: The review will be instantly published if the “Publishing” setting is set to “Immediately.” If this setting is set to “Schedule with appeal option,” then the timeline for publishing is different. When the status is changed to “Approved,” the review will be included in the next review email, which is determined by the schedule you set. Then, any reviews that were not appealed will be published when the next email is sent.
- Rejected: Comment will not be published but remains visible in dashboards.
- Published: Comment is exposed via API and can be displayed on your website.
- Under Appeal: Comment requires additional review after being approved or rejected (cannot be applied to Pending reviews).
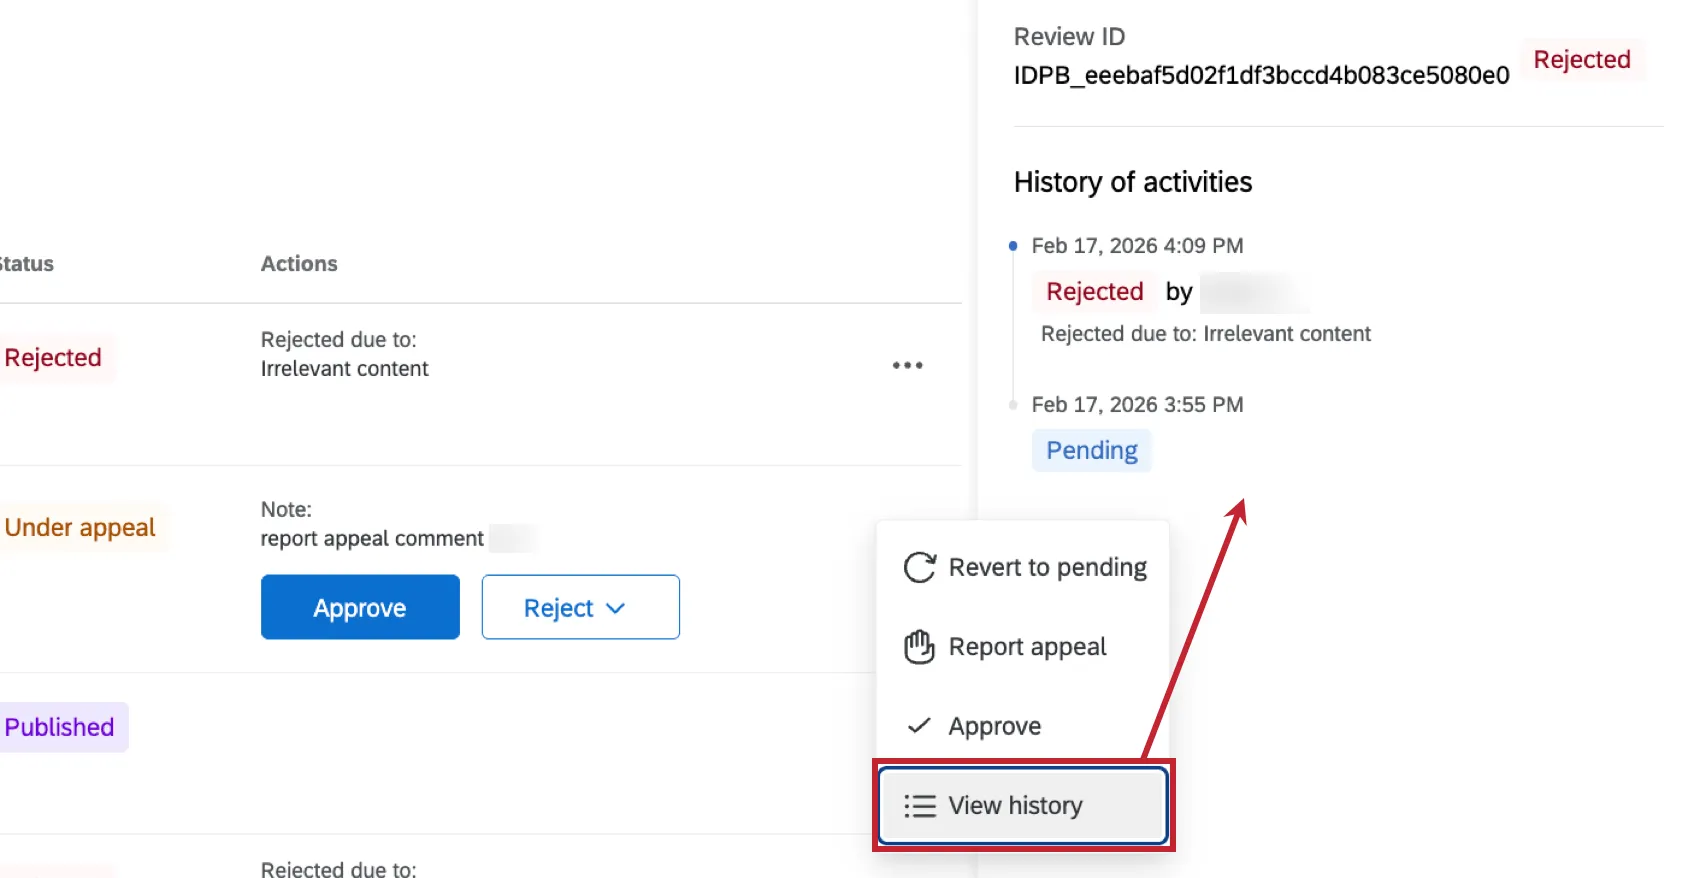
- View history: View a timeline of actions taken on the review once added to the project.
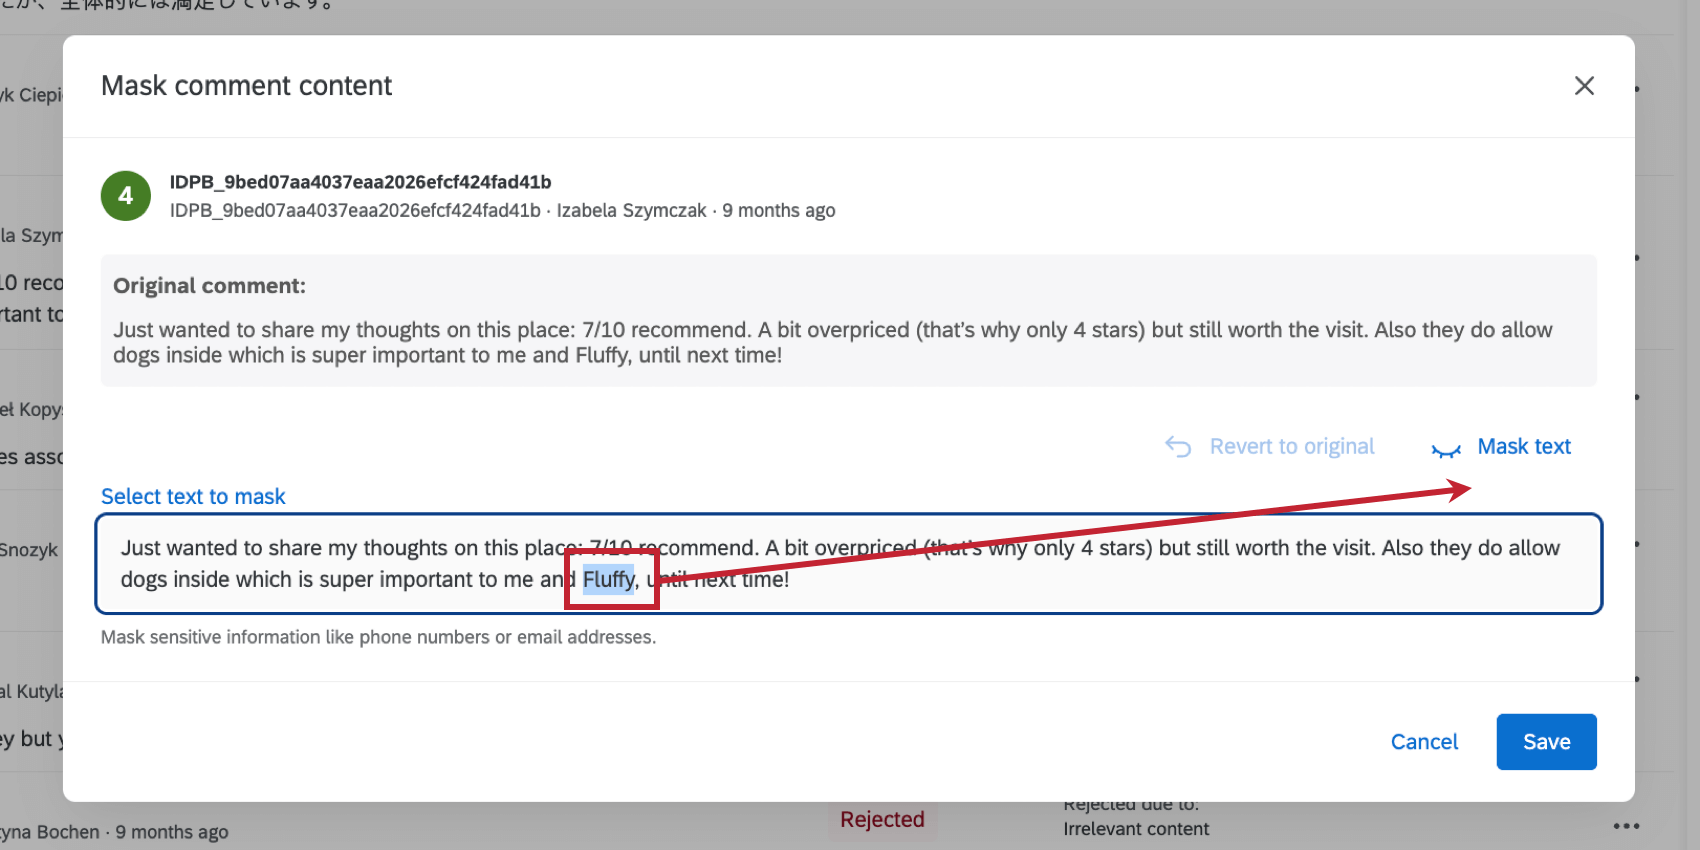
- Redact comment: If the “Editing comment” option is enabled, then moderators can directly redact text in the review content. This option is only available if your review’s status is “pending” or “under review.” To redact content, highlight the content you want to hide and then click Mask text. You can reselect text to unmask it, or click “Revert to original” to remove all redaction.

- Revert to pending: If a review’s status is “rejected,” then you can select this option to change it to “pending.”
- Report appeal: If a review’s status is “rejected” or “approved,” then you can select this option to change it to “under appeal.” When appealing a review, you can leave an optional note about why you’re appealing it.

- Approve: If a review’s status is “rejected,” you can change it to “approved” with this option. For “pending” and “under appeal” reviews, use the Approve button instead.
- Reject: If a review’s status is “approved,” you can change it to “rejected” using this option. For “pending” and “under appeal” reviews, use the Reject button instead.


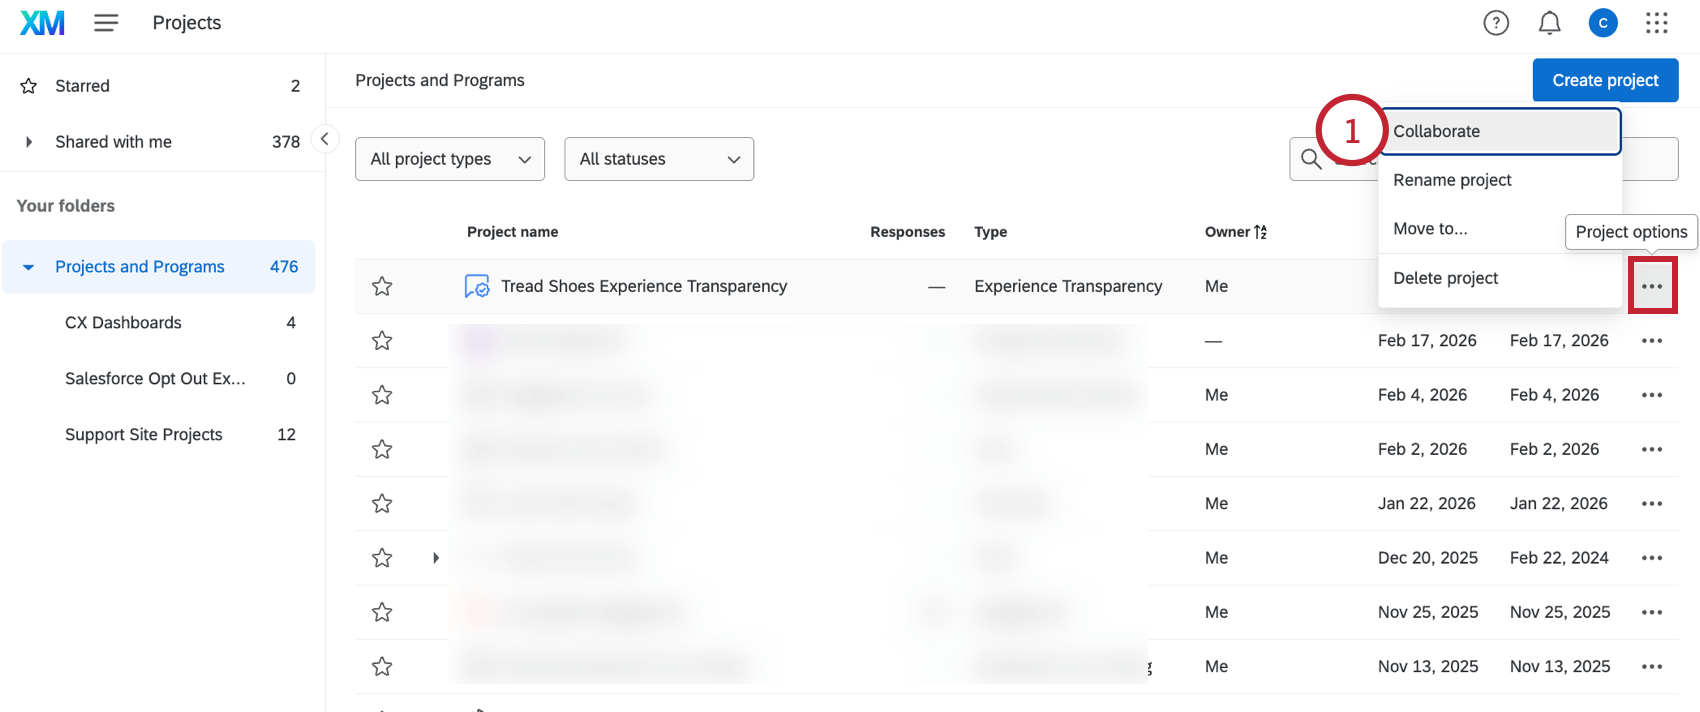
Sharing the Project
You can share your Experience Transparency project with other users in your Qualtrics organization.
Qtip: Collaborators need the “Use Experience Transparency” user permission to access their shared project.
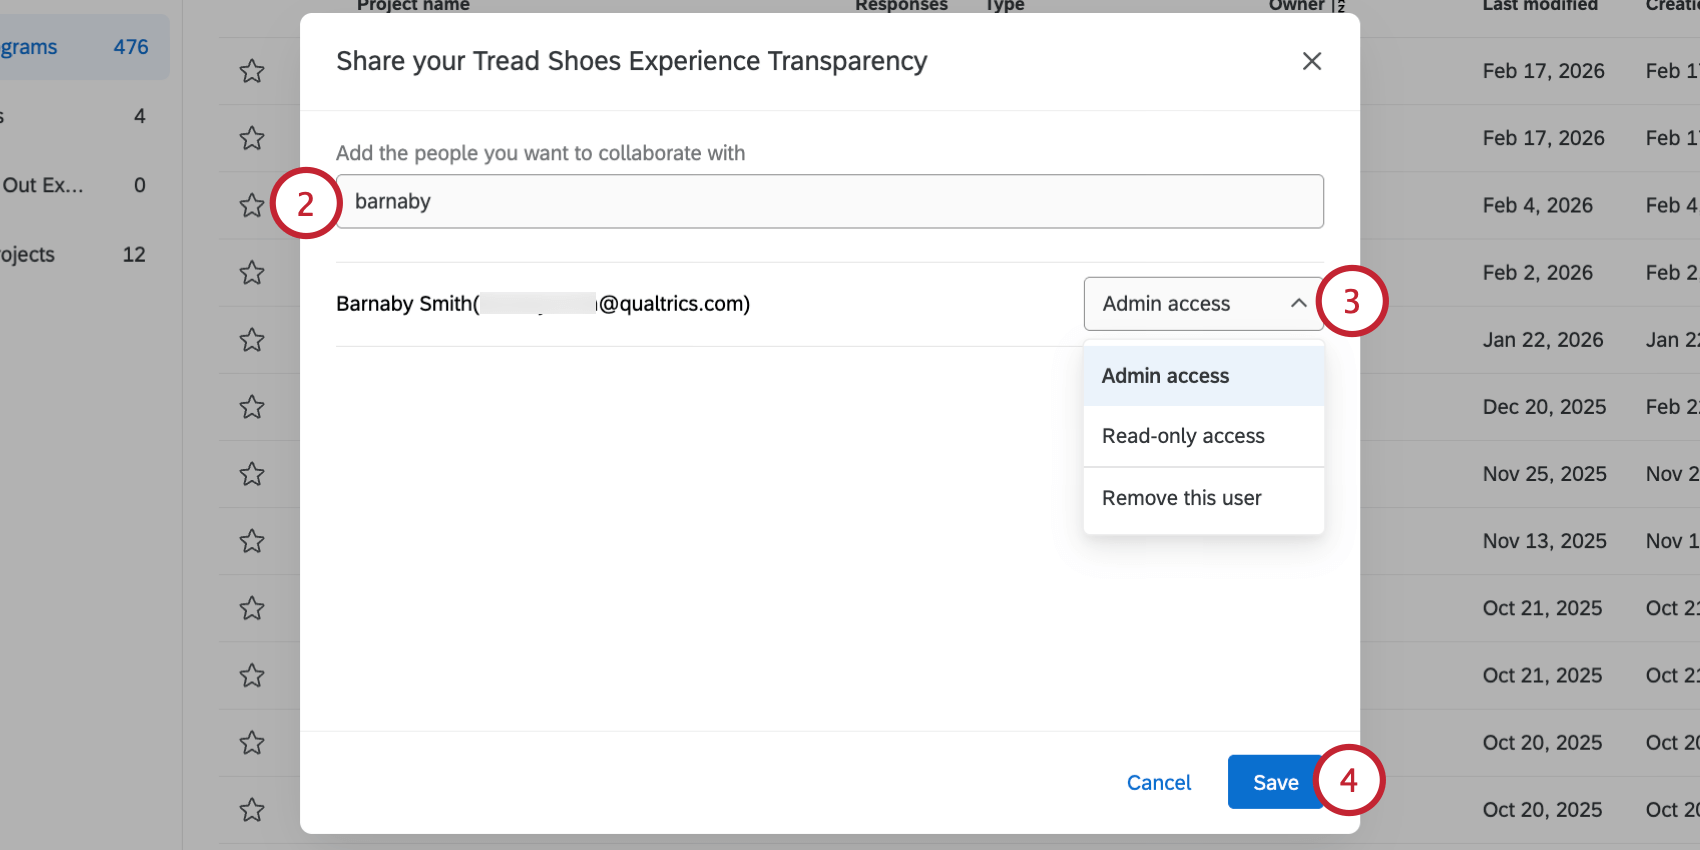
- Admin access: Full access to the project. The collaborator can change project settings and moderate reviews.
- Read-only access: Read-only access to the project. The collaborator can view reviews and settings but not make any changes.
- Remove this user: Remove access for this user.
That's great! Thank you for your feedback!
Thank you for your feedback!