-

Qualtrics Platform -

Customer Journey Optimizer -

XM Discover -

Qualtrics Social Connect
Publishing & Managing Creatives
About Publishing & Managing Creatives
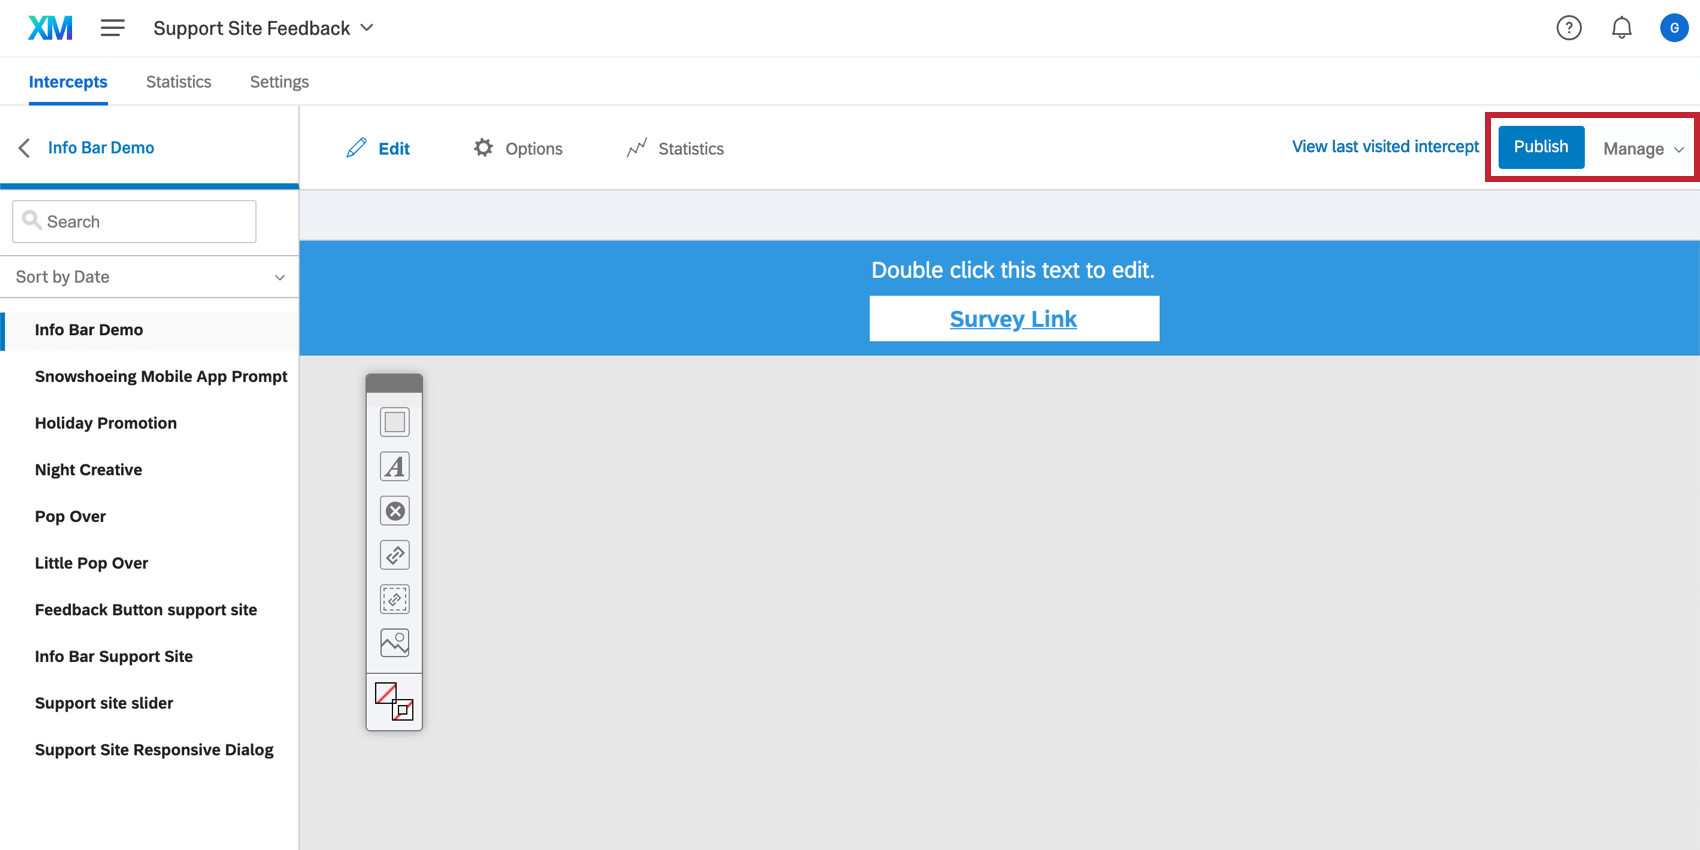
Publish and Manage are two buttons that appear in the upper-right corner of every section on the Creatives tab. Publish allows us to push changes to the deployment code, whereas the Manage button has options for copying, saving, and importing your creative.
Publishing a Creative
When you finish creating your Intercept and linking it to your creative, you can generate a project code to paste onto your website. This code comes with a great benefit: if you go back and need to make changes to your creative, or even add a new creative to the project, these changes won’t appear on your website until you are ready. That way you can make changes without confusing website visitors.
Clicking Publish makes it so that the changes you’ve made will be reflected on any website containing your project code.
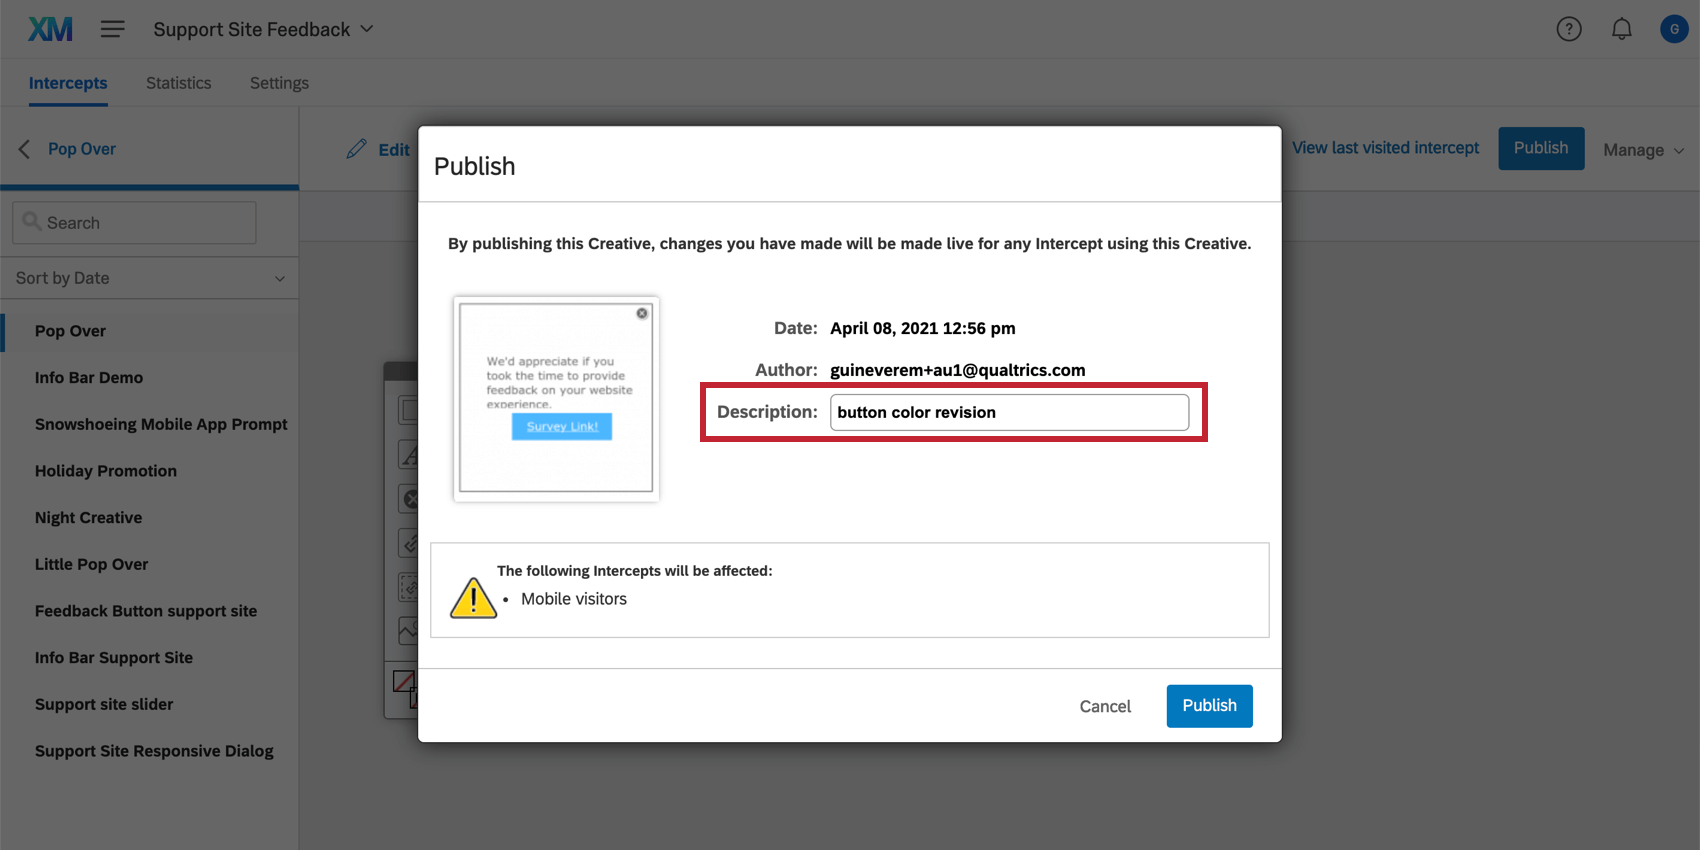
When you publish your creative, you will be invited to write a description for your changes. This description will be used in your revision history to help you easily identify this revision in case you need to revert to it at some later point. You can find the Revision History by clicking Manage on the top-right of the creative editor.
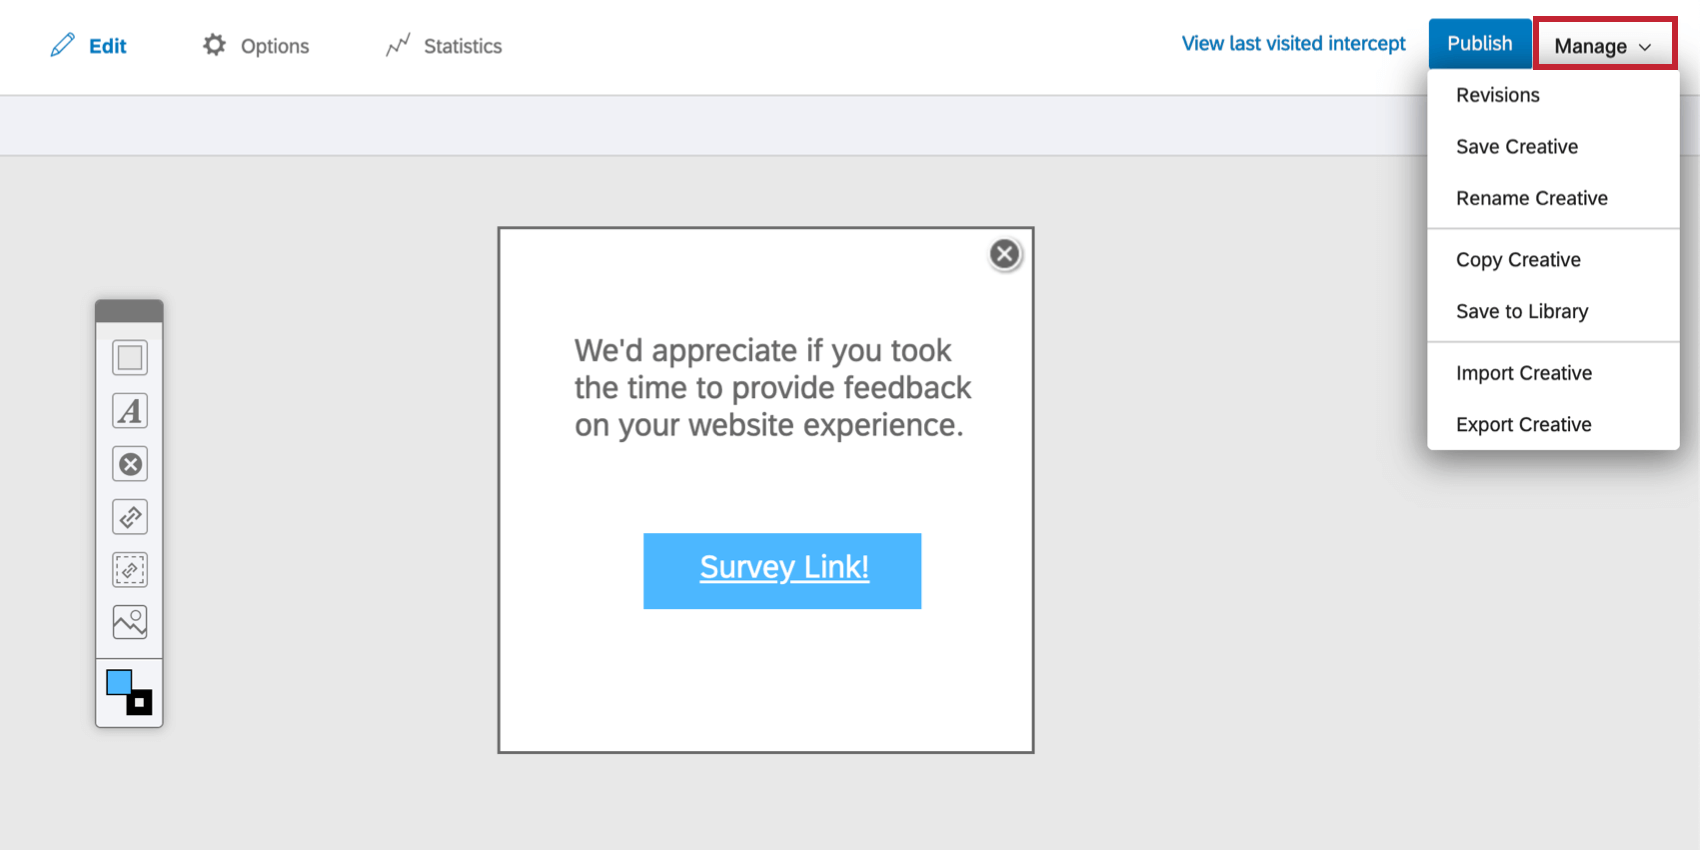
Managing a Creative
On the top-right of the creative editor you will find the Manage dropdown menu.
Revisions
View the Revision History of your creative. Here, you can tell when a revision was made and what user made it.
Click on the version you’re currently editing for the option to Save a new revision.

Click on an older version to Revert to this revision. This will replace the version you’re editing with this older revision.
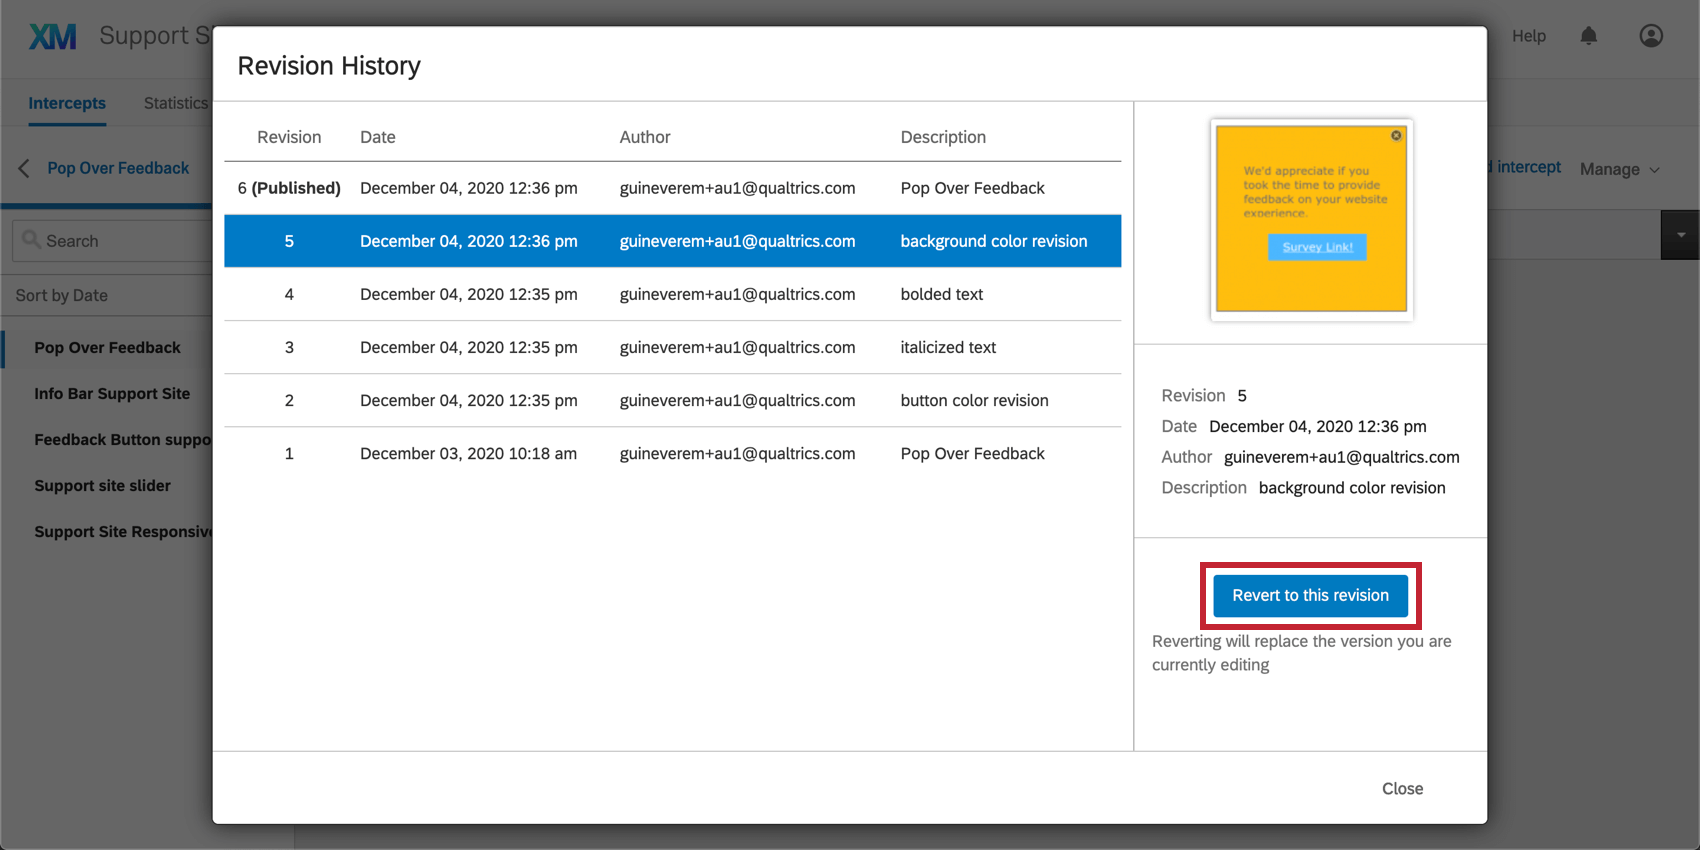
You can always go back in your Revision History to restore any previously saved revision, including ones created after the revision you are restoring.
Save Creative
Manually save any changes you’ve made to your creative. Note that changes are saved automatically every few seconds, so this option is not typically necessary.
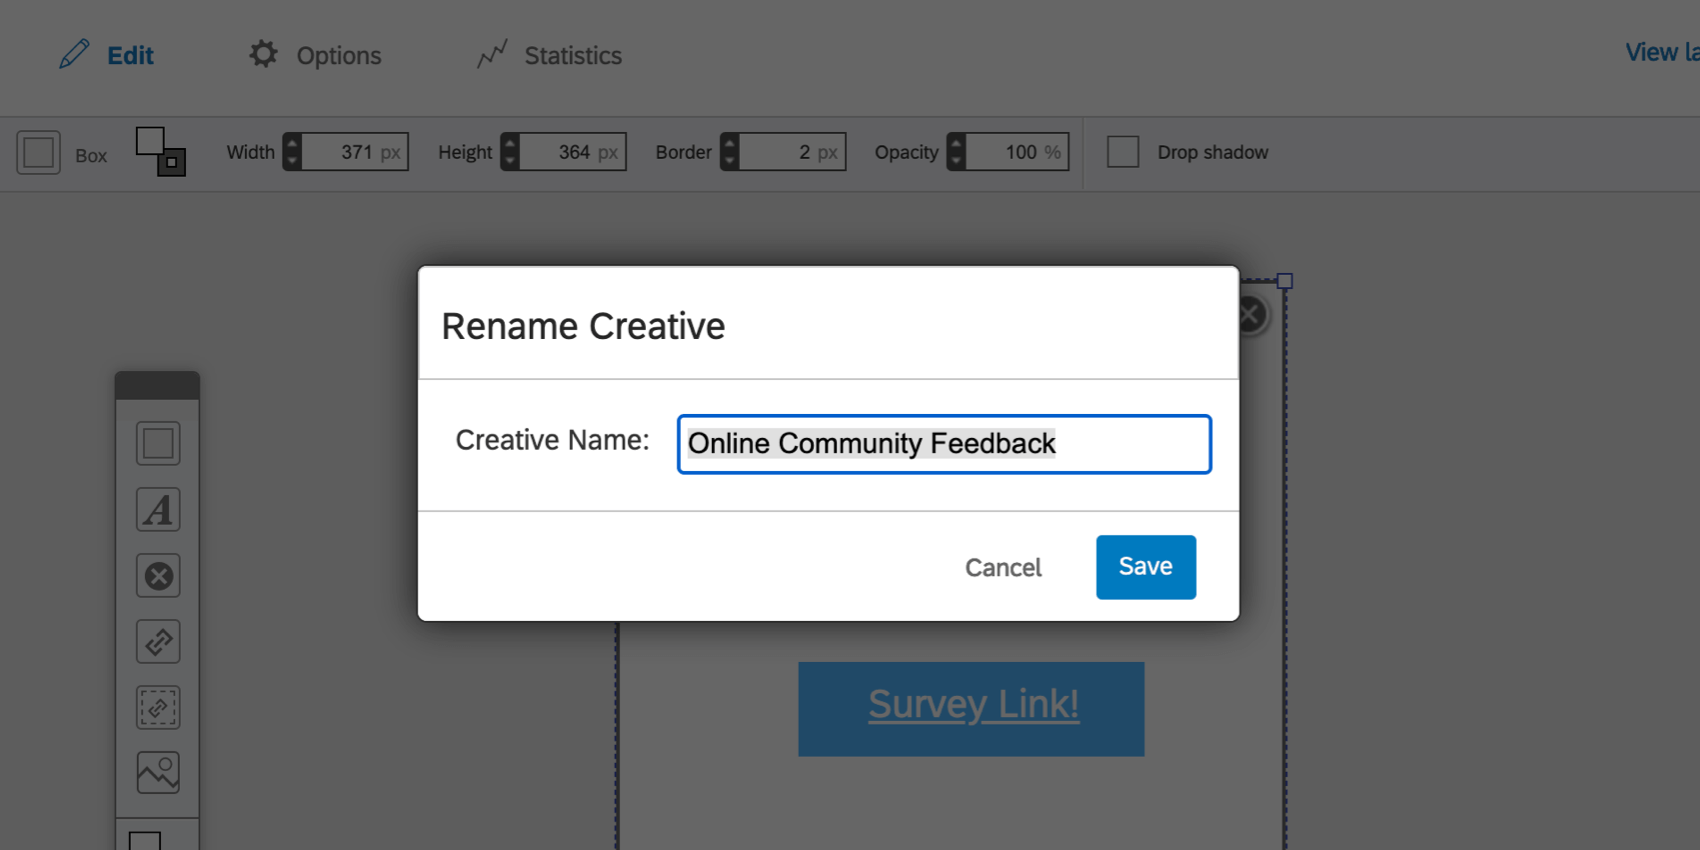
Rename Creative
Give your creative a new name.
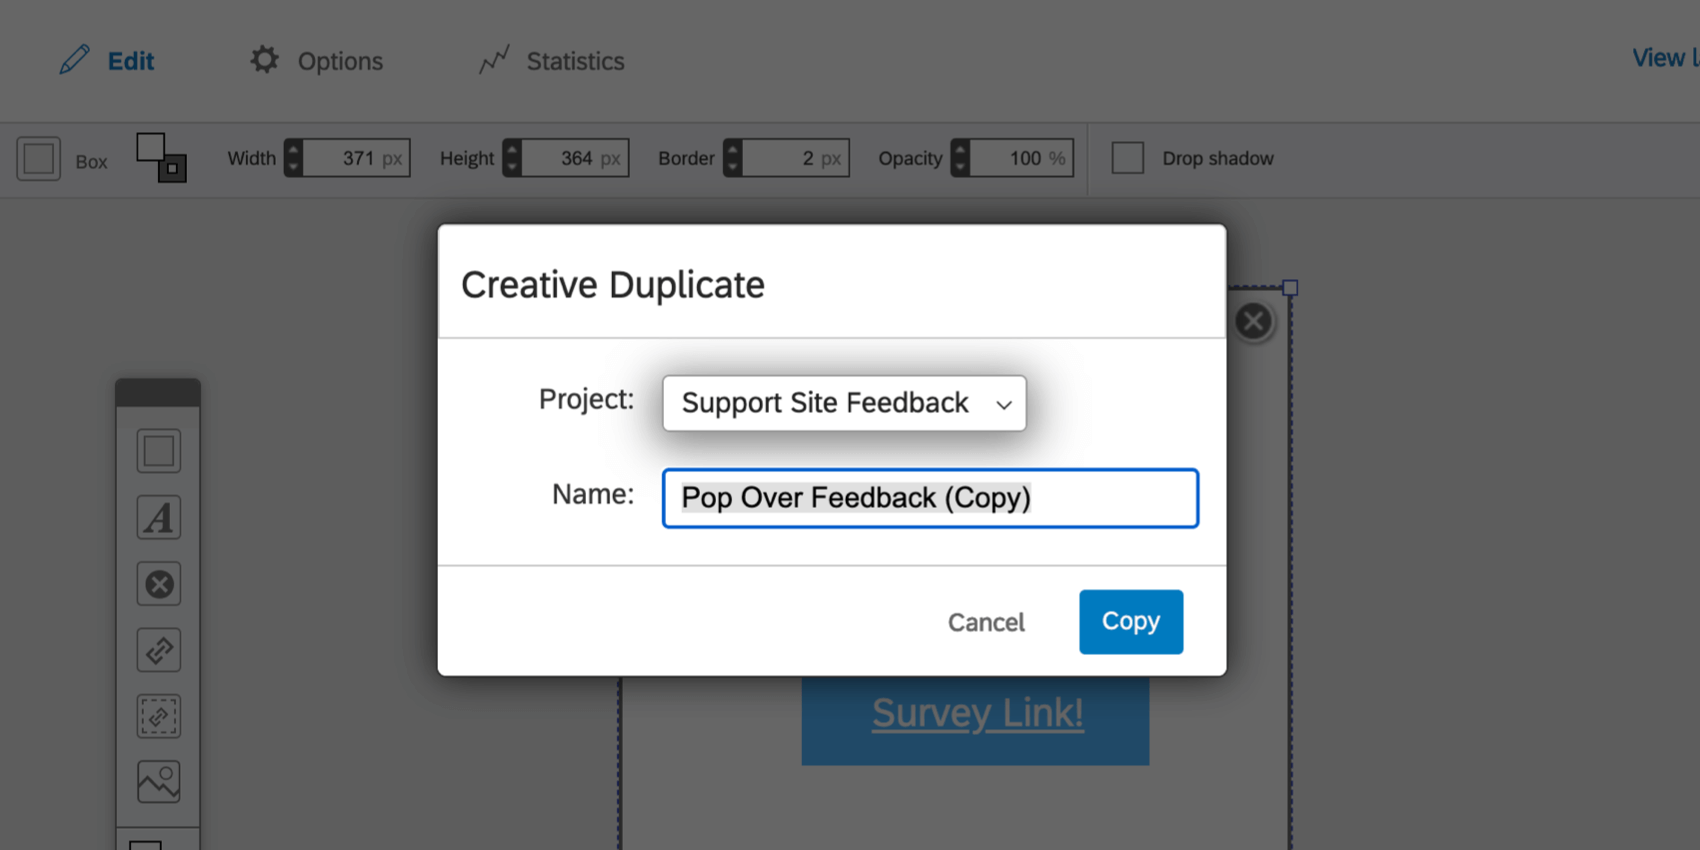
Copy Creative
Create a copy of your creative. Select which project you want this copy to be saved to under the Project dropdown menu.
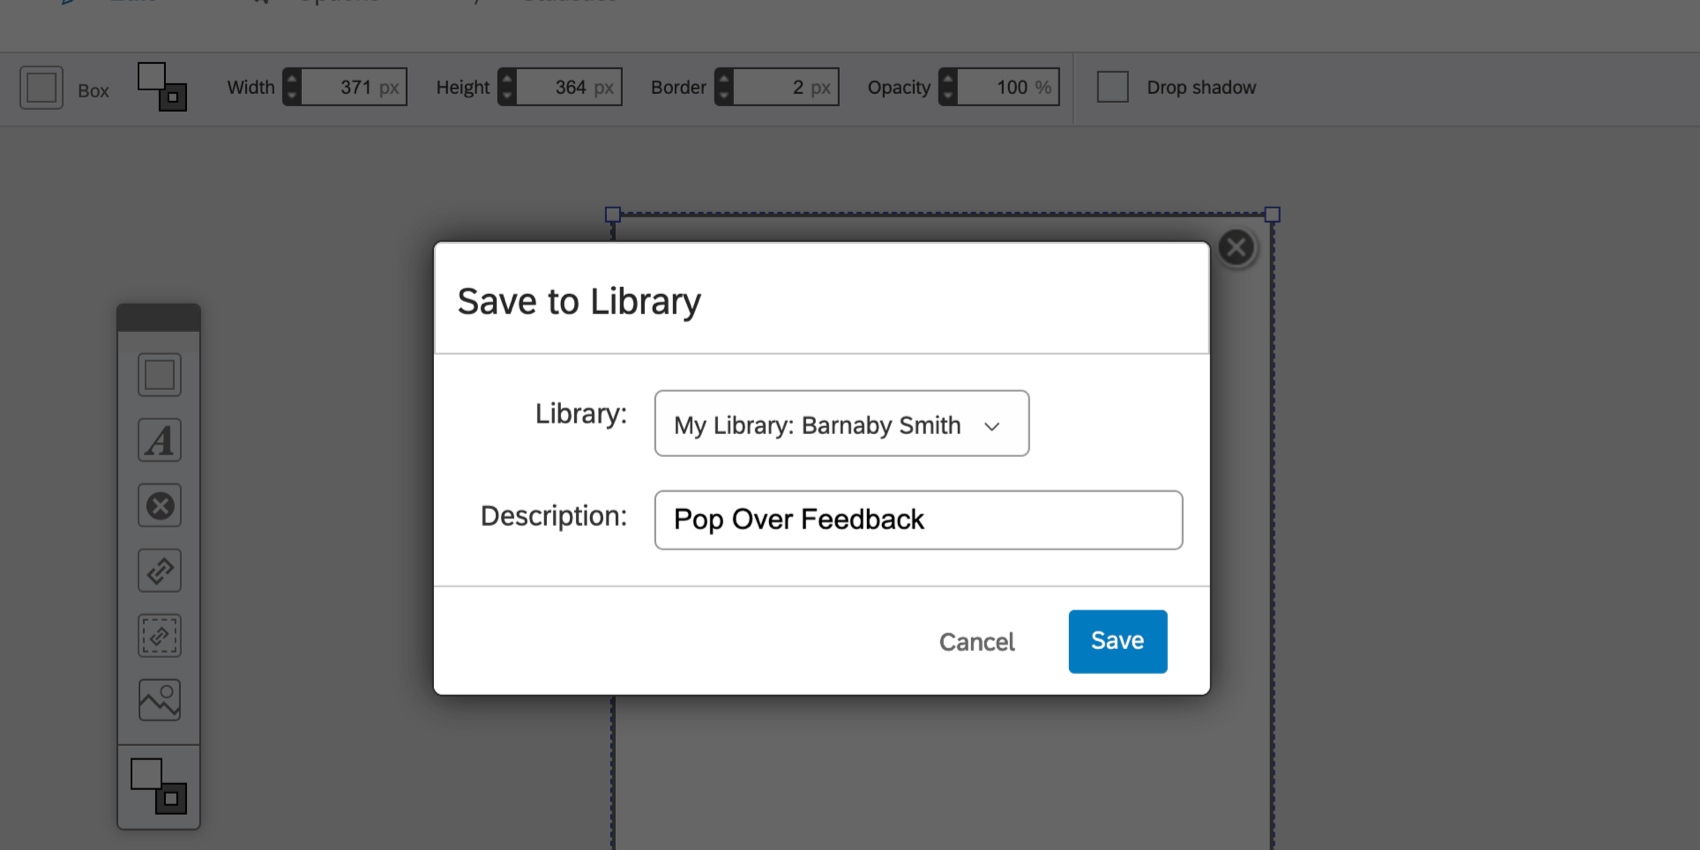
Save to Library
Copy your creative to a library.
Import Creative
This option allows you to import a creative qsif file, originally obtained from the Export Creative option.
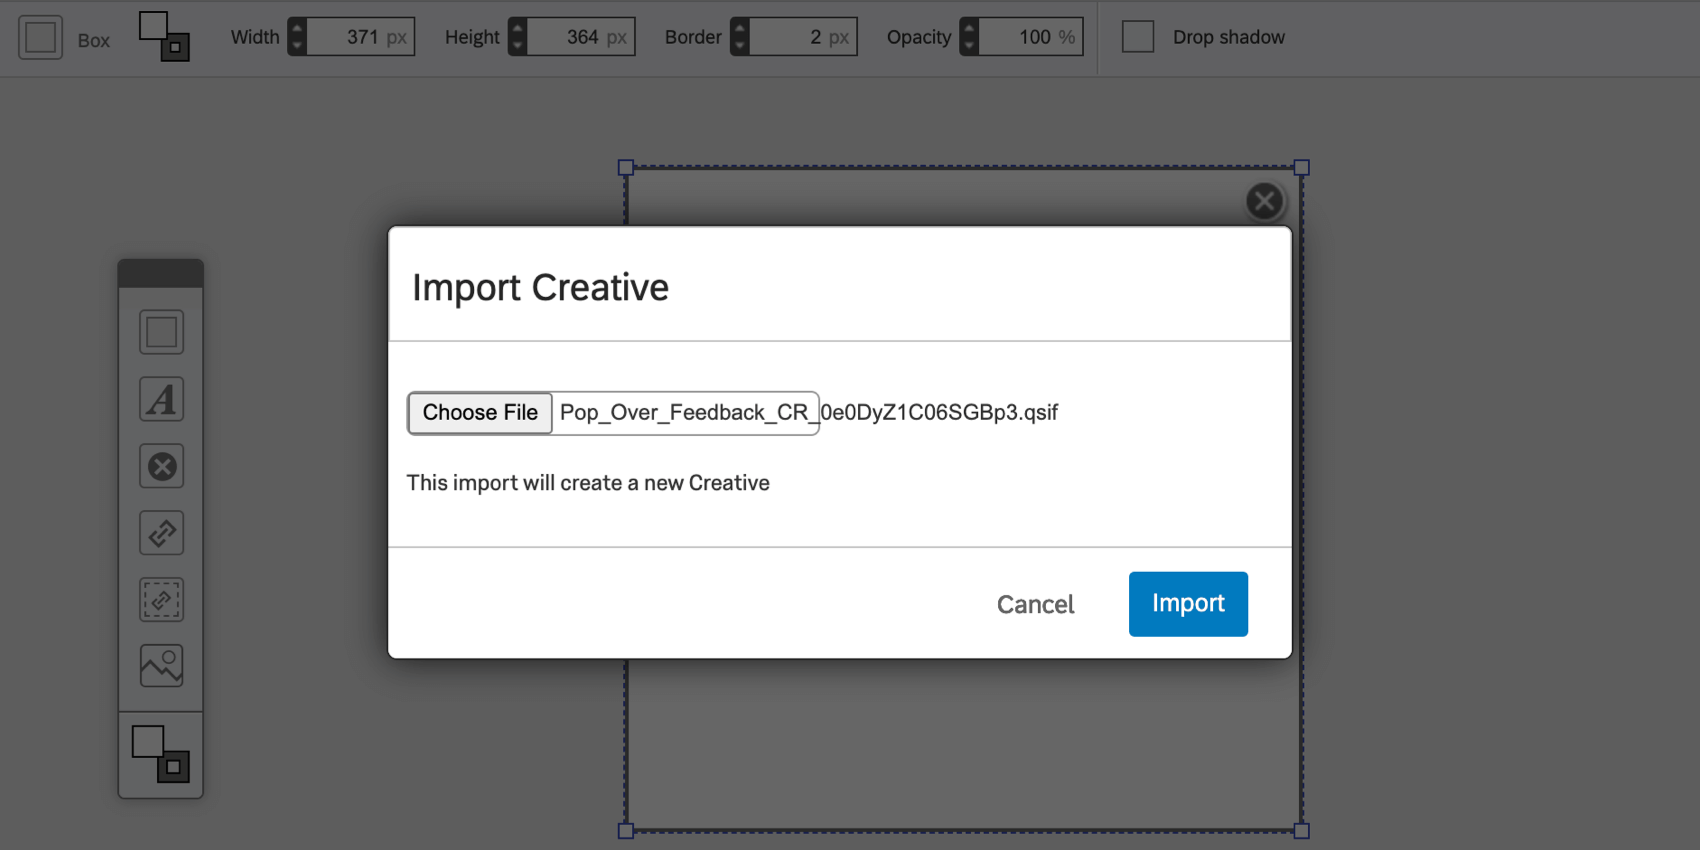
To upload, click Choose File. Once your file is selected, click Import.
Export Creative
When you select Export Creative, this will download a qsif file of your creative to your computer. This can be uploaded into any creative to create a copy of the exported creative.
Do not open this file on your computer. It can only be understood by the Qualtrics software.