-

Qualtrics Platform -

Customer Journey Optimizer -

XM Discover -

Qualtrics Social Connect
Ticket Settings
About Ticket Settings
Ticket Settings are options Brand Administrators can enable for their entire brand. These settings determine what happens to a ticket when someone’s out of the office, whether users are allowed to email people from tickets, notifications, and more.
Ticket Settings can be found on the Follow-Up Page, by clicking Tools and then selecting Ticket Settings.
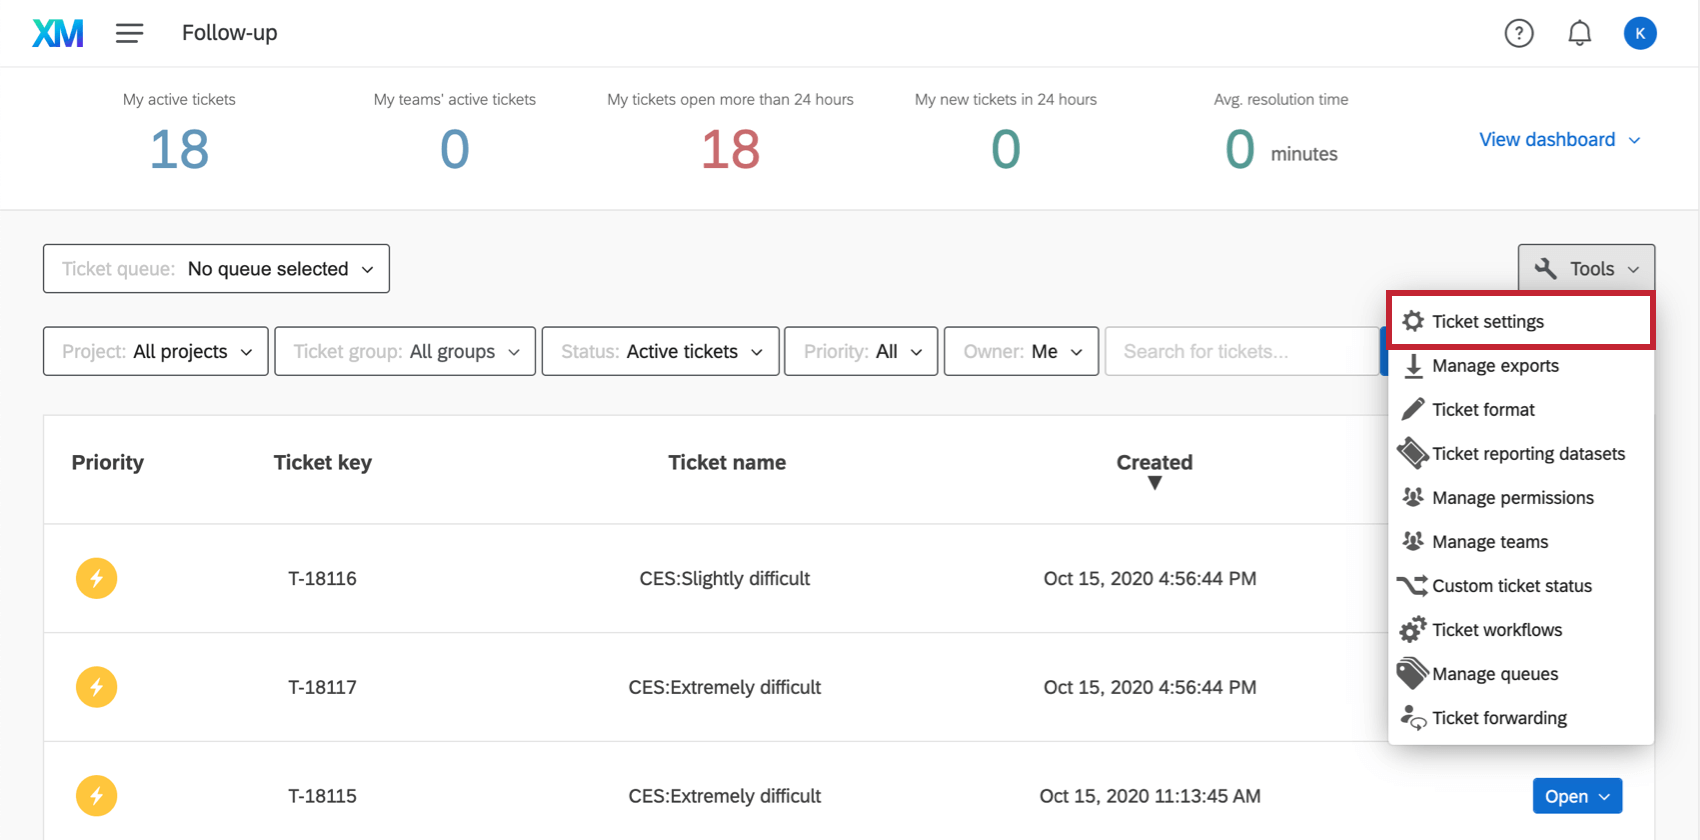
Disable “Send Email” Button in Tickets
This option disables emails in tickets. This means no user can send an email from a ticket.
- Click Tools.

- Click Ticket Settings.
- Select Disable “Send Email” button in tickets.
- Click Save.
Ticket Forwarding
Selecting Enable ticket forwarding feature for users will make it so that users can assign their tickets to someone while they’re out of office.

Learn more about how to set this up and how users would forward their tickets on the Ticket Forwarding page.
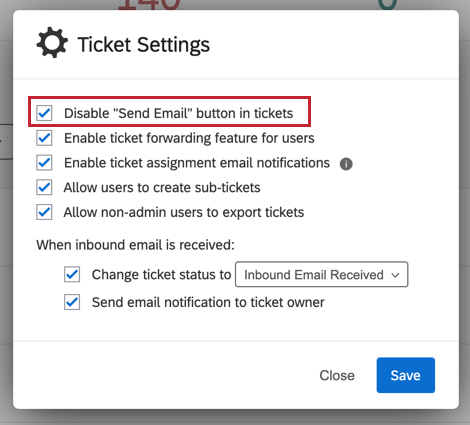
Ticket Assignment Email Notifications
If you wanted people to be notified if someone reassigns a ticket to them, select Enable ticket assignment email notifications.
Attention: If this option is not selected, then ticket owners will never receive a notification, even if you selected to send an email when setting up the tickets task.
Attention: If this option is selected, When inbound email is received: Send email notification will be unaffected, and continue to function as normal.
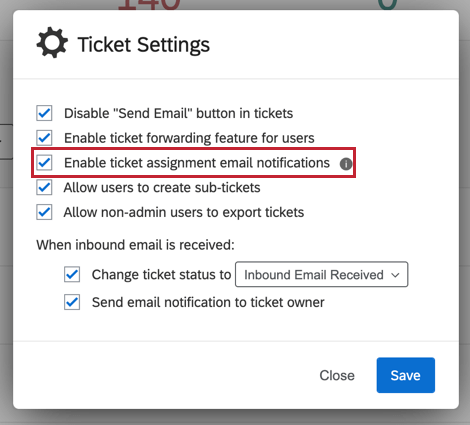
Allow Users to Create Sub-Tickets
Sub-tickets are tickets that link back to another, “parent” ticket. They’re great for splitting a complicated or long-term goal task into several smaller tasks.
When you select Allow users to create sub-tickets, you allow users in your organization to add sub-tickets to their tickets. If you deselect these setting, then no users in your brand, whether they are Brand Administrators or standard users, will be able to create sub-tickets.
This setting is enabled by default.
Allow Non-Admin Users to Export Tickets
There is an option in the Tools menu that allows you to export all your tickets to a CSV. If you select Allow non-admin users to export tickets, everyone in the brand will be able to export a CSV of their tickets. If you deselect this setting, all Brand Administrators will still be able to export a CSV of their tickets, but no standard users will be able to.
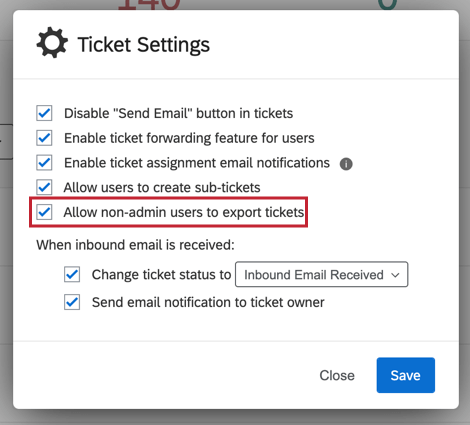
This setting is enabled by default.
Inbound Email Status
2-Way Emails in Ticketing are when, rather than just being able to email people from the ticket, users can also then see the entire email thread (including responses) right on the ticket. Since you want ticket owners to pay attention to these email threads, you can make sure the status of the ticket changes when a response comes in.
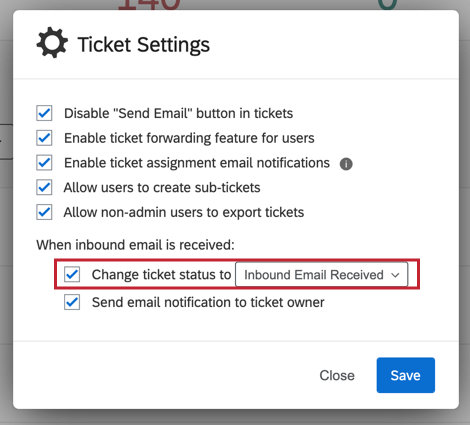
Select Change ticket status to and use the dropdown menu to select the status you want the ticket to change to.
Inbound Email Notifications
2-Way Emails in Ticketing are when, rather than just being able to email people from the ticket, users can also then see the entire email thread (including responses) right on the ticket. Since you want ticket owners to pay attention to these email threads, you can send them an email when a response comes in on the ticket.
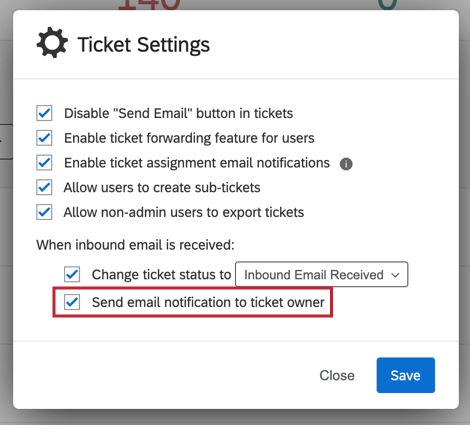
Select Send email notification to ticket owner. This will result in the ticket owner getting an email notification whenever someone replies to the email they sent from the ticket.
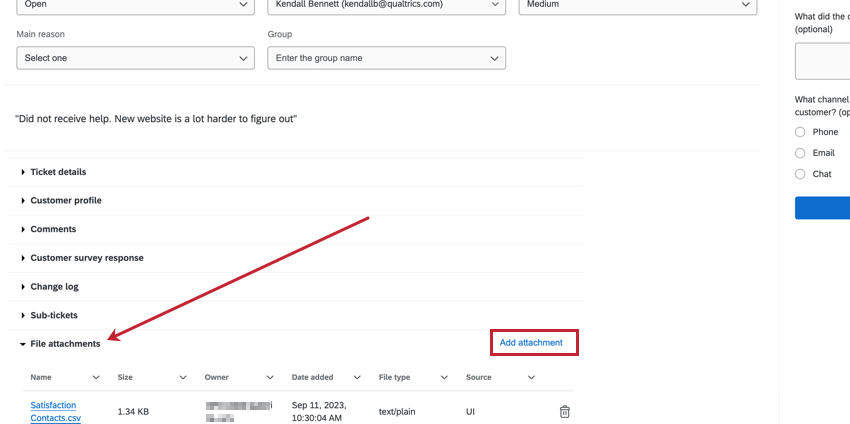
Allow Users to Add Attachments
If you select Allow users to add attachments, users will be able to upload up to 10 files into a ticket. File size cannot exceed 25MB. Ticket owners, users with edit access to the ticket, and brand administrators are able to upload files. Files can be uploaded if they have one of the following file types: BMP, GIF, JPEG, PDF, DOCX, XLSX, CSV, HEIC, PNG, zip files, or multi-media (e.g. MP3 and MOV).
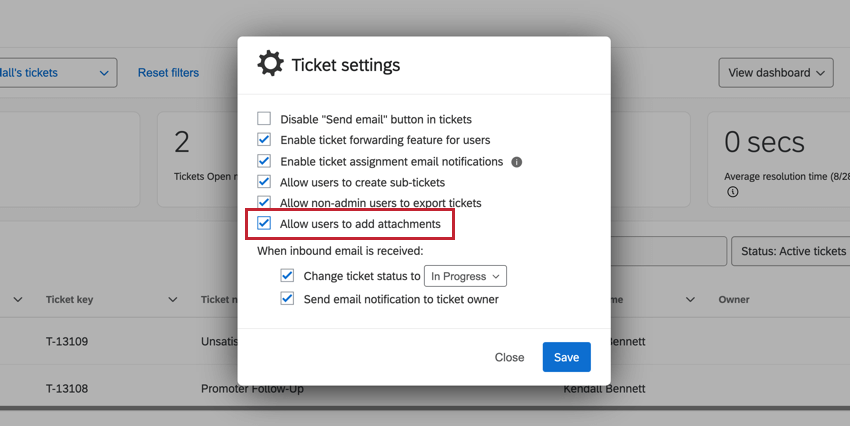
After this setting is enabled, a new row for File Attachments is added to the ticket. Click Add Attachment to upload a file. Uploaded files will be displayed and can be accessed by anyone with permission to view the ticket.
EMAIL ATTACHMENTS
Files uploaded to an outbound ticket email will also show up in the file attachments table.
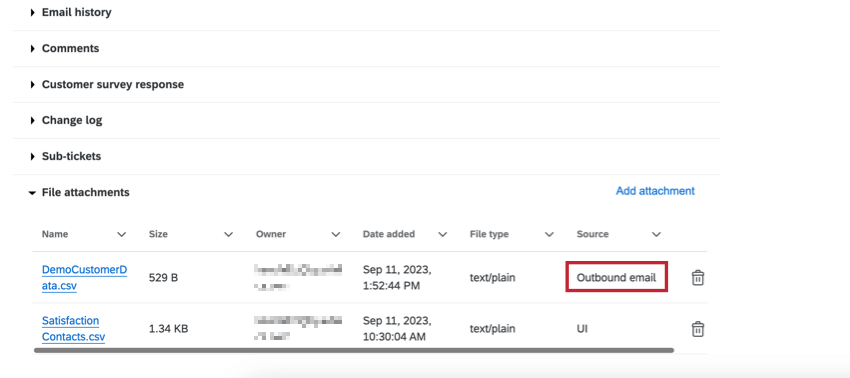
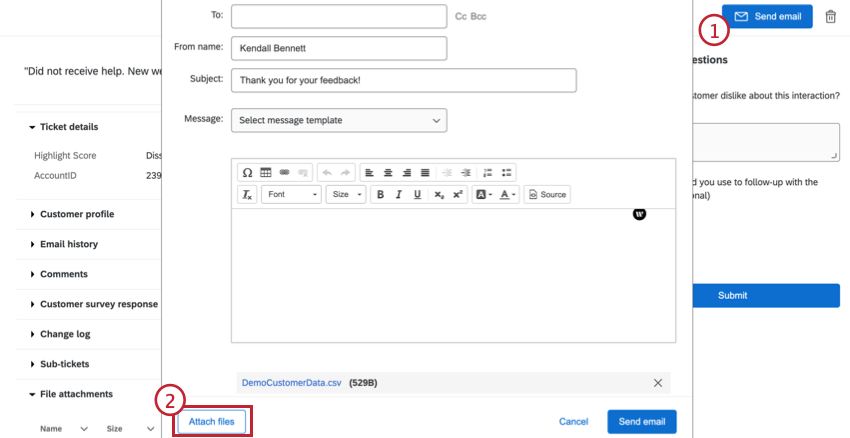
- Outbound Emails: Attachments added to an email sent from the ticket. After you send the email, those files will be included in the file attachments.
- Inbound Emails: If someone sends an attached file back by replying to the email that was sent from the ticket, those files will be included in the file attachments.
Attention: This feature is only available for brands with the Capture Inbound Email in Qualtrics Tickets permission enabled and the Inbound Email Notifications setting turned on. For more information, see User, Group, & Division Permissions, or reach out to your brand administrator.