-

Qualtrics Platform -

Customer Journey Optimizer -

XM Discover -

Qualtrics Social Connect
Data Formula Task
About Data Formula Tasks
Data formula tasks in workflows help you transform your data so it can be more easily used later in your workflow. One common example is calculating how long a customer spent on your website based on when they first loaded the page and when exited the site. You can then use the calculated time spent in your workflow conditions or subsequent workflow tasks.
With the data formula task, you can:
- Change the case of string fields (e.g., transform text from lowercase to uppercase).
- Change the format of date fields.
- Calculate the difference between 2 dates.
Setting Up a Data Formula Task
- Go to the global Workflows page, or the Workflows tab in a survey.
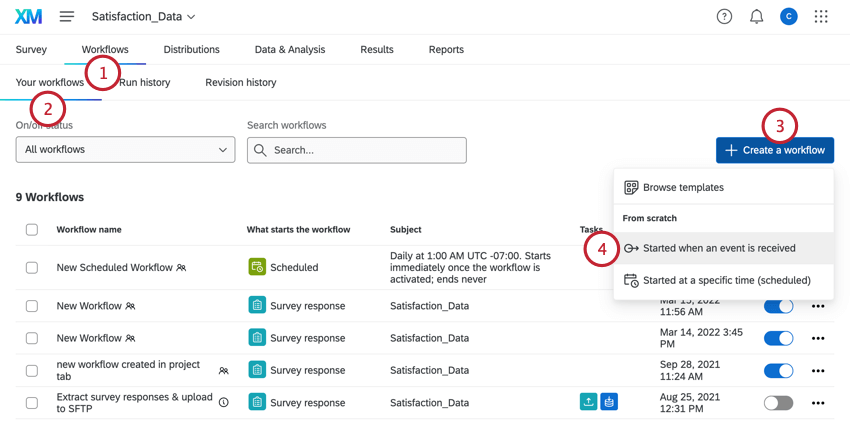
- Make sure you’re in the Your workflows section.
- Click Create a workflow.
- Decide if the workflow should be Started when an event is received or Started at a specific time. See Scheduled Workflows vs. Event-Based Workflows for more information.
- Rename your workflow.
- Choose the event that starts your workflow (if event-based), or set the schedule (if scheduled).
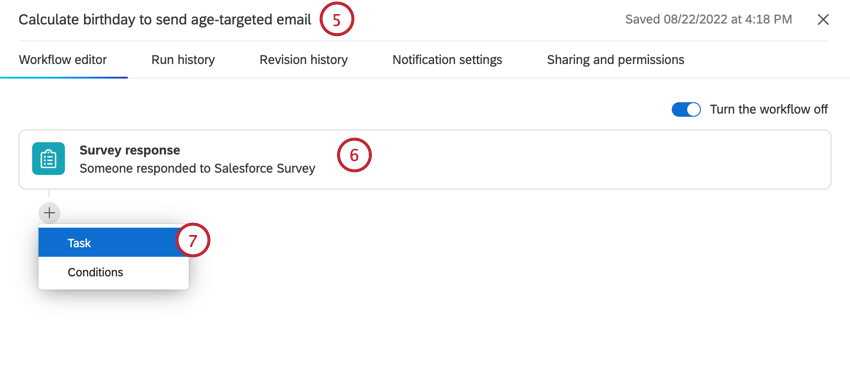
- Click the plus sign ( + ) and select Task.
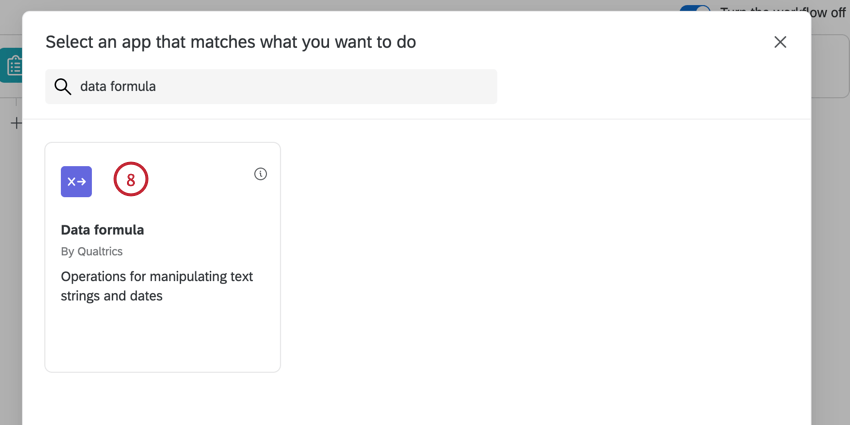
- Choose the Data formula task.
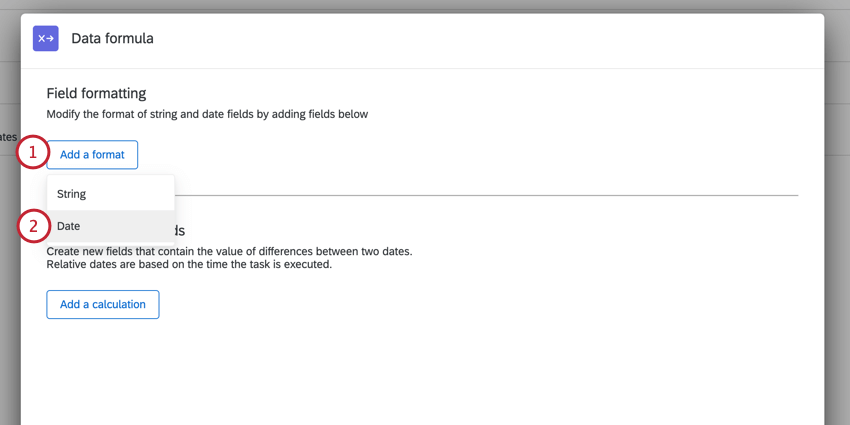
- To change the formatting of a string or date field, click Add a format. See Modifying String Field Formatting and Modifying Date Field Formatting for more information.
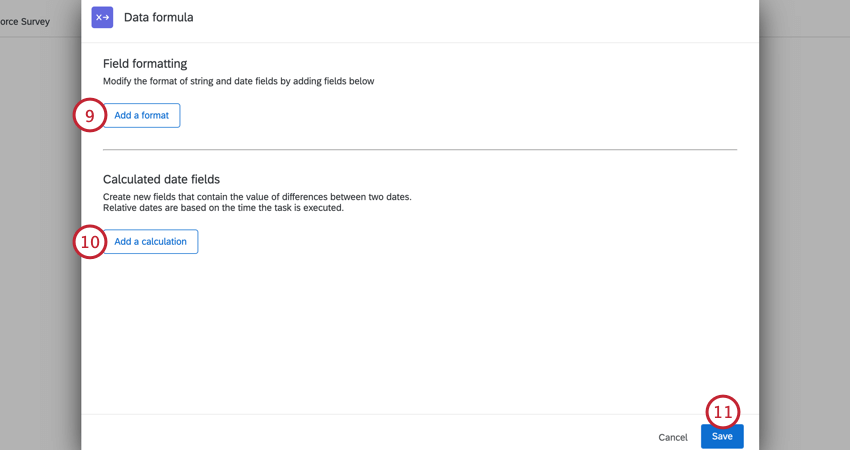
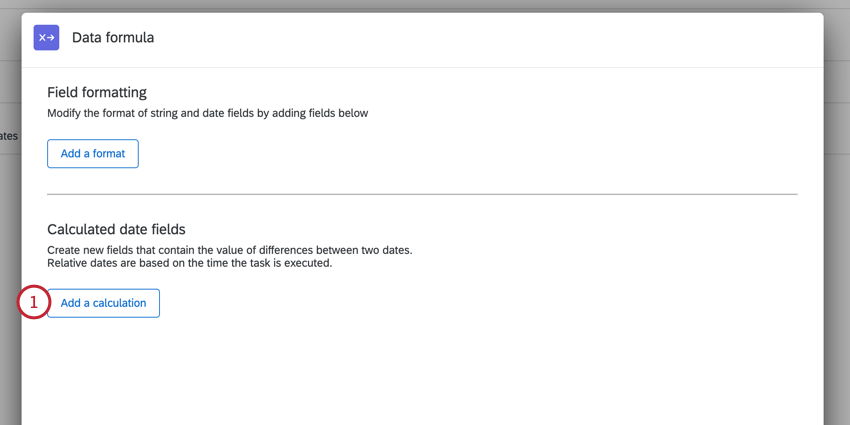
- To calculate the difference between 2 dates, click Add a calculation. See Calculating Differences Between Dates for more information.
- When finished, click Save.
- Continue building your workflow with more conditions and tasks. When building your workflow, your transformed data fields will be available in the piped text menu.
Modifying String Field Formatting
With the data formula task, you can transform a text string into another case. For example, some employee data systems store information in all uppercase letters. However, when ingesting that data into Qualtrics, you want to transform it to title case (only the first letter of every word is capitalized) so it looks better on your Qualtrics dashboards.
- Click Add a format.
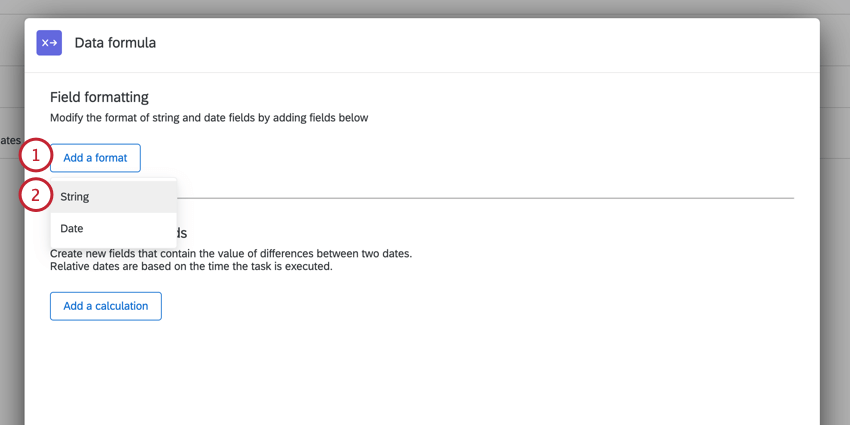
- Choose String.
- Select your desired format. Your options include:
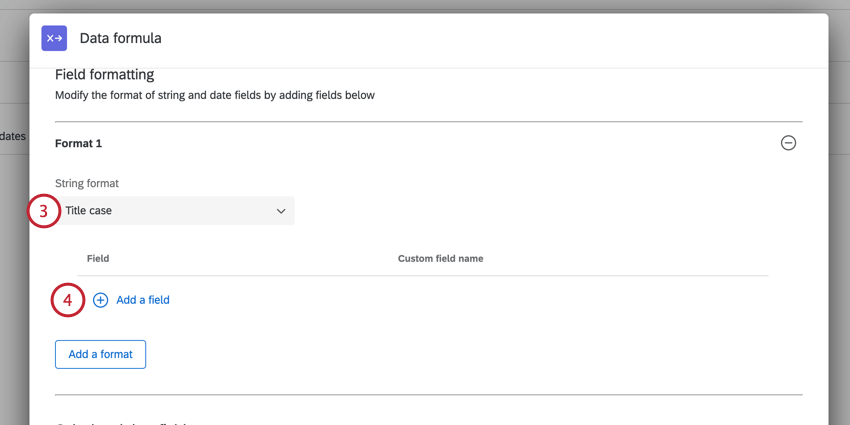
- Title case: The first letter in each word is capitalized (e.g., “Hello World”).
- Upper case: All letters are capitalized (e.g., “HELLO WORLD”).
- Lower case: All letters are in lower case (e.g., “hello world”).
- Click Add a field.
- Use the piped text menu, {a}, to choose the field you want to transform.
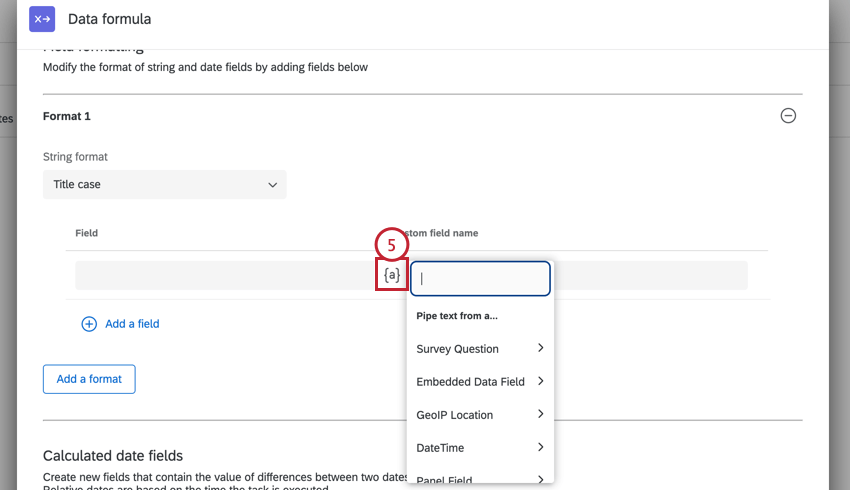
- Enter a name for your new transformed field. Note that spaces are not allowed and will be automatically turned into an underscore.
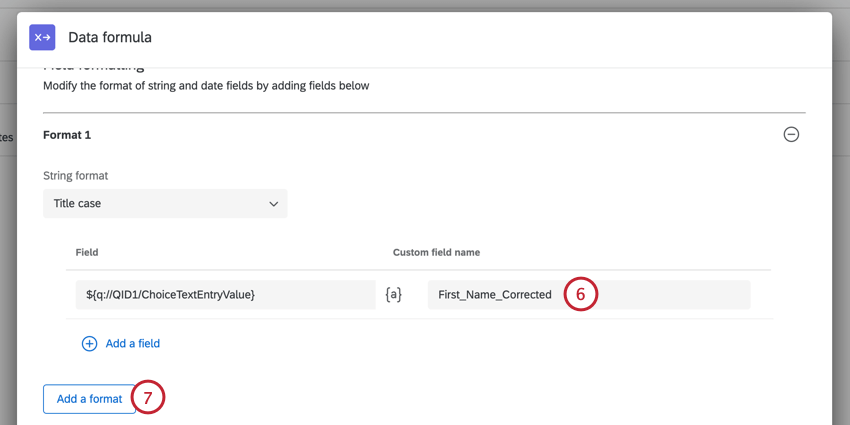
- You can transform multiple fields using the same task. Click Add a format to add additional fields.
Modifying Date Field Formatting
With the data formula task, you can change the format on date fields. For transforming date fields, the original date format must be ISO-8601 format.
- Click Add a format.
- Choose Date.
- Select your desired date format.
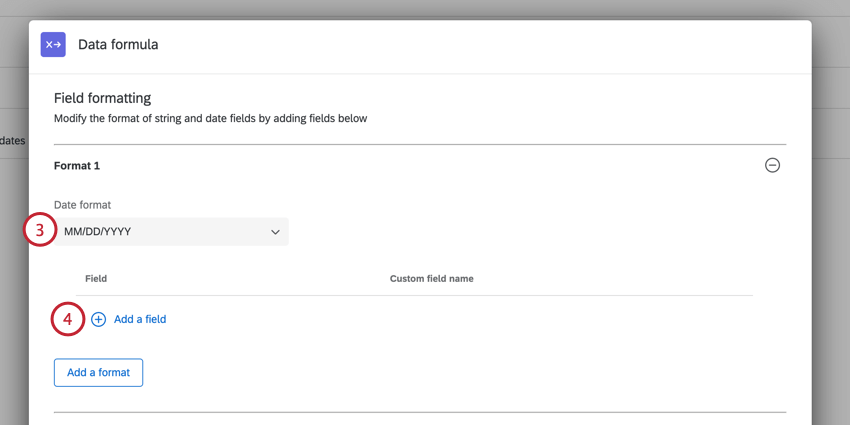
- Click Add a field.
- Use the piped text menu, {a}, to choose the field you want to transform.
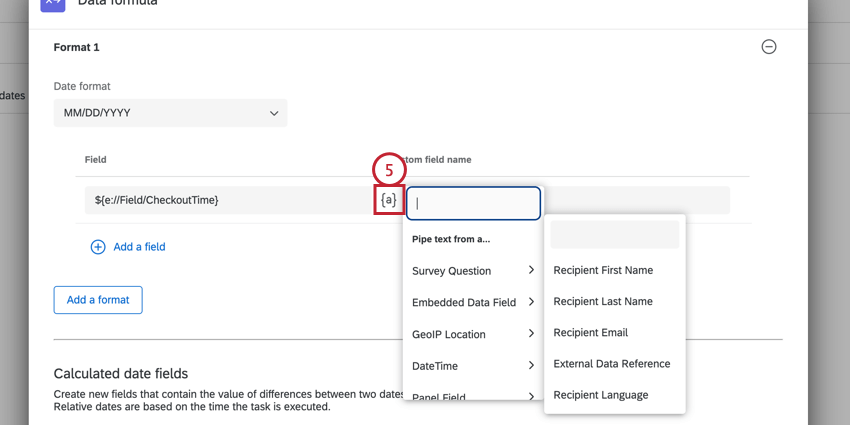
- Enter a name for your new transformed field. Note that spaces are not allowed and will be automatically turned into an underscore.
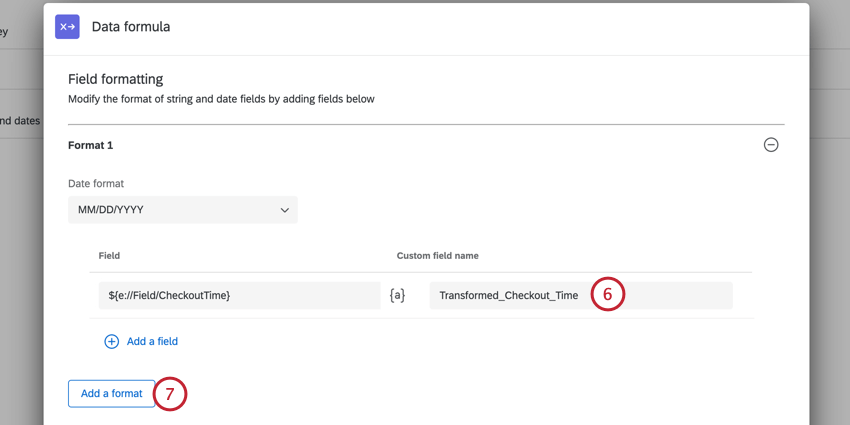
- You can transform multiple fields using the same task. Click Add a format to add additional fields.
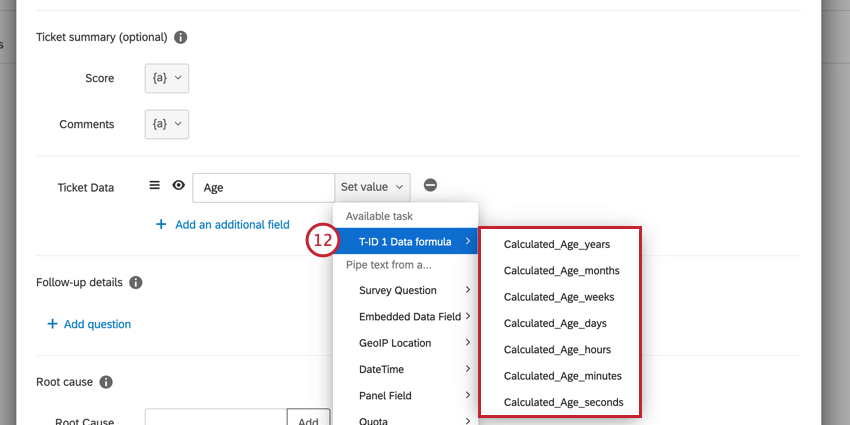
Calculating Differences Between Dates
With the data formula task, you can calculate the difference between 2 dates. The task will return the difference in a variety of units, allowing you to choose the one that is most useful for you. Dates must be in ISO-8601 format to calculate the difference between them.
- Click Add a calculation.
- Give your calculated date a name. Note that spaces are not allowed and will be automatically turned into an underscore.
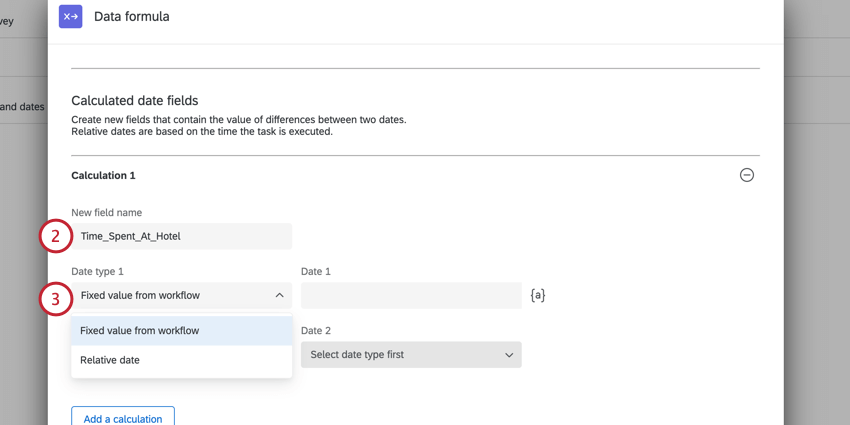
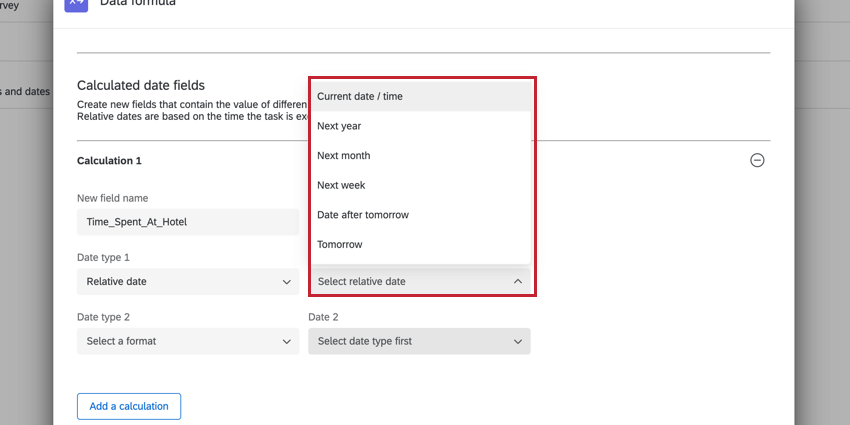
- Choose the date type for the first date you’d like to use. Your options include:
- Fixed value from workflow: Choose a field from your workflow to use as the date.
- Relative date: Choose a date relative to the current date (e.g., “tomorrow”).
Qtip: Relative dates are calculated when the data formula task processes. For example, if the task begins running at 2022-01-26T20:14:02.000Z and you select “tomorrow,” the date used in the calculation will be 2022-01-27T20:14:02.000Z.
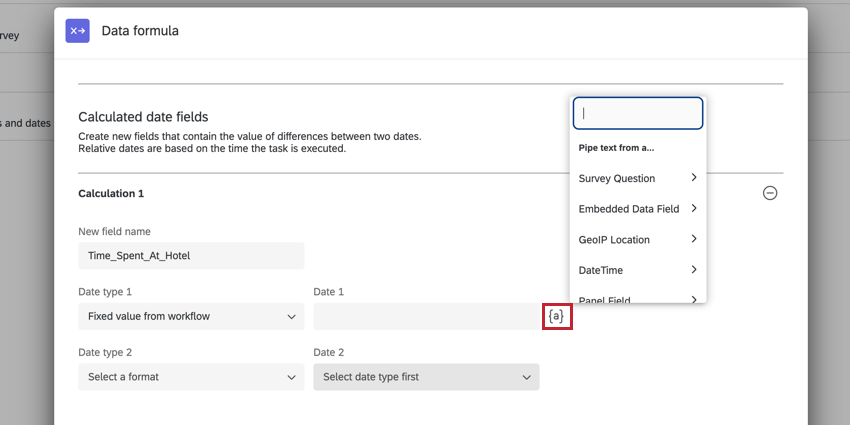
- Select the date you’d like to use for the first date. How you choose a date depends on your date type:
- Fixed value from workflow: Use the piped text menu, {a}, to choose a field from your workflow to use as the date.
- Relative date: Use the dropdown menu to choose a relative date.
- Fixed value from workflow: Use the piped text menu, {a}, to choose a field from your workflow to use as the date.
- Choose the date type and date for the second date in your calculation.

- You can calculate multiple dates using the same task. Click Add a calculation to add another calculation.