-

Qualtrics Platform -

Customer Journey Optimizer -

XM Discover -

Qualtrics Social Connect
Ticketing Queues
About Ticketing Queues
Ticket queues are perfect for large teams working on tickets. Ticket queues prevent multiple people from working on the same ticket at the same time. They also manage assignment of tickets so that they only go to owners who are ready to work on a ticket.
Ticket Assignment
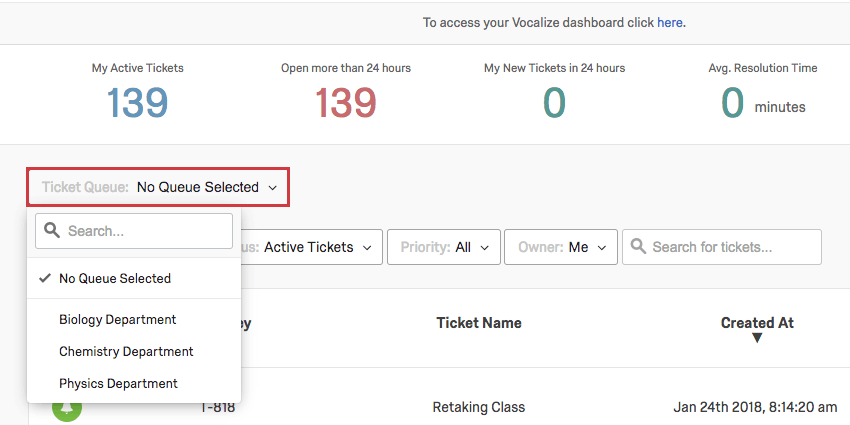
Once queues have been set up, you can navigate between ticket queues by choosing one from the Ticket Queue dropdown on the upper-left.
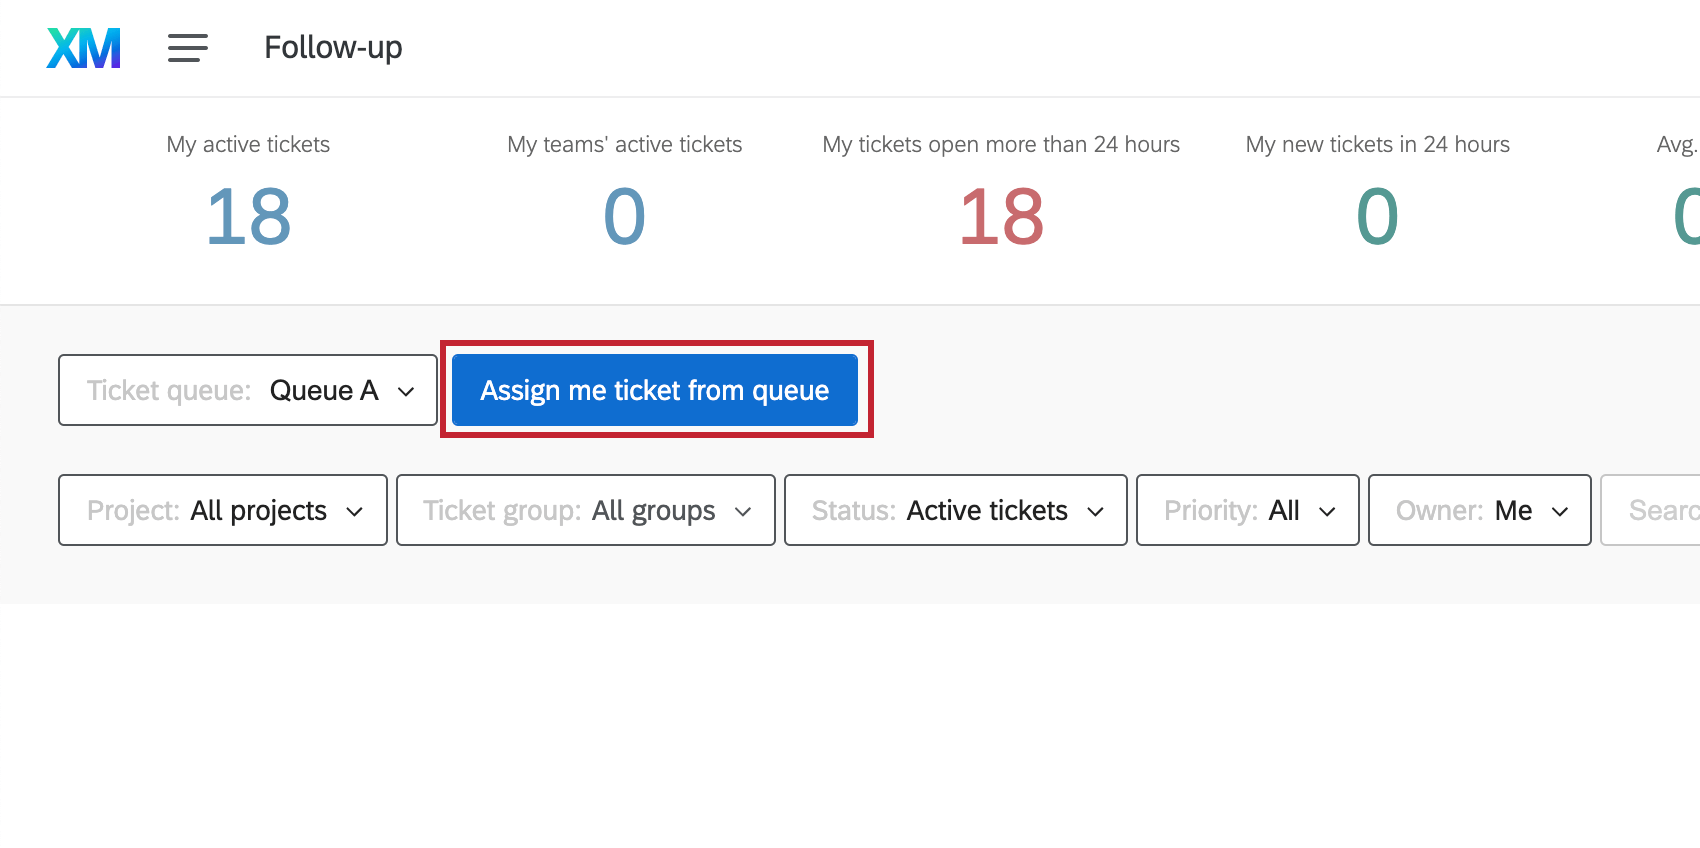
Once inside the desired queue, you can click Assign me ticket from queue to automatically get a ticket from this queue.
Tickets included in the queue
Tickets that match the following criteria are included in queues and can thus be assigned to people accessing those queues:
- Tickets that match the conditions set
- Tickets that do not have an individual owner assigned to them. Teams assigned to tickets are not considered individual owners.
Once a ticket is assigned to an individual, it is no longer in the queue.
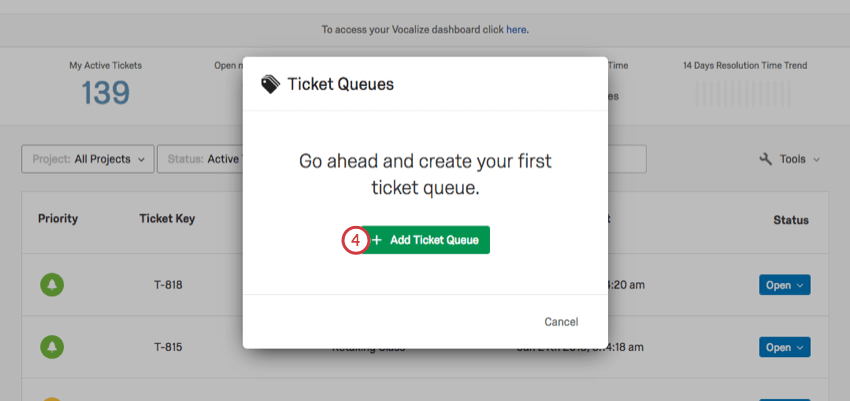
Setting up Ticket Queues
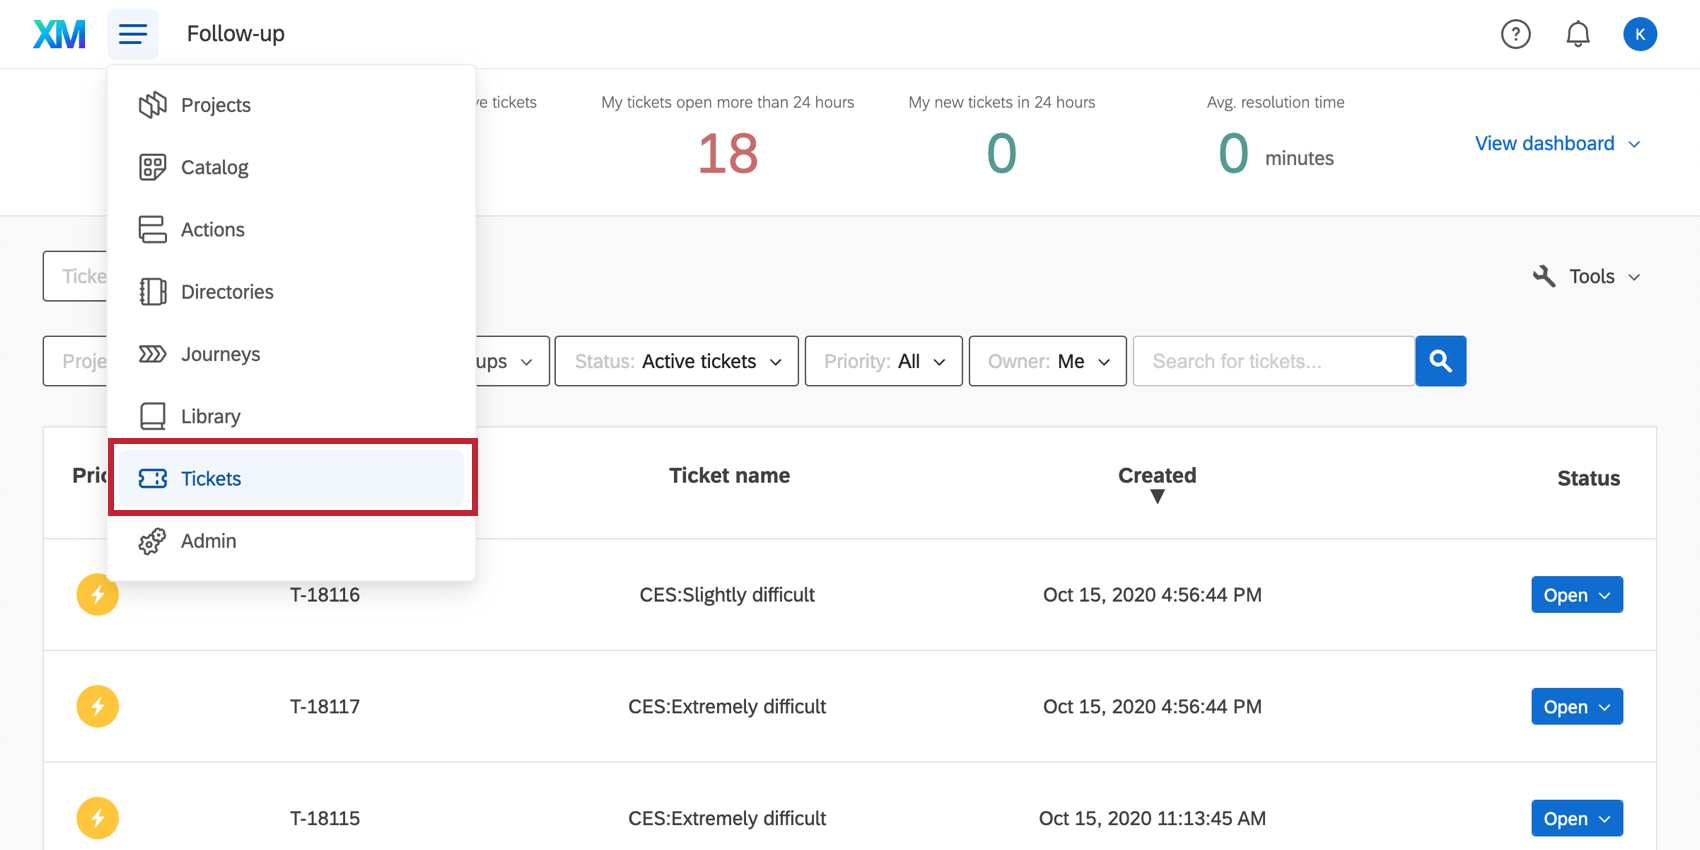
- Go to Tickets.
- Click Tools.
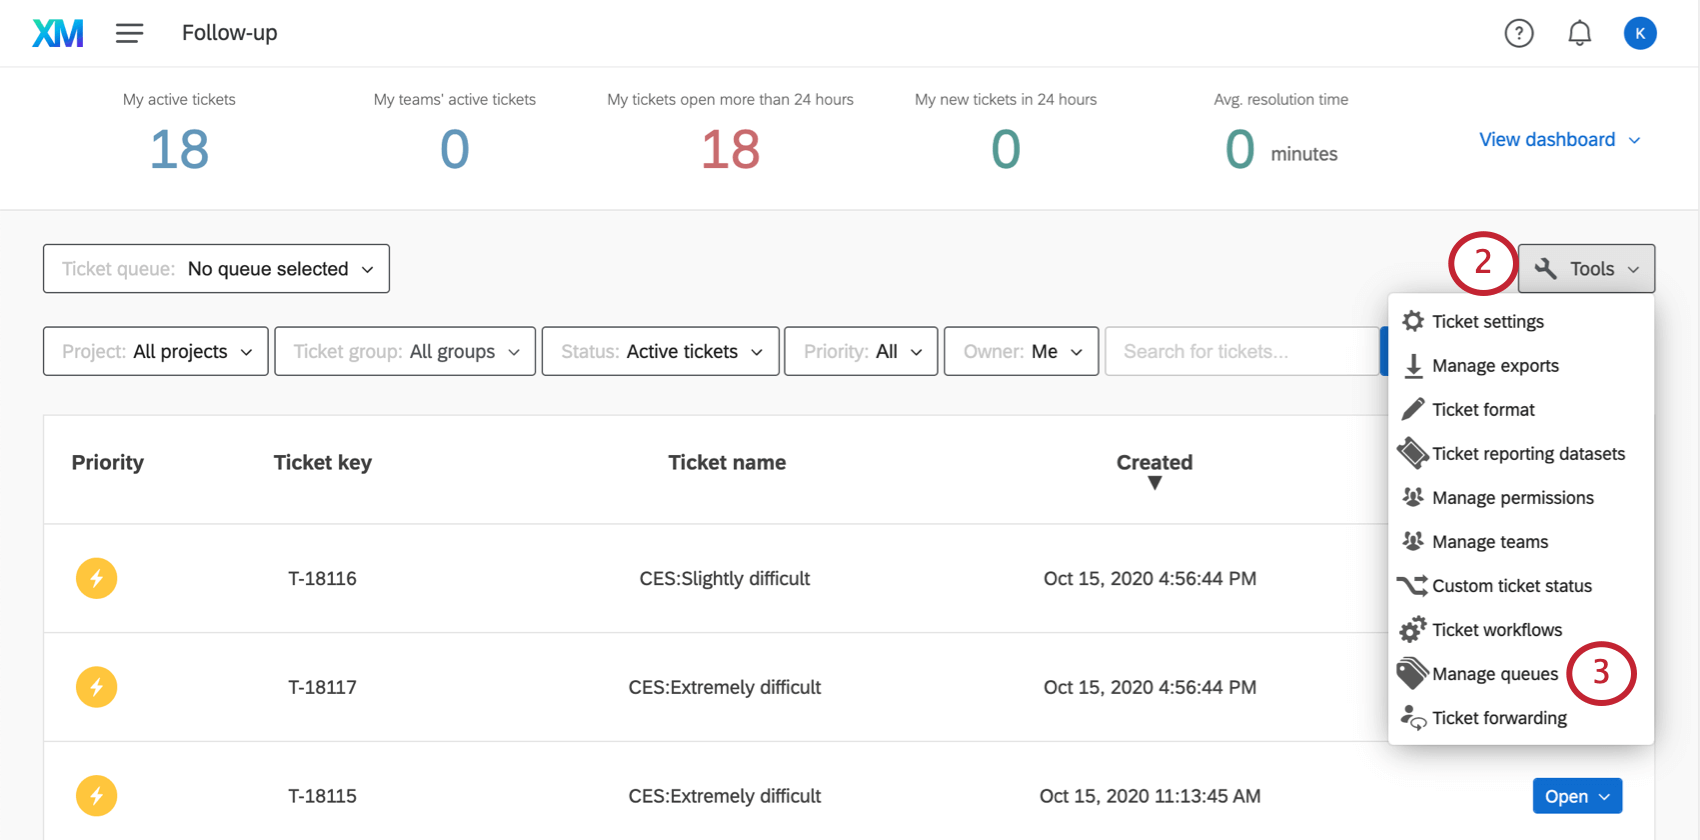
- Select Manage queues.
- Click Add Ticket Queues.
- Give your ticket queue a name.
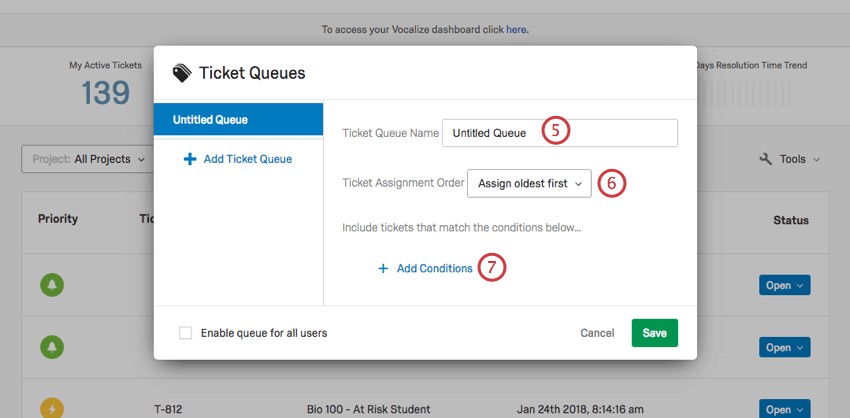
- Decide what order tickets are assigned in. For example, when someone requests a ticket to work on, should they automatically get the oldest one? Or the highest priority?
- Click Add Conditions to determine which tickets are added to a queue.
Qtip: You should add a condition related to ticket status – otherwise, closed tickets are included in assignment by default! For more on setting conditions, see the Conditions section below.
- Select Enable queue for all users to turn this queue on for all users, regardless of whether they are Brand Administrators. Brand Administrators can always see all queues.
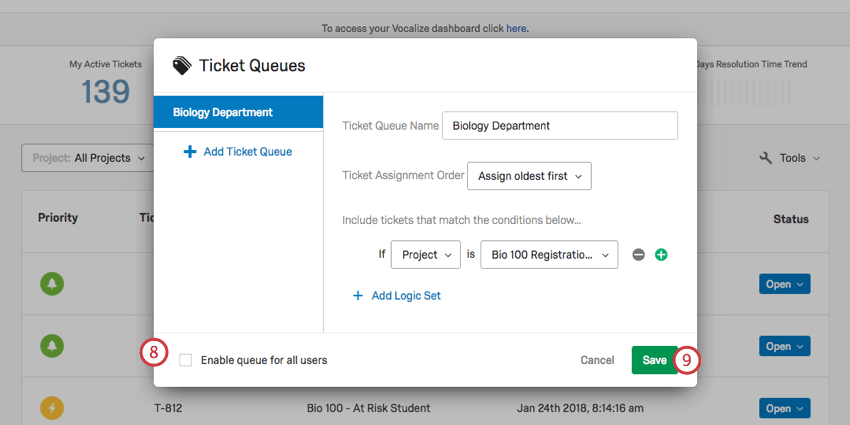
- Click Save to save your queue.
Conditions
Conditions are important in determining when tickets are added to a certain queue. This section will go over the different components involved in building complex conditions.
Types of Conditions
Conditions can be based on any of the following:
- Project: The project the ticket was generated in.
- Status: The status of the ticket.
Qtip: It is advised you add a status-based condition. For example, you probably only want to assign tickets if their status is open – not resolved or closed!
- Priority: The priority of the ticket.
- Team: The team assigned to the ticket. If the person viewing the queue does not belong to this team, they will not see these tickets.
Adding and Deleting Conditions
After you add the initial condition, you can add conditions by clicking the plus sign ( + ) and remove conditions by clicking the minus sign ( – ).
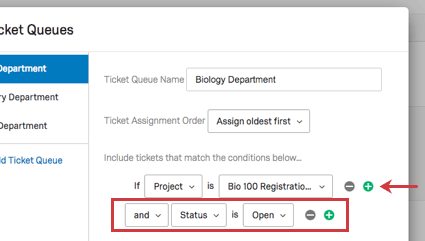
Conditions are joined by conjunctions and and or. In the example above, a ticket must be from the Bio 100 Registration project and have a Status of Open to appear in the Biology Department queue.
Adding Logic Sets
Logic sets add another layer of organization to your conditions. They are sets of multiple conditions joined by and or or. In the example below, there are two logic sets: the content above the or, and the content below the or.
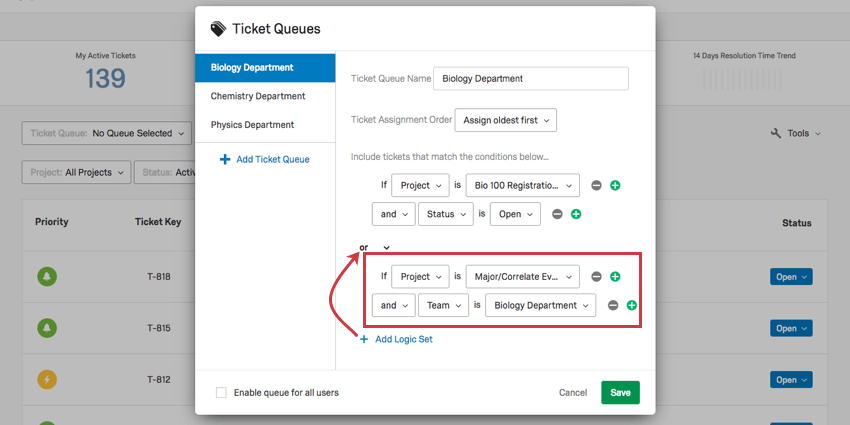
Click Add Logic Set to add another logic set.
Ticket Reporting
Ticket queues function with ticket reporting in CX Dashboards. You are able to report on the name of the queue and the time the ticket was taken from the queue.